Showing posts sorted by relevance for query painting wood furniture. Sort by date Show all posts

In the Corner

Wow-eee.  Life is busy, no?  Places to be, things to do, people to see, thoughts, more thoughts, kids, more kids, throw in a cold or four…add yours to the list because I’m sure you can relate!  That’s why posting around here has been minimal the past few weeks and why the project I’m about to tell you about has been in-progress for a month now and still isn’t finished.  You see, we’re on a mission to re-organize our laundry room.  I’m not sure why this whole process started…it might’ve been the annoyance of looking at this to long:photo (7)
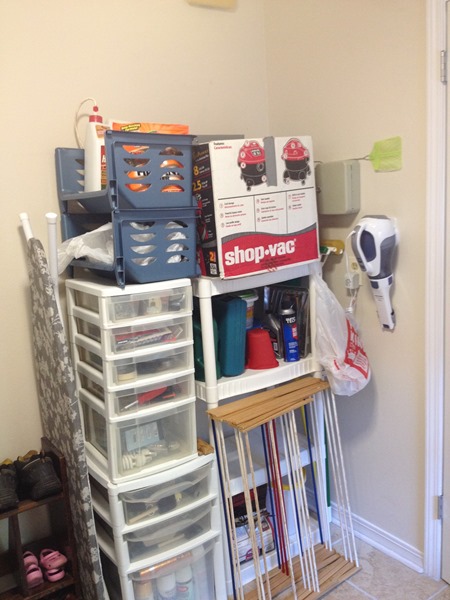
The corner in question.  It’s organized ‘per-say’ – drawers full of painting supplies, spray paint, tools, paint chips - but overall it’s just a big heap of random stuff that’s really not the most aesthetically pleasing sight we ever did see.

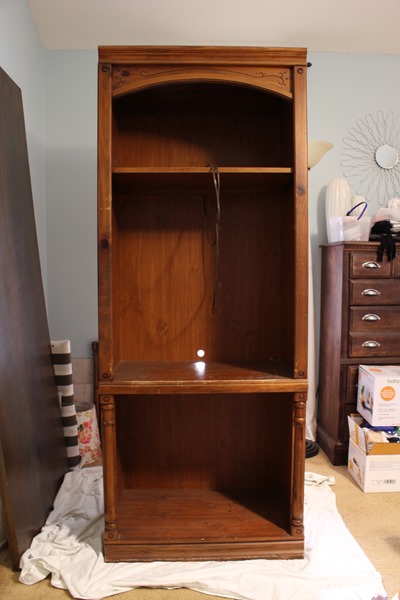
Enter this big lug:
 
IMG_5069
I found him at Goodwill a month ago.  At $19.99 his tall, dark, and not-so-handsome physique was just what we needed to take that corner of the laundry room to the next level of organization.  We removed the built-in lighting and also ripped out the top shelf, as it didn’t extend all the way to the back of the cabinet, in order to replace it with a few more shelves and left the bottom opening as it was because it’s the perfect size to accomodate our shop vac.

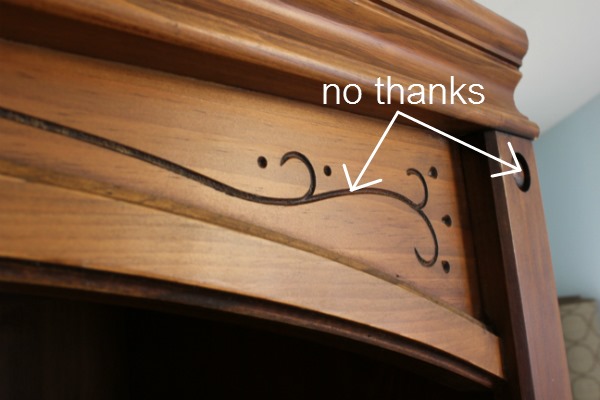
The plan was to paint him white before we put him in his place.  So first things first, I wanted to make him a little less country and a lot more modern by filling in the scroll work and decorative holes.
IMG_5072 

To do that, I used a plastic putty knife with this Elmer’s wood filler that we picked up from Lowe’s:
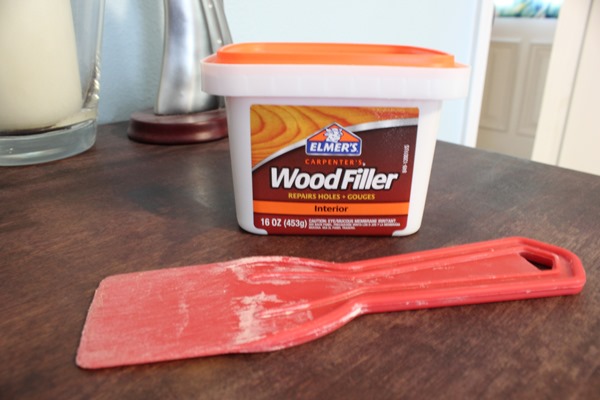
IMG_5073 I’ve used it before (to fill in holes in this desk and this dresser and cracks in this loveseat) and have been really happy with it.  It dries nice and hard without cracking.  However, it doesn’t sand down to a very smooth finish so I usually use it in conjunction with spackle.  More on that later.
Side note:  For the loveseat, I used a tube of the wood filler and when I went to use it for the desk, I found it had hardened near the opening, even though I had the lid screwed on nice and tight.  So, since the stuff towards the other end was nice and soft, I cut off the top of the tube and pulled from there, taping the opening off and storing it inside a plastic bag for extra protection against drying.
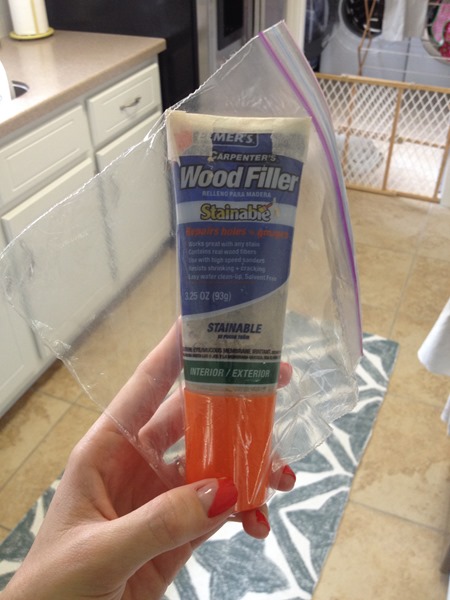
 
photo 2 (8)
Hoewever, when I pulled it out again for this project, the whole tube was hard and unusable so we that’s when we purchased the tub of filler, hoping its fate will be the opposite.  I’ll keep you updated but so far, so good (This just in!  Kelly told me she puts saran wrap over hers before she lids it and it keeps hers nice and nothardened!  Thanks for the tip Kelly!)

To fill in the scrolls and holes, I scooped up a large chunk of wood filler and spread it over the holes like I was buttering bread, making sure I pressed it in enough that it filled the entire area.  Then I drug my knife across the surface, scraping off excess.  When you do this you don’t want to scrape off all the excess.  There should be more filler than you need over your filled areas, sort of like a miniature hill.  You’ll make everything smooth and level by sanding the dried excess off later.  Make sense?  Here’s what the top of the cabinet looked like after I was done filling:
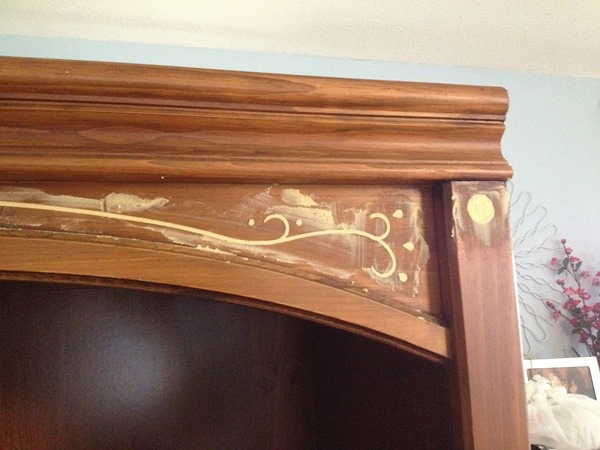
 
photo 1 (8)

So, after everything was filled and dry (since the holes were pretty deep, I waited a whole 24 hours to ensure the filler was completely dry), I went over it all with a fine-grit sanding block to remove the excess and level the surface as well as I could.
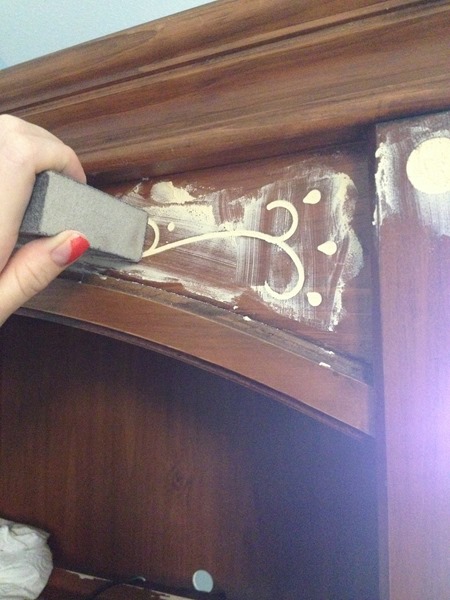
 
photo 4 (5)

I mentioned above that I like to use spackle in conjuction with wood filler.  Wood filler has fibers in it that make it unable to be sanded down to super smooth surface.  So, using this spackle and a metal putty knife (our plastic putty knife has some tiny divots on the edge so metal was better to get a smoother finish)…
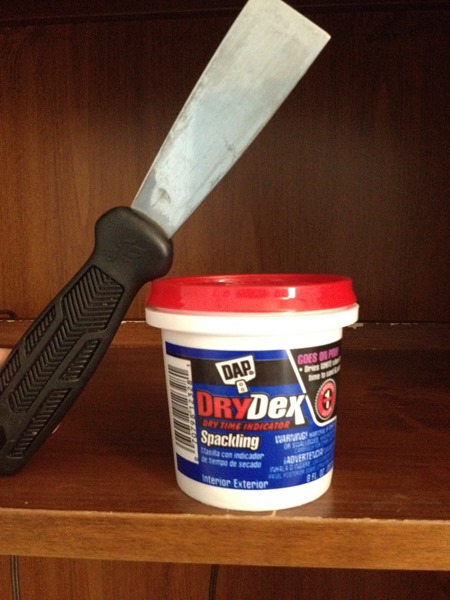
photo 2 (7)
…I went over all the areas I had filled with the wood filler using the same technique, only with spackle.
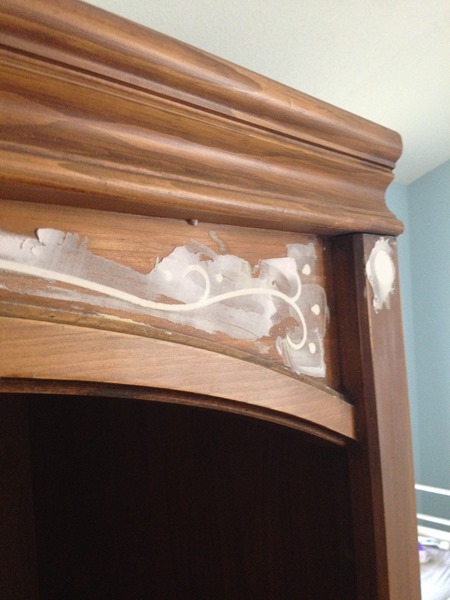
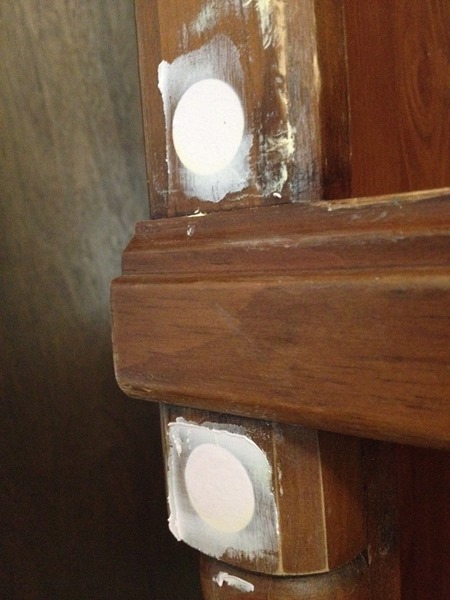
photo 3 (5)photo 1 (7)       
After that was dry (I spackled in the morning and it was good and dry by late afternoon), I got out the fine-grit sanding block again and sanded everything until it was smooth and level.  After wiping it all down with a damp rag to get rid of any sanding dust, I was ready for paint.
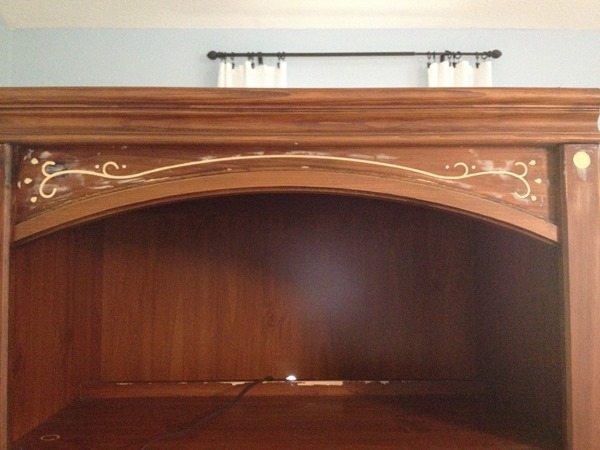
photo 5 (2)

The cabinet front, bottom, and shelf are solid wood; the sides are particle board.  The wood parts had a few large knots which tend to bleed through latex paint (so I’ve read).  photo 5 (1)
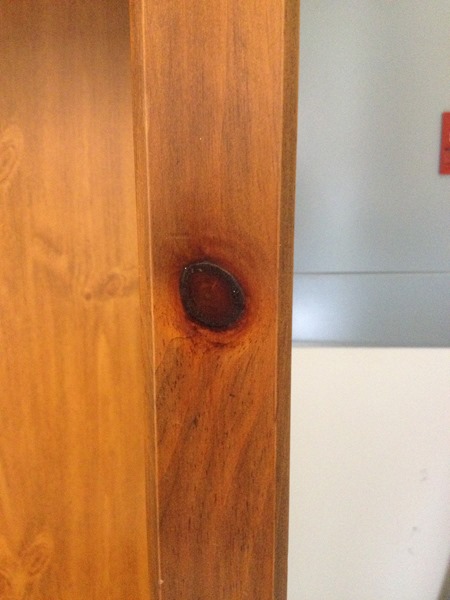
To keep them from bleeding through my handiwork, I brushed a thin layer of oil-based primer over them first.
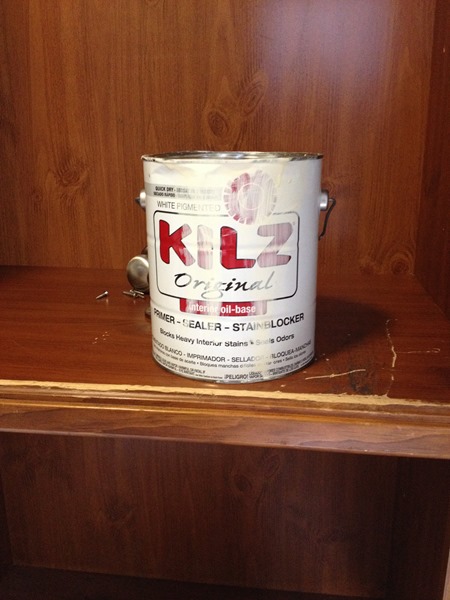
photo 4 (4) 

Once those areas were dry, I primed the rest of the piece with some Kilz primer.  I reminded myself over and over to take pictures of the cabinet primed before I painted but still forgot.  Not a huge deal but just know that when I prime, I just make sure everything is covered.  Primer will probably always be splotchy and that’s ok.  Next up was paint.  It took me three hours on four different nights and naptimes to prime the cabinet so I opted to spray paint the cabinet with its final layer of latex paint.  Not canned spray paint though.  Some good friends of ours offered to let me use their paint sprayer so I used some basic white latex we had on hand (by Olympic).  This
Graco paint sprayer is what I used to spray on the paint.

graco sprayerIt was really cool to be able to borrow it so I could get a feel for how paint sprayers work and whether we should invest in one.  It definitely took me more time to set up and learn how to use it than it did to paint.   However, I apparently have a lot more learning to do because one side of the cabinet turned out really drippy…
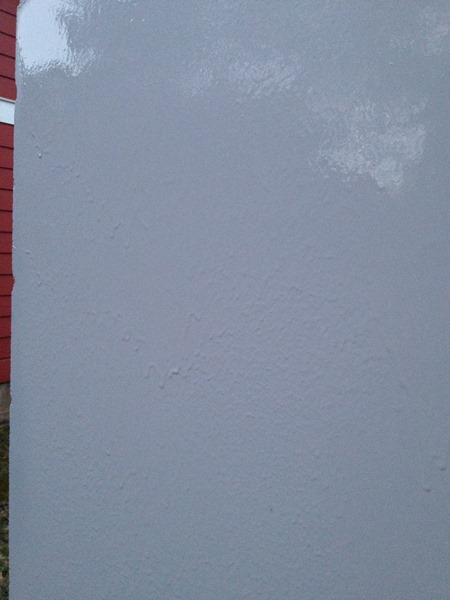
 
photo 1 (6)
I either added too much water to my second round of paint or painted too close so next time I’ll have to pay attention to those two things to make sure it doesn’t happen again.

I painted the cabinet outside and while it was drying, there were some things to take care of in its corner:
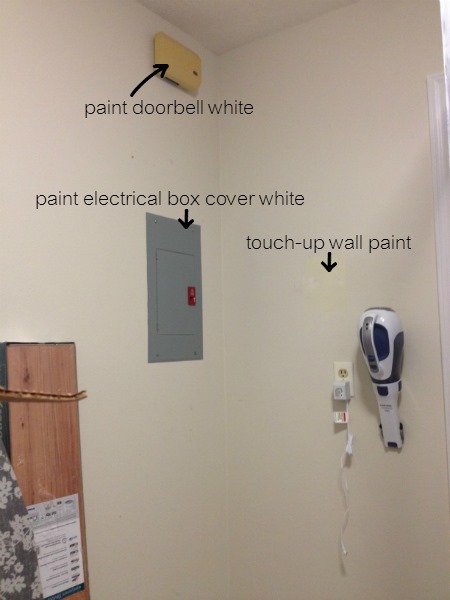
photo 2 (5)I wanted to paint the doorbell white (like I did our other doorbell), spray paint the electrical box white so that it’d blend in in with the back of the cabinet, and touch up the wall paint where we removed an old key box.
 

To spray paint the electrical box, I simply protected the area around it by taping pages of a magazine (thank you Franciscan Way) to the surrounding wall.
photo 3 (3)

Then I primed it with Rustoleum’s Clean Metal primer and spray painted it white.
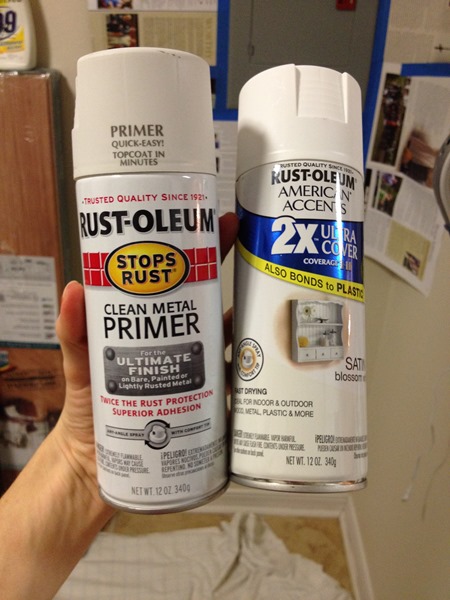
photo 4 (3)

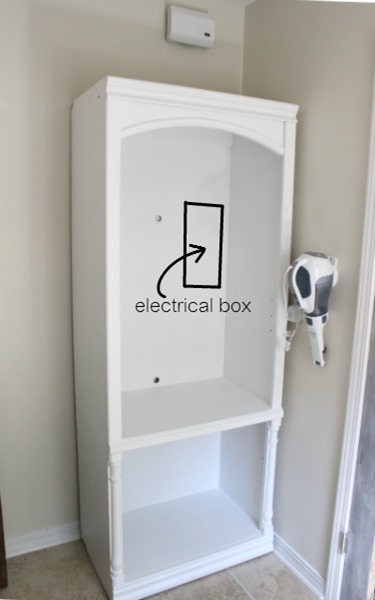
Then in went the cabinet!  We have yet to cut out a hole in the back so that we can access the electrical box without having to pull the entire cabinet out from the wall but so far so good!
 
IMG_5241

Like I said above, we’re not done yet.  There are still a couple more things we want to do before everything gets put back and organinzed and those things started with a bang last night in the form of a DIY fail.  Stay tuned.

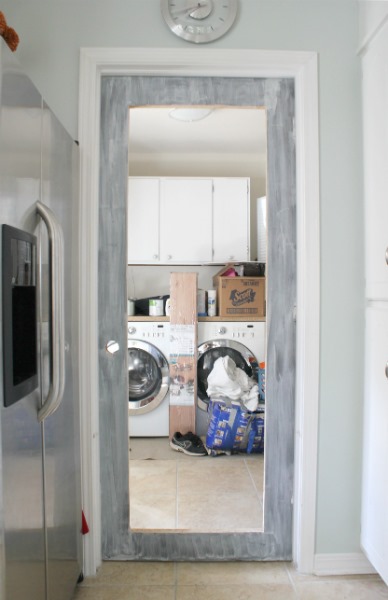
Also, a sneak peek!  The french door leading from the kitchen to the laundry room is becoming a reality…slowly!  We used an old wood door we found at ReStore, cut out the middle (which is now on top of the washer and dryer working as a countertop), and hung it!  I managed to prime it while I primed the cabinet but that’s all the farther we’ve gotten.
 
IMG_5246
We would’ve had it finished a few weeks ago but the glass insert turned out to be more expensive than we thought so we had to postpone in order to save up.  A typical step in the life of budget-ridden folk, I guess.  :)  All the details on how that all went down up to come hopefully soon.

And that’s all she wrote…so far!  We’re moving the kids rooms around today which means that Sebastian is going to his own room and the girls are moving to another.  I’ll be crying out of sadness that they’re getting older and smiling out of happiness that I won’t have to tip-toe around my own room anymore to avoid waking a sleeping boy, all while I move furniture this afternoon.  What are you up to?  Any projects that have been in-progress for quite some time now or are you pretty good at starting and finishing without too much time in between?  Any paint sprayer users out there?  Any secrets or tricks I should know?  Spill ‘em!  I need to make this relationship work!  :)

Have a great Tuesday!

Built-Ins - Fake It 'Til You Make It

 Hey!  I wish I was sitting here typing up a big kitchen update but alas, I'm not.  I'll blame it on fully enjoying our summer and I'm not mad about it in the least.  Actually, the drier fall air and milder temps will serve us better anyway when it comes to painting cabinet doors outside so you could even say that our lack of kitchen progress this summer is a blessing in disguise, paving the road for efficiency later.  Orrrr maybe that's just wishful thinking...  ;)

Anyway, I'm not here to talk about what we haven't done but something we did do.  It was a little project that only took a few hours one lazy Saturday afternoon.  Not only was it quick but it also itched that scratch that not doing anything creative for a few weeks can create.

It all happened in the reading room (music room?  library?  study?  We're not sure what to call it.)  We've known for at least a year that we want to line the back wall with bookshelves atop cabinets but that's a back burner project as we focus on other things.  For awhile, we improvised with a built-in we moved in from the living room (when we removed the wall between that and the kitchen, this built-in had to be moved) and an old secondhand shelf but that left a bare corner that we just used to store stuff like the vent hood that had to go up in the kitchen.


Not very aesthetically pleasing.  But then time marched on and I found chairs, the vent hood went out and up, supplies were relocated, I moved  in a small bookshelf from the kids' room, and topped it all off with some DIY art in a thrifted frame (tutorial here).

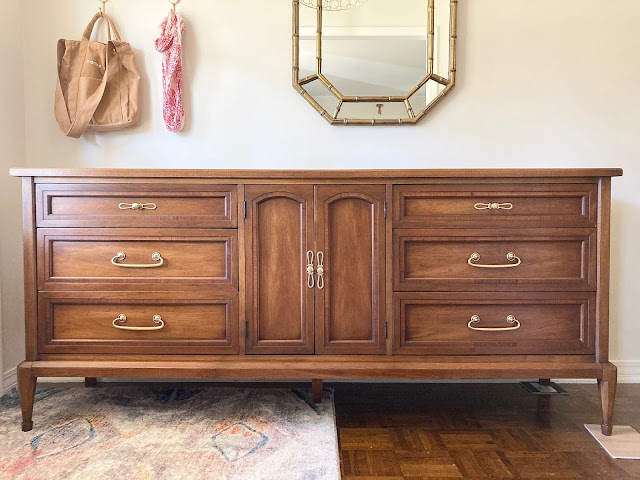
A Mid-Century Wood Dresser Makeover / Restoration


We bought this dresser right after we moved into this house - we really needed something to set the tv on in the living room so when I saw it on Facebook Marketplace (being sold by a neighbor...yay!), I pounced.  I can't say no to a dresser with legs.  It's just the best combo.  Proof right here.

It served us really well for a few years functionally and, once we got the paneling painted, it served us aesthetically too; adding a little warmth into a now very light and bright space.

Quite a Distressing Situation

We’ve been storing all of Gianna’s clothes in two drawers of Anthony’s dresser and two fabric boxes in the kids closet and, the older she grows, the bigger her clothes are getting, and the more that that’s just not working.  We had room leftover galore when we were talking newborn clothes but lately I’ve been just digging and storing excess stuff in a large tupperware bin…in the kids room.  Not efficient and definitely not pretty.

So, for the past couple of months I’ve been keeping an eye out online for a tall dresser that could fit in the kids room to house her things and then some.  Mid-century dressers are some of my favorite things and so I’ve been looking with that aesthetic in mind and coming up short.  The few that I’ve found had either been sold right before I messaged the owner or the owner just never messaged me back.  Well last weekend, my luck changed and I found one.  It didn’t really fit into the mid-century category but I loved the thick molding detail on the doors and the drawers themselves were simple enough that I flew in with a $50 offer (down from the $75 asking price) and they were sold. 

Here’s the picture from the listing:IMG_8283
The listing noted that the piece was solid wood and that all of the drawers “worked properly”.  I could tell it had been painted from the listing and the paint job didn’t look that bad via pictures so, if anything, I figured it might need a touch-up or I could totally go a different color with it.  Either way, it was painted white and with the addition of some new hardware, I hoped we could as least live with it as-is until I get around to making over the kids’ room.

Well, when I showed up to pick up the dresser, the owner had all of the drawers extracted and set by the door (which I thought was great since I figured we’d have to do that anyway to make it easier to carry).  At first glance of it, I could tell the owner used a semi-gloss or gloss paint and so I knew at that moment that I’d be repainting.  I also noticed that the paint job was really poorly done – there were brush strokes everywhere and it looked like maybe some spray painting mishaps.  But, like I said, I had already prepped myself for a possible repainting so that didn’t scare me away.  When we went to lift the dresser, the owner said he’d carry the lower side (we carried it horizontally) since it was heavier.  At the time I was like “Dude, the top is clearly the heaviest part with these doors that weigh a ton…” but I didn’t say anything because I wasn’t really worried about not being able to carry it.  (Four babies over the years has given me quite the biceps.  Ha!)  We got it outside and slid it into the back of my van and I remember seeing that the underside of the dresser, the side he was closest to carrying the dresser, was pretty beat up.  Immediately after he saw me looking at the bottom, he distracted me by stepping in front of it and telling me it would be helpful if I got into the back seat and pulled.  And ok, this is me adding a little bit of assumption in saying he distracted me because maybe he was really in a hurry to get this thing gone (even though after he talked my ear off) but it all happened in the matter of a few seconds and dawned on me afterwards.  I thought about it the entire drive home (ten minutes) and really, I wasn’t too deterred by the state of the bottom of the dresser – I mean, it still stands perfectly and is sturdy and the bottom isn’t seen whatsoever.  But then I got home.  And we pulled the dresser out of the van and into the car port.  And I noticed a few things I hadn’t before because I didn’t take the time to really look it over.  First of all, it wasn’t “solid wood”.  Argh.  The sides of the dresser and drawers are all particle board…not the cheap kind but still, not wood.  There were a couple of screws – one in the top of the dresser and one on the bottom trim on the same side – that were definitely not meant to be there.  Also, one of the “properly working” drawers was missing an entire track so that it literally just falls out of the dresser if you pull it out more than six inches.  I was annoyed.  Annoyed with shady sellers and annoyed with myself for not taking the time to look over the dresser better before I pulled the trigger.

Either way, it was now ours, I was happy I didn’t pay the $75 asking price (I wished I would’ve offered more like $30), and something fun and unexpected happened after I cleaned it out (there was so much dirt and dust in the drawer slots!) and sanded it down.  It was somewhat of a redemption for the whole situation.


Wood and White

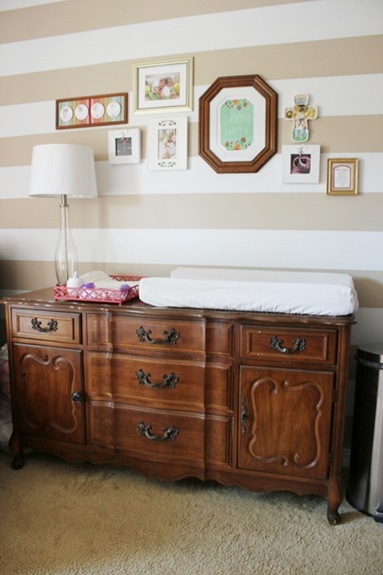
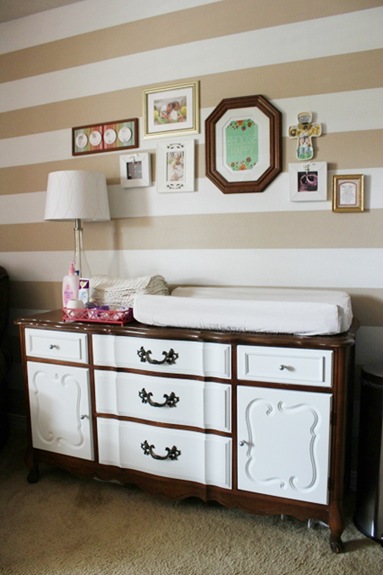
Here’s the story about the wood and white.  You might remember the girls’ hand-me-down dresser:nurserycollagedeets 009

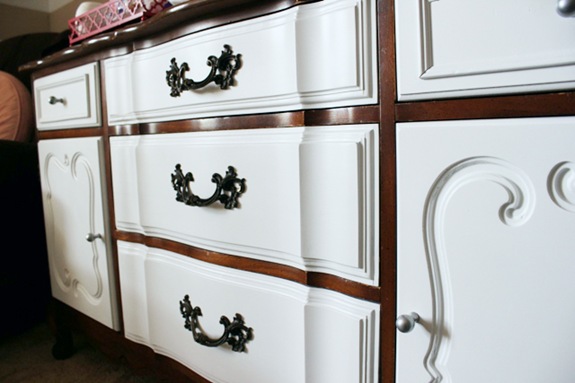
We went back-and-forth, from option to option, thinking of a bajillion ways we could update it.  We’re not huge fans of it’s ornate, curvy make-up so something needed to be done.  I even begged for your opinion of our final option(s) via Instagram, Facebook, and this post.  Well the landslide slid toward painting the drawers white, giving us a two-toned dresser.  Here’s how it all went on.

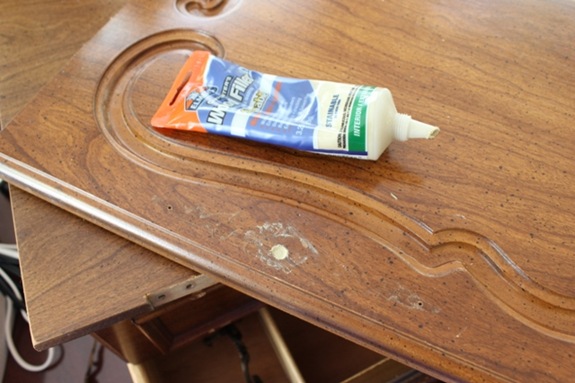
First we had to fill in some hardware holes with wood filler.  Put some tape over the backs of the holes, overfill, sand, fill a little more, and sand again for a nice flush finish.  We used Elmer’s wood filler from Walmart and a fine grit sanding block for the sanding. dresser 003 The two doors needed new holes that were centered between the door edge and the decorative groove and the two small drawers were just going to get knobbed instead of handled. 

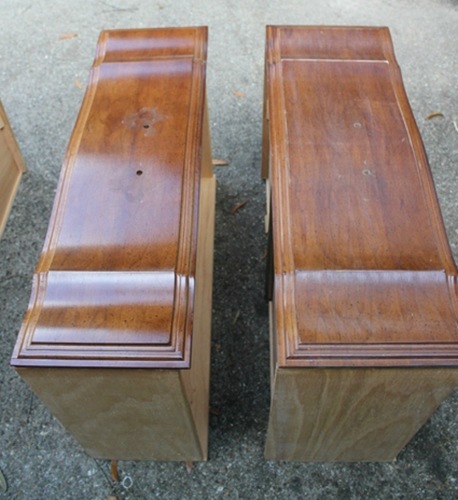
Next step was more sanding.  I gave each of the doors/drawers a quick go over with a medium grit piece of sandpaper.  I seriously spent 30 seconds rubbing each door/drawer.  No big deal…thank goodness because sanding is not how I like to spend most ‘o my days. 

dresser 004The drawer 0n the left isn’t sanded; the drawer on the right is.  See the difference?  I roughed them up just the littlest bit to make sure the paint would stick.

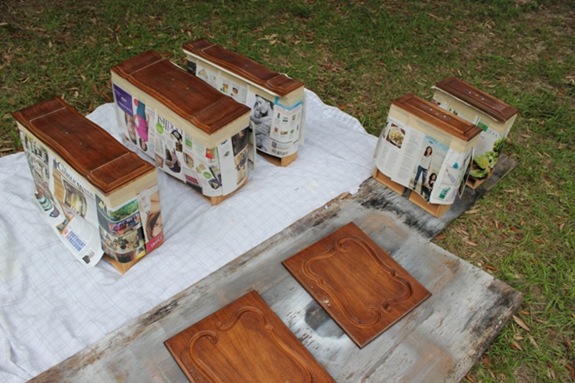
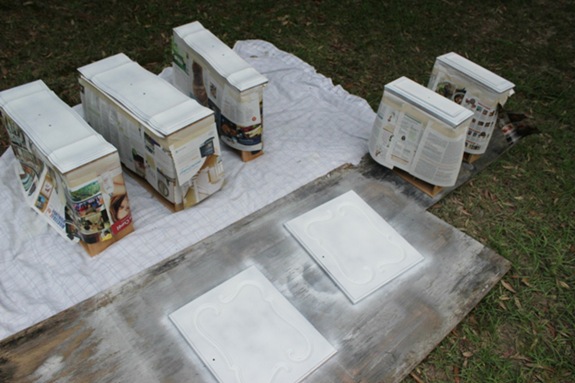
Then it was time to protect.  I was planning on using spray primer and paint so I had to tape off and cover the insides of the drawers.  I also made sure to stick a little piece of tape behind each hardware hole to make sure no spray got inside the drawers through those.  The prepping was probably the most time-consuming part of this whole project because all we had on hand for me to cover with were magazines.  So I tape page-by-page-by-page…

Then it was outside with them where the real fun began.   dresser 006

I used Valspar spray primer in white, spraying two thin and semi-even coats.  I’m not too picky on how the primer goes on as long as every inch is covered and it’s nice and smooth.  That being said, my prime jobs are usually a little splotchy albeit smooth.

Here are the drawers all primed: dresser 008

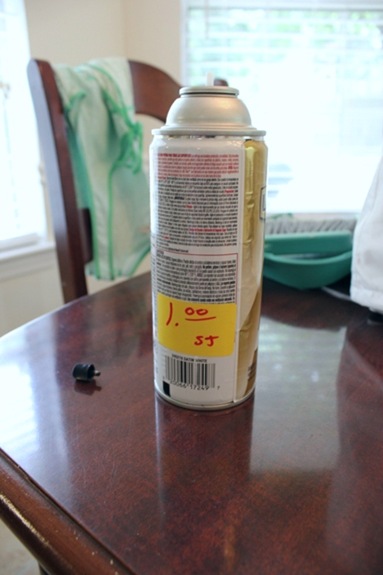
Next up, the real stuff.  I scored big with the spray paint for this project.  While picking up some landscaping plants a couple of weeks ago at Lowe’s, I found this can of white satin Rustoleum paint-and-primer-in-one.  (Side note:  I still used primer even though I had a p-and-p-in-one so I didn’t have to use as much paint and because I had it on hand anyway.)  It was marked down to $1 because it was missing a nozzle. 
dresser 007

Vvell, if you know me you know I’ve got a stash of spray paint therefore a stash of nozzles.  I simply borrowed a nozzle from another can and away I sprayed.  HOWEVER, even though I grabbed a nozzle from a can of the same exact brand, I still managed to get paint allllll over my right hand as it dripped from the nozzle.  I learned that I had to press and hold the borrowed nozzle perfectly straight or paint would drip.  A little annoying but still totally worth the $1 investment.  I might also mention that this Rustoleum paint and primer-in-one is theee BEST spray paint I’ve ever used!  It sprayed smooth and covered so well!  I’ll definitely be using this kind next time!

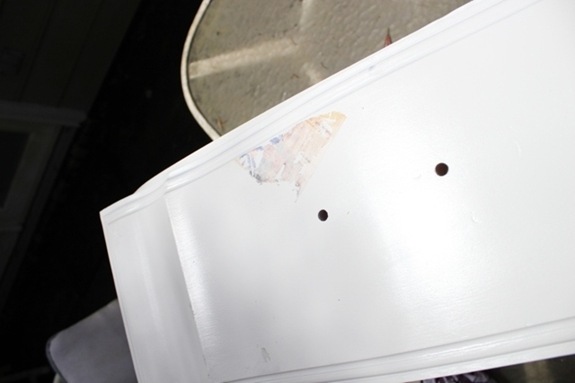
Beside the paint all over my right hand (which I donned for two days afterward despite a shower), I had one more minor happening.  While I was inside waiting for the second-to-last coat of paint to dry, the wind whipped two corners of two covering magazines up and onto the wet paint.  Grrr…  When I went out to check for dryness, I found them and ripped them off only to have a little paper left behind. dresser 010

So, adding another step to my almost-done process, I had to sand the area where the magazines had stuck after the paint was completely dry (I was so annoyed I actually called it quits for the day and did the sanding and re-painting the next day) just enough to remove most of the paper.  I didn’t sand all the way to the wood because I didn’t want an obvious dip in paint nor did I want to re-sand the entire drawer.  So, I sanded until smooth and put an extra coat on the drawer while doing the last coat on the other doors/drawers.  All good.

After letting the drawers dry for a full 24 horas, we stuck hardware on them and admired our new beauty.
 dresser 041

Cost breakdown:
Dresser:  f-r-e-e (hand-me-down)
Primer:  already had
Paint:  $1
Sandpaper:  already had
Total:  One Dolla…Holla!

The hardware won’t stay, it’s only temporary.  I’m on the hunt for some so I’ll be sure to update y’all when I find it.  Until then, we’re loving the white-and-wood combo despite the needs-to-go hardware. dresser 044

So what about you?  Painted any dressers lately…or any furniture for that matter?  I’m always all eyes for pictures!  What about clearanced/oops paint?  Anyone ever score any?  I’m gunning for the “oops” paint section first thing next time I’m in Lowe’s to hopefully find more!

Our Spring Living Room + An Easier Way to Hang Frames Straight & Level

I don't normally decorate with the seasons (besides Christmas) mainly because I don't want to store seasonal decor nor am I quick enough but I managed to do so in our living room this spring thanks to some springy fabric finds I made pillow covers out of.   Just changing those up made all the difference and was all I needed to do to go spring in here since our furniture can already pass for the season.  I ventured out of our norm and threw in a little bit of blush pink (I made those pillow covers out of this curtain panel* - it's semi-sheer so I layered it over the existing pillow cover) that nods to the abstract painting that's hanging in the breakfast nook.  You can't see it in the photo below but here it is up close and personal.  Just adding that pink really unifies this whole, big space. 


The kitchen in the background will hopefully soon look more like it belongs (paint!) and maybe even the fireplace (mortar!) but even still, I'm liking the fresh new view.

It looks especially fresh when you look back on what it was two years ago:

One Room Challenge–Week 2

Week 2 of the ORC is here and, amazingly, I’m right on schedule (all the thanks to the two chicklets who have been taking awesome naps)!  My goal was to get the kids room painted before the week was over and bada bing, bada

BOOM!  Here’s what their room looks like right now!

IMG_9209
Yep, week 2 also saw me, not only painting their room but “bedazzling” their wall with diamonds.

I CANNOT WAIT to show you how those diamonds came to be and I will in my next post (pssst…it’s CHEAP & EASY!), but before I could even get to that fun part, I had to cover up the tan walls.  If you’ve ever painted a kids room before while it was being inhabited by said kids, you know, it’s muy inconvenient.  To get to the walls you have to completely upheave their room – move beds, dressers, whatever else they use on the daily.  For us, that meant moving the furniture from one side of the room to the middle one day and the other side the next day.  It also meant moving the kids into the play room and our room to sleep for a few nights.  (This is why, if I get the chance to paint before we move into our next house, whenever that is, I WILL.)

Color Block Walls + Painted Curtains

I just love paint.  Don't you?  It's truly magnificent.   


It can pack a real punch for, really, not a whole lot of cash.  I leaned heavily on that fact when I made over the playroom-now-bedroom.  Solid walls are nice but, especially in a kids' room, adding a little more color on the walls ups the ante and makes things just a little more fun.

The walls in this room were painted right before listing by the previous owner (China White by Ben Moore) and it's really a great color (we've actually copied it to most of the rooms in our house so far and the exterior) but I wanted something a little more upbeat for S & G's new room.  I wasn't actually planning on painting this room when we first decided we were going to move them but then I thought, well, if we're going to be moving furniture around, we might as well paint.  Over-achiever, I know.  But it was worth the extra effort.  :)

The Process:

Before the walls got painted, I had to paint the trim (read our tips on that here).  The previous owner had also had them freshly painted but they had them painted a really shiny, ivory-beige color.  We painted the ceilings in here Pure White (Sherwin-Williams) back before we moved in and wanted to follow suit with the trim to make things cohesive.  The crown, door and window molding, and baseboards all got a that white treatment.  The chair rail isn't a favorite feature of ours and taking it down meant filling in holes and, since the top part of the wall is painted-over wallpaper (grrr...even though they did it semi-right by filling in seam gaps), there'd be a line where the painted-over paper met the chair rail that would also have to be hidden with some spackling.  So, while painting an entire room sounded fun, painting and having to fill in where the chair rail was didn't.  You can only be so much of an over-achiever.  Ha!  

Two-Toned Down

Two weekends ago, our church had a yard sale filled with lots of donated treasures; the proceeds of which went to a bunch of our youth group teens who are going on a mission trip this summer.

Among those things donated was this solid wood table and chair set:
IMG_9010

And actually, it was donated last year for the same fundraiser but didn’t sell.  It’s seen better days and a picture doesn’t really acknowledge that – peeling paint and a slightly warped top.  It probably had a really cheery life though considering the fun paint job, no?

Well, who shows up at the smell of great potential that apparently no one sees?  You oughta know by now…yes, yes I did.

I helped transform the table into this to be (hopefully) sold to benefit the mission trip:
IMG_3733(For some reason the fabric seat on the chair on the bottom right looks darker than that of the chair on the bottom left but they’re the same fabric so it must just be the angle of the camera on the geometric print.  Also, the table top was removed for delivery and so it’s a little off-center in the picture simply because it was just set on top for a quick pic.  In case you were wondering about those things, which you probably weren’t, I thought I’d fine-print them.) 
However, I can only take a little bit of credit because, even though I had the vision, I didn’t do all the work.  Some of the teens going on the mission trip sanded everything down just enough that the peeling paint was gone and what was left was nice and smooth.  Another teen (hey Duncan!) painted the big ‘ole base of the table and the love of my life painted the top.  I finished painting the chairs (the teens started), did the distressing, and added a little flavor to the table top.

But let’s break it down a little more than that, shall we?  Of course we shall.

The Chairs
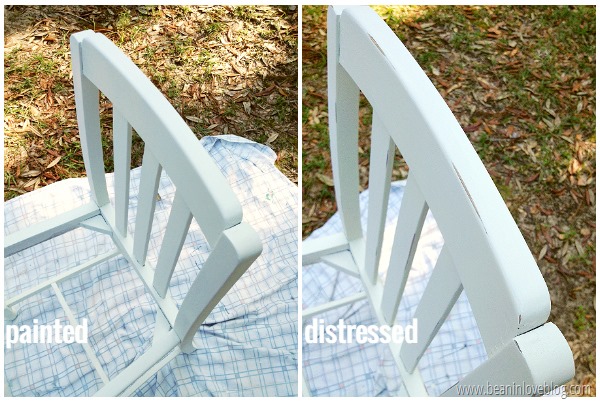
Like I mentioned above, they were rocking lots of peeling paint and some slick vinyl seats that were in need of replacements.  First, we took all the seats off.  Since they were nestled right inside the chair frame, no screws were holding them in place nor did any need to be, so they just popped right out with a little pressure from underneath.  The chairs were then sanded and two or three coats of chalk paint (this in ‘Kid Gloves’ from Lowe’s) were applied.  We decided to go with chalk paint mainly because I had heard there was no prep or primer needed to apply it so we thought it easiest since multiple people would be working on the chairs.  I’ll go into more in a little bit, but I probably won’t ever use chalk paint again.  Half of the chairs were painted with a brush and the final coat was done with two cans of spray chalk paint because we ran out of the canned stuff and thought spraying them would be quicker, which it was.

Once they were painted and completely dry, I went over some of the edges with a palm sander paired with fine-grit sandpaper to give them a slightly distressed look.
chairs
A palm sander is a lot quicker than sanding by hand but it requires a bit more care as it can easily get away from you if you’re not paying attention.  After sanding, Anthony put a coat of polycrylic on each chair to seal the chalk paint.

The fabric that we recovered the seats with was a remnant donated by someone to be sold at the yard sale and it ended up being perfect for these chairs.  It’s a heavy-weight upholstery fabric so it’ll hold up great.  The boards that made up the seat on a couple of the chairs were broken, so Anthony grabbed some thin plywood and replaced them.  The seats were made of a wood frame that was curved at the front (you can see the that curve in front in the pictures) so the plywood was placed right over the frame.  We used thin plywood because it needed to be able to bend to the shape of the frame and chair once attached.
IMG_3716I’m sorry I didn’t take more pictures but I wasn’t around when a lot of the refinishing was happening.  :(

Each chair was the same but also a little different since the distressing was done in different spots but they turned out so great, didn’t they?
IMG_3717

The Table
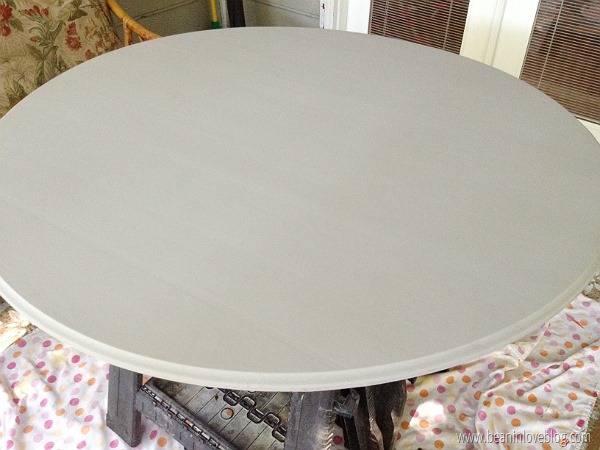
To help straighten out the table top (it was slightly warped), we laid it on the hard tile floor of the youth center for a day and piled some weights on the underside (and when I write “we” I mean Anthony…don’t go all freaking out on me because you think this preggo lifted some weights).  It didn’t completely straighten it out but helped and it made it far less noticeable and luckily, it wasn’t set-your-plate-on-it-and-watch-it-slide-off bad in the first place.  The base was painted with the same chalk paint we used on the chairs and the top was painted a gray color, mixed at 50% intensity (I think the color was “Woolen Stocking”, but in the paint can form). 

IMG_3681
To add a little more character, I added a layer of this stain on top of the dried and quickly sanded chalk paint (sanding chalk paint with a fine sandpaper after it’s dry makes it really smooth).  Using a foam brush, I brushed on one coat, making sure I brushed in the same direction as the grain of the wood and/or the placement of the boards that made up the table top.
IMG_3682
Halfway done:
IMG_3683Imperfection is completely okay with this step and really, the more imperfect, the more character after.

I actually had to do this twice because, the first time around, the polycrylic layer we put over the stain bubbled because of the foam roller we used.  So we had to sand the entire top down and repaint, restain, and reseal.  This picture was taken after the first time I applied the stain.  I loved how it looked before I had to wipe it off and I was tempted to leave it that way.IMG_3572
But back to round two, after applying the stain, I let it sit for two minutes and then wiped it off with an old t-shirt.  I made sure to wipe in long sweeps and once again, with the grain of the wood.  (I did stain around the edge too and along the small lip underneath, in case you were wondering.)
IMG_3684
IMG_3685
It took a whole day for the stain to dry and then, once it was, I brushed on (vs. rolling on like the first time) two coats of polycrylic, allowing the first coat to dry completely and be lightly sanded before the second coat went on.  I like using polycrylic instead of polyuerathane 1) because it doesn’t yellow near as much even though it still yellows a teeny-tiny, possibly unnoticeable bit when painted over white and 2) because it’s soap and water clean-up. 

So here’s the thing about the chalk paint.  I see it being used EVERYWHERE around here.  I’m guessing the no-prep feature makes it a hit because it definitely isn’t the price.  That stuff costs $$$.  The chalk paint we bought from Lowe’s cost $30 for a quart and, for us, that covered one coat of paint per chair, three coats for the table base, and a couple of coats of paint on the two small doors and three small drawers of a hutch that’s also being refinished to sell.  I feel like we could’ve gotten more painted with a quart of $15 latex paint…but maybe I’m not factoring in primer which I know helps a ton when we’re talking coverage.  Even still, it’s double the price of the latex paint I use to paint furniture and the coverage seems to be less or not that different without a primer.  Also, while no-prep sounds appealing, the thing with chalk paint is that you have to seal it.  I mean, you HAVE to…unless you’re painting something that will never be touched post-paint.  I know this because, while they were painting this table, another teen was painting another table and that table got water on it.  The water made it so that you could literally take your finger, swipe it over the surface of the table, and watch the paint come off with your finger – not something you want happening to your furniture ever, ever, ever.  A lot of people seal chalk paint with a wax and some with a polycrylic or even polyuerathane.  Wax sealer doesn’t harden so, while it prevents liquid and fingerprints from getting to the paint beneath, you can’t place anything hot on it because, like wax does when it gets near heat, it’ll melt and stain.  Also, I’ve read that it wears off over time so anything sealed with wax will eventually have to be resealed.  So, in the end, you don’t have to prep by sanding or priming but you do have to seal so really, you’re doing extra work whether you use latex or chalk paint.  It’s in the beginning with latex (primer) and in the end with chalk paint (sealer).  For me personally, the cost will probably deter me from ever using chalk paint again.  I mean, we spent close to $50 alone on paint for this table!  I can get the same distressed, antique look if I want with latex and I feel like, in the end, it’s a lot more durable.  But, that’s just me.  You painters out there, what do you prefer?  What are your experiences with chalk paint?

Anyway, back to the object at hand, which once was a fun table that is still a fun table, just a little toned-down. 

IMG_3736

We all need that sometimes, right?  Maybe it’s called entering adulthood…or maybe just parenthood.  Supposedly that’s when all the fun stops.  Supposedly.

I beg to differ.  ;)

.           .           .

P.S.  The table ended up selling before the day of the yard sale and while it was half finished.  A lady came in to buy something else that we had posted online to profit the mission trip team when she saw the table and fell in love.  Next up is french provincial-style hutch that’s awaiting a makeover that I’m going to help with…hopefully before this baby gets here. 

Surgery

Our once pretty, clean living room has (once again) become a workshop, in this case, a furniture workshop.  Actually, let me rephrase that.  Our once pretty, clean living room has become a furniture operating room.  Let me show you what I mean (be prepared for lots of pictures..."surgeries" of this magnitude and depth are very, very detailed).  
We realized that before we continued ripping off fabric and pulling out anymore staples from the "over-acheiver" love seat, we needed to get the back legs fixed.  If they couldn't be fixed, there was no point in putting anymore manpower/womanpower (yep, that's right...womanpower) into pulling and removing, right?  So, out came the sawhorses and upsy-daisy she went.
 As you can see, the left back leg is comfortably dangling while the right leg was completely pulled out with a tiny tug.  Thankfully, both legs were in great condition and, God-willing, could hopefully be used and re-attached.  At this point though, we realized that the only way the legs could be fixed was by removing all of the fabric and obstacles around each. 
Covering the entire bottom was a thin black sheeting which needed to be removed first.
It was ripped in some places already so all I did was tear the rest off, thinking I'd just buy new sheeting to replace it.
Here's what I found underneath...
...bands of strong burlap holding the seat springs in place with another layer of even thinner black sheeting underneath.
Up close, here's what the left back leg looked like:
And the right (minus said leg):
So, I got to work...tedious, I-need-to-reuse-all-of-this, operating room work.
(During this entire process I took tons of pictures for reference so that I put everything back in the exact order it was in - a very helpful, very important step for a beginner like me.)  As I was prying off burlap straps, I realized how old this love seat really was.  The pieces of fabric I had ripped off so far had been attached with staples, but these straps had been attached with old, rusting upholstery nails which told me the love seat had probably already been re-upholstered before. 
I LOVE history so it was really cool to think about the history that belongs to this love seat - where it's been, who made it, how old it was...
But anyway, history aside, strap by old strap I peeled away until I was left with two gaping holes on either side of the back of the love seat.

And man was it dirty and dusty inside the bottom of the love seat, again showing it's age!
 I even stuck our camera inside one of the holes to get an even better...er...disgusting perspective.
A little eerie, huh?  Don't worry though, most of it got sucked up with the handy shop-vac...thank goodness because I'm allergic to dust!

The next part of the process is/was the most critical and also where Anthony comes in.  Up until this point, I'd been single-handedly operating.  I'm the prep nurse and he's the doctor; we make a good team.  So I say, "Doctor, I have everything all prepared.  What is your plan of action?  What do you need?"  And he says, "It looks like the legs can be saved which is great news!  You've done incredible prep work nurse but now it's time to get these legs back on and standing.  I'm going to need twelve three-inch screws, my drill, and two strong pieces of pre-cut wood for reinforcement".  Okay, okay, you get the point.  I'll get my head out of the clouds now and tell you what actually happened, doctors and nurses aside.  :)

First, we removed the casters from both legs by simply unscrewing them and pulling them out.  Since the front left leg is unable to have a caster (it was apparently ripped out, taking half of one side of the leg with it...but the leg still works), we're not going to use any casters at all.  Next, using a piece of wood we already had, Anthony cut two pieces to fit into the love seat right behind each leg and glued them into place.  They will serve as reinforcement.  Gluing them in was just an extra, optional but pre-cautionary step. 
Then he drilled six holes and screwed the pieces of wood to the frame using the three-inch screws like so:
Since they're on the outside of the frame and can be seen, he used a counter-sink drill bit to embed the screw heads, making sure they're flush so that they can later be covered up with wood filler and then disappear.  :)
Here's what "fixed" looked like after each leg was screwed on:

Next comes the clean-up.  Surgery is over.  It's time to put the patient back together, strap by strap.  It was at this point that I whipped out our new staple gun!  We've always just borrowed one when we've needed to but since this is kind-of a big, time consuming job, not to mention that we'll need one in the future for upcoming projects, I went out and found one on sale from Lowe's.  :)
A-stapling we went, Anthony actually doing the stapling while I firmly held the burlap straps in place, making sure we put everything back the way it was.  After all of the straps were re-attached, here's what the underside looked like:
Nice and put together!  We weren't done yet though.  We still had to put some sort of backing over the burlap straps.  I ended up finding and using a heavy duty, Pellon brand backing from JoAnn Fabrics.  It was white (they didn't have black) but I didn't think it would be a big deal since 1) it won't be seen unless you're hiding out under the love seat and 2) I'm planning on painting the love seat a lighter color anyway.
So, I laid the backing across the bottom of the love seat and cut a rough template just so that I wouldn't have bunches of fabric everywhere.  Then I got to stapling.
After it was all stapled on and secured, I simply cut around the edges to reveal a perfectly fitting backing and one great looking undercarriage.

Next...THE MOMENT OF TRUTH - WILL SHE STAND WHEN TURNED OVER OR WILL SURGERY HAVE BEEN A FLOP?  At least, that what I was thinking.  If you would've asked Anthony that question regarding the success of his workmanship, he would've said "Of course it's gonna stand!"  Gotta love his confidence.  :)

So...

Taa-Daa!
She went through surgery like a champ and is on her way to making a full recovery!  I even sat on her and she felt as solid as a rock!  I envisioned future naps, children jumping (and me yelling not to), movie nights...the whole nine yards!  Oh yeah, you've probably noticed all of those little dots of stuffing are gone too!
(See 'em?)

Those, as you might've guessed, were the strings and stuffing attaching the upholstery buttons.  I sawed them all out with a razor blade while Anthony was doing his magic with the drill.  There were 64 buttons in the couch!  64!  Well, they're gone for good now...adios, adieu, and hasta la vista!  And, speaking of goodbyes, I really should be getting back to making the valances I mentioned earlier this morning so ta-ta for now!  You can be sure I'll be back with more on the love seat later!  Have an awesome weekend!