Christmas Art-Making with Kids | DIY

We don't have our Christmas tree up yet even though it's not abnormal for us to wait until we get closer to Christmas, but we do have some treeS hanging out in the breakfast nook.  


And nope, I'm not talking about the plants.  I'll zoom in for ya in a minute but let's start from the beginning.  Awhile ago, when the blue patterned linoleum floors were still being walked on in here, I whipped up that big 'ole painting on the left wall to add a little fun and color (you can actually purchase a digital download of mine here or follow my lead and paint your very own!) 

The Case for Matching Hinges to Cabinet Color

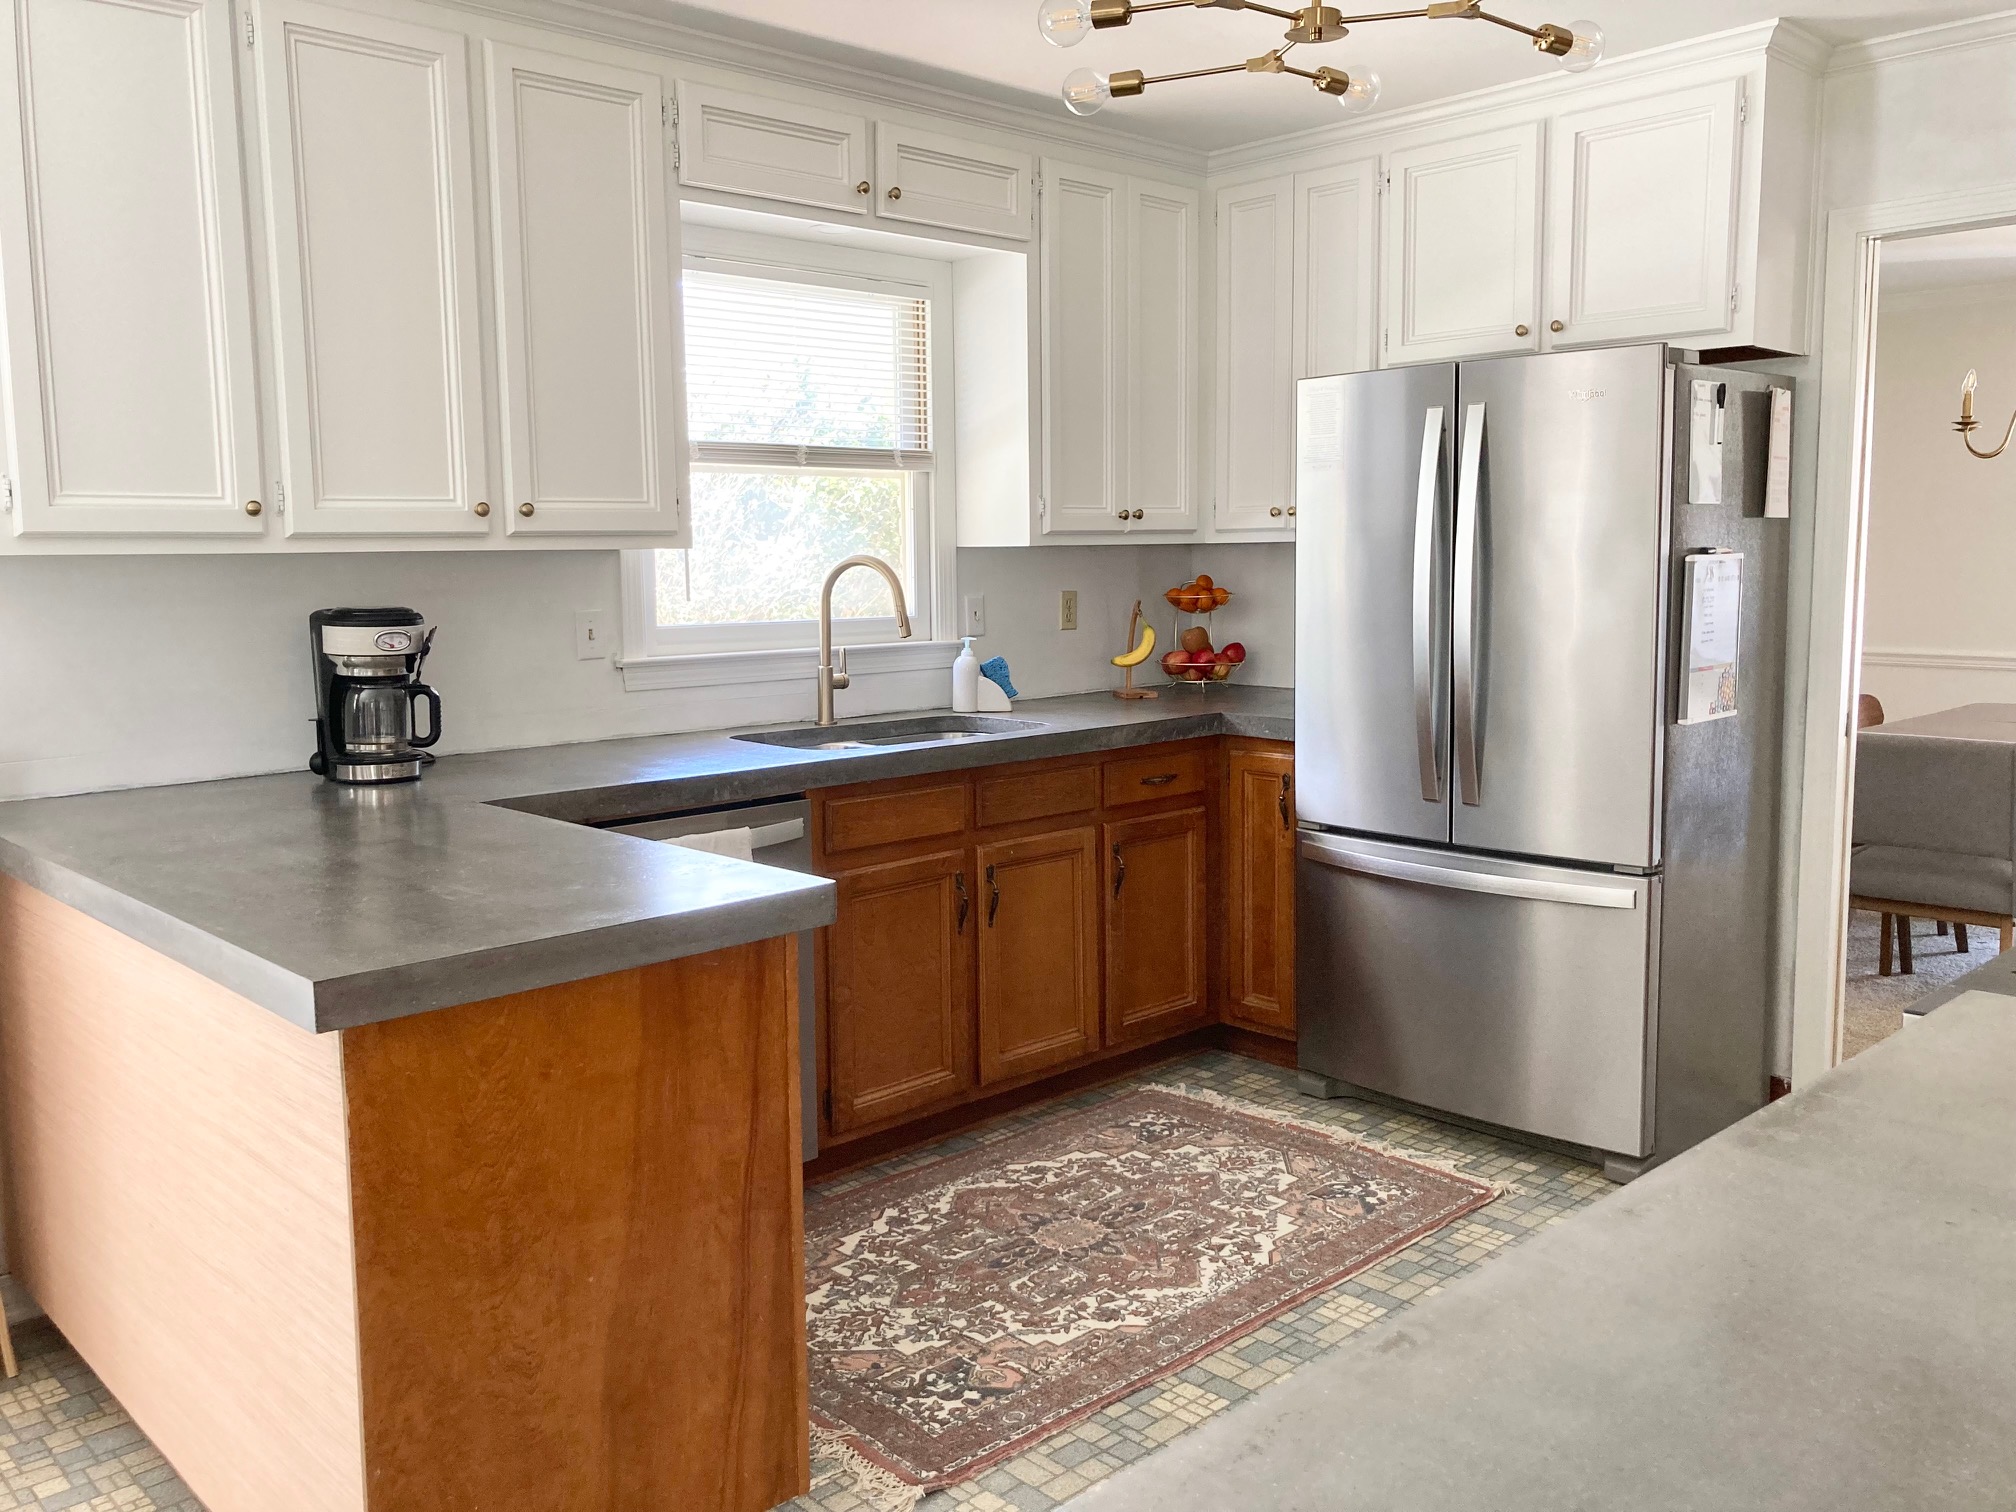
I've become very passionate about something.  It started out as something I tried in our first house down south years ago and since then, I've done it a few more times and I now won't ever deviate from not doing it.  It's maybe a small matter in the grand scheme of painting cabinets but I feel like it's not so small in the impact it makes.  

Hinges.  Specifically, like it gives away in this post's title, matching the color of your hinges to the color of your cabinets.  I know that these days, most cabinets are made with hidden hinges so this is a moot point for most truly modern kitchens but if you've got old cabinets that you're hankering to paint or have already painted, take note.  You might agree with me and you might not but here's my argument...

If you're doing a little kitchen makeover (or bathroom...or anywhere there are cabinets that could use a fresh coat of paint to modernize them), it's only natural to then replace the old hardware on them with new.  New pulls and knobs go a long way in updating cabinets.  You might even go a little farther and want to replace the hinges on the cabinets to match that pretty new hardware.  Makes sense.  It's logical.  But here's where things could go two ways.  You could get new hinges that match the hardware - you know, brushed nickel hinges to go with your new brushed nickel hardware -  OR you could scrap that idea and either buy hinges that match the paint or paint them to match.  If the color you're going with is black or white, you probably won't have the hardest time finding new hinges in those generic colors, making the switch fairly simple.  But, if you're going with the latest trend of green, blue, tan, etc...you'll probably end up having to paint your hinges.  Lucky for you, you can pretty much find every color of spray paint on the planet these days so finding a match may not be that difficult.  (I'd recommend this primer* first though along with several light coats.  Opening and closing the hinges between coats also helps them not to stick in the process.)

Do I sound crazy?  Or are you smelling what I'm cooking?  Let me give you a few examples...this is the fun part.  This whole idea of mine started here in our master bathroom back in our second house (click here to get a whole tour): 


It's hard to tell at this angle but it was the best I could find.  Can you spot the hinges?  They're the same color as the cabinets.  They're definitely not invisible but they don't stand out like a sore thumb either.

$33 Marble Backsplash | DIY

Alright, alright, maybe that title deserves the eyebrow raises I'm sure it'll get and maybe I should've put quotation marks around "marble" because it's probably pretty obvious that you can't get a marble backsplash these days for $33 buckarooskees but it'll sure look like you can if you pick up what I'm throwing down here in this post.

This was a still of our kitchen a few months ago:


When we first bought the house, the backsplash was wallpapered with the same stuff that continued throughout the entire kitchen and breakfast nook area (see a before and so far house tour here).  We ripped that off and primed the wall for what would eventually go up, which leads me to that same spot last week:


Spotted: A Thrift Trip

It's been a good long while since I've been able to take a couple of hours to just roam through a thrift store or two.  But, as last week's errands would have it, there were four of them within the near vicinity of places I had to go and since I had a little extra time on my hands (well, borrowed of course from continuing painting the kitchen), I roamed...and these things are what I spotted...

(Pssst...if you're local to Mobile, I'll put the thrift store under each photo in case you have your heart moved and want to see if any of these are still there!)

This long tray was only a couple of bucks and would be a nice valet tray to set in a bathroom or atop a dresser in the bedroom to hold pretties and things.  In a kitchen it would also make a great place to lay cooking utensils that are in use next to the stove.

Goodwill on Azalea


Are you a plant person?  Pots can get pricey but I've always found thrift stores to have them.  These three were cute.

A Mid-Century Wood Dresser Makeover / Restoration


We bought this dresser right after we moved into this house - we really needed something to set the tv on in the living room so when I saw it on Facebook Marketplace (being sold by a neighbor...yay!), I pounced.  I can't say no to a dresser with legs.  It's just the best combo.  Proof right here.

It served us really well for a few years functionally and, once we got the paneling painted, it served us aesthetically too; adding a little warmth into a now very light and bright space.

More Painted Kitchen Cabinets...That Didn't Turn Out

 In case you were wondering, it takes about 193 steps to get from here:


to here:


Open for a Surprise

 Opening up a cabinet to grab a can of diced tomatoes is the most exciting thing ever, isn't it?

.

.

.

.

I know.  Feel free to laugh or wonder what the heck is in my water.

It's one of the things you can chalk up to monotony.  Well, for me, it still is monotonous, but it at least brings little tiny spark of happy with it because...

I wallpapered the backs of our cabinets!


Our Painted [Upper] Kitchen Cabinets

I've painted a thousand cabinets, ok, maybe not thousands...let's see - four kitchens now, four bathrooms, and more dressers and pieces of furniture than I can count - and each time, I've done things a little differently.  Each time, I learn a more efficient way, or a better way to get a smooth finish, or I use a new paint.  So I can't say that I have an ironclad, tried-and-true method to painting cabinets but I can say that I've had great success in the arena.  The same story follows the most recent endeavor of painting our current upper cabinets in the kitchen.

First, I removed all of the doors and the contents of the cabinets.


I wanted to replace the old cabinet pulls with new knobs so the next thing we had to do was fill in the old hardware holes and drill new holes.

DIY Concrete Countertops - Finishing

Alright, where did we leave off on the concrete countertops?  Oh yeah, the SINK!  I can feel that ugh feeling coming right on back...

(Pssst...click here to read about the Part I of our new countertops.)

In our first post about the prepping and pouring, I wrote about how much of a pain it was to install the sink form.  We hoped the pain would end once the concrete was poured but when we removed the form, we had all these big voids.

The frustration was real but we had to move on and start with the process of finishing the counters before we figured out how to make the sink look better.  So, let's talk about the finishing and come back to the sink.

With the concrete completely dry (about five days after pouring), it was time to grind them down so the tops were smooth.  Even with screeding and then floating the concrete after it was poured, the counters still felt rough to the touch, slightly more smooth than something like our sidewalk but definitely not smooth enough for a kitchen sponge to glide over.

Easter / Spring Mantel

We are not so great at all-out decorating for every holiday, big or small.  Christmas is the one holiday we do more than usual; this year we even managed to hang lights outside and we felt really accomplished.  But holidays like Easter don't see much of a change around our casa.  (I mean, Easter baskets sitting around and crosses already hanging on the walls count, right?)  But this year, I pulled a Bonnie Engstrom and decorated the mantel for Easter.  It needed a good dusting last week and one thing led to another and by the end of cleaning the mantel shelf, I had a whole new set up.


It doesn't scream bunnies and eggs (because in all honesty, I'm not a huge fan of that dang Easter bunny) but it's a simple nod to the reason for the season.

DIY Concrete Countertops - Prep & Pour

Last year, I wrote a post all about our kitchen plans and in that post I mentioned concrete countertops were on the docket.  Well, here we are, many moons later excitedly crossing that off our list.  And boy, are we glad we can.  What. A. Process. it's been.

The kitchen isn't finished yet - we still have more painting and floors to tackle - but it's gotten to the point where it's skipped right on over the dated to modern line and our new countertops have a huge part to play in that.  


Here's where we started three long years ago:

I painted the cabinets a few months ago and I know that really helps up the ante too.  A post on those will come but today, I'm going to share the beginnings of how we prepped the kitchen for those new counters and poured them in place.  I was going to write a whole big post on the prep, the pour, and the finishing but just adding photos was a bajillion pages so we'll split it up so you can chew it all without choking. 

An Overdue Kitchen Update

 Oh how far we've come...in the kitchen.

I've been wanting to share our kitchen progress for awhile but when I think to do it, another voice says "just wait until you get a little more done and then post an update".  Well, we're slow (but sure!) and so if I wait and wait, you'll never get to see it.  

We are most definitely not done but we've jumped and skipped, more like leaped and bounded, our way to modern-day kitchen in the past three years (almost three years on the dot, can you believe it?!)

I give you...progress:


Comfort Gray

 Hey!!  It's been a couple of months since I popped on here.  👀

Blame it on the wonderful world of internet technology.  In the 10+ years I've been blogging, I've never had any technical issues until the past few months.  Every free minute I had to jump onto my computer to blog was spent dealing with blog issues.  The internet changes everyday and to fix anything now, I feel like you have to take an entire college course to keep up.  There were quite a few frustrating moments but thankfully, I think they're ironed out for the most part.  

So, with twisted digits, I'm just going to go ahead and sweep all the technical stuff under the rug and dive into paint.  Hopefully it'll stay under that rug and just, well, disappear.  We've gotten a good chunk of home project progress down pat and I've got a big 'ole kitchen update to share soon but right now, I'm going to take it easy and share a tried and true paint color...

Comfort Gray 


The past couple of weeks, I spent about an hour each day painting trim and walls in our storage room/laundry nook/half bath area.  This combo of three rooms plus a small hallway sits right off the breakfast nook and it's the only place that still had unpainted wood trim.  That fact alone made it look like it didn't even belong in this house.  I hate painting trim so much that I'm sure I've put this off lots and lots of times but I finally buckled down and went classic white on it.  (By classic white I mean Pure White by Sherwin Williams color-matched to Valspar paint in a satin sheen - all of the trim in our house is this color.)