
Last year, I wrote a post all about our kitchen plans and in that post I mentioned concrete countertops were on the docket. Well, here we are, many moons later excitedly crossing that off our list. And boy, are we glad we can. What. A. Process. it's been.
The kitchen isn't finished yet - we still have more painting and floors to tackle - but it's gotten to the point where it's skipped right on over the dated to modern line and our new countertops have a huge part to play in that.
rug*
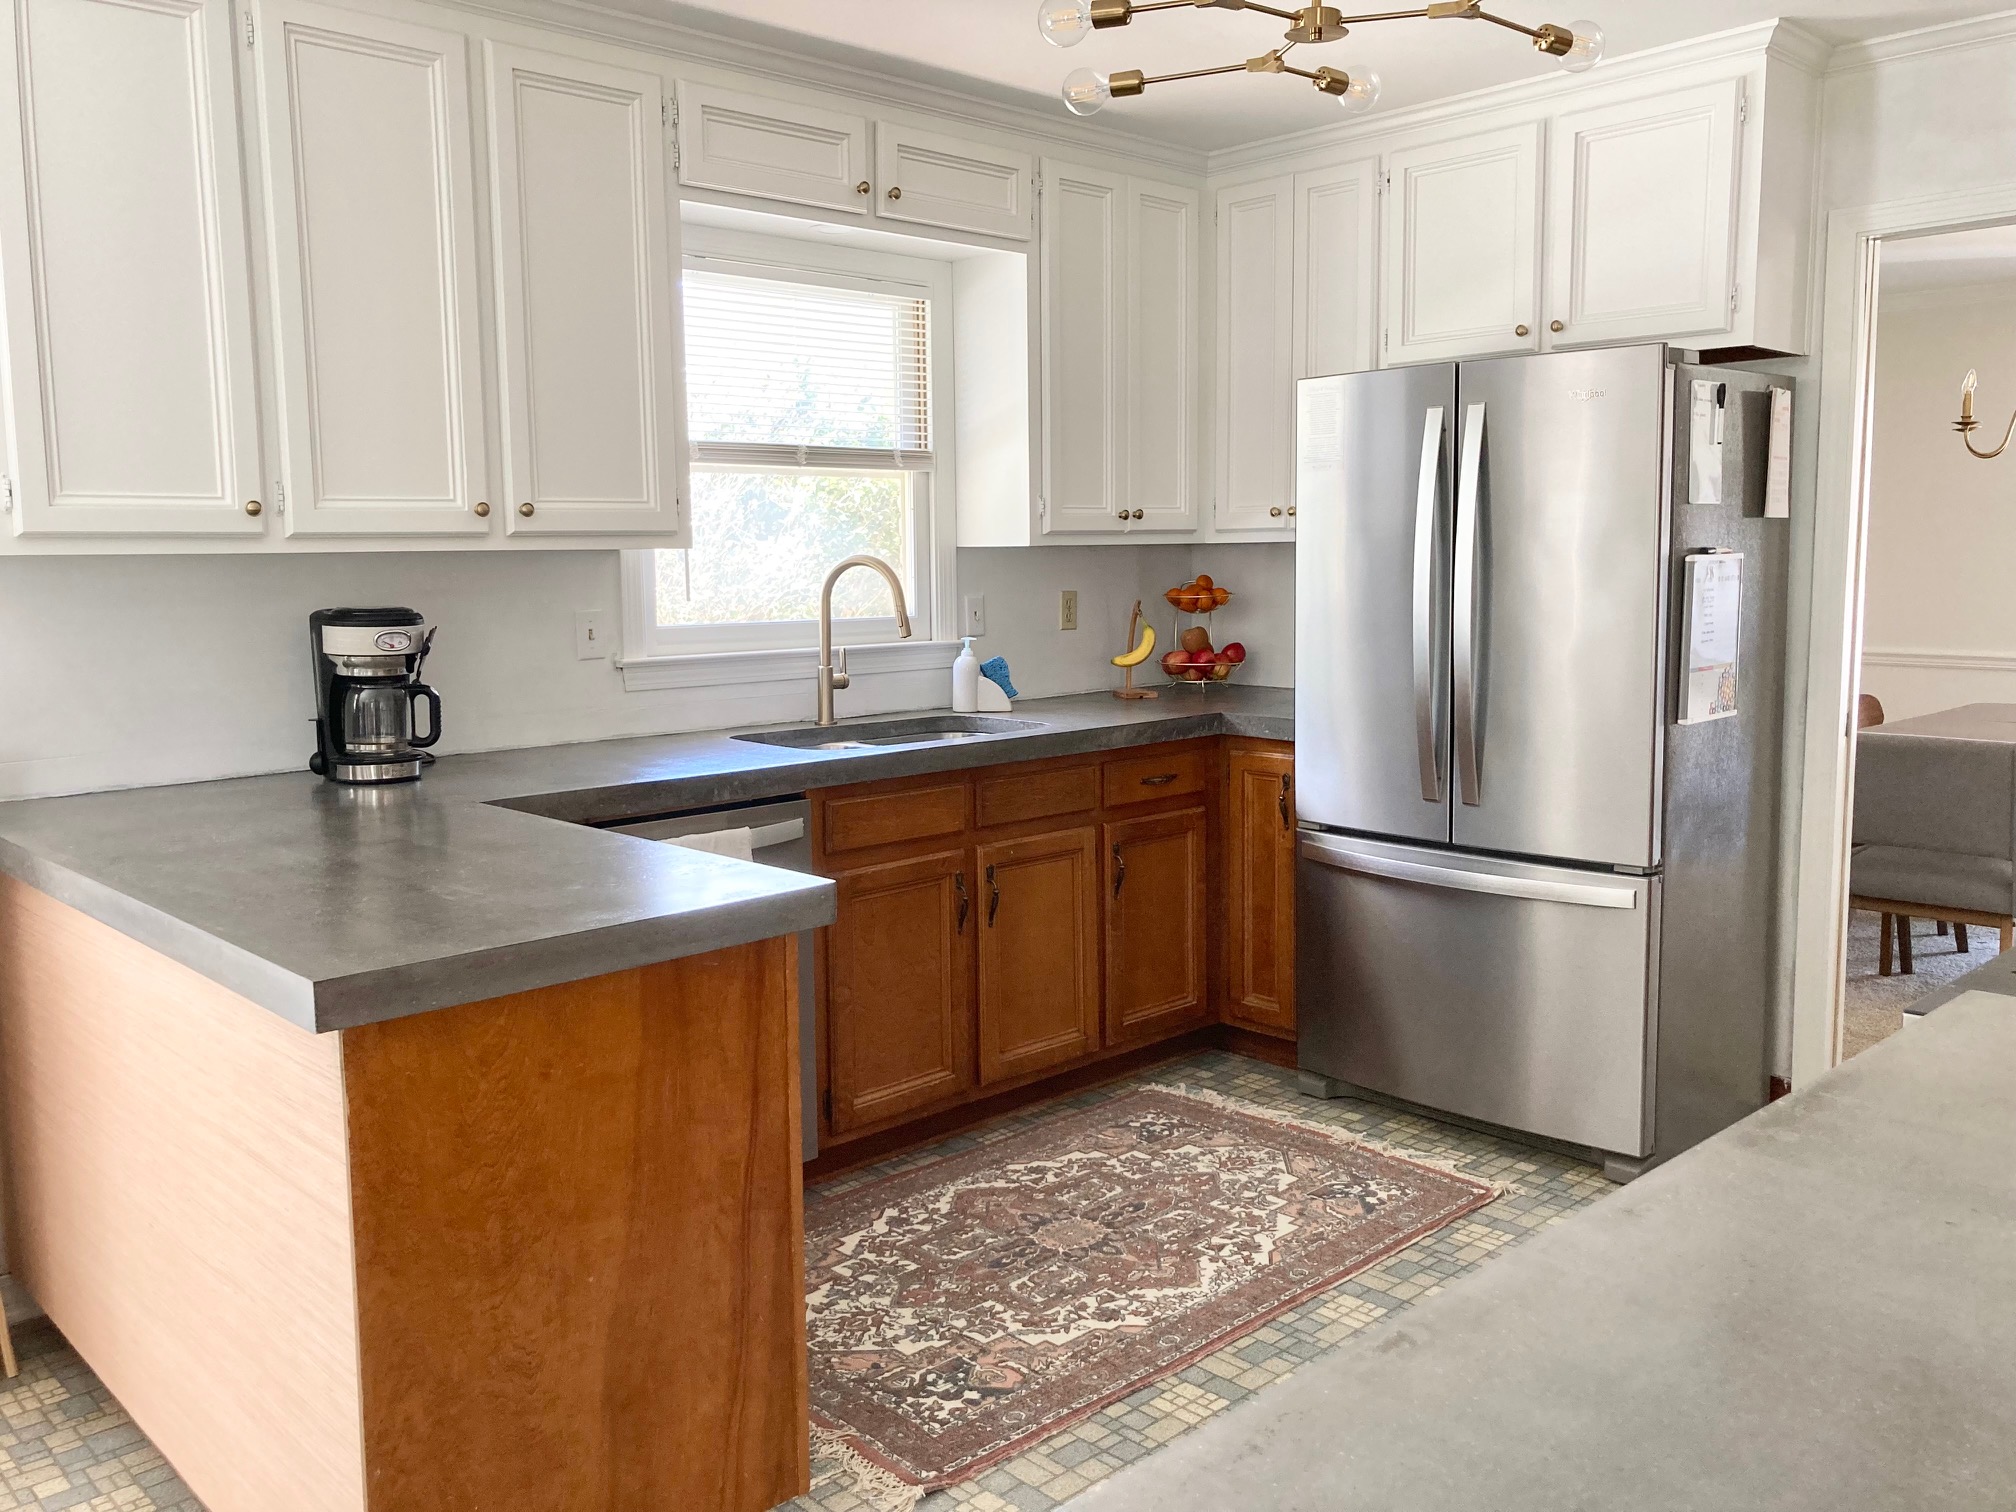
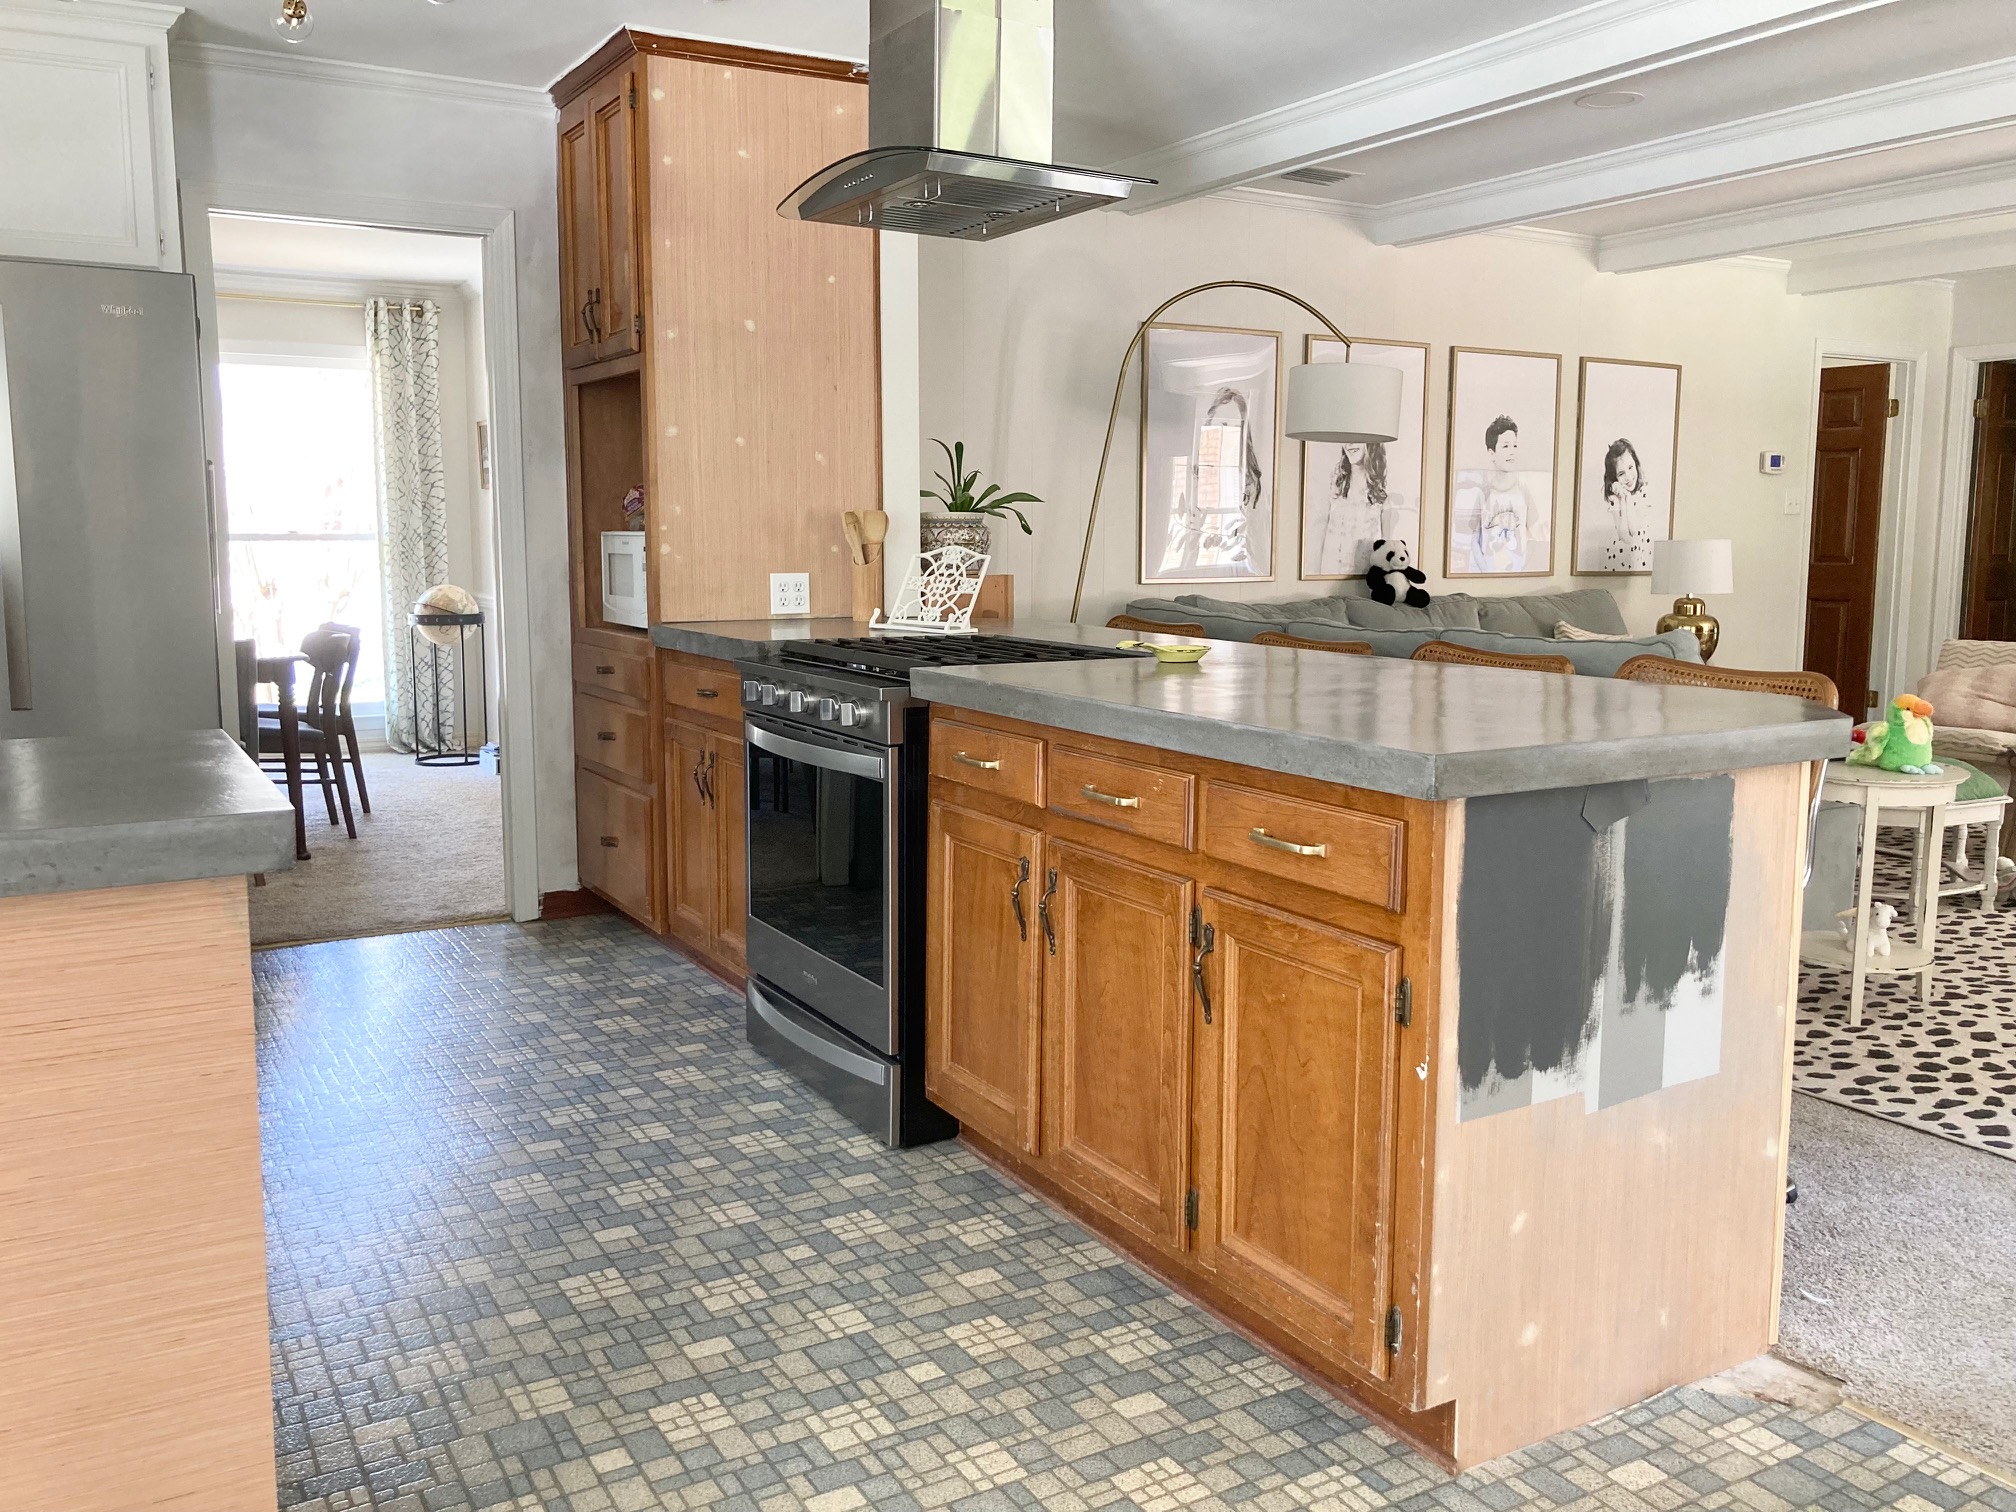
Here's where we started three long years ago:

I painted the cabinets a few months ago and I know that really helps up the ante too. A post on those will come but today, I'm going to share the beginnings of how we prepped the kitchen for those new counters and poured them in place. I was going to write a whole big post on the prep, the pour, and the finishing but just adding photos was a bajillion pages so we'll split it up so you can chew it all without choking.
First, you might be wondering, why concrete? Well, lemme tell ya. 1) It's very durable. Once fully-cured (it takes about a month), it'll last years and years and years. 2) Concrete counters are affordable...if you can make them yourself. We spent about $1000 making ours and we've got a large amount of counter space at 55 square feet. That's just over $18 per square foot. If you've seen countertop prices these days, you'll recognize that BIG savings. 3) The customization options are virtually endless. Want purple counters? Have 'em. Want purple counters with inlaid sea shells from your last visit to the beaches of Greece? Done. 4) Anthony has experience working with concrete thanks to a summer job during college and got into making concrete countertops as a side job years ago so we felt like this was the perfect avenue for us.
There are two ways to make/pour concrete countertops - in place and out of place. The concrete countertops Anthony used to make were poured out of place in melamine forms he created. Once the concrete was dry enough, he'd take off the forms, polish them, seal them, and then they were carried (by many strong men) to their place. (Here's a video tutorial to explain that more.) For large areas, he'd have to pour in pieces so that the finished counters weren't obnoxiously heavy to carry and set into place. So, for example, our kitchen would probably have to be poured in five different pieces which meant there would be three seams. That's fairly normal for a lot of countertop materials though. We thought that's how we'd pour ours but then we ran across Z Counterform somewhere on the web. Z Counterform makes forms specifically designed for concrete countertops that allow you to pour in place, right on top of your cabinets. (Pssst, we were not paid or perked to write about their products and they don't even know I'm typing this up.) It brings the mess inside but there's no moving involved. The main reason I loved this idea of pouring in place was because it would mean no seams! We could just have two big expanses of countertop. I was pretty much sold on the idea but it took a little bit of convincing for Anthony to agree. The (fairly large) downside of pouring in place though, is that you lose your sink for a few days (or weeks...ooph!) and your stove might have to live in the middle of the kitchen for weeks (and maybe add a couple more if your entire family gets covid right in the middle of the process *gut punch*). Pouring out of place allows for a simple (though heavy) swap so losing washing and cooking capabilities isn't that big of a deal because it's usually only for a couple of hours. Pouring out of place also gives you a smoother finish right off the bat so there's not as much finishing work. Both require a good amount of precise measuring (which can be tedious) and building forms.
So, let's get into the process. Warning, it's A. Process. I wasn't joking when I typed that earlier.
To make life a little easier for us and to keep daily life flowing as much as possible, we did each side of our kitchen separately - by doing the peninsula first we lost the stove and oven but had the sink and when we did the sink side, we lost the sink for a few weeks but could at least use the range. I don't know if we'd do it the same way again but it did help to not lose everything at once, especially when you've got four small kids very much dependent on what goes on in the kitchen. :)
Z Counterform has an entire video dedicated to showing you how to pour using their system so I'm not going to retell the tale but I will tell you how we tweaked a few things, lessons we learned, and a few issues we had.
First and foremost, before pouring, you have to make sure your cabinets are up to the task of carrying a whole lot of weight. Concrete is super heavy and so that means most IKEA cabinets and the like need to be reinforced before they carry that load. Our cabinets are solid wood from the 80's so we were set. Also, it's important to pour a few samples if you're adding a dye to make sure you get the color you're going for. Every concrete mix is different and can have a different undertone color. You can buy cheap baking tins to pour samples in. Set on darker counters, we poured a sample of black and it came out navy blue thanks to the blue undertones in the mix we used. I can't imagine if we had just gone for it without a test and ended up with blue countertops. Yipe.
Step 1: Remove the old countertops (or in our case, the temporary plywood we had been living with for almost two years since removing that wall...ha!).

Step 2: Cut Durock/concrete board* (it's made out of concrete and mesh but comes in sheets like drywall) to size and squeeze some silicone caulk between it and the cabinet frames to hold it in place. Because we had an overhang (13 inches), we also added some hidden braces* for added support underneath the concrete board.

Step 3: Place the forms all around the outside edges of the concrete board. This got tedious. There's lots of measuring involved and angles to cut. We wanted to be fancy and angle our corners too so we really had to pull out that middle school geometry. We used the 2 1/4 inch square edge forms. I was afraid I'd hate how thick the counters looked when we were done but the only other option for a square edge is the Euroform, which is only 1 1/4 inches thick from the sides - too thin for me. However, now that we're on the other side of the project, let me tell you how much I love the countertop thickness. It's beefy, substantial, not too thick and I'm so glad we used the forms we did.
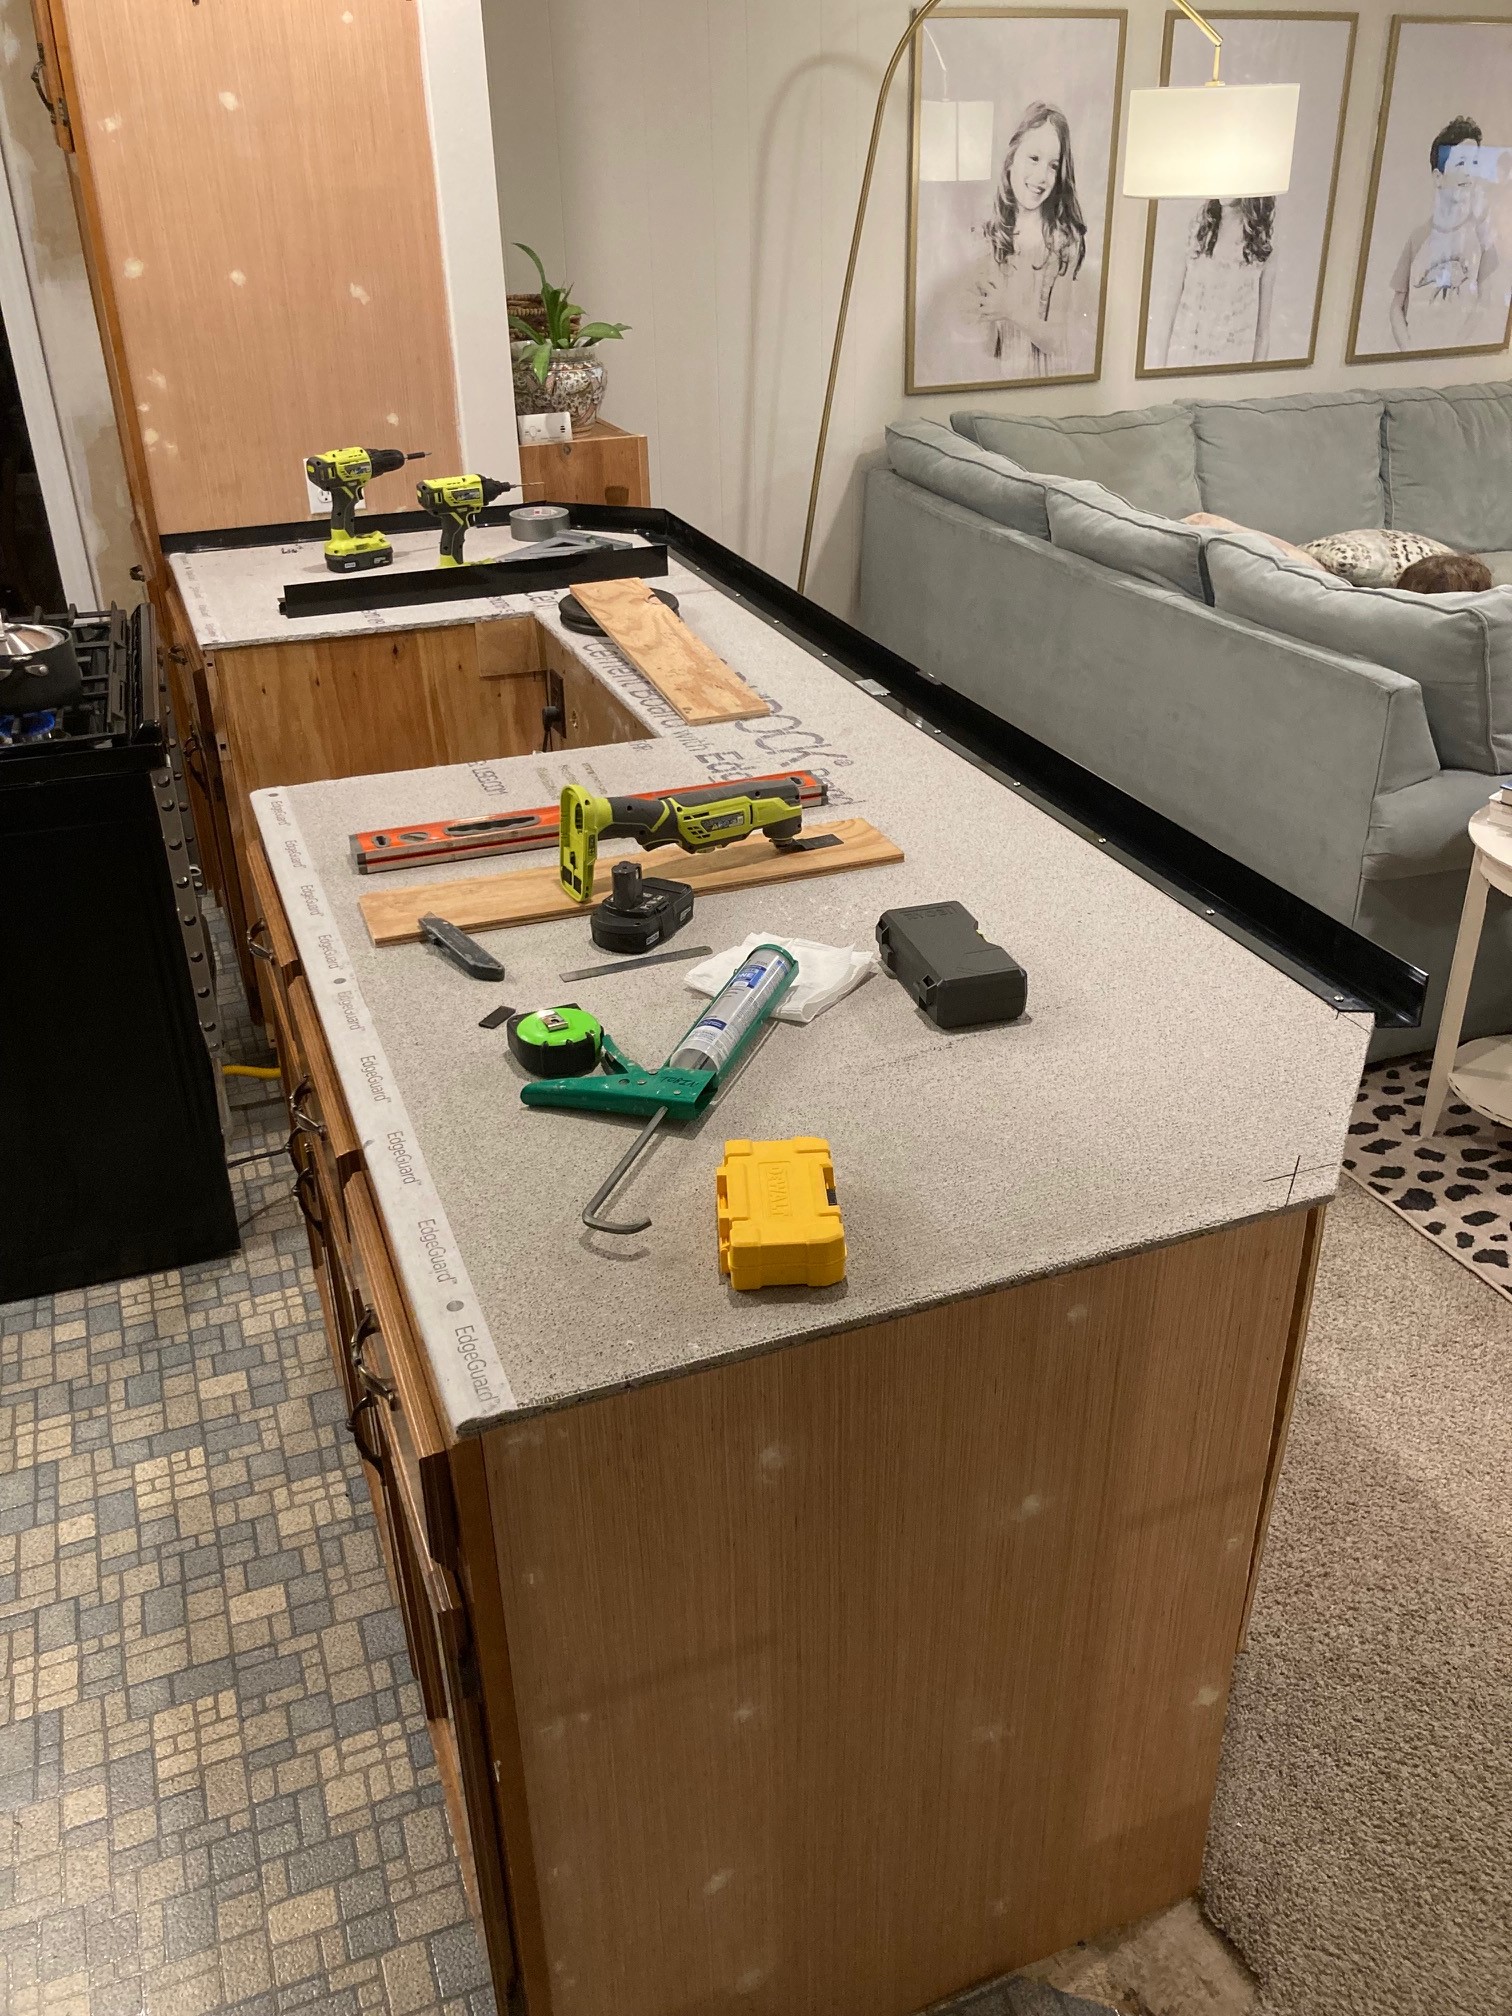
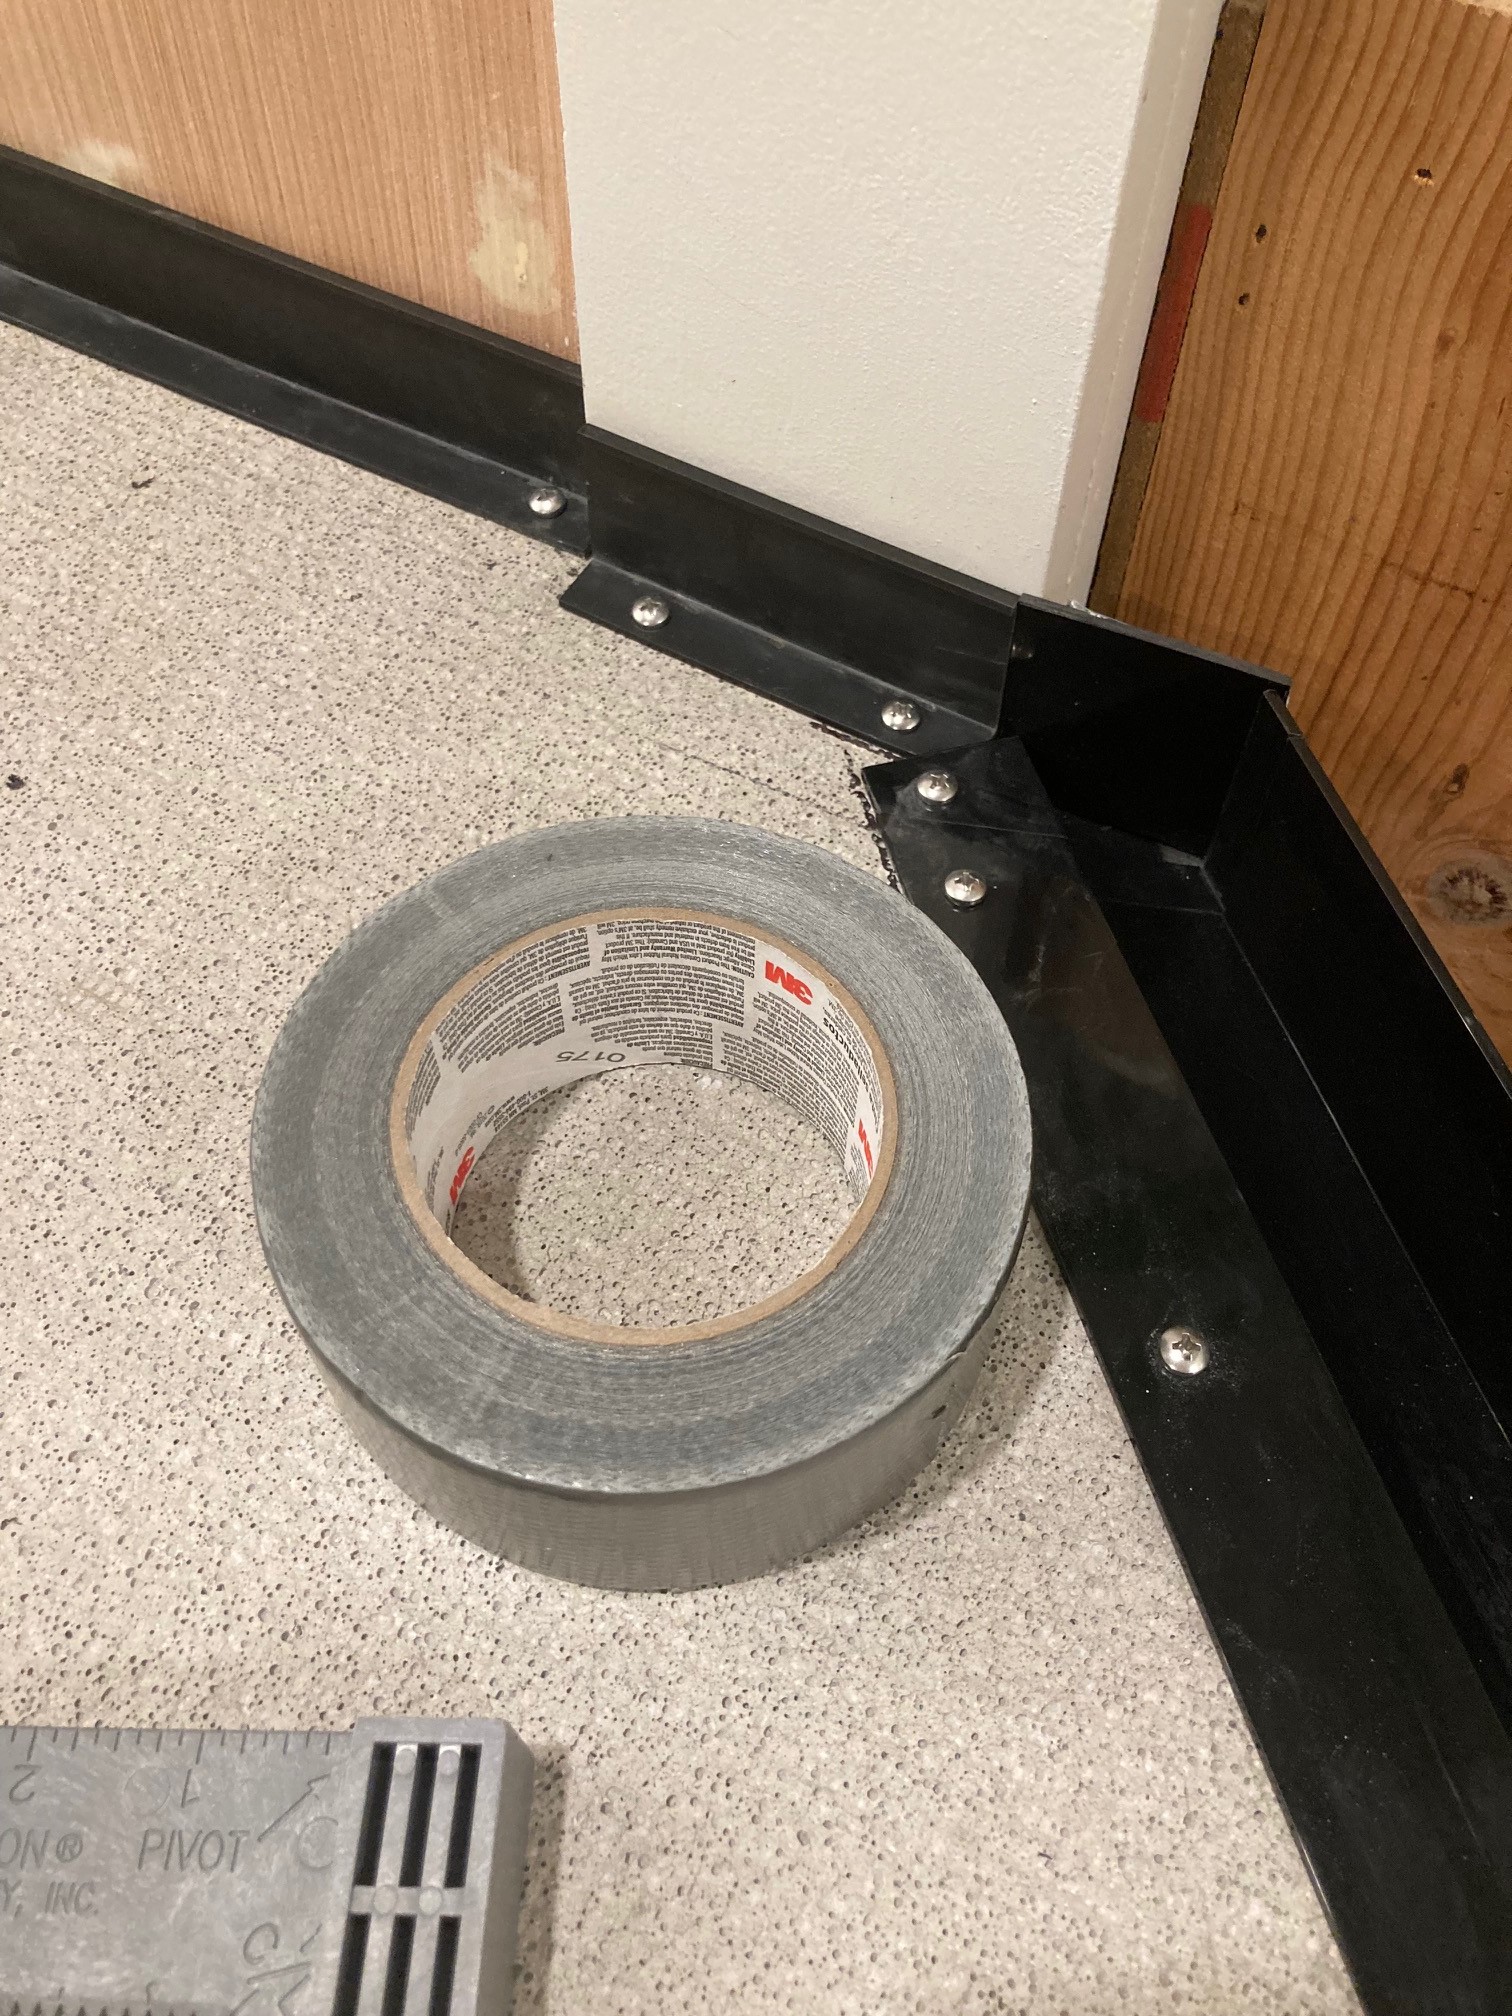
Anthony cut all of the forms to size, dry fit them, and then screwed them into place. I'm not sure whether it would be better to cut and attach as you go, piece by piece, or dry fit first but that's how we did it. Once attached, all of the forms needed to be sealed at the corners to prevent concrete leakage. To do this, we taped the seams with duct tape around the outside edges. We also added some caulk to a few places for extra protection.

Z Counterform doesn't make a specific form for areas around appliances like our slide-in range (nor do they explain how to tackle that situation). Anthony cut some boards to size and screwed them into the cabinets. The edge of the concrete board is visible under the concrete this way but the range covers it when in place so it's really not visible.

To get those shiny smooth edges around the range (even though they're not seen), Anthony put some clear packing tape over the wood. When the concrete cures against that smooth, shiny surface, it comes out smooth and shiny too.

Step 5: With the forms attached, it was time to add the z clips and fiber mesh to reinforce the concrete. This was by far the easiest part of prep.
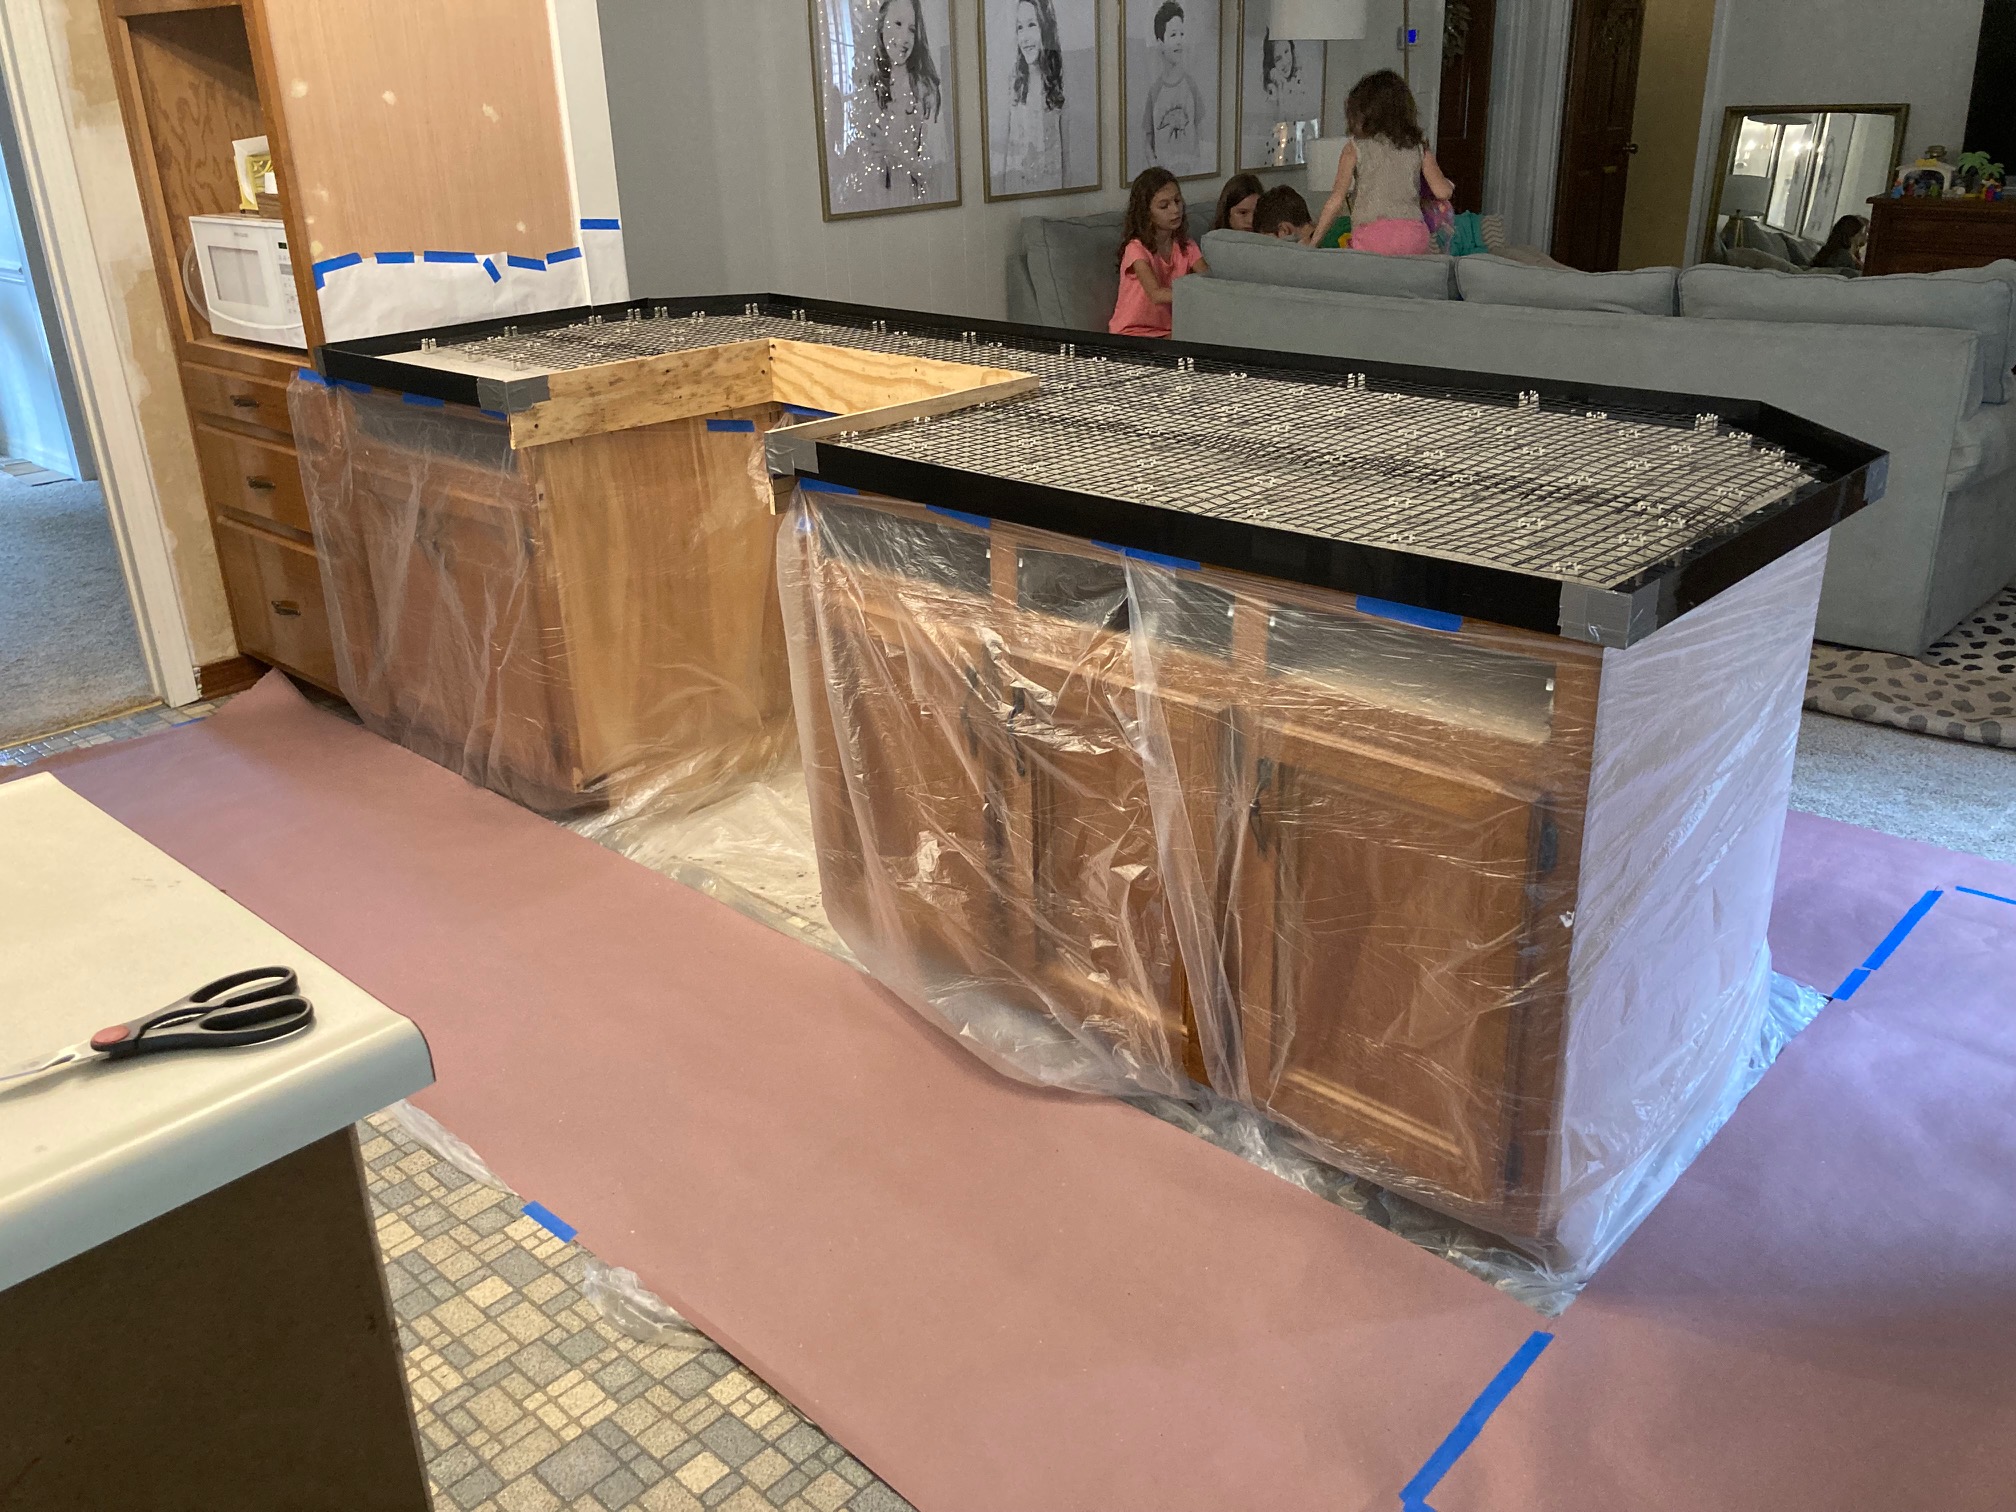
Step 6: Almost ready to pour, we taped plastic all around the lower cabinets and laid rosin paper on the floor. It gets messy.
Step 7: When we were ready to pour, we had some friends come over to help. We rented a small cement mixer from Home Depot to make mixing a little easier since we were mixing eight bags of concrete for the peninsula. The other mixing option is using a drill + mixing attachment and mixing bags one-at-a-time in a five-gallon bucket. Anthony and a friend mixed outside while some strong friends carried in buckets. As they dumped the concrete into the forms, a friend and I pushed it around and into the mesh, then leveled it all out by screeding. We also vibrated the sides of the forms to get out any rogue air bubbles. Z Counterform's video explains all of that. Anthony wanted some aggregate (rocks) visible in the finished countertops so we used a concrete mix with aggregate in it instead of a sand mix. It was a little harder to work into and around the mesh reinforcement, even though mixed it with Z Counterform's Liqui-Crete so I don't know if we would do that again. A sand mix would have been much easier to work with but you wouldn't get that added character.
As far as color goes, we passed on the purple with sea shells and added the maximum amount of this charcoal dye to get, yep, you guessed it, charcoal gray. White concrete was an option we weighed but we were nervous about staining issues plus, the mix was almost three times more expensive. Plus, everyone is doing white now so we thought we'd go against the grain. Gray sounded nice but I could only go that route if it was dark gray. I didn't want my countertops to look like sidewalks. Black was too dark for me and a dark beige or tan wasn't appealing either. Any other color of the rainbow was out of the question. You'll notice when you see the after photos, but the dye didn't darken quite as dark as we wanted or as our sample was. We think adding the LiquiCrete may have lightened the mix a little because we didn't account for that extra product in calculating how much dye to use. Don't worry though, we darkened them more with sealer later.
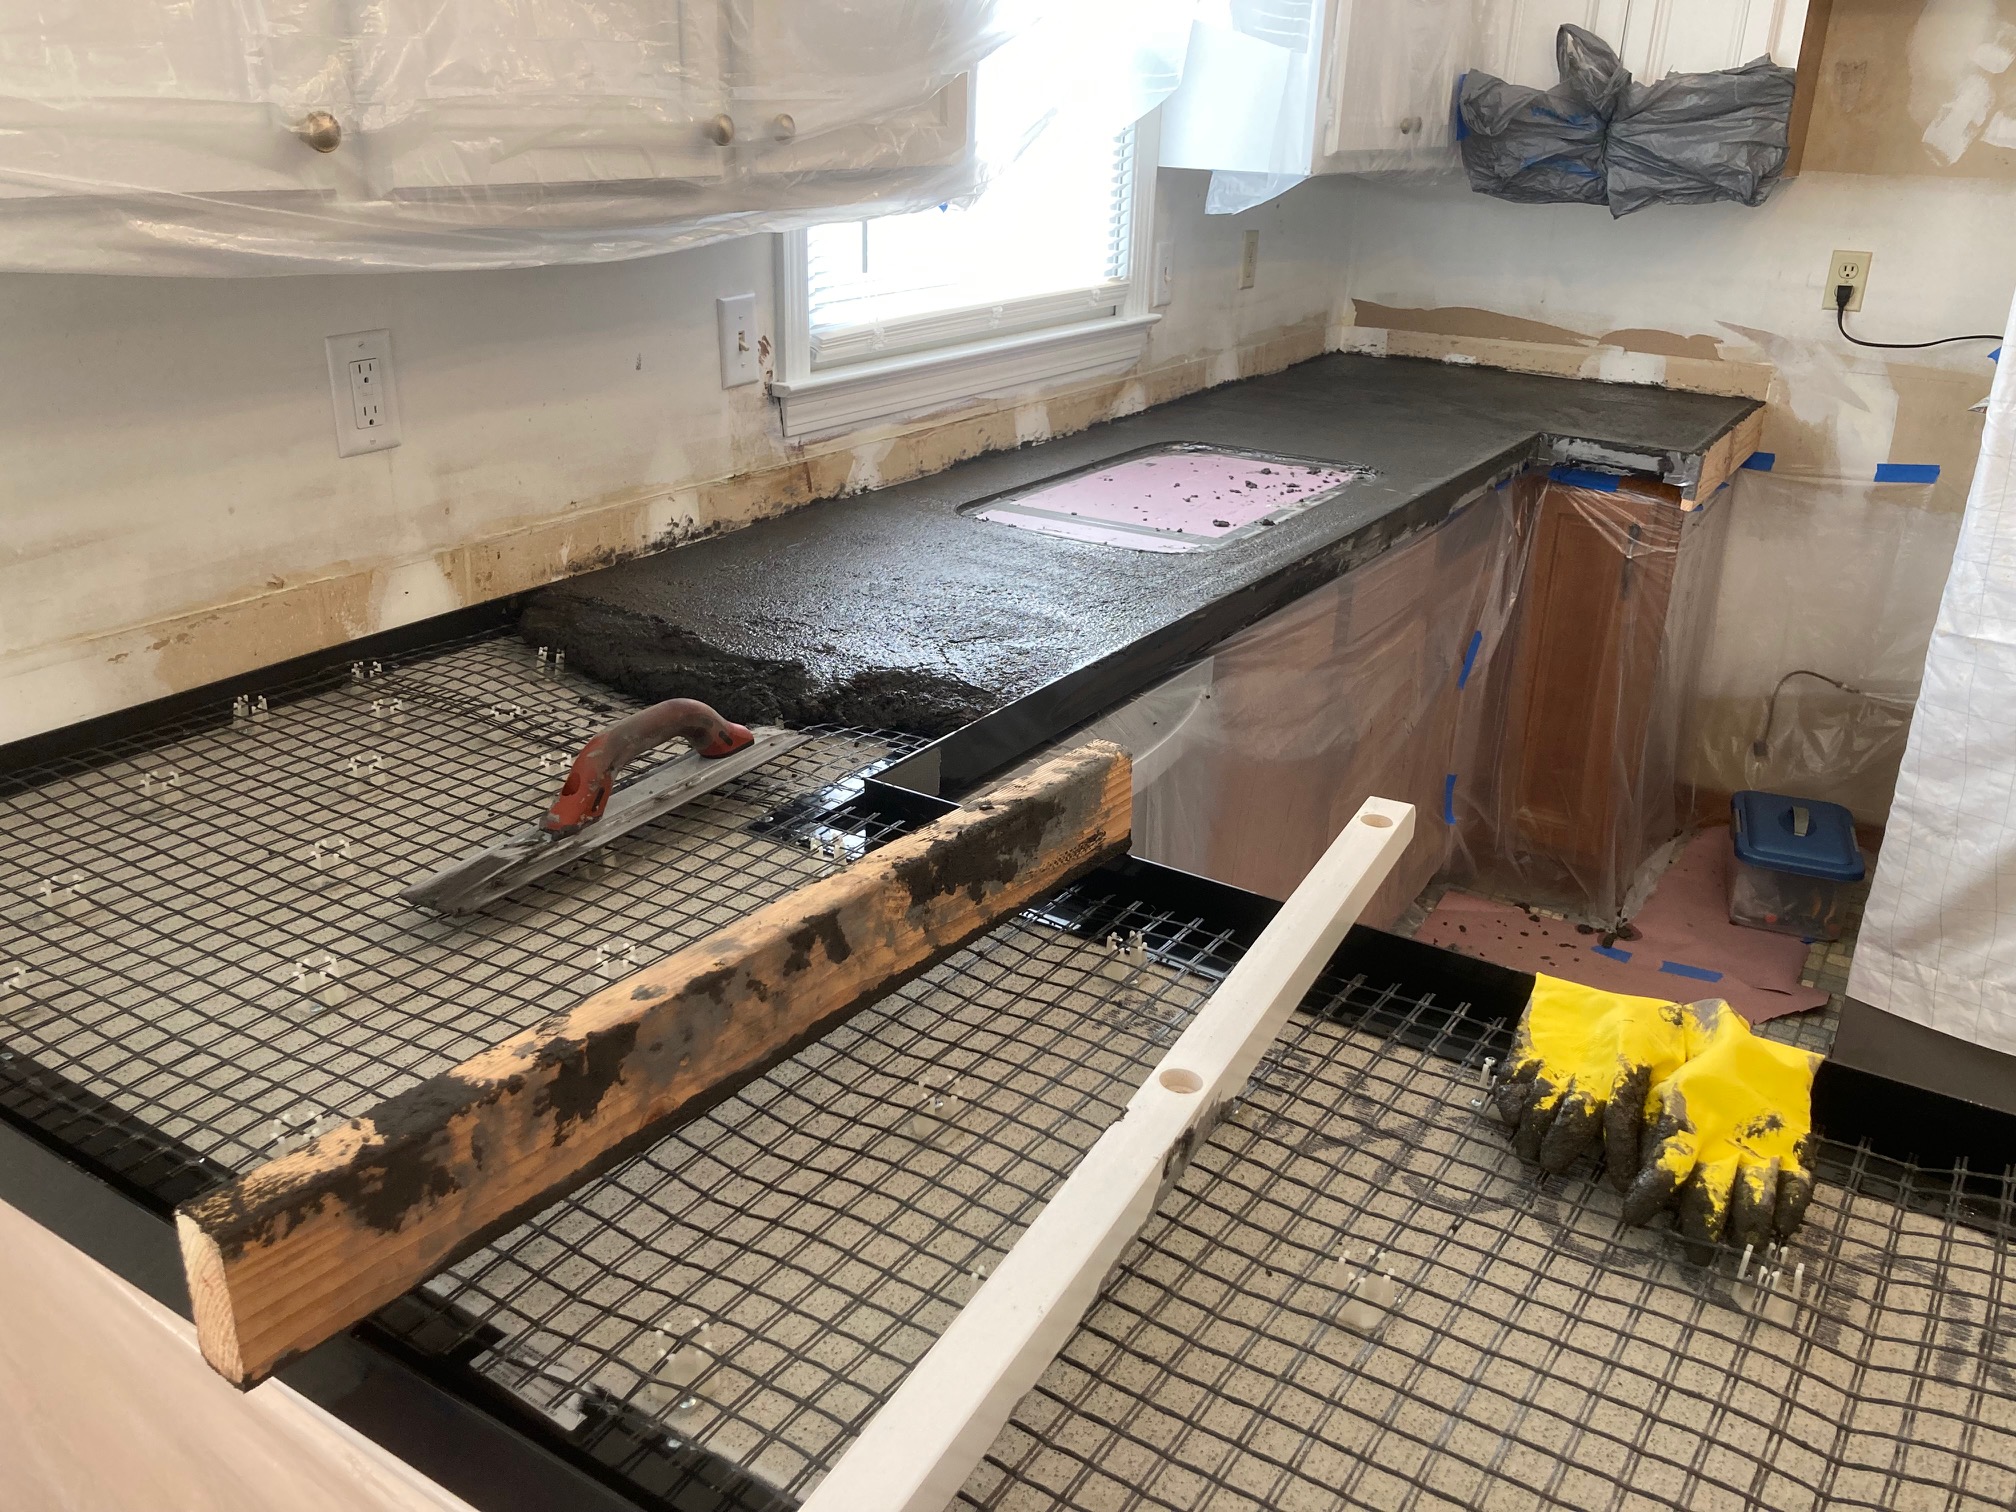
This is right after pouring:

I don't know all of the steps that you have to follow post-pouring as far as troweling the concrete goes but once again, if you're thinking about going the way of concrete, watch the video. Anthony did all the troweling and I was just the watchful observer.
We poured around noon one Saturday and this is what the counters looked like that night:
24 hours later:

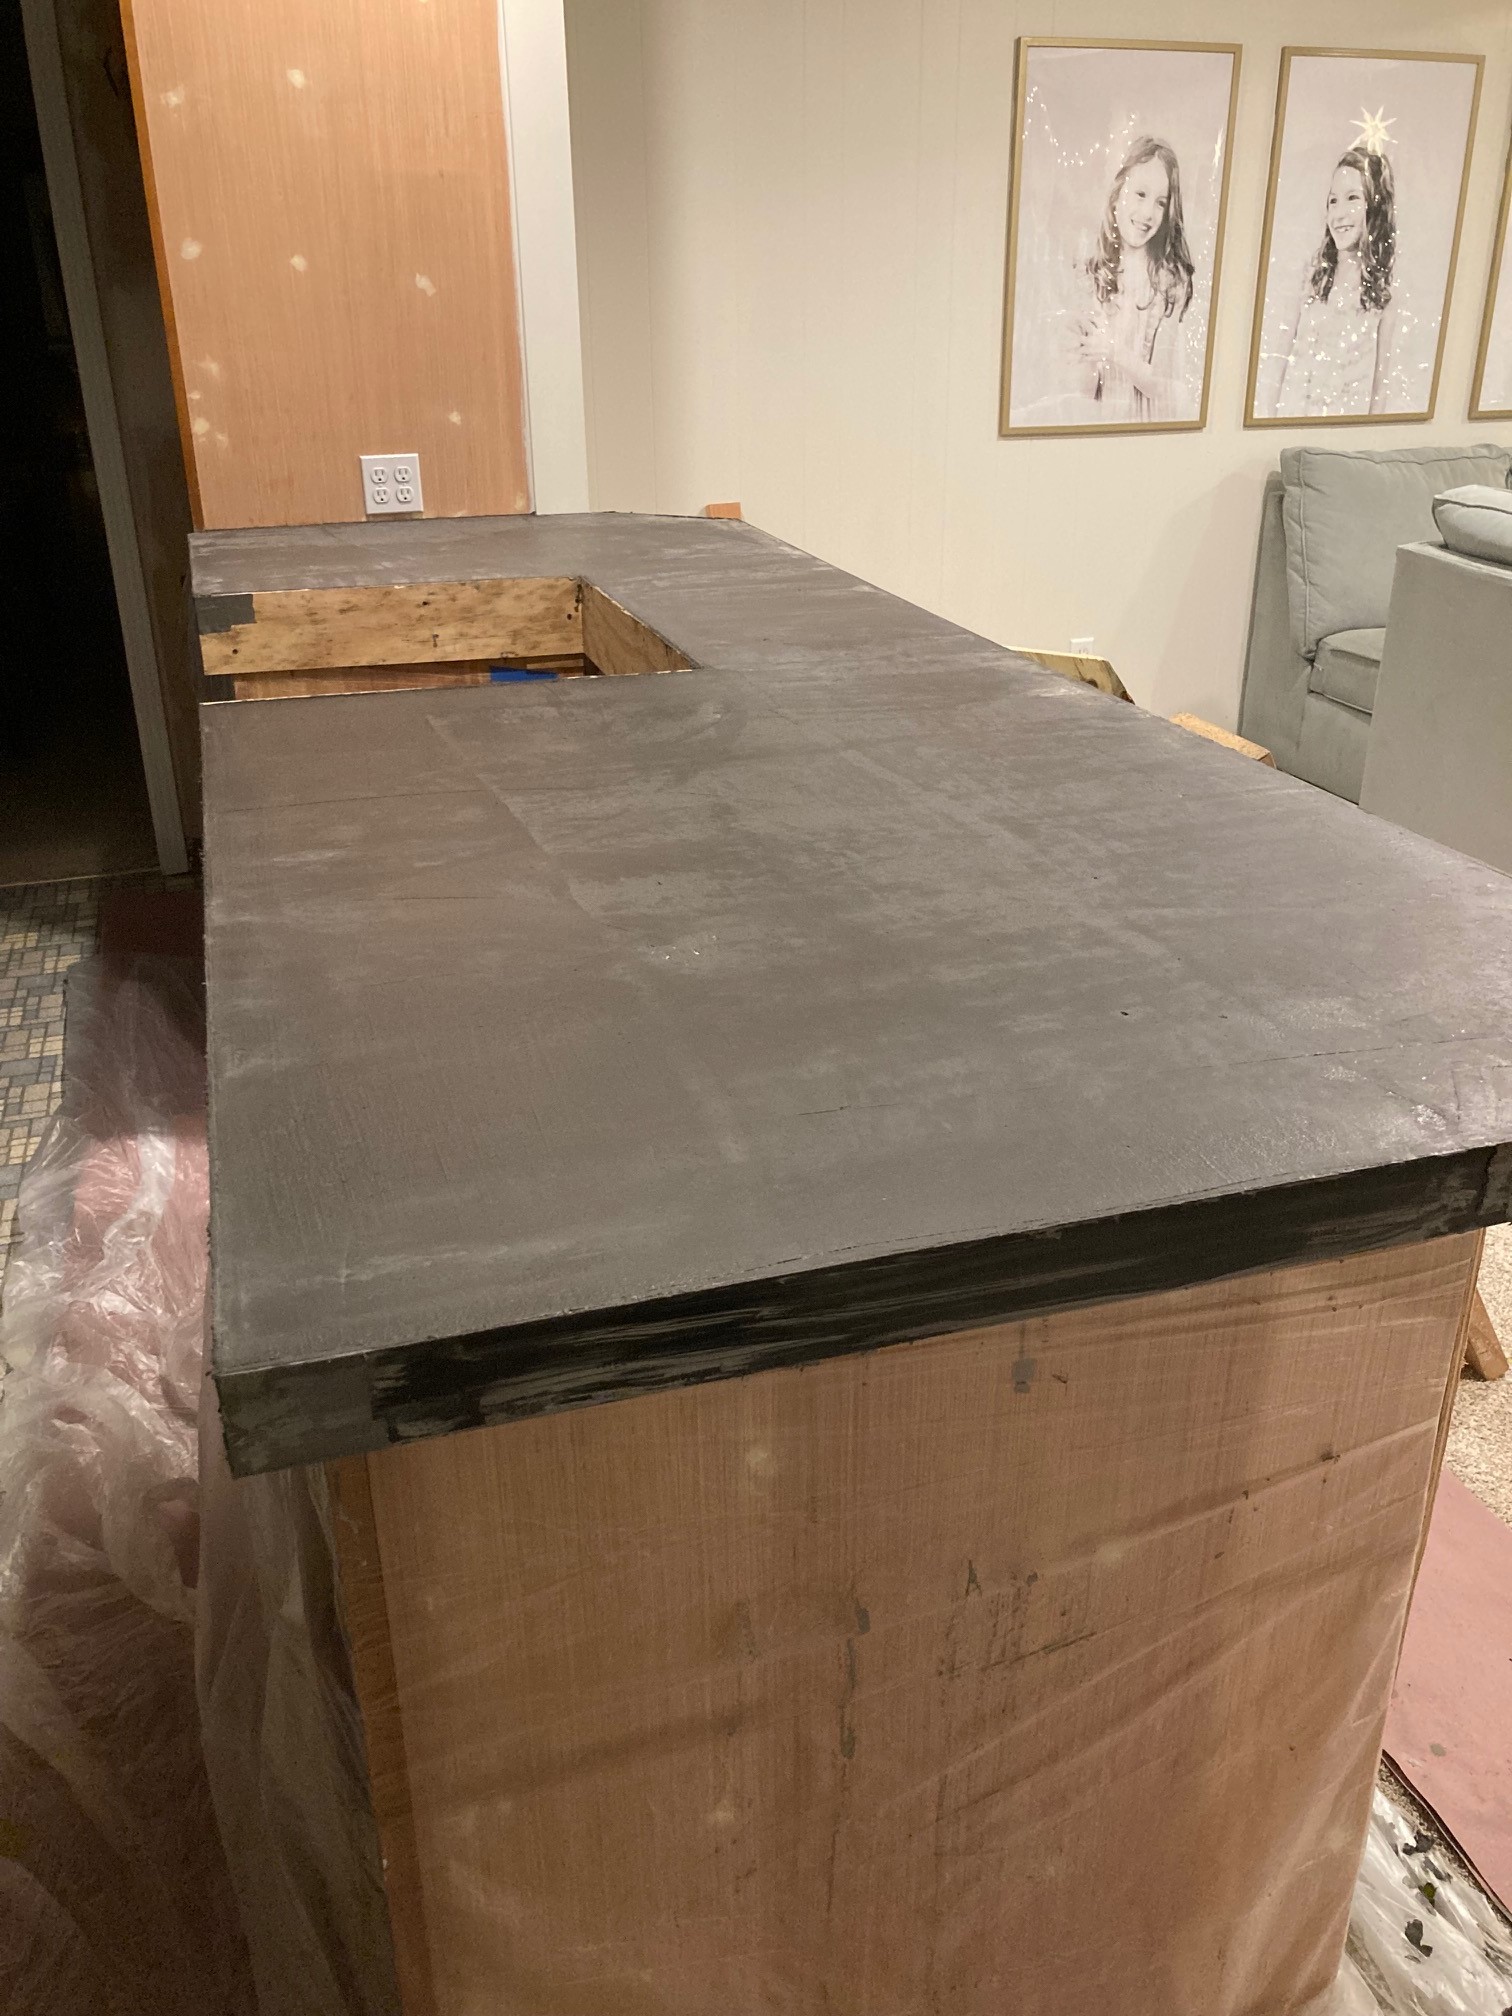
Step 8: Lightly sand the edges and snap off the forms. This is what the counters looked like right after that:

We finally got around to pouring the other side a couple of months later and followed the same process.


One extra step we had on this side was installing the new sink. When pouring in place like this, the sink is installed on top of the concrete board like so:

It's a little nerve-wracking to install it this way because - What if something happens to the sink and you have to remove it? It's literally sandwiched between the concrete board and the concrete counters so to get it out, we'd have to chisel away the concrete board from underneath. This is how Z Counterform shows it done but we can't help but wonder if there's a better way. Either way, our sink is sandwiched and stuck good and it's not common that sinks go bad so we're just riding that hope and crossing our fingers. One more thing about the sink, we did reinforce it underneath with some scrap wood because we felt like the concrete board was bowing with the weight of it...let me correct myself, the concrete board WAS bowing with the weight. This is something I wish Z Counterform addressed in more detail - the entire sink situation, all the what-ifs and best practices.
Once the sink was set, we placed the forms and z clips + fiber mesh, then were ready to pour.

This time around, Anthony and I poured ourselves...not ideal. We had a friend planning to come help who couldn't at the very last minute but we convinced ourselves we'd be fine, just the two of us. Anthony mixed and carried in buckets while I pushed concrete into the mesh, leveled everything out, and vibrated the sides. I'd be lying if I told you I wasn't nervous the whole time I was working with the concrete. Eek.
This is right after pouring:

Next time, I'll go into the whole process of finishing and sealing.
Let's go into some of the issues we ran into quick and then I'll let ya loose.
On the peninsula side, we had some tricky corners to work with so we had to rework how we used the forms. It took us far longer to figure these out than we would have liked.
I don't know if there's a solution to make forming up indentations and corners easier but I would say that you should allot extra time for it. It takes longer than you'd think.
One big issue we had was visible forms. All of the edge forms snap off and are then hidden under the countertop edge. The same is not true for forms used up against wall - like where our counter met the side of our pantry cabinet. The form that's supposed to be used up against a wall like this is visible after the countertops are poured. That's not a problem at all if it's against a back wall that will have a backsplash installed after. The backsplash will cover that black form. However, we weren't going to have a backsplash going up the side of the cabinet so now we have the form showing.

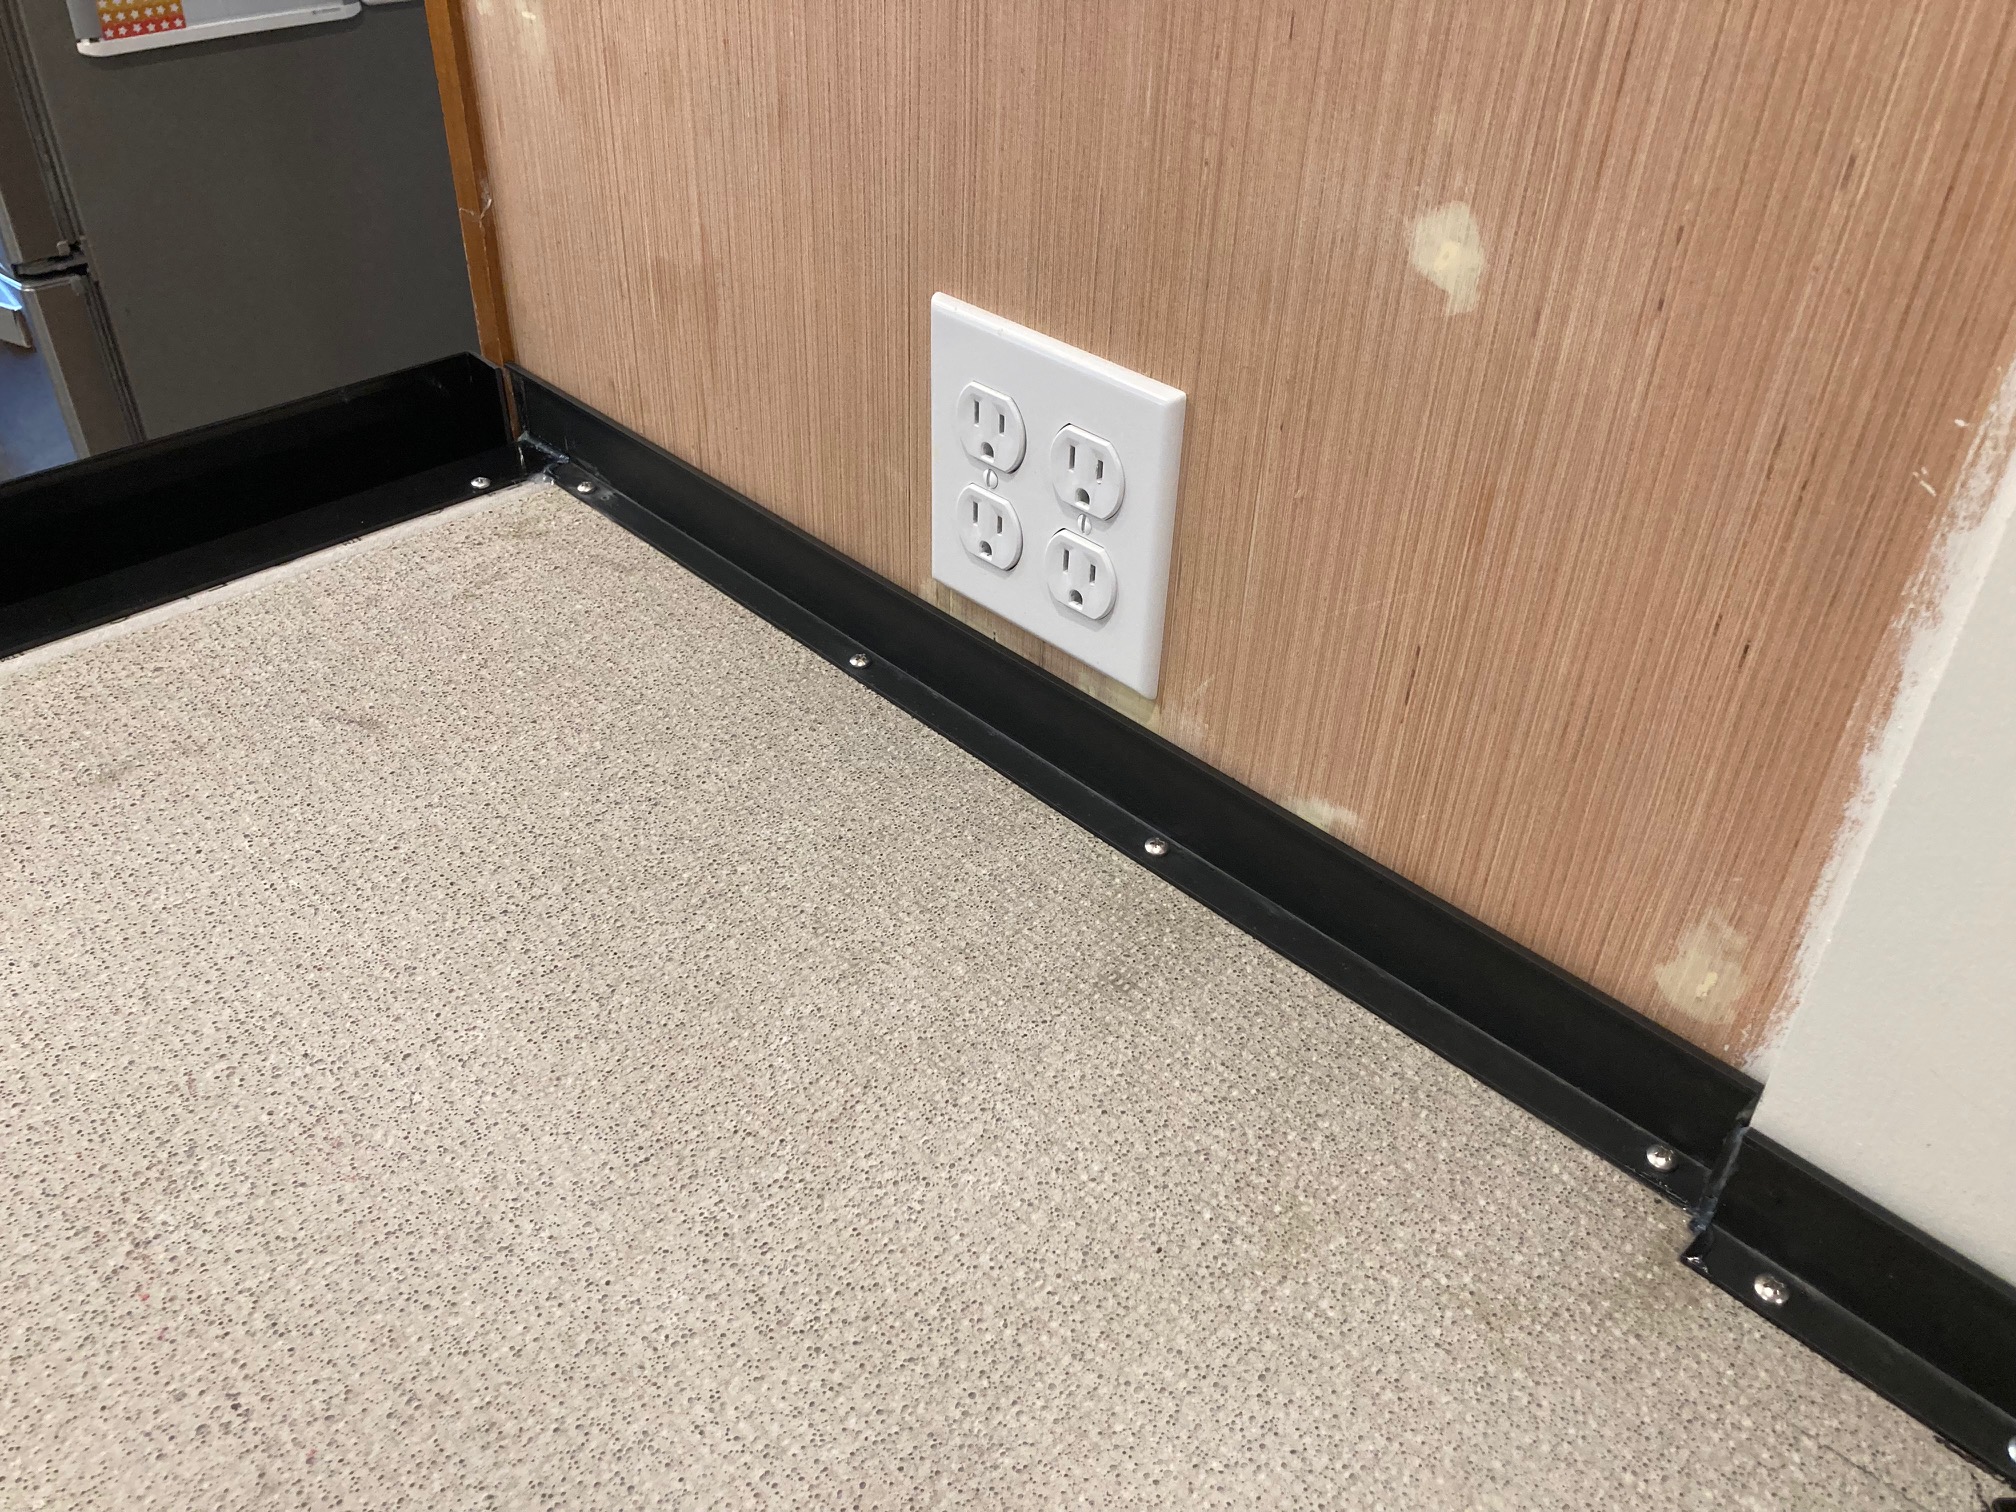

Boo. We didn't realize we'd run into this problem until the moment we were forming this side up and couldn't come up with another solution at the time so we just went with it. I think we'll just paint it to match the gray of the countertop and hopefully that will hide it enough. It's not a prime visual location so it probably won't be noticed anyway but it's still stinks that it is there.
We had a similar issue on the other side of the kitchen. We're planning to install a backsplash along the wall over there but there's a small expanse of wall where the backsplash will stop but the counter extends out. We didn't want the same black form showing like it does on the peninsula so we taped clear packing tape to the wall to keep the concrete off it and then ran the square edge form all the way to the wall, running a little bit of caulk in the seam to keep concrete from leaking out. After the concrete was dry, we simply used a razor blade to cut off the tape so it looks like the concrete goes right up to the wall.

Another issue we ran into on the sink side of the kitchen involved screeding. Z Counterform's video shows you how to level the wet concrete by screeding over an island counter, but they don't show you best practice for screeding when one side is against a wall. This was especially difficult in that far corner near the fridge.

You can barely move a screed back and forth perpendicular along the outside edge and the wall. You've got the edge of the wall form which is a few millimetres to work with and that's it. Move a little too much and the edge of the screed falls and makes a nice divot in the fresh concrete. It was frustrating and we felt unprepared for this issue.
I wrote about the sink and how it's pretty much stuck where it's at but that's not the worst of it.

We found the sink form SO hard to work with. I didn't take a single picture, probably because we were both so frustrated and grabbing a phone was the last thing on our minds. First, the form is not very pliable. I mean, you want it to be tough and fairly rigid because it needs to hold concrete without bending but it made it really hard to bend around the inside of the sink (you can get an idea of what I'm talking about by watching this video on how to install the sink form). Not only that, but because we choose a double-bowl, undermount sink, we had to figure out through an internet search how to install it in our sink. Z Counterform is lacking in instructions for this. They have one photo that shows how to do it but that's it. The tricky part is that the notches have to be pretty exact in where they are - they have to be placed low enough that the top of the form lines up with the tops of the edge forms and they have to be measured out and be placed exactly where your bowls meet to bridge that divider. We still don't know if it's easier to measure first, then cut the notches, then place or place, mark where the notches go, remove, and then replace. If we ever do this again (a huge question at the moment...ha!), I think we'll figure out a way to do this without using the Z Counterform sink form.
Eventually and with a lot of extra time, we finally got the sink form installed and then cut a piece of rigid foam to fit into the inside to keep concrete out of the sink and to help hold the form in place when concrete was being poured. We thought we were good...until we removed the forms a couple of days later. We tried to vibrate around the sink form but with the foam inside of it, we could only vibrate the tippity-top. Vibrating under the sink would've been an option but with all of the plastic in place protecting the cabinets, it was hard to access without a good deal of moving now-messy plastic. So, this is what the concrete around the sink looked like when we removed that blasted sink form:

Those big 'ole voids and air bubbles you see? Not intentional. Cue all the annoyance.
And that's where I leave you until next time. The good news is that the sink area looks great now but it was a process to get there that I'll tell you all about when we talk about finishing and sealing...
Stay tuned...
+ + +
*These links are affiliate links which means that, if you click over and/or make a purchase through the link, we may receive a small commission at no extra cost to you. I am an Amazon affiliate and also use other sources to link to products. All of these links will lead you to things we actually paid for or that are similar to the item we paid for in case ours is thrifted/sold out/secondhand. This extra green helps us with the costs of running the blog and buying paint. Thank you for your support and for fueling our love to share all things DIY!


Impressive DIY concrete countertops! The meticulous prep and pour process is both informative and inspiring. Your detailed documentation offers valuable insights for those considering a similar project. Well done on achieving a modern, custom look!
ReplyDeleteThis takes DIY to a whole new level. I love how you laid out each step with links to more details. I can definitely tell you have a passion for helping others because of the time and effort you put into creating this post. Happy creating to you and yours. P.S. Purple countertops inlaid with seashells would be breathtaking! I could see that being a great addition to a backyard patio. Thank you :)
ReplyDeleteGreat post! DIY concrete countertops require careful prep and a smooth pour for the best results. Proper mixing and curing make all the difference. Thanks for sharing!
ReplyDeleteA margin trowel or even a butter knife sliced along the edges when pouring would've eliminated a lot of "honeycombing".
ReplyDelete