
We don't have our Christmas tree up yet even though it's not abnormal for us to wait until we get closer to Christmas, but we do have some treeS hanging out in the breakfast nook.
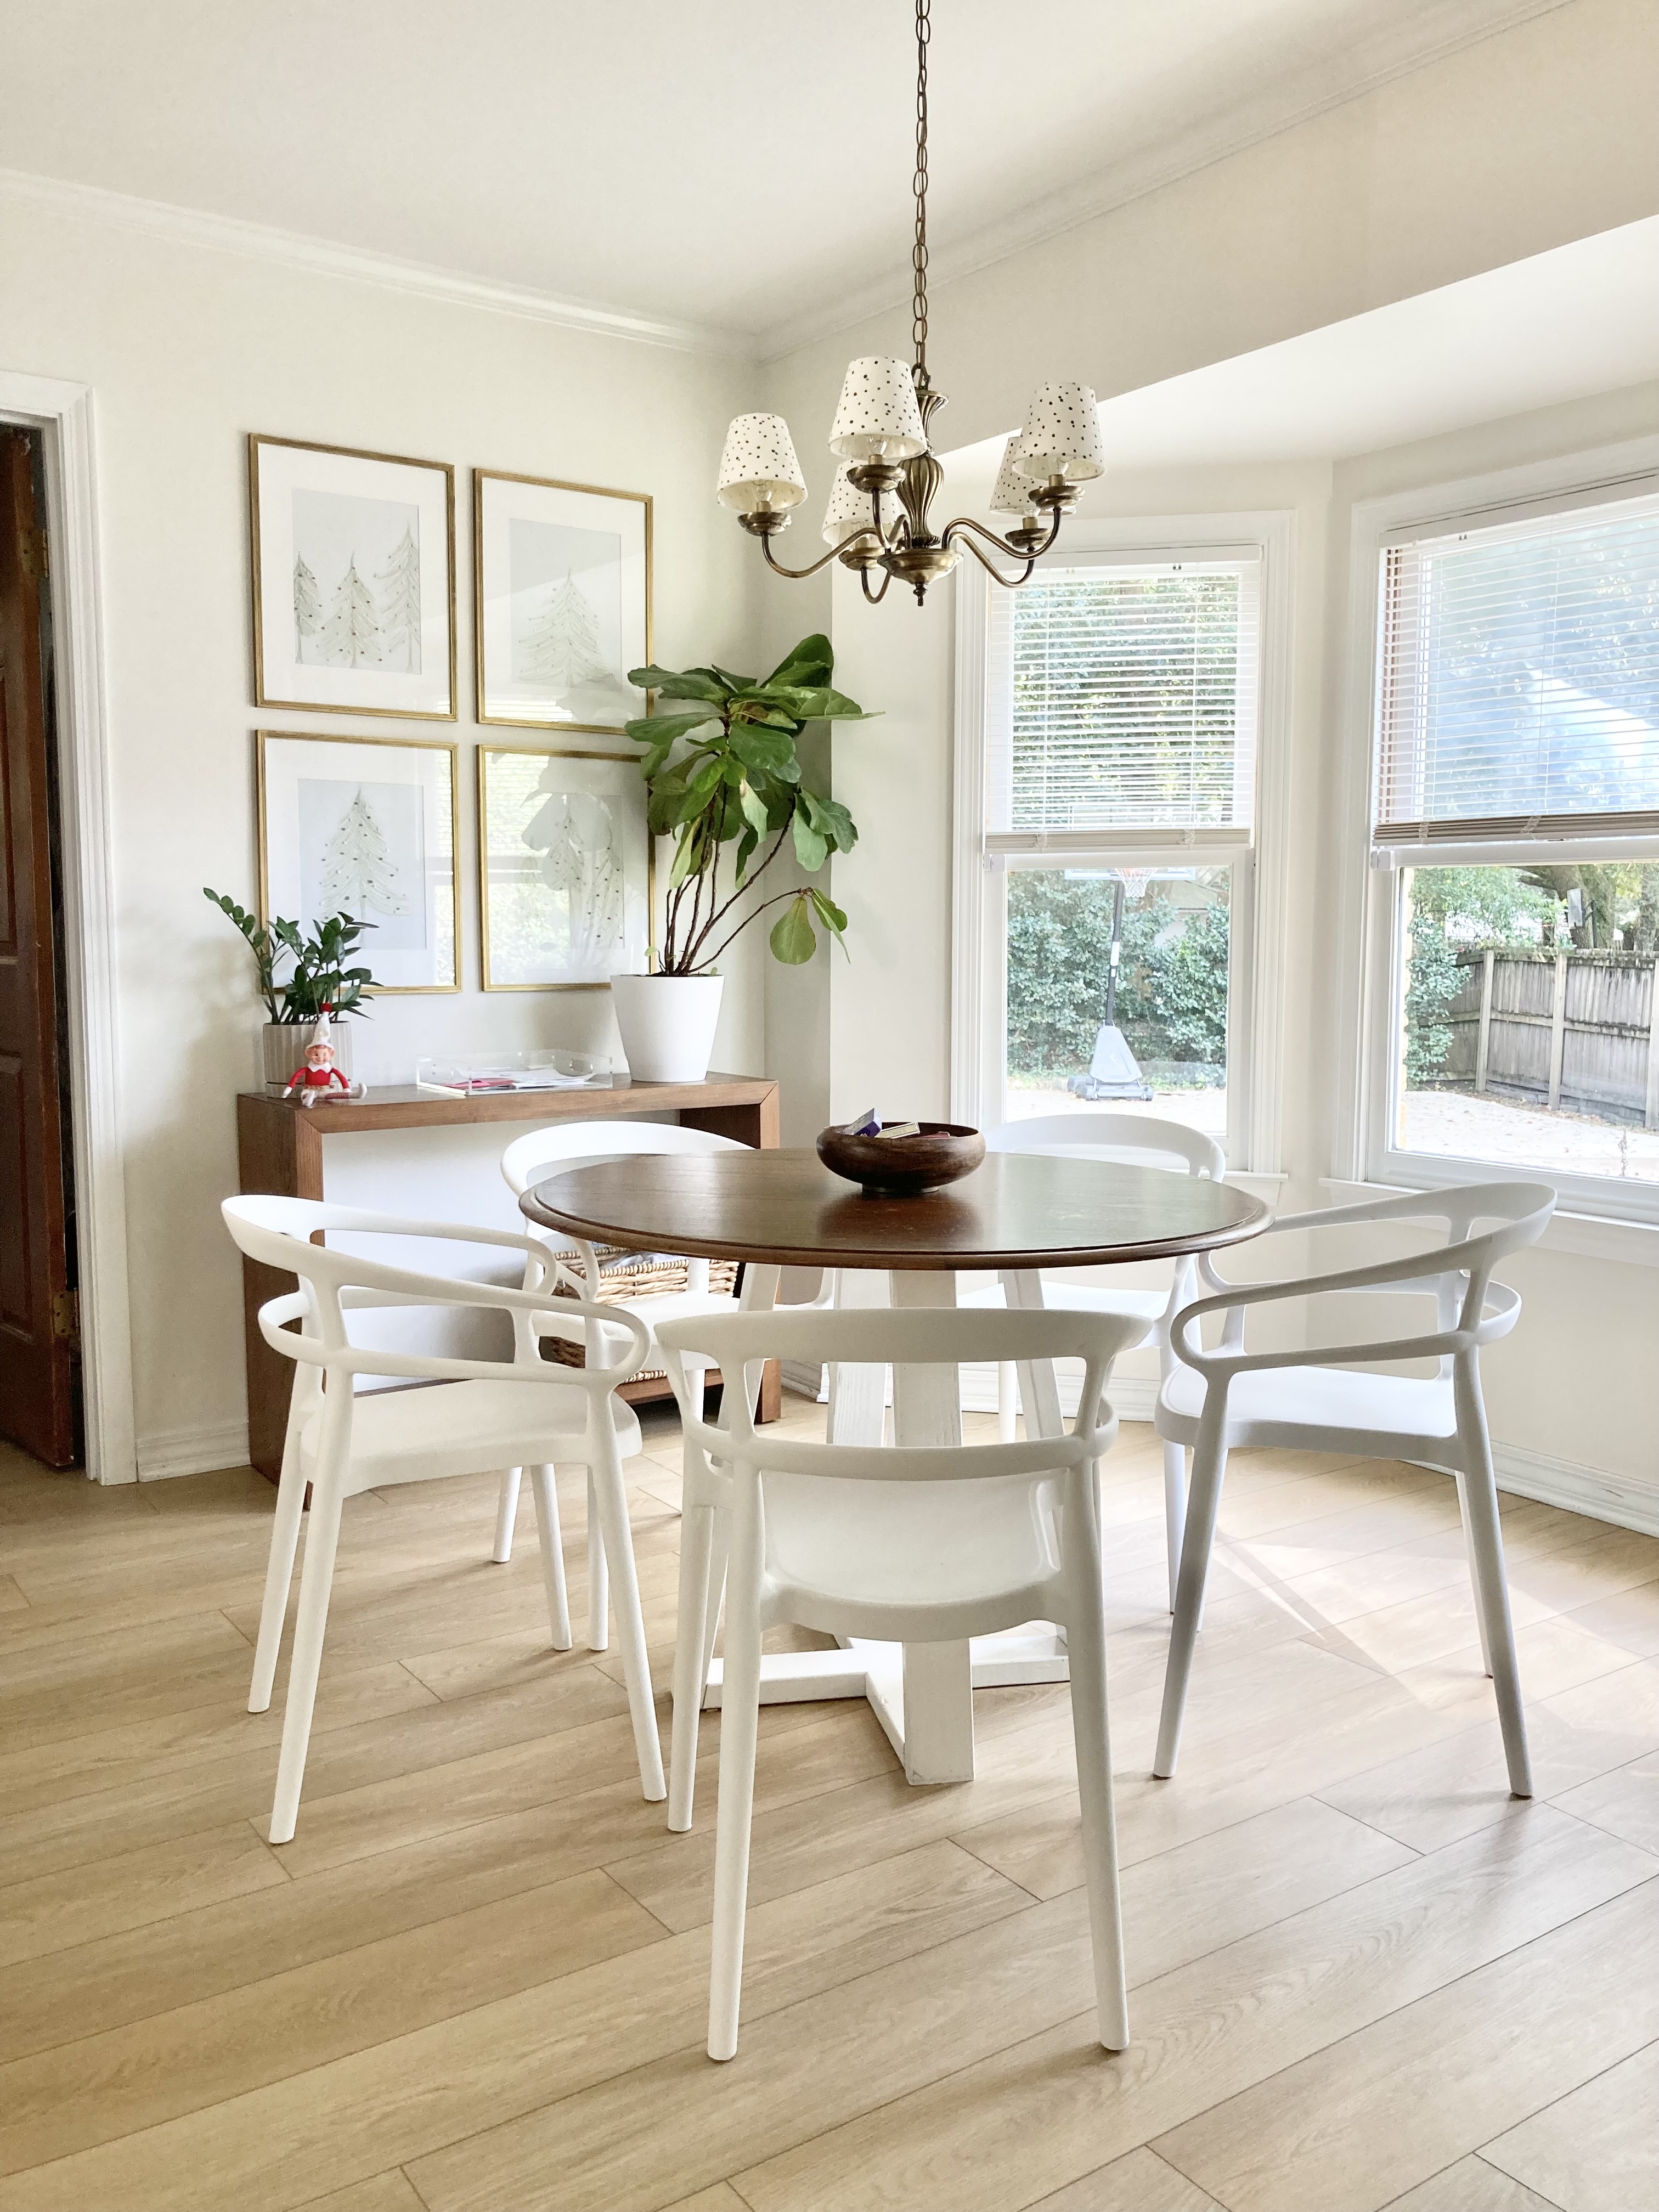
And nope, I'm not talking about the plants. I'll zoom in for ya in a minute but let's start from the beginning. Awhile ago, when the blue patterned linoleum floors were still being walked on in here, I whipped up that big 'ole painting on the left wall to add a little fun and color (you can actually purchase a digital download of mine here or follow my lead and paint your very own!)
.JPG)
It hung there for a good year until I took it down and gave it a new home in the girls' room. Eventually, I found this console table* at Dirt Cheap and then, a few weeks ago, got these chairs* during a flash deal on Amazon. (You'd think white chairs + kids = stupid but they're heavy-duty plastic which means very wipeable and even take-outside-and-spray-them-down-able...color us in love so far.)

Anywho, with the white, the no art on the wall, and the new floors (more on them later!) which were awesome but much, much more simple than the faux blue tile, it was too simple in here. I had to take a hot second to do something about it...scratch an itch type thing A four-frame collage had been on my mind for awhile but I just hadn't found the right frames for the right price...until last week.
A trip to Ollie's for a few Christmas gifts found me walking through the home decor aisles (I don't know how that happened) and into the checkout line with my gifts and four new, 16 x 20 inch frames priced at $6.99 each. Per the stickers on the back, they were originally sold at JoAnn Fabrics for $15. *insert exclamatory, excited phrase*
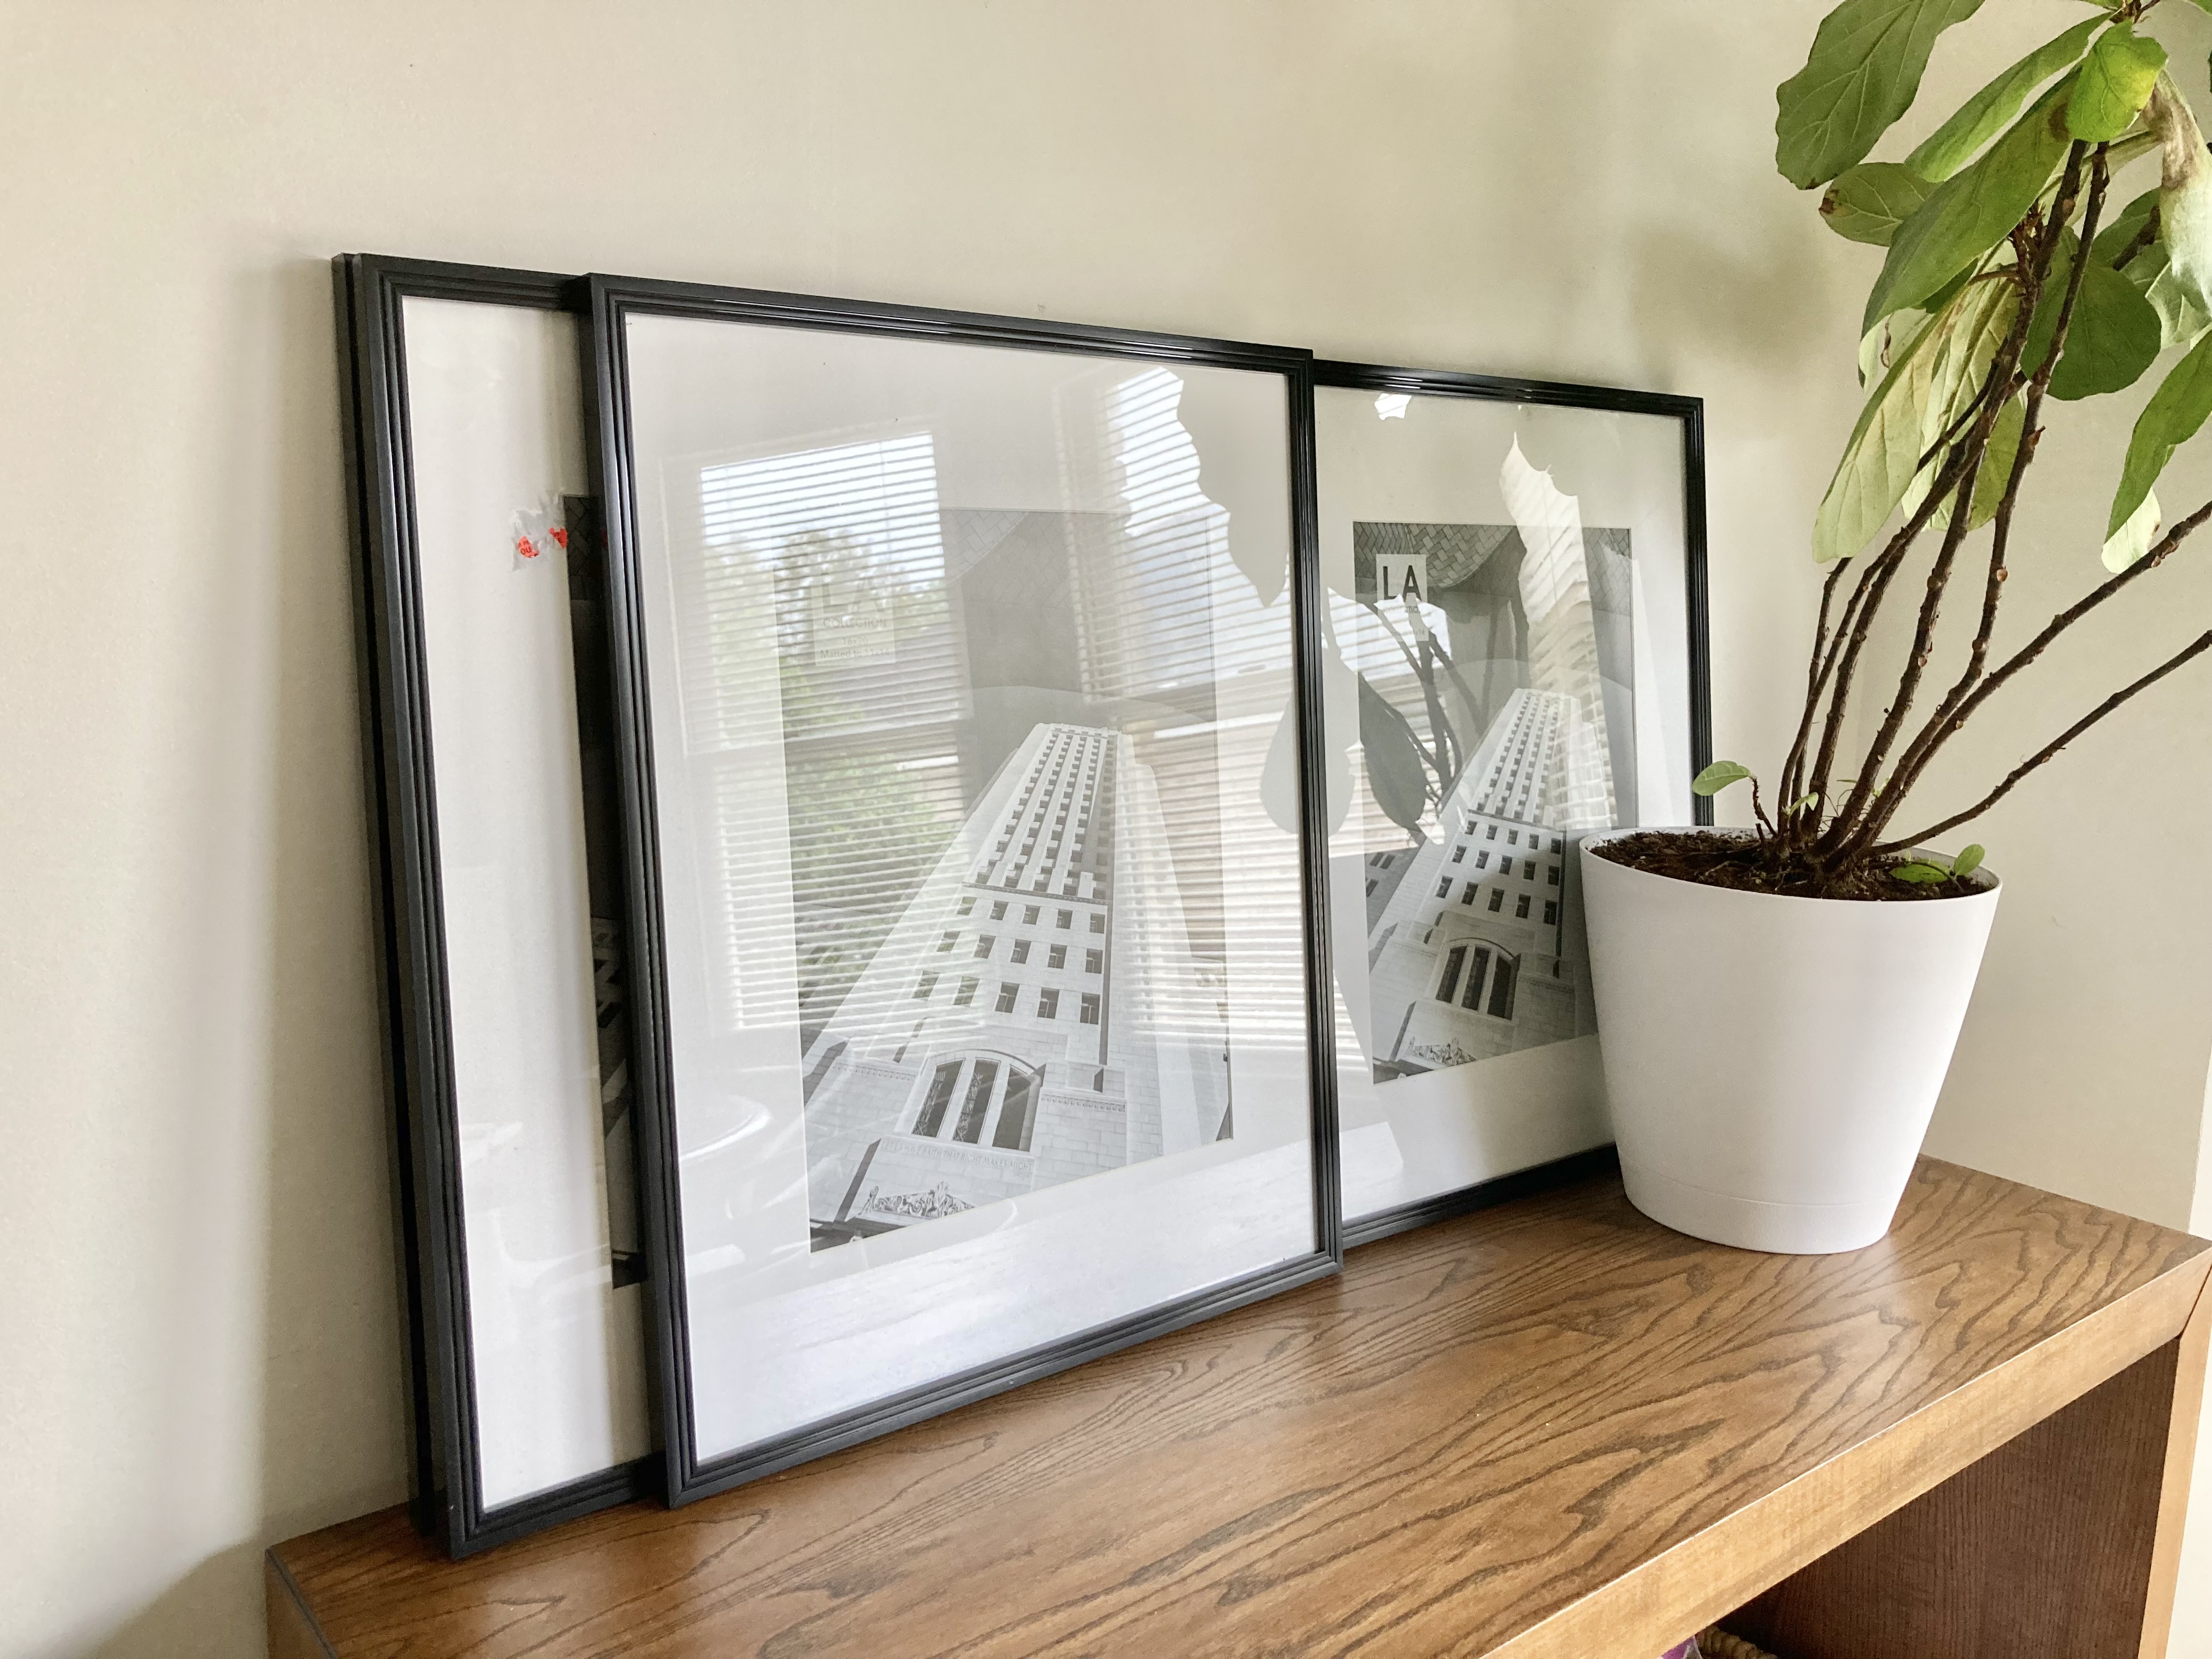
They weren't the color that I wanted though and the frames themselves are plastic so I was a little concerned about how that would take paint, but for the price, I just went for it. I did love the little channel detail on the fronts and I liked how slim they were. Plus, they're not frames filled with plexiglass, which can sometimes look cheap, but had real glass in them. It was a classic situation of the pros outweighing the cons. :)

I wanted them to be gold to play off the gold in the kitchen a few feet away so I thought about spraying them with this spray paint*, which I've used on plastic before with good luck but then took a sharp turn for Rub 'n Buff instead. The Rub 'n Buff would give them a little more depth and variation than an evenly sprayed coat of paint can give. The process was very complicated...ha! Kidding. I took everything out of each frame and then I literally put a little bit of Rub 'n Buff on my finger and rubbed it on, using straight up and down/side-to-side motions vs swirls. I used a small, stiff paint brush to get into the channels. With music on in the background, it was actually a very peaceful process and took me maybe 25 minutes to do all four frames.

While the frames dried, I grabbed the generic art inside, flipped it over so I had a blank piece of paper, grabbed a pencil, and drew some simple pine trees on the back. You know, the kinds of pine trees that an eight-year old could draw.

Then I added a little bit of green...

And a little bit of brown.

After I had made eight trees of varying sizes and heights on the backs of all of the generic prints, I put everything back together inside the frames. When the kids got home from school and finished homework, we trimmed the trees. This is where it gets fun. I had them 'dot' the trees with ornaments on the glass over the trees using paint colors I had picked out. It was one kid at a time so that I could closely monitor lest paint go everywhere and because, even though it was kid art, I didn't want it to look totally like kid art. I showed them exactly how to dot the ornaments on - small dots scattered around each tree - and they followed my lead.

Dotting the glass on top of the trees is fun because when the Christmas season is over, we can just wipe the dots off the glass with glass cleaner (plus a razor blade if the paint sticks really well) and have pine trees adorning the wall for the rest of winter. Spring will inspire some more art, I'm sure of it.

It was a fun project that didn't take much time and and gave us four new, unique, and authentic art pieces to adorn a wall for Christmas. 100% recommend!

Here's what you'll need to do this project at your house:
If you have a discount store like Ollie's or Big Lots near you, check them for frames first! If you don't have any luck there, here are some other frame options:
frames* - these aren't the cheapest and come in a pack of six 16 x 20s (lower quantities cost more per frame) so you'd have two extra frames to do something with but they do have glass inside.
frames* - these are a lot cheaper but they have plexiglass inside. That's not necessarily a bad thing but sometimes that can mean they look cheaper. They also come in more colors if gold isn't what you're going for.
rub 'n buff* (though it's cheaper at Michael's if you've got one near you with it in stock)
pencil
colored pencils (or you could just stay with a black and white scheme)
paint (I've found that muted colors make kid art look less like kid art vs. bright, Nickelodeon-esque ones. We used mint green, a muted pink, dark sage green, red, white, and gold. Also, any type of paint works for this.)
small paint brush - I have a paint brush set like this one* that I've pulled from for various projects over the years - from artwork to touching up cabinet paint. It's really worth having a set stashed somewhere.
hammer and nails
picture hanging tool* - I've had this one for years and it works but I feel like the design could be better. This one* has better reviews so it seems more promising.
While you're at it, you might as well take some paint and a brush around the house and add some Christmas cheer to more glass-laden picture frames - a Santa hat on everyone's heads in this family photo, a white snowfall in this beach scene, etc...
Have fun with it! 🎄
+ + +
*These links are affiliate links which means that, if you click over and/or make a purchase through the link, we may receive a small commission at no extra cost to you. I am an Amazon affiliate and also use other sources to link to products. All of these links will lead you to things we actually paid for or that are similar to the item we paid for in case ours is thrifted/sold out/secondhand. This extra money helps us with the costs of running the blog and buying essentials like goldfish. ;) Thank you for your support and for fueling our love to share all things DIY!


This is genius! What a cool idea. Now I’m thinking what I can do similar around the house. What is your trick for hanging a gallery wall? Haven’t been able to successfully do one after trying many times.
ReplyDeleteYay! I hope you find lots of things to paint. :) I think my biggest trick to getting a straight gallery wall is having a hanging tool. Mine isn't the best but I've learned to work with it. I'd grab the other one I linked to or just find one with some rave reviews and grab it! Takes the guesswork (and measuring) out of the equation. :) You just have to attach the frame to it, hold it up where you want it, and the tool will mark the spot where the nail should go with the press of a button or something like that. Worth having!
DeleteI found your website today and I am thoroughly enjoying it! Beautiful mind and beautiful life and beautiful family!
ReplyDeleteYou're so sweet! Thanks for making my day!
Delete