Otherwise known as “Thank God It’s Over”, “We Lived Through Potty-Training Twins!”, and “Oh Shoot, Now We Can’t Leave the House for Awhile”…because yep, it’s true. I haven’t ventured outside the home with the three little piggies in a week because, do you know what it’s like to have a baby strapped to your chest and one or both toddlers telling me they have to “go potty” while in a public place? I don’t either and I really don’t need to find out to tell you that it’s probably HELL! So, I’ll stay nice and cool inside our humble abode until my courage level reaches an all-time high and tell you how we potty-trained our twins in three days…round two. If you care to read how we tried when they were 21 months old and failed MISERABLY, click on over here but make sure you come back to read the success story because it’s a much better read.
SUCCESS!!
Now, before we hop on the train and head to Pottytown, let me tell you this. I’m going to give you a run down on how we got the girls to go but this is no tutorial as we are most definitely first-timers and every kid is very different and all that. No pros will you find here, just regular parents trying to make life easier by cutting out several diaper changes.
We purchased Lora Jensen’s 3-Day Potty Training Bootcamp e-book, and while Lora had some really good advice which made the e-book worth the buy, not every single tip worked for us. We learned that during Round 1. For Round 2 we decided to take a little bit from her, a little bit from Pinterest, and a little bit of logic and mold it into our own little potty-training method. Here’s how it all went down (pun definitely intented):
(Note: Some of the links to the products we purchased are affiliate links.)
>>> Pre-Game <<<
Things we bought beforehand: Underpants/panties/underwear/scivvies/whatever - Chances are, your kid(s) is going to go through a sh*&load of underpants (I’m running on little sleep and feeling a little feisty so, again, pun intended). Buy A lot. We bought 15 for each girl and during Round 1, we were washing underpants every couple of hours just to keep up. And FYI, toddler underwear is a little more expensive for some crazy reason so if you want to save a little moolah, get out of the baby/toddler section and head over to the little girls/boys section and grab some of the smallest sized underpants you can find, take them home and wash them in hot water and dry them on high. Chances are they’re cotton so they’ll shrink a little and fit your little ones hinny just perfectly. We bought a few packs of size 4s for the girls (Xhilaration from Target) and even though our girls measure in the 25th percentile weight-wise, they fit just great. Juice – To give the girls plenty of opportunities to pee on our floors learn to empty in the toilet, they needed to be guzzling liquid. Giving them water cup after water cup would’ve over-watered them with boredom so we mixed in a little juice to make things exciting. A toilet seat – We skipped the little potty because 1) we’d rather skip the gross cleaning and rely on the flushing, plus when one girl has to go right after the other, cleaning that thing out in a hurry seemed like a disgusting mess waiting to happen and 2) eventually they’ll need to get over the little toilet and move to the big one so why not start them there off the bat? We bought this Arm & Hammer seat that fits right over our existing toilet seat and it’s been awesome. There are also actual toilet lids (like this one) you can buy with a built-in mini-seat that flips down but our current lid is in great working order so there was no need to spend the money (even though I really, really, really wanted one.) Rewards – They go in the toilet? They get an M&M. Simple as that. Reinforce good behavior. Progress chart – We taped a couple of charts that my sister made onto the wall opposite the toilet and whenever the deed was done, the girl would get to put a sticker on her chart. Both girls loved this and, after scarfing down her M&M, would immediately demand her ‘sticka’. You can find printable charts on Etsy or make your own easily. (I had a lot of people asking about ours and my sister is planning on a possible Etsy shop stocked with them and other cute printables so stay tuned!) If you buy Lora’s e-book, you also get some printable charts to use for free if you’d like. Extra crib sheets – Because we trained day and night control, we needed some extras. I wish I could say we haven’t used them… Extra toilet paper – Our usage doubled so, obvious. Clorox wipes – For the messes we wish hadn’t happened. Things we didn’t buy: Pull-ups or training pants – We went cold turkey to underpants and only underpants.
Choosing our words wisely: In other words, we had to decide on what words we were going to use during the whole process. Is it a toilet, a potty, the throne, or a potty? Are we going to tell them to go potty, pee, tinkle, or tee-tee? Is it poo, poop, a dump, or a duke? (Too much potty talk for ya? Me too. It’s not enjoyable, only necessary.) This is one of the most practical pieces of advice we took from Lora. You can’t ask “Do you have to go pee-pee on the potty?” one minute and then “Do you need to go potty on the toilet?” the next. You’ll confuse the kid. We stuck with potty, poop, and toilet and made sure that our parents, who were here to help watch Sebastian while we trained, used the same words.
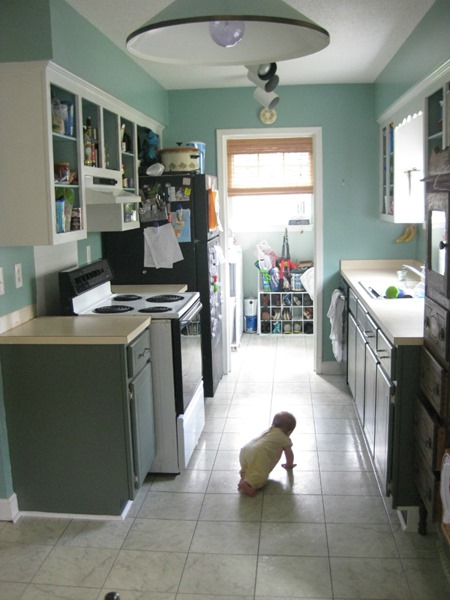
Taking precautionary measures: Anthony is a clean freak and I’m a clean freak but not quite as much as him. So, clean freaks over here. Pee and poop on furniture, rugs, carpet, other home paraphernalia? Ewww... So, the night before we started potty-training, we rolled up all the rugs in the hizz-ouse, laid washable blankets on the couch where we told them they could sit, kept them out of rooms that were carpeted, laid some towels on their high chair seats, etc…
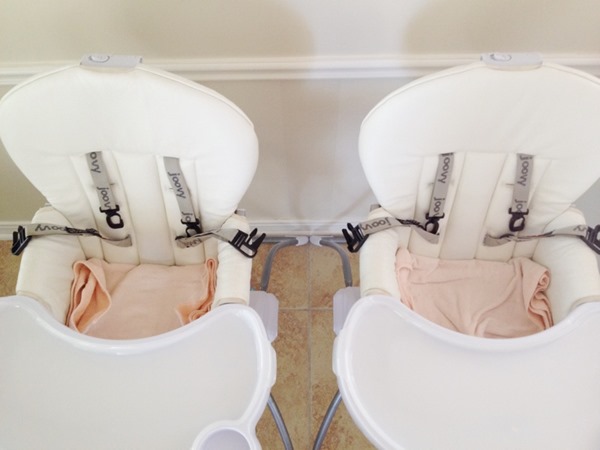
Also, we learned from our round one mistakes and this time called in reinforcements to help give attention to Sebastian while we chased diaper-less toddlers around the house. Grandma and Grandpa were awesome and we wouldn’t have two girls trained without them. Also, this time around we opted to train one girl at a time so that we could focus our sole attention on the one trainee. We noticed last time that if one girl rebelled against the toilet, the other would follow suit. Twins. So this time we hoped that by training one, the other would notice and want to follow that suit. The plan was to start training Seraphia since she had already been going on the toilet here and there (and she also is much more docile/less rebellious). Depending on how well she did, we’d start with Cecilia a couple of days later. (But it turned out that Seraphia did so awesome on her first day that we started Cecilia the very next day.) In the end it took us an extra day to train but it was a much smoother process.
>>> Day One <<<
We started day one with our normal morning routine – wake up, breakfast, and making sure we (Anthony and I) were ready for the day so that we could focus our attention on S. After breakfast when we’d usually go change those overnight diapers, I took S with me to her room and explained to her that she was going to start going potty on the toilet from now on and that we weren’t going to use diapers anymore. Our kids respond the best to short phrases (because they’re only two, duh) so I explained and hammered it in with “No more diapers” and “Potty on the toilet” and “No potty in underpants”. Then I had her ‘throw all her diapers in the trash’ – in which I placed a clean plastic bag into their trash can and had her toss her cloth diapers. Our girls loved to throw things away so of course she had a hay day throwing away her diapers.
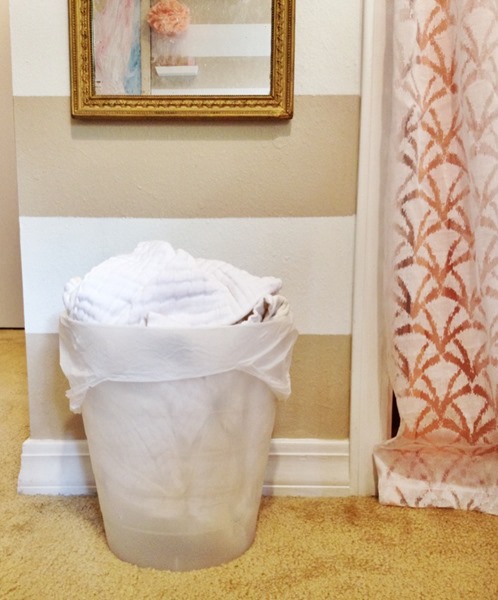
(Obviously I didn’t want to really throw out the cloth because, Sebastian, so I just stowed them away so I could do the same thing with C.)
Then, after we put on some underpants and a tee, I took her to the toilet, sat her on it, explained that this is where she needed to do her business from now on, and SHE WENT POTTY!
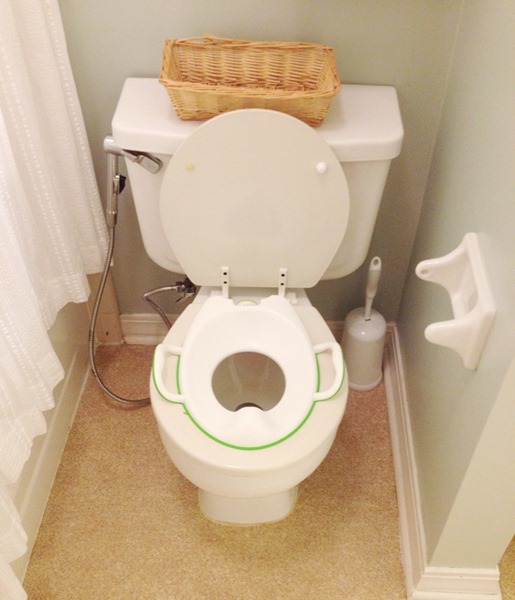
It was awesome! She got an M&M and I almost dubbed her trained right then and there…but then I came to my senses…and she had two accidents within the hour. With each accident, we made sure to grab her as she was going and rush her to the toilet. As we picked her up we’d say “No potty in underpants! Yucky! Wet!”, not yelling it to her or at her but just lovingly letting her know that that was a no-no. In general, Seraphia responds really well to us telling her not to do something so this was key in our training her. When she did go, we’d give lots of “Yay!” and clapping and she soaked it up. Throughout the day we’d remind her to tell us if she had to go potty and she caught on really quickly. We also made sure she was drinking a lot of liquid by keeping her sippy cup full. Compared to round one when the number of accidents far outnumbered any of the extremities with which I had to count, she went her entire first day with only five accidents and woke up from her nap dry as bone. This was what her chart looked like by noon of day one: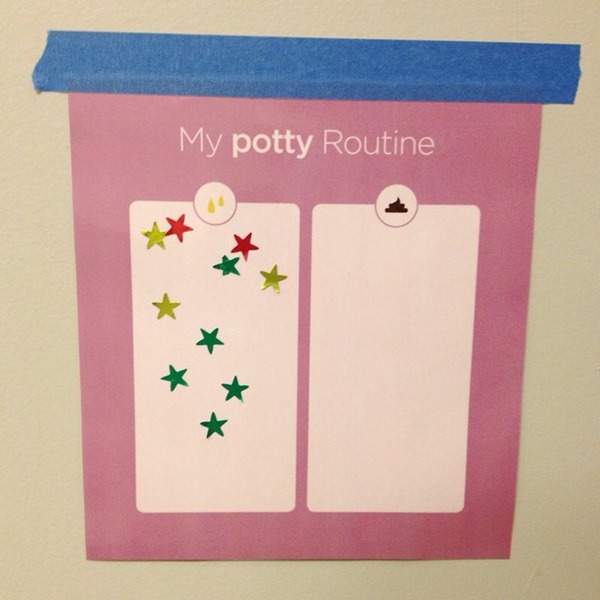
>>> Day Two <<<
Seraphia’s second day; Cecilia’s first. Seraphia continued to do great and had maybe two accidents, including a wet bed after naptime, and was doing great at letting us know she had to go “potty towet”. Cecilia though. Oooooooh, Cecilia.
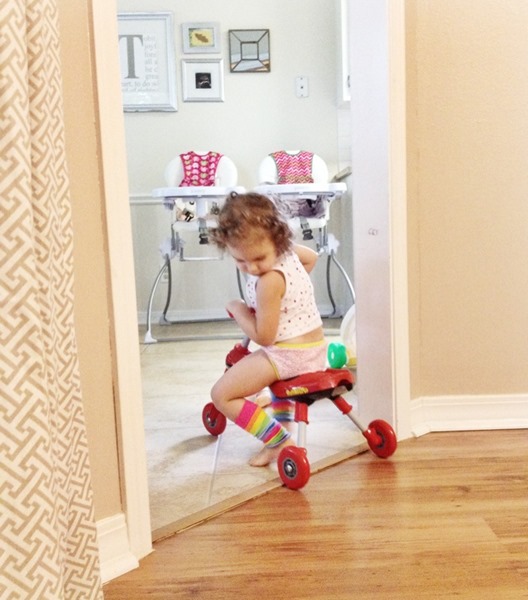
We went through the same first-day process that we had done with S the day before and she did a lot better than round one in that she learned a lot quicker how to tell when she needed to go but it took quite a few accidents. In the afternoon we switched things up with her and instead of telling her to tell us when she had to go, we would ask her every few minutes if she needed to go and she would either say “no” or her eyes would get big and she’d make a run for the toilet. If she went, there was lots of praise just like with S. If it had been awhile since the last time she had gone, we’d just go scoop her up and take her to the toilet every few minutes until she went. I don’t think it was until halfway through day two that she started to come tell us when she had to go and the accidents almost stopped.
>>> Day Three <<<
Seraphia’s day three; Cecilia’s day two. Things began to feel a little more normal this day. We stopped following the girls around like hovering hawks and just check-in frequently. Cecilia still had a few more accidents but I think it was more because she was too enthralled in her current activity to care about making it to the toilet and not because she missed the signs that she had to go. Also during this day we kind-of felt like we were making a bunch of trips to the toilet just so the girls could squeeze a few drips out for a reward. Smart girls. But, all in all, we finally felt like we were on the road to potty-training success. By the end of this day, here’s what the girls charts looked like:
[Cilia’s on the left; Phia’s on the right. Cilia liked layering her stickers, hence why it looks like there are less than there actually are.]
>>> Day Four & Beyond <<<
On day four we stopped giving M&M’s (except for when they go poop since it seems to be a little scary still). You can bet the girls still asked for an “em em?” upon finishing their business but we were quick to change the subject. 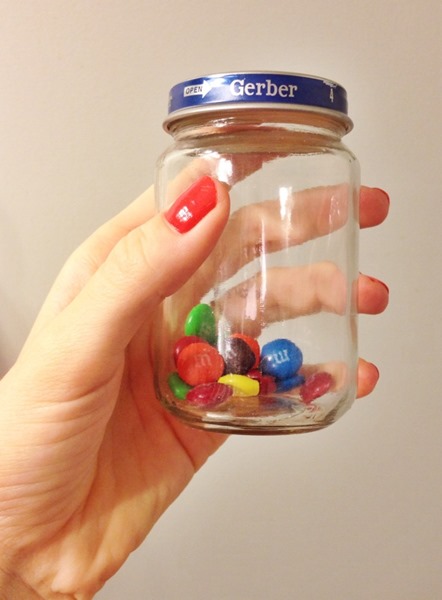
[A few left…signs of success in my book.]
We wanted to eliminate those unnecessary trips they were taking to the bathroom for the sole purpose of going for the chocolate. On day five we were confident in their newly-found knowledge to open the doors to carpeted rooms and lay rugs back down. It’s now been a little over a week and both girls are doing awesome.
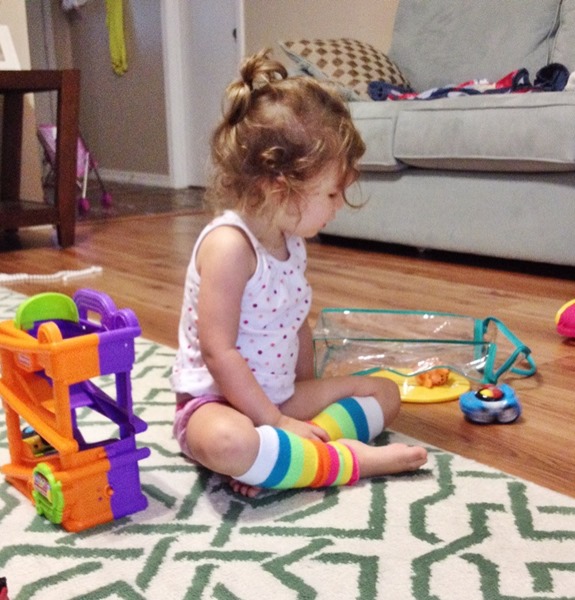
However, we’re not 100% accident-free and they haven’t woken from slumber with dry underpants every single time yet either. But, it’s a work in progress and one that I can now handle alone, at home, with all three in my care.
>>> Naps & Nights <<<
Like I said above, we chose to go cold turkey on diapers and anything of the sort which means that the girls are in underpants 100% of the time, 24/7. In my mind, it’s tough to explain to a toddler that they’re no longer allowed to go to the bathroom in their diaper/underpants but then allow it when they sleep. I know countless people have used pull-ups during sleep times and their kids do great with them but we didn’t feel like risking confusion by telling the twins it wasn’t okay while they were awake but okay when they sleep. So, we grabbed some of these GoodNites Disposable Bed Mats that have been awesome but we’ve gone through a whole pack thus far and won’t be repurchasing because they’re like $1 a piece which can get pretty pricey accident-after-accident. Instead, we’re content with washing sheets if an accident does happen. And speaking of accidents, they have happened. That’s a given. The girls generally wake up from naps dry, we’ll say 85% of the time, but nights are another story. We’re probably averaging 45% on those. We’ve started using Lora’s nighttime training recommendations though and for the most part, it’s working. I’ll let you know after a month of nights if we’re still heck bent on not using pull-ups or if we’ve caved. ;)
>>> On-The-Go <<<
Here’s the thing with this section. We’ve only left the house once since we began this process and it was on Seraphia’s first day to grab some fro-yo with the fam. Over-confidence killed the cat though (or is that another phrase?) because, while she made it there, she did not make it home with dry pants. Whoops. So, we have yet to leave the house again but when we do, you can make sure we will bring our Potette Plus. You guys, this thing is amazing and as far as I’m concerned, it’s the best traveling potty companion you can get. My sister sold me on it with her rave reviews (she has a trained three-year old) and so I ordered it from Amazon and couldn’t be happier. We actually did use it a few times during training last week when both girls HAD TO potty at the same time. I’ll admit that I was a little skeptical about buying it because I couldn’t tell from the pictures online how it actually worked and Farrah (my sis) and I were communicating via text about it but I’m not anymore. In case you want to grab yourself one, let me show you how it works.
Here it is:
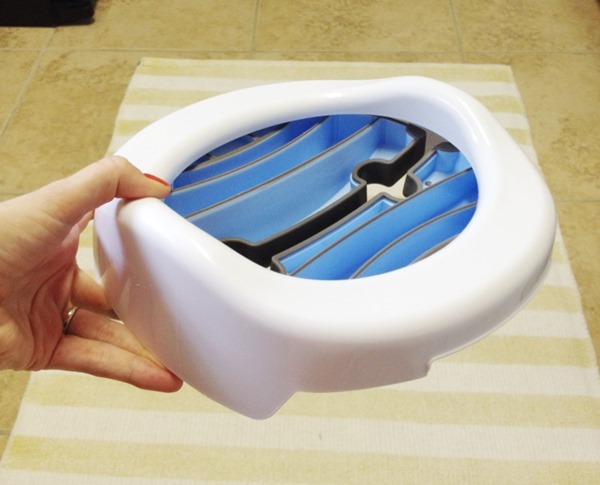
This is what it looks like all folded up. When you’re off to wherever you’re going, it can be placed inside its little bag that can then be stowed comfortably in your bag/purse because it’s only the size of a dinner plate.
But wait, Sally needs to go bad while you’re in the middle of driving to Target to buy a bunch of things you didn’t even go there for? No problem. All you have to do is pull over, pull out the Potette, pull out the two legs, push to lock them in place, and place a liner inside, and Sally can go. (Note: The Potette comes with a few liners and you can buy more but I’m pretty sure a plastic store bag set inside would work just as well…I’ll get back to you on that though once I’ve tried it. I’m back though because my sister said using a plastic bag with a paper towel placed at the bottom works as long as there are no holes in the bag…be sure to check before using!) Here it is, all set up (liner not shown but it just sits inside and comes up over the top edge).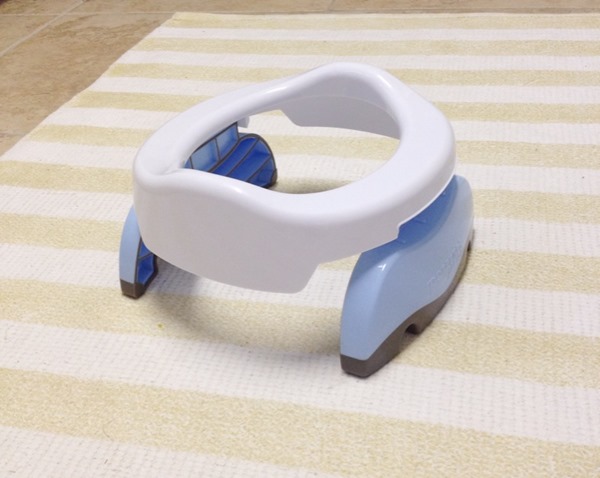
And a dry-run demonstration from a toddler very willing to help mommy: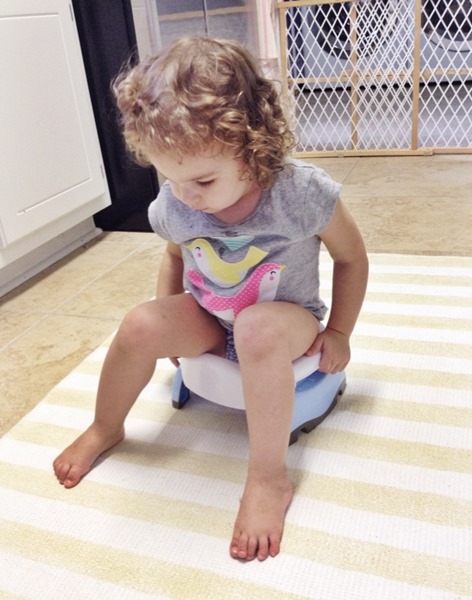
After Sally’s done, simply tie the bag up, toss it, and get back on your merry way.
But then guess what? Sally needs to go again in Target. That’s cool Sally because all mommy or daddy has to do is run to the nearest bathroom stall, pull out the Potette, unfold it so the legs come straight out, and set it on the toilet like so: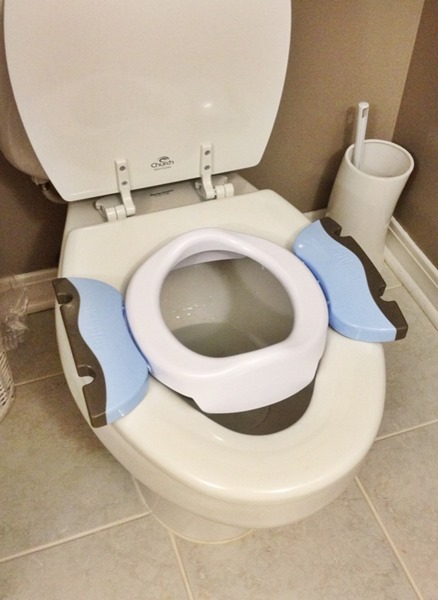
The legs are lined with rubber underneath so there’s no slipping and all of a sudden you have a potty seat. You can’t tell me that’s awesome, right?
. . .
So, that’s that. My initial intention was to write a quick recap on how our training went but somehow I managed to slip in a small novel that only took me a week to write. Jeesh Sheena. I’d like to thank our first experience at 21 months for planting the seed in our chicks because I don’t think that, if we hadn’t tried so hard back then, this time around wouldn’t have been as easy as it was (I say easy in comparison but really, it wasn’t that bad).
With all that though, I want your thoughts, amateurs and veterans alike. We are still learning and have at least one kid to go so the more tips and tricks the better. So spill those key ingredients in your potty book on how you get your kid to go. Also, if there’s anything that you’d like me to better explain or any questions, leave them too. And then make sure to have a great weekend!
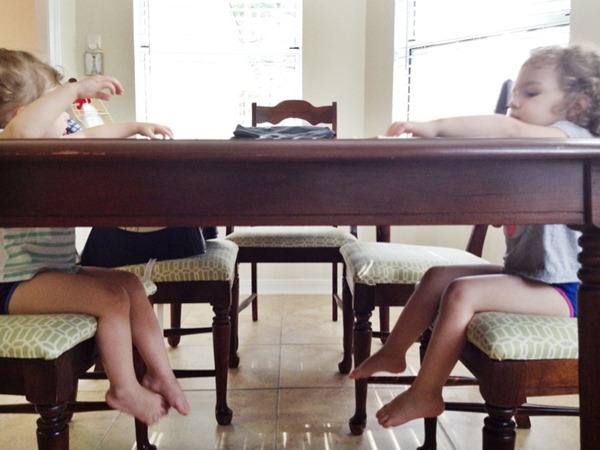
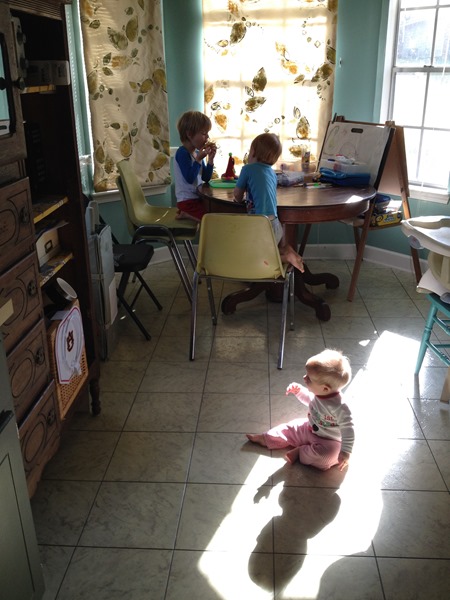
[Nothing between them and the chairs but underpants and that is a-okay!]



![IMG_5036[3] IMG_5036[3]](http://lh6.ggpht.com/-yVq9xM3HYrw/U_a0MmwNN3I/AAAAAAAANH0/wwmvNnmjTTQ/IMG_50363_thumb1.jpg?imgmax=800)
