Showing posts with label Our Master Bathroom. Show all posts

Master Bathroom Makeover Under $100

Hello!  Who’s in for a master bathroom reveal?  :D
This one won’t win any awards for most jaw-dropping transformation but nonetheless, it’s a transformation for the better and that’s all that really matters, right?  ;)
Before, our master bathroom was laden with that tan paint that coursed throughout the house (while not bad persay, not the best color for this house and it’s characteristics), some frilly curtains, baby blue fixtures, and horrible lighting.

While we weren’t going to dish out the money to change the tile, painting the room white (Pure White by Sherwin-Williams) was an easy way to make the blue feel a little more intentional.  The curtains came down as soon as I could get them off and, since the window itself is frosted, there really isn’t a need for window treatments but I made some anyway.  The full tutorial on that roman shade is here
After all of that refreshing plus some decor on the walls and new gold hardware (leftover from the kitchen makeover) on the cabinet, we are here:

Going Deeper

Updating the hardware on cabinetry makes the biggest difference in the world.  It’s kind of amazing how something so seemingly small can make such a big impact but the truth is, it does.  We learned that when we recently swapped out the drawer pulls in our kitchen for some more modern ones and we learned it again with those in our bathroom a couple of weeks ago.   
 
The existing drawer pulls had 1973 stamped on the back of them so, vintage.  Good vintage?  I don’t think so.  Back when we painted our vanity, I gave them and the door hinges a coat of oil-rubbed bronze spray paint to hide the dirty bronze they were. 

Here’s an  old picture with a better view of the vintage things:
sep242011 001

The Budgetiest Bathroom

There are a couple of rooms in this casa over here that I haven’t visited via the blog in many moons.  One of those rooms is the master bathroom.  I’ve tweaked a few things here and there since the last you heard about it and I guess none of them seemed newsworthy (not like anything on this blog is though) until last week.  I added a few little somethings that made a world of a difference and it only cost me $16.  I’ll get to that in a minute.  First, let’s get up to speed by starting at the very beginning.

Here’s what the room looked like when we were touring as potential buyers:
Random 470Too much plain and too much brown, if you ask me.

State of the Painted Countertops

I’ve had a lot of inquiries into the state of the laminate countertops that we painted in our master bath.  Their report card so far, after being the landing place for many a bathroom thing is:  Good.  Not excellent, not bad, just good.

There hasn’t been any peeling or bubbling or fading but I think they’re a little less glossy today than they were the day they were painted three years ago.  They’re not matte by any means though.IMG_5129
Not a huge deal because they still look good, but just sayin’.

The one downfall about them is that they’ve acquired a few stains here and there, like this mysterious ring that’s in two spots on the countertop.  The only bottle whose bottom matches the size of the ring is my mousse bottle but it’s metal and clean so I’m not sure if that’s the culprit or not but either way, I can’t get the ring out.
 IMG_5130

And then there’s this little nail polish splatter stain:
IMG_5131 
But logic tells me nail polish isn’t nice to any countertop it’s spilled on so, whoops.

Also, there are several teeny tiny divots in the paint/polycrylic where my hot curling iron sits.  The divots were created by the curling iron stand.  They’re barely noticeable because they’re so small and because they’re at the far edge but they’re there.  To keep this from happening, I should just set my iron on a piece of heat resistant something – a tray or piece of fabric – while it’s in use.

On top of all that though, I still love the countertops and I’d definitely paint them again and even have plans to paint the guestroom tops in the future.  So, painting countertops = two thumbs up.  :)

IMG_5137

I’m hoping to get the tutorial and state of Jesse’s painted countertops up soon too!  She used a clear resin top coat vs. the polycrylic I used so the results are a little different.  Have you ever painted countertops?  How are they holding up?

And That’s A Wrap!

Let’s talk about the art of washing hands, in particular, the dispensing that makes way for the washing.  Way back when we did our little bathroom remod, I went hunting around for some new soap dispensers to complete it’s new look.  Well, I didn’t find any in my price range (the usual handful of change) so I just filled and re-filled a couple of Bath & Body Works bottles because I kinda liked the geometric structure they provided.  I always thought maybe someday I’d give those babies a little upgrade with some spray paint or studs or somethin’ but that day never came because a few weeks ago, I spied these two just chillin’ on a Target clearance end rack:   soapdisp 001

They had nice curvature and with their $3 price tag, I couldn’t resist but take them home where I spiced them up a little more.  Here’s how:
 soapdisp 011words
[A sneak peek and graphic all-in-one…fancy that.]

First, I hunted around a few stores for the perfect color of twine…tougher than it sounds.  Not all twine is equal.  I didn’t want something too brown because then it’d blend in with the walls but I didn’t want anything too light either because then it’d blend with the countertop.  In the end, I settled for something a little lighter than I wanted but I’m happy with it and can always stain it down the road. 

So, supplies for this quick project:
soapdisp 002
Soap dispenser (or two)
Glue (I used Aleene’s non-washable fabric and craft glue)
Twine

I found this twine at Wal-Mart and got a little surprise upon taking the packaging off.  When looking at it from the top with the wrapping still on, it looked like it was a lot thicker than it actually was.  See what I mean?
 soapdisp 004
At first I was really bummed but then I just decided to work with it anyway since it was now non-returnable.  Lucky for me, it turned out perfect.

After gathering my supplies, I grabbed the loose end of twine and cut a fresh end.  Then I put a little dab of glue at the bottom edge of my dispenser and stuck the twine end to it.  Ellen did a great job cheering me on, flashing me those pearly whites every time I glanced her way.  I waited until this dried before continuing to make sure the end would stay put as I wrapped. soapdisp 005

After the end was nice and stuck on, I began wrapping my twine up and around the bottle like so: soapdisp 006
It was as simple as making a zigzag line of glue around the area I was gluing and wrapping the twine tightly over it, layer after layer.  It was a little monotonous at first but once I got my groove, it took me no time at all.

When I had wrapped all I wanted, I made sure to end right above where I started so that that side of the bottle would be considered the “backside” and faced away from any perfectionist eyes like mine.  I also wiped off any excess glue. soapdisp 007

My initial intent was actually to wrap twine up the entire bottle but once I got almost half-way up the bottle, I really liked the color-blocking/dipped/whatever-you-want-to-call-it look and it was just the right amount of texture, so I called it quits and cut the string.

We’ve got double sinks in our master bath so matching dispensers we had to have and matching they are.  Two cheers for matching and OCD!
 soapdisp 013
And speaking of OCD, it’s clear soap only to maintain the frosted glass look…very importante.  I know, you think I’m crazy.  If the shoe fits…ohp, it does.

Much better than the Bath & Body Works bottles, don’t cha think? soapdispensers

Cost breakdown:
Soap dispensers:  $6 ($3 each…thank you Target clearance)
Twine:  $3 (Wal-Mart)
Glue:  already had (Got it at JoAnn’s once upon a clock)
Total spent:  $9

I think I’m going to spray paint the nozzle gold or silver…I’m leaning towards gold…to upgrade them even more.  What do you think?  Silver or gold or just leave them white?  Speaking of, has anybody ever spray painted a nozzle like this before?  I’m a teeny bit worried the tube will scratch as it’s pumped even though I’ve given it a once-over a hundred times already and I’m pretty sure the tube and top dispenser don’t actually touch…if that makes any sense.  Either way, you know I’ll let in on that whole story once it happens.  Until then, you’ll find me smiling every time I pump to wash.  :)

Have a great rest of the weekend!

I Slit A Sheet

Three sheets I slit.  Three common sheets I slit. 

And that’s how curtains became a part of our bedroom oasis.  I cut three twin sheets in half, cut them to the length I needed them, hemmed all cut sides, and hung them.  And, it only cost me $15. 

When we moved in to this house, I was dying to get our master bedroom together and in some semblance of “our space”.  So, after slapping up some paint (BM’s Heaven on Earth color-matched to Olympic low-VOC paint), moving in furniture, and making the bed, one of the first things we did was hang some curtains.  On a free whim, I used what we had which was one pair of extra-wide toile curtains from IKEA.  I cut each panel into thirds (we have three windows in our room) and we hung them on some cheap curtain rods we got from Big Lots.  I think the rods were $5 each or something like that.  Cheap.  Well, the rods were great and did the job but the curtains were a little to sparse…scratch that, they were just plain ugly:
master ip4 
Looking back makes me cringe…do you ever have those what-the-heck-was-I-thinking decorating moments?  Lesson:  Free decorating is not always better.

So, months later after I came to my decorating senses, I snatched up three flat twin sheets (Target brand) from Dirt Cheap for $5 each, slit ‘em and hung ‘em a little higher, and the room magically looked 100 times better. 
mb 007

Sometimes I wish I would’ve spent an extra few dollars and bumped up to queen-size for thicker curtains but for now, we’ll just continue rolling with the twin theme. 

We have even bigger plans on the back-burner including a curvy, padded headboard, new pillow covers all around, a transformation of the existing bed skirt, a diyed slipcover for the raspberry elephant in the room, some chunky lamps (currently on the thrifting hunt), raising, painting, and spicing up (think mirrors!!) the existing nightstands, a coffee table turned bench for the foot of the bed (said coffee table is currently in hiding underneath the bed), some picture hanging, and whatever else pops into the dome piece by then.  Like I said, all of this is on the back-burner and all of it will be on the very cheap, per the usual.  The padded headboard WILL be done before #3 gets here so this mom has a comfy place to rest her back during those middle-of-the-night feedings?  The rest though?  Who knows.  Eventually.  :)

Fake Out

What a happy Saturday it is!  Happy here because I finally have a project to blog about…’er, rather have found time to blog about!  Here’s to hoping I can get back on my regular Saturday schedule from here on out plus maybe squeezing in more posts during the week since I’m usually confined to zee couch with one or two infants in my arms…and since my one-handed typing skillz are world class these days. 

Anyway, I’m all about covering windows.  There isn’t a window, or door for that matter, that isn’t adorned with some sort of fabric in our house except for this one:aug222012 002pxd 

The one in our master bathroom.  Well, I’ve had plans to cover it for many moons but indecisiveness about fabric and the baking of two buns has left it naked…until  now.  Let me digress.  A few months ago I had an itch to switch out our plain white duvet cover for something more flavorful but, like usual, didn’t want to spend a ton of money…as in no more than 20 bucks.  Well, I found a new cover but when I got it home, I realized I had bought the wrong size and unfortunately for me, I bought it at a huge discount - $10 – at final sale.  Poo.  So, I did what I do best and conjured up another use for it…dec12011 011 A decorative blanket/quilt/extra layer on the end of our bed.  Still unable to find a suitable fabric for the master bathroom window at this point, I had a revelation soon after to use the included pillow shams to cover it up. 

june122012 487

The plan:  to make a fake roman shade (similar to this one in our guest bedroom).  To do first:  take apart the two pillowcases.  At eight months pregnant, at which point I began this project, laziness efficiency took over and I simply just cut off the backs of each case (since they wouldn’t be seen anyway), took the seams out of the sides that would be sewn together, and made them one.

june122012 488

To achieve a roman shade look, I hand sewed 12 plastic rings onto the backside of the shade in three vertical rows that were evenly spaced apart and then gathered each row together using another plastic ring that opened.  Hopefully these pictures help explain that mumbo jumbo:  aug222012 004

aug222012 003

So, fast forward to this past week during a 15 minute slot when both twins were passed out.  As quickly and quietly as we could, we stapled the new shade to a pre-cut piece of 1 x 2 wood, attached two L brackets to the underside of the wood, decided on and measured its placement over the window (see side note below), and got ‘er up.

Side note:  While planning for the valances we hung in our dining area, I came up with a simple way to figure out the height at which to hang window treatments by holding up a folded piece of paper at a distance, adjusting until I was satisfied, like so:aug292011 002

Once again, I’ve learned to never underestimate the power of a window treatment.  See what a difference this one makes?ba

So, if anyone’s keeping track of the DIY madness, so far we’ve tiled the floors, painted the cabinets, painted the laminate countertop, and stenciled a wall in here.  Even though, in my mind, the room isn’t yet “finished” (will it ever be?), it definitely looks a lot more complete and homey (if you can call a bathroom that) just because of a little (cheap) addition over the once naked window.  :)  aug232012 001 

.           .           .

Stay tuned for more finished projects!  The girls were baptized a couple of weeks ago and my sister and I made their gowns and accessories and then of course, I’ve got finished pictures of our “new” kitchen to share as it’s finally done along with progress pics of the nursery!  See you soon! 

A Lack Thereof

So the twins conception has brought with it a lack of motivation for anything diy...or really anything of anything for that matter.  Hence why the loveseat still sits in the same, unfinished condition it was in a month ago, our master bath window is still naked, and my sewing machine (and the pile of must-do's I have waiting for it) are out of commission.  I blame this lethargy partly on the fact that, unconsciously, my mind is tantruming over the fact that paint of really any sort is out of the question right now.  Don't get me wrong, I'd choose our two little souls over a hundred cans of spray paint and projects any day, but I'll admit that I'm going through a little withdrawal.  I'm hoping trimester numero dos brings with it my former motivation to take on everything (but painting) and I'll be counting down the days - nine - until then.  :)
Lucky for you, I still have my will to write.  :) 

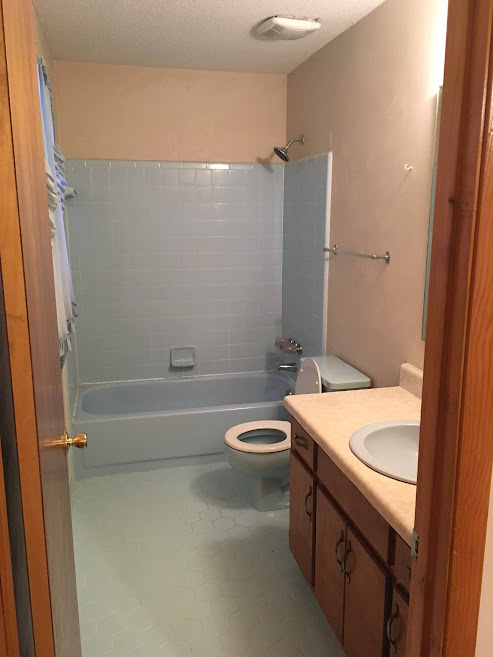
First things first - towel rings. 
I'm not sure if writing about this will slightly ease my withdrawal pain or just cause it to go into overdrive, but c'est la vie, right?  Here's what happened:  I had been on the hunt at my favorite discount store - Dirt Cheap - for some oil rubbed bronze towel rings to give our hand towels a home during our bathroom mini-makeover.  Well, I came up short time and time again until ReStore came to the rescue and I found these:
 As shiny as gaudy, shiny gold can be but ringing in at $4 a piece.  And you can probably guess where I'm going from here...

Yep, after one coat of primer:

And two thin, even coats of Krylon's oil rubbed bronze:
We have these (Anthony has one on his side too) - used for two months now and without a scratch or scribble to be seen.  I heart spray paint!


So that's that and this is this.  You'll probably think we're crazy...because we are...but we've scored some more free furniture.  This time from our parish priest's home.  Yes, we recently had a priest switcheroo in our parish and our new priest casually ridded his new home of some of the previous priest's furniture...of which two club chairs were a part.  So, we (Anthony) kindly asked if, since the chairs were in indecent condition and would probably be thrown out or given away, if we could take them off the hands of the parish, thereby releasing them of the dirty work.  We're so selfless, aren't we?  Well, a borrowed truckload (thanks Jess and Alan) later and two over-sized raspberries we've got:
 We didn't like the skirt and they had nice legs so with a little bit of pregnancy motivation one night while watchin' the tube, off they came.  What do you think?  Better with or without the skirt?  Thankfully, they were really simple to remove.  All I had to do was lay each chair on it's side, lift up the skirt to expose the staples,
and rip them out one-by-one, after which the skirt came right off and we were left with some slightly better looking club chairs.  The plan is, someday, to diy some slipcovers (for their washable advantage) and construct a home decor friendship between them and our sectional but for now they're just sitting in our office.  Since it'll be the future nursery, we wrapped up the twin bed that was in their place and stored it in the attic for now.  The chairs will eventually be moved out (after the twins take up residence circa six months after birth?) and placed elsewhere but for now, they give off a good home office/library vibe, even if they are still pretty sore to look at...raspberry, not my idea of a a good furniture hue.


Anyway, what else can I bore you with?  Oh yeah, we're officially going to take on a small kitchen makeover.  I wrote an itty-bitty post a while ago about my wish to do so and now the other half has officially signed on.  We just feel that in order to sell this house (we've had it on the market for a good while now in hopes to move closer to work), we need to give our semi-sad kitchen a freshening up.  We started pricing out countertops today, trying to get the best bang for our buck.  We don't want to spend loads because we know that we're probably not going to get much of any of this small investment back but we also don't want to skimp either.  That means that laminate is out and we're leaning towards a solid surface like Corian or an inexpensive, simple Quartz.  Of course, we'll let you know how that tops out.  Other than that, we're going to paint the cabinets white...let me rephrase that...Anthony is going to paint the cabinets.  I'm simply going to sit in a back room with a mask on sulking.  I'm really excited about it though...the project, not the sulking!  More to come later!  We've only just started researching countertops which could mean, with our tightwad ways, that it could be little bit before any actual progress is made.  :) 

Last but not least, I can't not give the twins their due.  Here's the three of us last week, at 10 weeks:
Not much of anything yet besides a little b-l-o-a-t and a messy bedroom.  :)


Before I sign off:

While we were perusing the addicting corridors of Pinterest for "white kitchens" Anthony said, "all these pictures are of huge, expensive kitchens!  Why don't they make a Pinterest for poor people?"  Agreed.  Pinterest, although incredibly inspirational and much-loved, is quite I-wish-we-could...except for the diy and crafts area of course.

It's so very refreshing to know that I'm not the only one who thinks that spending $20 for a shirt is outrageous.  Thank you for the ego boost Ana!

Sign this petition.  It's to protect the eyes and hearts of young people...and everyone for that matter...by making it a requirement for Cosmopolitan magazine to encase their ill-worded mags in a non-transparent casing.

You must read Grace's blog daily if you want to be at all in high spirits.  Laughs, doses of lovely reality, incredible sewing inspiration, and lots of simple wisdom abound...and her kids are about as cute (and sometimes mischievous) as they come.

Check out Mona Lisa in her earlier days.

Consumer Reports is the most incredible research engine for those of you, who like us, like to research to the death before we buy anything to make sure we're getting our pennies worth.  Seriously, we make every big purchase decision after we check it out.  They're so smart, non-profit, and totally worth the subscription fee!

Problem:  My blog header is blurry and no matter how many times I remove and reload the crisp image from my comp, it's still all fuzz!  Anyone know how to fix?

Adieu!

T.E. Dious

For the past three weeks I’ve been working on the most time-consuming, am-i-insane project ever…but it’s done now and was “wall” worth it.  Let’s backtrack though before we get to the good stuff.

As you might recall, we’ve been transforming our master bathroom into light and bright over the dark and outdated it was.  So far, we’ve ripped up the laminate tile, laid down new, ceramic tile, painted the cabinets, and painted the laminate countertops.  Most recently though, I took to painting the walls and adding some accent wall flair with a stencil.  I’ve always loved the idea of having a tiled accent wall, using either some gorgeous glass subway tile or round penny tile in a bathroom but, on a budget, those dreams remain just what they are…dreams.  :)  But the next best thing is a free stencil, right? 

So, using the same stencil (downloaded from Jones Design Company) I used to spice up these pillows last spring, I first penciled the stencil, then grabbed a small paint brush and leftover cabinet paint (Promenade by Valspar) and played Picasso.

Here’s the wall before I started:
nov262011 001
   Of course, this is after I painted the entire room – Smoked Oyster by Valspar.  It’s a sort of dark grayish beige, or greige if you’re into mixing words like that.

This is in process…when I was questioning why I did this and also came to the realization that my hand wasn’t as steady as I had previously thought…:
nov262011 002

 And this is done:


The whole process took me almost three weeks to finish, me working on it about 4 hours a week…yeah, for one wall, that’s crazy!  Tell me about it!  One of the reasons it took me so long though is because I used an el cheapo paint brush we had lying around.  It was not very short of a kids watercolor brush.  But, once I started with it, I had to continue because if I had gotten a nicer, stiffer brush it wouldn’t have looked quite as hand-painted…which I wasn’t necessarily going for but actually looks really good on the completely finished wall. 
nov262011a 003
Any imperfections are unnoticeable because when you look at the finished wall, your eye doesn’t know where to land so they just blend in…even though after I was done I did take some of the greige paint to fix a couple of “oops” spots.

I’m really happy with the end result even though I’m not sure if I’ll ever take on this stencil again…it made the $40 - $50 wall stencils look cheap and maybe worth it in the future.  But, when the day comes where I forget how long this took me but remember how cheap it was to do, I’ll probably stick my foot in my mouth and do it again.  :)

Just to jog your memories, here’s where we started:
master bath b42

And here’s where we are so far:

We have yet to add some floating shelves to the wall in between the two mirrors, make a roman shade to adorn the window, and add some other decor in the way of pictures and such before we can officially call it a done deal but the big projects are d-o-n-e.  Thank goodness, because the loveseat’s a-waitin’.  Look for a post on her next week…yes, we’ve made progress!  Until then, have a great weekend!