
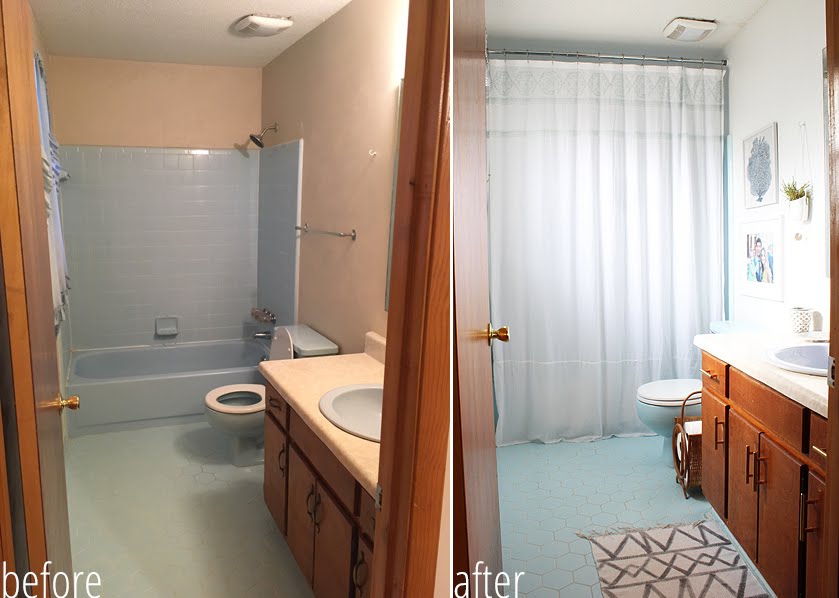
This one won’t win any awards for most jaw-dropping transformation but nonetheless, it’s a transformation for the better and that’s all that really matters, right? ;)
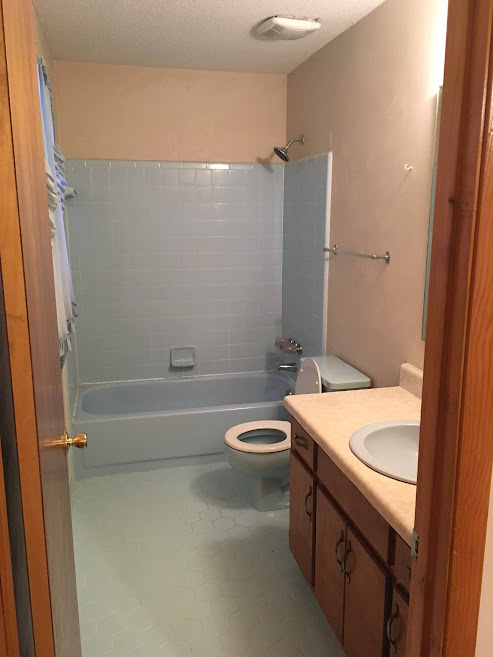
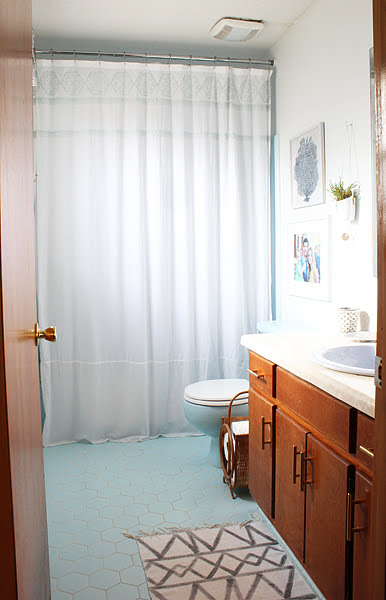
Before, our master bathroom was laden with that tan paint that coursed throughout the house (while not bad persay, not the best color for this house and it’s characteristics), some frilly curtains, baby blue fixtures, and horrible lighting.
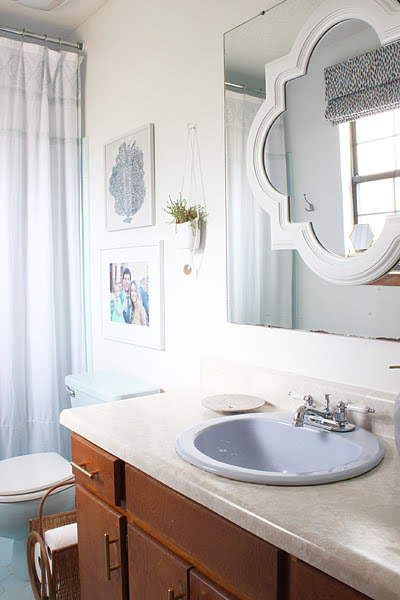
While we weren’t going to dish out the money to change the tile, painting the room white (Pure White by Sherwin-Williams) was an easy way to make the blue feel a little more intentional. The curtains came down as soon as I could get them off and, since the window itself is frosted, there really isn’t a need for window treatments but I made some anyway. The full tutorial on that roman shade is here.
After all of that refreshing plus some decor on the walls and new gold hardware (leftover from the kitchen makeover) on the cabinet, we are here:
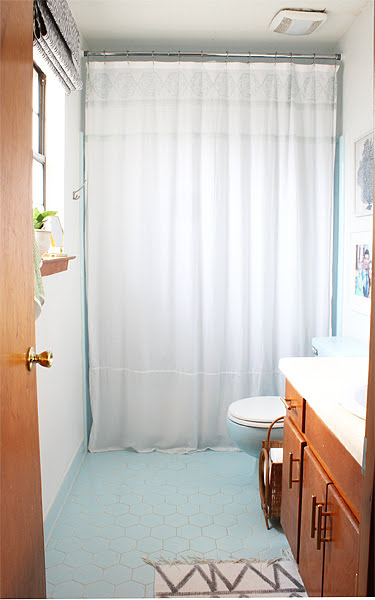
(West Elm knock-off rug tutorial here and basket transformation here. The shower curtain is this one* in blue and white with part of a second one sewn to the bottom to make it longer. Framed coral print is this one* that I found at Dirt Cheap for $2. Woot! The frame below it was also a Dirt Cheap find at $1 but it was black and got a coat of white. I had planned to put some abstract art in it but then Anthony surprised me by sneaking a photo of us in it. He’s cute, isn’t he?)
I didn’t keep track of all of my expenses but it’s definitely under $100 and if I had to guess, probably closer to $70-80. That includes the roman shade, the plants, paint, hardware, frames on the wall, hanging planter, and the new mirror.
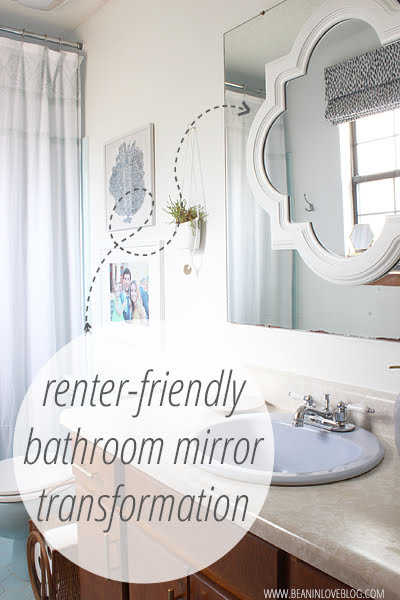
And speaking of the new mirror…
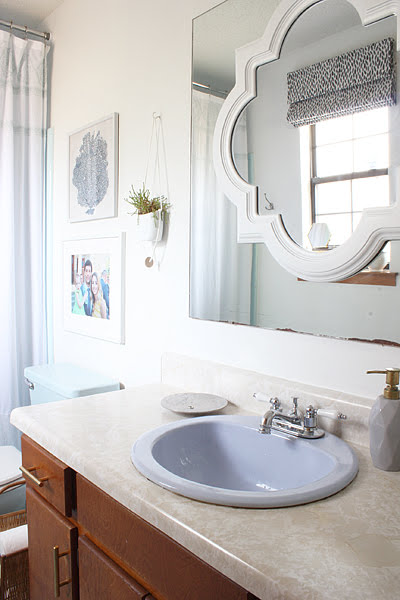
It makes the room! Or at least takes the attention away from that periwinkle sink. I got really excited when I thought of adding a mirror a few weeks ago. I love the look of unique-shaped mirrors in bathrooms but when you’re renting and your house already has one of those big, builder-grade mirrors, you don’t have many options. Unless…you hang one over the existing mirror. One that you can easily remove when you leave with no one being any the wiser. Bingo!
I found a quatrefoil mirror on a Facebook Marketplace for $30. It’s this one* from Kohl’s. (Really, any shape mirror will work as long as it has hanging hardware on the back!)
I wanted it white so it didn’t stand out so much with the new white walls and was more of a subtle but pretty addition. So, I spread newspaper over the top of the mirror and under the frame, gave it a quick coat of white spray primer, and then a couple of thin coats of white.
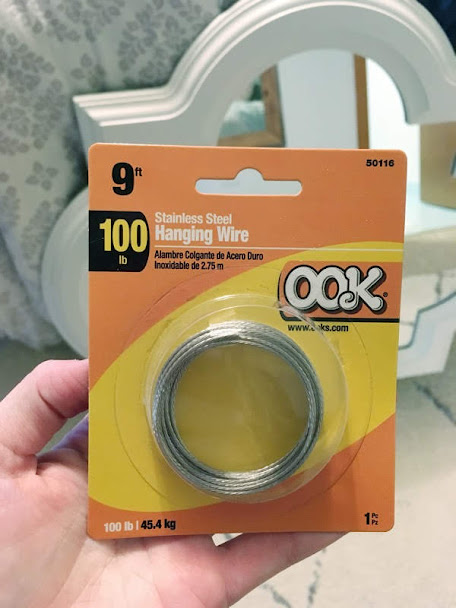
To hang it up, I bought some of this hanging wire from Home Depot and grabbed a hook (similar*) we had in our stash, which also got painted white to kind of camoflage it’s existence on the wall.
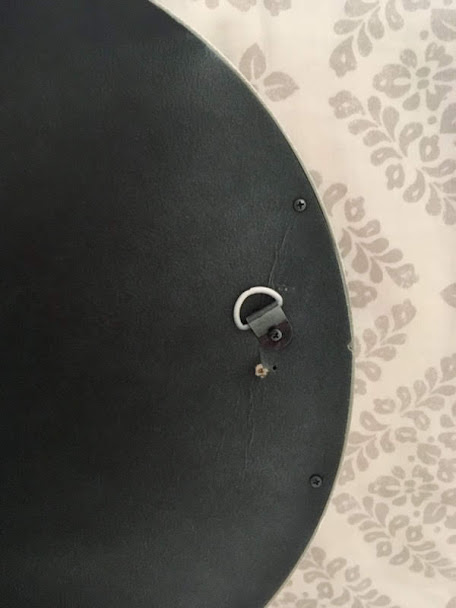
This mirror has two rings on each side with which to hang it and a sticker on the back says that it’s not recommended to hang it with picture wire. They write that because, if you string wire between the two rings, it could strain the rings and they could eventually be pulled out. That obviously wouldn’t be the greatest thing to happen, right? Especially if you’re superstitious. ;) To keep that from happening though and enabling yourself to use a wire (like I had to for this project), all you have to do is loosen the screw holding in the ring the slightest bit, turn the ring so that it hangs at the angle the wire will be pulling from when attached (instead of straight up and down like the ring is pre-installed), and then tighten the screw again. I didn’t take the best picture but this is what the ring looked like after I moved it to hang with the angle of the wire:
I wanted the mirror to hang right in the middle of the existing mirror so I measured, cut a piece of wire long enough, attached each end to the mirror rings, hammered the hook into the wall above the existing mirror, and hung the new mirror. (PS, when we move, I’ll simply remove the hook and patch the small nail holes.)

Originally, I had planned to paint the vanity white but procrastination got the best of me and it just hasn’t happened yet and probably won’t. I’m justifying not painting though by telling myself that it makes the master bathroom cohesive with the master bedroom and all of the wood in there. They jive.
Next up is the master bedroom. Keep your eyes peeled. But don’t make a staring contest out of it or anything because my roll is pretty slow these days. I blame it on the homies. ;)
. . .
*These links are affiliate links which means that, if you click over and/or make a purchase through the link, we may receive a small commission at no extra cost to you. All of these links will lead you to things we actually paid for or that are similar to the item we paid for in case ours is thrifted/sold out/secondhand. This extra money helps us with the costs of running the blog. Thank you for your support and for fueling our love to share all things DIY!


No comments