Showing posts sorted by date for query painting wood furniture. Sort by relevance Show all posts

Spotted: A Thrift Trip

It's been a good long while since I've been able to take a couple of hours to just roam through a thrift store or two.  But, as last week's errands would have it, there were four of them within the near vicinity of places I had to go and since I had a little extra time on my hands (well, borrowed of course from continuing painting the kitchen), I roamed...and these things are what I spotted...

(Pssst...if you're local to Mobile, I'll put the thrift store under each photo in case you have your heart moved and want to see if any of these are still there!)

This long tray was only a couple of bucks and would be a nice valet tray to set in a bathroom or atop a dresser in the bedroom to hold pretties and things.  In a kitchen it would also make a great place to lay cooking utensils that are in use next to the stove.

Goodwill on Azalea


Are you a plant person?  Pots can get pricey but I've always found thrift stores to have them.  These three were cute.

A Mid-Century Wood Dresser Makeover / Restoration


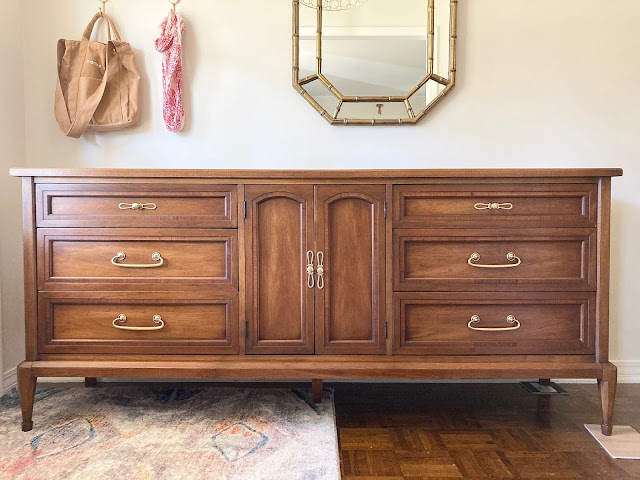
We bought this dresser right after we moved into this house - we really needed something to set the tv on in the living room so when I saw it on Facebook Marketplace (being sold by a neighbor...yay!), I pounced.  I can't say no to a dresser with legs.  It's just the best combo.  Proof right here.

It served us really well for a few years functionally and, once we got the paneling painted, it served us aesthetically too; adding a little warmth into a now very light and bright space.

Our Painted [Upper] Kitchen Cabinets

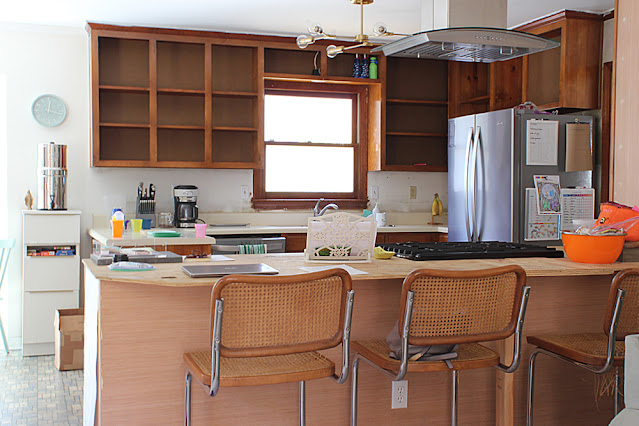
I've painted a thousand cabinets, ok, maybe not thousands...let's see - four kitchens now, four bathrooms, and more dressers and pieces of furniture than I can count - and each time, I've done things a little differently.  Each time, I learn a more efficient way, or a better way to get a smooth finish, or I use a new paint.  So I can't say that I have an ironclad, tried-and-true method to painting cabinets but I can say that I've had great success in the arena.  The same story follows the most recent endeavor of painting our current upper cabinets in the kitchen.

First, I removed all of the doors and the contents of the cabinets.


I wanted to replace the old cabinet pulls with new knobs so the next thing we had to do was fill in the old hardware holes and drill new holes.

Built-Ins - Fake It 'Til You Make It

 Hey!  I wish I was sitting here typing up a big kitchen update but alas, I'm not.  I'll blame it on fully enjoying our summer and I'm not mad about it in the least.  Actually, the drier fall air and milder temps will serve us better anyway when it comes to painting cabinet doors outside so you could even say that our lack of kitchen progress this summer is a blessing in disguise, paving the road for efficiency later.  Orrrr maybe that's just wishful thinking...  ;)

Anyway, I'm not here to talk about what we haven't done but something we did do.  It was a little project that only took a few hours one lazy Saturday afternoon.  Not only was it quick but it also itched that scratch that not doing anything creative for a few weeks can create.

It all happened in the reading room (music room?  library?  study?  We're not sure what to call it.)  We've known for at least a year that we want to line the back wall with bookshelves atop cabinets but that's a back burner project as we focus on other things.  For awhile, we improvised with a built-in we moved in from the living room (when we removed the wall between that and the kitchen, this built-in had to be moved) and an old secondhand shelf but that left a bare corner that we just used to store stuff like the vent hood that had to go up in the kitchen.


Not very aesthetically pleasing.  But then time marched on and I found chairs, the vent hood went out and up, supplies were relocated, I moved  in a small bookshelf from the kids' room, and topped it all off with some DIY art in a thrifted frame (tutorial here).

Our Spring Living Room + An Easier Way to Hang Frames Straight & Level

I don't normally decorate with the seasons (besides Christmas) mainly because I don't want to store seasonal decor nor am I quick enough but I managed to do so in our living room this spring thanks to some springy fabric finds I made pillow covers out of.   Just changing those up made all the difference and was all I needed to do to go spring in here since our furniture can already pass for the season.  I ventured out of our norm and threw in a little bit of blush pink (I made those pillow covers out of this curtain panel* - it's semi-sheer so I layered it over the existing pillow cover) that nods to the abstract painting that's hanging in the breakfast nook.  You can't see it in the photo below but here it is up close and personal.  Just adding that pink really unifies this whole, big space. 


The kitchen in the background will hopefully soon look more like it belongs (paint!) and maybe even the fireplace (mortar!) but even still, I'm liking the fresh new view.

It looks especially fresh when you look back on what it was two years ago:

Small Cabinet Makeover

Something I've had on my to-do list for a good long while now is to paint a small cabinet that's main function is to hold our Berkey water filter*.  The Berkey is awkwardly large as far as water filters go and if it weren't the best at filtering all the things, we'd probably ditch it for something smaller.  But, here we are with this big, chrome, bullet-looking thing in our kitchen. 


There isn't really a good place for it on our kitchen counter because it's so tall and takes up too much space so we kept hoping to find a small cabinet at just the right height that we could set on this small expanse of wall right beside the kitchen counter and obviously, found one.  


It was for sale on Facebook Marketplace for $10 and not only was it not the prettiest cabinet in the wide world, but the lady who sold it to me used it to store makeup and so it smells...like makeup.  It's a weird smell to have a cabinet giving off.  I knew the smell would eventually go away but that faux wood finish had to be dealt with.  Fast forward months and months when only this #letsroomtogether challenge could provide the motivation I needed to get this thing looking a little more like it fits in with it's surroundings.

Guest Room + Home Office Combo

We've only ever lived in three bedroom houses.  Our first house was a 3/1 (with a fourth bedroom and second bathroom finished shortly before we sold and moved), along with our second, third, and fourth houses.  It's great when you're newlyweds because then you have two extra bedrooms (we had a guest room and an office...spoiled) but with four kids, three bedrooms fill up quick with no space left for anything else.

So, we were excited this house around to find something with another bedroom.  The fourth bedroom in this house affords us a guest bedroom, which is fantastic since the closest family members we have live seven hours away.  But, with the right situating and set up, it also affords us a home office - something I really wanted so that I could have a designated place to sew.

We got really lucky in finding furniture secondhand for this room - furniture that is multi-functional so that we can fairly easily switch from home office mode to guest bedroom mode.

Home Office Mode


Bleached Dressers - DIY

I'm really excited to tell you about this project!  It's a goodie but definitely not my normal "Hey!  Here's an easy peasy project anyone can do!" type of project.  It took a little more time and effort but it was so worth the end result.  Oh and hey, anyone really can do this, I didn't mean to sound deflating, just be prepared.  ;)

It all started with two of these little guys:

When we moved Seb and G over to their own room, separate from the twins, we needed a dresser (or two) to store their clothes in over in their new space.  I did my usual Facebook Marketplace/thrift store/resale group scours but came up short oodles of times...until I didn't.  I found these two small, matching dressers (the owners used them as nightstands but they're quite larger than your typical nightstand) for $20 each.  The only drawback was that I had to drive 45 minutes to grab them.  But, they're vintage, solid wood with some wood veneer, and in great working order so it was worth the car time.  Plus, they were perfect for what we needed them for.  His and hers.   

I could have just plopped them into the room as-is but that shiny yet worn dark stain and outdated hardware just wasn't my fave.  Painting was always an option and would have been a fairly easy update but then I came across this post on Within the Grove on how to strip and bleach wood furniture and I was SOLD.

I'll admit that there were more moments that I can count during this process that I wished I would've went down the painting route but I stuck with it, slowly but surely over the course of two weeks and golly gee whiz, they look much, much better.  👌 

Color Block Walls + Painted Curtains

I just love paint.  Don't you?  It's truly magnificent.   


It can pack a real punch for, really, not a whole lot of cash.  I leaned heavily on that fact when I made over the playroom-now-bedroom.  Solid walls are nice but, especially in a kids' room, adding a little more color on the walls ups the ante and makes things just a little more fun.

The walls in this room were painted right before listing by the previous owner (China White by Ben Moore) and it's really a great color (we've actually copied it to most of the rooms in our house so far and the exterior) but I wanted something a little more upbeat for S & G's new room.  I wasn't actually planning on painting this room when we first decided we were going to move them but then I thought, well, if we're going to be moving furniture around, we might as well paint.  Over-achiever, I know.  But it was worth the extra effort.  :)

The Process:

Before the walls got painted, I had to paint the trim (read our tips on that here).  The previous owner had also had them freshly painted but they had them painted a really shiny, ivory-beige color.  We painted the ceilings in here Pure White (Sherwin-Williams) back before we moved in and wanted to follow suit with the trim to make things cohesive.  The crown, door and window molding, and baseboards all got a that white treatment.  The chair rail isn't a favorite feature of ours and taking it down meant filling in holes and, since the top part of the wall is painted-over wallpaper (grrr...even though they did it semi-right by filling in seam gaps), there'd be a line where the painted-over paper met the chair rail that would also have to be hidden with some spackling.  So, while painting an entire room sounded fun, painting and having to fill in where the chair rail was didn't.  You can only be so much of an over-achiever.  Ha!  

Living Room Update + Some Fireplace Ideas

Whew!  After a whirlwind romance with primer and paint, we are FINALLY done painting the living room.  Ok, so there a few spots that need to be touched up like where I accidentally got some trim paint on the ceiling but they're not noticeable to anyone but me so I'm going to push them off like a lazy person.  I need a break from touching paint brushes and rollers to any part of this room.  ;)  It was a doozy of a project that required lots of painting after lots of bedtimes because of oil-based paint fumes but hip hip hooray.  We're over that mountain.

I took this a few weeks before we started priming:

So. Much. Wood.  Not even our modern-era furniture can make a dent in those aesthetics.  Instead of the furniture pulling the room more towards 2020, the room pulled the furniture back towards the disco age.  💃

Sometimes I feel bad for even wanting to paint over stained wood in great condition but, in this case, we're both so glad we did.  It's like a completely different room!

Patio Plans


We have been spending a ton of time outside on our back patio.  The weather down here has been really mild - 80's during the day but without the humidity that hangs out most of the year, it's been oh-so enjoyable.  So, naturally, I've been doing a lot of dreaming about the direction I want to go on our patio.  (Shhh...don't tell Anthony.  He always thinks I should focus on one thing at a time...ha!)  It's not the biggest space but we got lucky in that all of our (secondhand) outdoor furniture fits really great and creates a cozy atmosphere that just needs a little nudge in the right direction to amp up that coziness and make it a bonified, outdoor living room.  

table and chair set //  The brand is Tropitone and is still made - we were given this set from friends who had it handed down to them.  So, it's probably 15+ years old and still looks great.  Needless to say, if you want to invest in an outdoor set that will last, grab something from this company.  Here's their collection on Patio Living.  
umbrella* //  If you don't mind waiting, check clearance at the end of summer!  That's how I found this one!
sofa //  similar from eBay  I've found that bamboo furniture like this is often found on secondhand sites, at least around here.  I got both of these for $45 total! 
loveseat //  similar*

It's always really helpful for me to use Photoshop to create a mock-up so I can visualize my ideas.  I'm not even close to a pro when it comes to Photoshop (I use an older edition so I'm definitely not a pro...haha!) but I'm good enough to create a good glimpse, even if I need to squint to make the after even more realistic.  ;)

Here's what I came up with for our patio:

About a Door


About a door that only took us a whole entire week to hang.  Lemme explain.

Outside on our back patio we have a small closet of sorts that houses our water heater.  Right?  A closet outside for the water heater?  I thought it was weird too when we saw it but it turns out it's actually pretty common down here in the deep south.  The door on that closet was in major need of repair or replacing though - the bottom part of it was all rotted from the elements and since we moved in, a couple of the slats had fallen out.


Not the prettiest sight.

Not even with our outdoor furniture and a quick power wash helping to disguise its falling-apart state.

It's never been a priority to replace it but when we were painting this part of the exterior trim a couple of weeks ago, we decided to just remove and replace the door with a new one.  Neither of us felt like painting a crumbling old door was a good use of paint.  We had braced ourselves to spend at least $150 on a new door to match the old but then, guess what happened?

Depending on how well you know us, you might have guessed it.

House Exterior Update | One Year In

Whew!  March 2020, you are one for the books, right?  April and May etc etc will probably get the same association.  Yipe.  I hope you're tucked away from it all!  We are just trying to lay low and distant but have high hopes that this social distancing will allow us some good family time and maybe let us get a few more things done around here quicker than we expected.  For one, we grabbed exterior paint this morning so we're planning on a few weeks (or more) of sticking close to home and painting.  There's a bright spot in everything, right?  If you haven't never considered yourself a DIYer before, Covid-19 might bring it out of you!  :)  

In other news... 

We closed on our house one year ago!  That's seems wild to me.  Like, really.  And maybe it's because technically, we've only been living here for 10 months so we haven't quite hit the year mark there yet.  If you don't remember, we closed on our house a couple of months before we had to be out of our rental.  That gave us time to scrape all of those popcorn ceilings and paint before we moved in all of our furniture, which would've made scraping ceilings 100 times harder.

I'm going to write up a picture-loaded post of the inside and how it's changed in the past year but first, we're going to start outside.  The backyard hasn't changed much (here's a little update on some landscaping) but the back patio has and all with the addition of furniture and a little feng shui.  ;)

Before:

Currently:

Updating an Old Dresser | A Makeover

Right after we got married, Anthony and I shared a twin mattress on the floor in our first house because it was the only mattress we had (mine from college).  That set-up lasted a few weeks until we bought a new mattress and a secondhand bedroom set from a local thrift store.  We stripped the shiny varnish from the set of dressers and gave them a coat of satin poly to modernize them a little (key word:  a little).  You can see them in our first house tour.  We also added some new hardware I found on clearance at Lowe's.  (Was this the beginning of a lifetime of furniture makeovers?  Looks like it.)  We used that set for years and are still using the bed (though it looks a smidge different), but the dressers have hopped around the houses we've had.  The tall dresser eventually got traded for another tall dresser (that matched a long dresser we bought from someone online) and the long dresser went from kid's room to kids' room and landed in the living room in this house where it held the TV.  When I spotted a longer dresser on Facebook marketplace a couple of months ago, we decided to swipe up that one and swap it out with our old one in the living room.  Did you follow all that?  Basically, we still have this dresser we bought as newlyweds but now we have no place for it. 


It sat in the breakfast nook for a few weeks which drove us all crazy so, pushing all sentiment aside (which wasn't easy), we decided to sell it.  But it sat and sat and sat with very little interest.  *womp womp*  I might've been asking too much considering it still looks like it hails from the 1980's but I was trying to recoup the money we spent on that "new" dresser.

We knew something was going to have to change to get this thing out the door and we didn't really want it to be the price since it's in great shape and has great bones so...

The Best Painting Tools, Say Us

This post is a long time coming; one I should have written a very long time ago.  (Thank you Rebecca, for helping me realize it!)  We've painted a room, or a hundred, and we've pretty much got painting down to a science.  But the science of it all doesn't add up if you don't have the right tools.  That's how it goes, right?  The right tools will help you succeed!  #communitycollegeslogan

I didn't know the first thing about painting an interior room growing up (and neither did Anthony).  My dad made my siblings and I scrape and repaint our white farmhouse when I was ehh, maybe middle to high school somewhere (I hated it so much I must've blocked out the time frame) and that's the most painting I did until we bought our first house and dove headfirst into changing the color of 90% of the walls in the house...and then 100% of the walls in our second house, 100% of those in our rental, and now what will eventually be the walls (and ceilings!) in this house.


All that's to say, you don't actually have to have any experience in painting to start.  It's not that hard!  Yes, it takes a little bit of time and effort but as far as I'm concerned, the time you spend is money saved and the effort counts as a workout.  Win, win.  :D


So, without further ado, these are our tried-and-true, all-time favorite painting tools.  We've used all of them for quite a while, so there aren't any newbies here.  Just oldies and goodies.  ;)  

Breakfast Nook "Reveal"

Or really "Breakfast Nook So Far" because, as you'll see, we're not done in here.  There's still painting (doors and ceiling) to be done, furniture to find, and decorating to do but HEY, we have come a looong way from here:


And here:

Tiny, Tiny Home

Hey friend!  So, uh, yeah.  I know.  I’m supposed to be revealing the kids’ room.  That’s what you should be reading right now.  But you’re not.  I gave a short explanation over on Instagram the other day but if you missed that, basically, I ordered something for their room a month ago, got an email it was shipped from Virginia (or at least that a shipping label had been created) on October 30th, and that still have not yet received it.  I know I could just go ahead and share the final result but that thing is going to be a part of a big piece of design in the room and I just can’t show the room without it.  Sorry!  Hopefully when I get the reveal up and can explain a little further, you’ll understand.  I’ve since ordered from another company (and just got a shipping notification yesterday!) after contacting the first company multiple times without a response.  SO, the silver lining in this little mess is that the new thing will be here by mid-week and a reveal will be up on the blog by week’s end.  Huzzah!  Look for it!

I know I missed the deadline for the big One Room Challenge reveal but I’m not too sad about it.  I wasn’t in it for recognition or blog fame so there’s nothing lost in the delay and only a cute kids room gained in a six-week motivational scoot to a finish line.

Enough about that though, how about this little house?!IMG_7112

I had been very casually hunting for a dollhouse for the girls for the past year or so and, while the four kids and I were traipsing through a local thrift store here at the end of the summer, our eyes beheld this little house and it’s fine $15 price tag.  It was in great condition besides being a little dusty and VERY heavy.  Phew!   

Oh, and a little too frilly.  I realize that someone once painted this sweet little thing for some little person they loved and you can tell that A LOT of love and elbow grease went into it.  But, all of that love came in the form of lots of scrolls and sponge paint and that’s just not my language.  So, I changed things up a little.

One Room Challenge–Week 2

Week 2 of the ORC is here and, amazingly, I’m right on schedule (all the thanks to the two chicklets who have been taking awesome naps)!  My goal was to get the kids room painted before the week was over and bada bing, bada

BOOM!  Here’s what their room looks like right now!

IMG_9209
Yep, week 2 also saw me, not only painting their room but “bedazzling” their wall with diamonds.

I CANNOT WAIT to show you how those diamonds came to be and I will in my next post (pssst…it’s CHEAP & EASY!), but before I could even get to that fun part, I had to cover up the tan walls.  If you’ve ever painted a kids room before while it was being inhabited by said kids, you know, it’s muy inconvenient.  To get to the walls you have to completely upheave their room – move beds, dressers, whatever else they use on the daily.  For us, that meant moving the furniture from one side of the room to the middle one day and the other side the next day.  It also meant moving the kids into the play room and our room to sleep for a few nights.  (This is why, if I get the chance to paint before we move into our next house, whenever that is, I WILL.)

Swing Arm Lamps

Once upon a time we were having dinner with some friends and one of these friends asked me if I had any use for a pair of lamps she didn’t need anymore.  She had seen what I had done with some hand-me-down lamps before and thought maybe I could work wonders on these.  But before I could even get a word in, Anthony piped up with a resounding “NO”. 

So maybe at the time, we had too many lamps.  I was going through this cycle, which really wasn’t a big cycle, of rehabbing a couple of lamps, finding more lamps to rehab, and listing the former ones.  So sometimes we really had a bunch of ununsed lamps sitting in our house because some were awaiting a little love and some were awaiting a new owner.  And I was totally ok with it. 

Anthony though, well, he was not.  Understandable.

Why do you care?  Well because one day during those lamp-hoarding days I was walking through Goodwill with all (three at the time) of the kids and what did I spot?  These:

IMG_8386

They were marked at $8 for the pair.  Argh, I had to have them.  But I resisted the temptation because I love my husband so much.  But then those lamps haunted me and the headboard was a dream waiting to happen and I thought they might look so great with that headboard and so…I went back to Goodwill the next day, bought them, and immediately stuffed them under our bed when Anthony wasn’t looking.

And they stayed there for the next couple of years.

Doh.

Where We Eat

Rooms are starting to flow a whole lot better around here and I feel like it’s just added a greater sense of (superficial) peace when we’re constantly moving from room to room…which we do A LOT.  Of course that sounds ridiculous and you can’t really gleen peace from a house, right?  Or maybe you can?  Who knows.  Either way, I might be crazy but here’s the old view into the dining room from the “new” kitchen:

IMG_8943pix

It’s like there was an invisible line at the doorway in which all the fun stopped and all the boring started.

But now, NOW it’s one continuous space where decor harmony flows in, out, and all around:IMG_9161

White walls did the dining room good.  I painted them the same Pure White (Sherwin Williams) as the walls in the kitchen which was key in getting this pretty choppy room layout to feel, well, not quite so choppy.  Maybe cohesive is the word I’m looking for…

Here’s a better view of the whole dining room taken before we moved in:IMG_6821

Old, heavy curtains, tan walls, and all.

And here’s what we’re currently working with: