Showing posts with label Nursery. Show all posts

Wood and White

Here’s the story about the wood and white.  You might remember the girls’ hand-me-down dresser:nurserycollagedeets 009
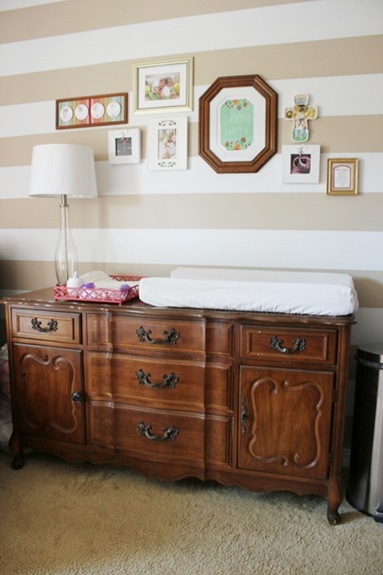
We went back-and-forth, from option to option, thinking of a bajillion ways we could update it.  We’re not huge fans of it’s ornate, curvy make-up so something needed to be done.  I even begged for your opinion of our final option(s) via Instagram, Facebook, and this post.  Well the landslide slid toward painting the drawers white, giving us a two-toned dresser.  Here’s how it all went on.

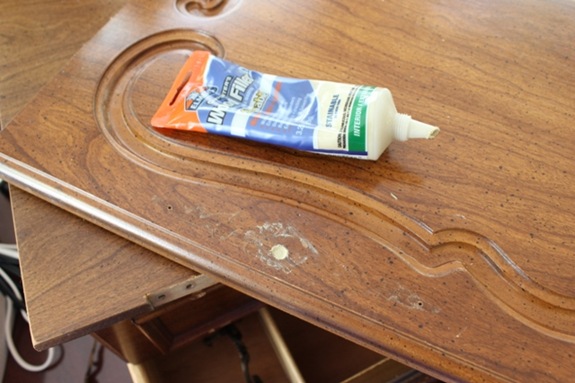
First we had to fill in some hardware holes with wood filler.  Put some tape over the backs of the holes, overfill, sand, fill a little more, and sand again for a nice flush finish.  We used Elmer’s wood filler from Walmart and a fine grit sanding block for the sanding. dresser 003 The two doors needed new holes that were centered between the door edge and the decorative groove and the two small drawers were just going to get knobbed instead of handled. 
Next step was more sanding.  I gave each of the doors/drawers a quick go over with a medium grit piece of sandpaper.  I seriously spent 30 seconds rubbing each door/drawer.  No big deal…thank goodness because sanding is not how I like to spend most ‘o my days. 
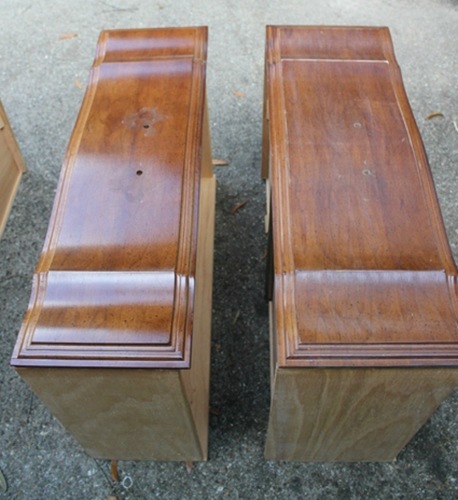
dresser 004The drawer 0n the left isn’t sanded; the drawer on the right is.  See the difference?  I roughed them up just the littlest bit to make sure the paint would stick.

Then it was time to protect.  I was planning on using spray primer and paint so I had to tape off and cover the insides of the drawers.  I also made sure to stick a little piece of tape behind each hardware hole to make sure no spray got inside the drawers through those.  The prepping was probably the most time-consuming part of this whole project because all we had on hand for me to cover with were magazines.  So I tape page-by-page-by-page…

Then it was outside with them where the real fun began.   dresser 006
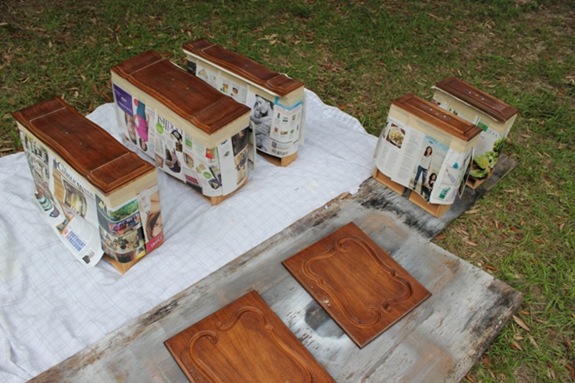
I used Valspar spray primer in white, spraying two thin and semi-even coats.  I’m not too picky on how the primer goes on as long as every inch is covered and it’s nice and smooth.  That being said, my prime jobs are usually a little splotchy albeit smooth.

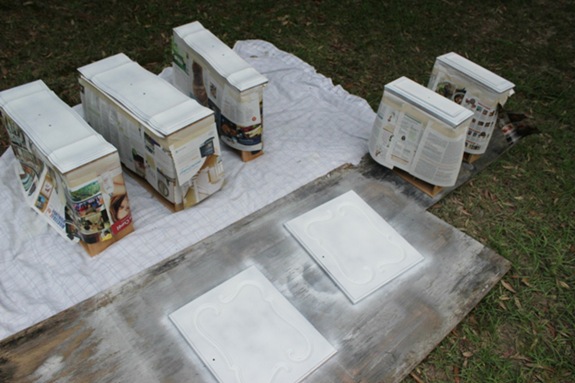
Here are the drawers all primed: dresser 008
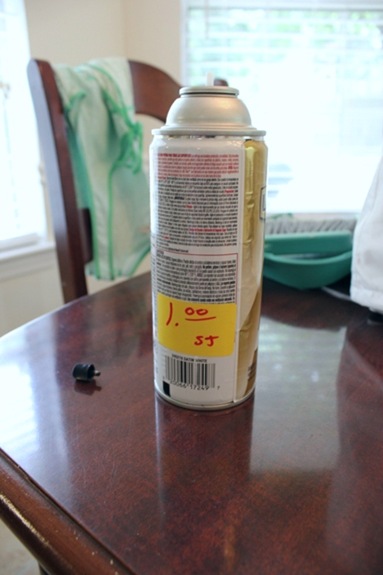
Next up, the real stuff.  I scored big with the spray paint for this project.  While picking up some landscaping plants a couple of weeks ago at Lowe’s, I found this can of white satin Rustoleum paint-and-primer-in-one.  (Side note:  I still used primer even though I had a p-and-p-in-one so I didn’t have to use as much paint and because I had it on hand anyway.)  It was marked down to $1 because it was missing a nozzle. 
dresser 007

Vvell, if you know me you know I’ve got a stash of spray paint therefore a stash of nozzles.  I simply borrowed a nozzle from another can and away I sprayed.  HOWEVER, even though I grabbed a nozzle from a can of the same exact brand, I still managed to get paint allllll over my right hand as it dripped from the nozzle.  I learned that I had to press and hold the borrowed nozzle perfectly straight or paint would drip.  A little annoying but still totally worth the $1 investment.  I might also mention that this Rustoleum paint and primer-in-one is theee BEST spray paint I’ve ever used!  It sprayed smooth and covered so well!  I’ll definitely be using this kind next time!

Beside the paint all over my right hand (which I donned for two days afterward despite a shower), I had one more minor happening.  While I was inside waiting for the second-to-last coat of paint to dry, the wind whipped two corners of two covering magazines up and onto the wet paint.  Grrr…  When I went out to check for dryness, I found them and ripped them off only to have a little paper left behind. dresser 010
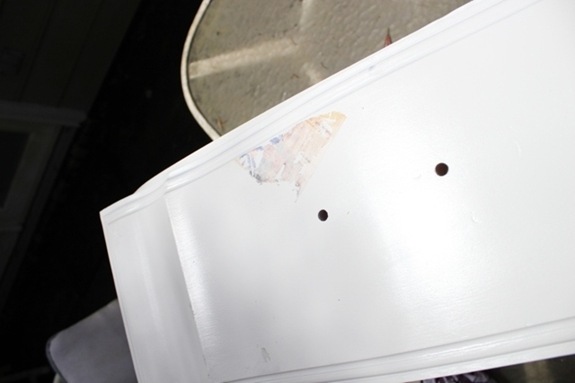
So, adding another step to my almost-done process, I had to sand the area where the magazines had stuck after the paint was completely dry (I was so annoyed I actually called it quits for the day and did the sanding and re-painting the next day) just enough to remove most of the paper.  I didn’t sand all the way to the wood because I didn’t want an obvious dip in paint nor did I want to re-sand the entire drawer.  So, I sanded until smooth and put an extra coat on the drawer while doing the last coat on the other doors/drawers.  All good.

After letting the drawers dry for a full 24 horas, we stuck hardware on them and admired our new beauty.
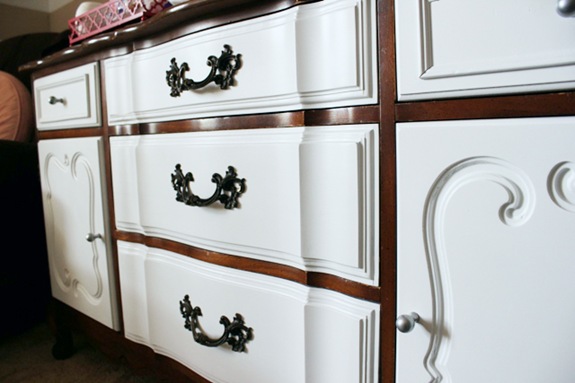
 dresser 041

Cost breakdown:
Dresser:  f-r-e-e (hand-me-down)
Primer:  already had
Paint:  $1
Sandpaper:  already had
Total:  One Dolla…Holla!

The hardware won’t stay, it’s only temporary.  I’m on the hunt for some so I’ll be sure to update y’all when I find it.  Until then, we’re loving the white-and-wood combo despite the needs-to-go hardware. dresser 044
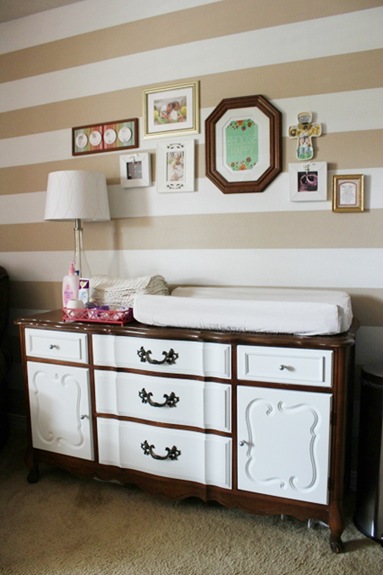
So what about you?  Painted any dressers lately…or any furniture for that matter?  I’m always all eyes for pictures!  What about clearanced/oops paint?  Anyone ever score any?  I’m gunning for the “oops” paint section first thing next time I’m in Lowe’s to hopefully find more!

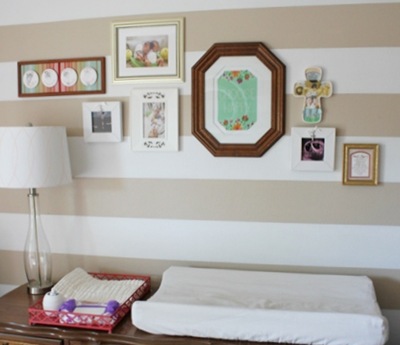
Fill ‘Er Up

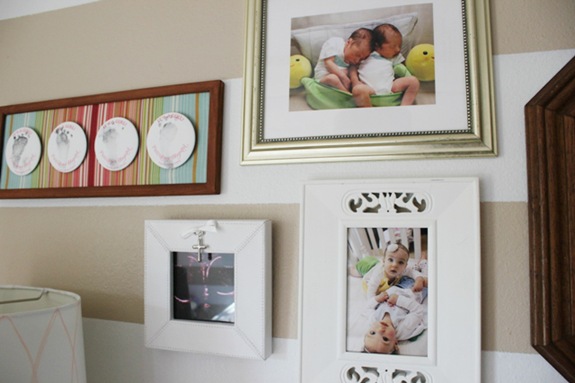
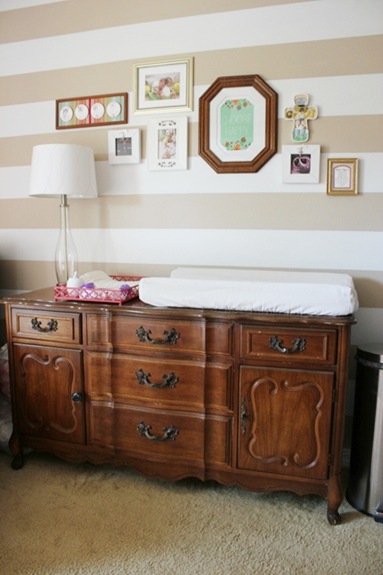
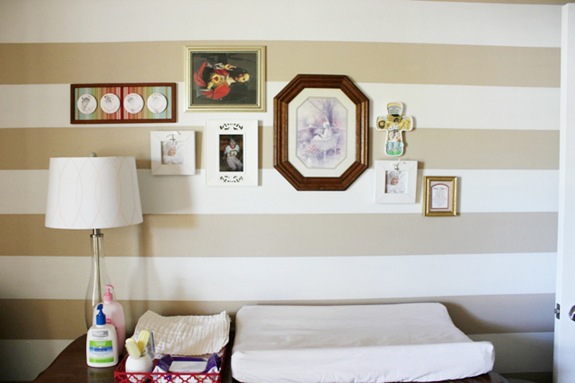
I got all of the frames in the nursery collage filled – out with the generics!  To see how I hung the collage, click here.
nurserycollagedeets 005

It didn’t turn out exactly as I had planned…I feel like all of my projects have little hiccups these days.  The girls in the pea pod picture was supposed to be an 8 x 10 but when I saved it way back when, I saved the file smaller than I intended (so sad considering it’s the only copy I have) and the largest I could print without it being super-blurry was a 5 x 7.  I didn’t plan on having to mat it considering the size I wanted it so I simply placed it over a white piece of copy paper I cut to size. 

nurserycollagedeets 006

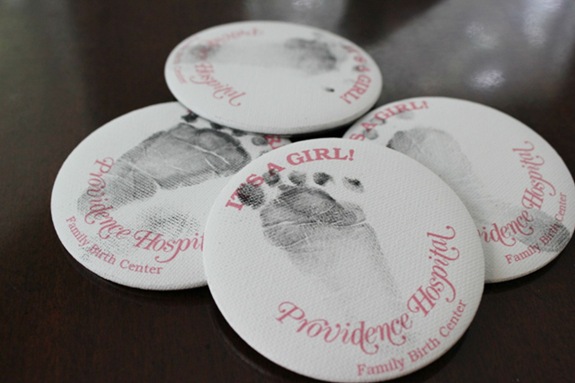
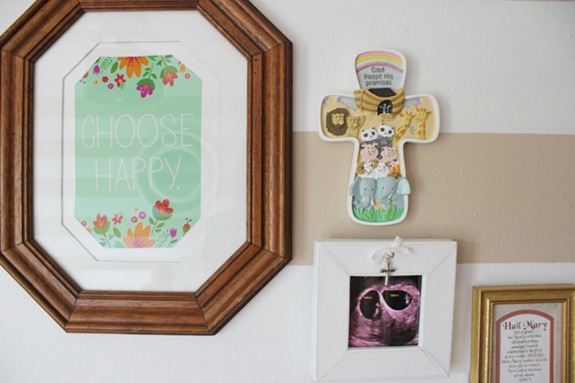
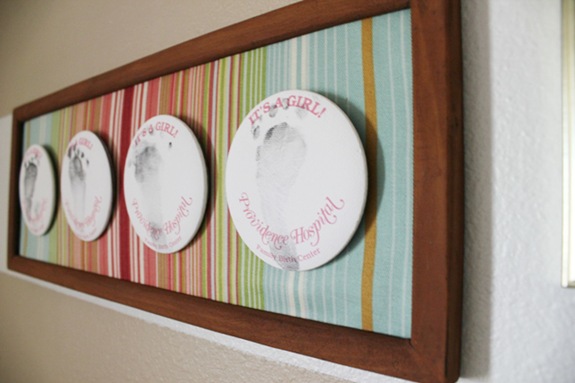
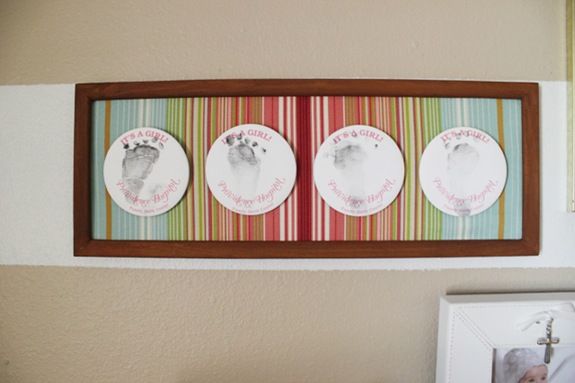
The little square frames on both sides hold ultrasound pictures of both girls, the one on the left is a picture of the tops of their heads together and the one on the right is the first ultrasound we got that told us we were going to have our hands (and hearts) full with twins!  I used pixlr.com to put a pink filter over them and was planning on lightening them just a little but forgot.  The frame on the far left is the one I tried coffee staining and holds these foot-printed buttons we got from the hospital after the girls were born:nurserycollagedeets 003

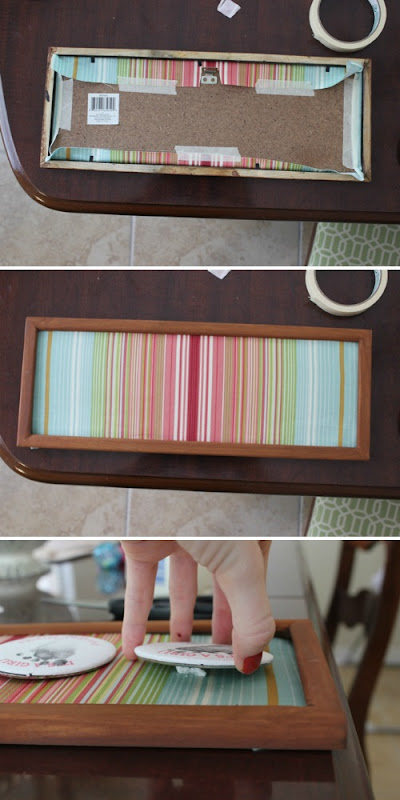
I took out the frame glass, wrapped some leftover fabric around the backing, and used some washable tacky glue to glue the buttons to the fabric (I accidentally glued Cecilia’s feet on backwards…oops!  Good thing it’s washable glue!) wrapnglue

I used this free printable in the octagonal frame, another one of my hiccups.  Since we were out of ink, I printed all of the pictures out at Wal-Mart.  The word art downloaded as a .pdf file and so I had to use some online service to convert it to a .jpeg and after it’s conversion, the background color was a little more green and darker than it’s .pdf version…hmph.  Then I assumed that it’d fill the frame as an 8 x 10 but I was wrong (always check before you print…duh).  I had to extend the existing mat (which I spray painted white) with some more copy paper to make up for the size difference.  It’s not my fave.  I might swap it out for my own painted rendition one of these days.

nurserycollagedeets 007

Even with the minor issues though, I do love it.  The best part is that the whole thing only cost me about $6 in picture printing and $3 for the octagonal frame (thrifted).  The other frames and cross were either gifts or hand-me-downs.  The collage is hung high enough that the girls can’t reach it while being changed and once potty-training has commenced and the changing pad goes away, I can always add to it.  For now, it’s one more thing checked off the nursery to-do list.

  nurserycollagedeets 009

This and the mint wall in the kitchen are the two out of four tasks I completed after last week’s coffee-induced motivation.  I’ll be back sometime this week to dish on the other two.  I’m going to need some input so please come back and give me yours! 

Stain and Sniff

I finally got around to mounting a collage ‘o frames and such above the changing table in the twins room.  No more bare walls!  The rest of the house though…very naked. 

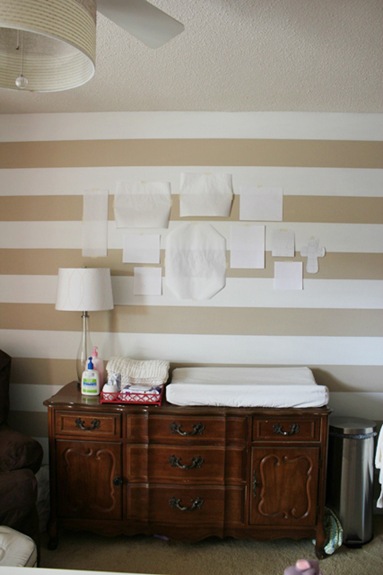
To figure out a layout, I simply grabbed some frames from our (large) unused stash, traced some onto an old calendar and some onto freezer paper and hung the paper cut-outs up, rearranging as I saw fit. 

This was my first I-think-this’ll-do:
collage 001

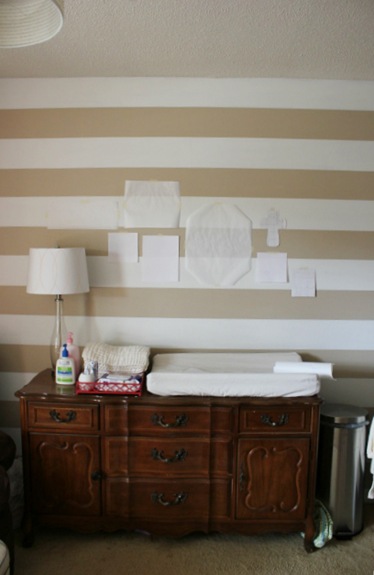
But after looking at it for a week, it felt a little too busy.  So, after sticking and unsticking a hundred times over, I came up with this:
collage 002

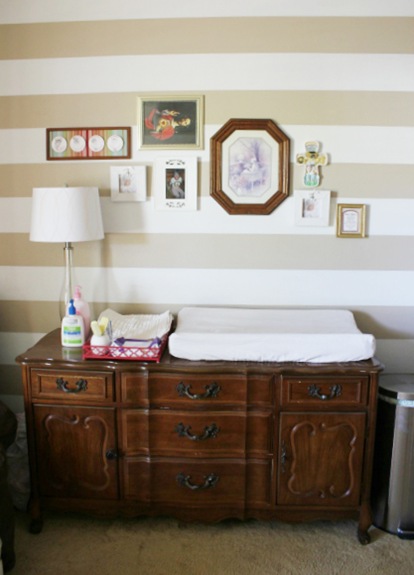
Up and at ‘em and here it is now:
collagetoo 007

 collagetoo 006 

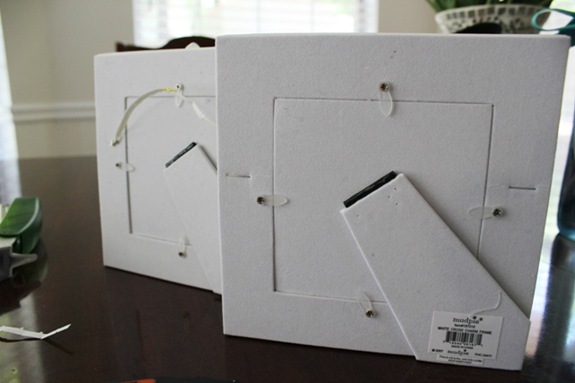
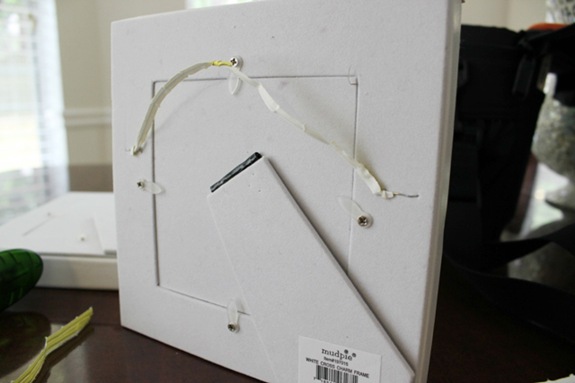
I made sure the whole thing was high enough that little hands wouldn’t be able to smash and grab whilst being changed.  Some of the frames were gifts including the cross, the large geometric one was thrifted awhile ago ($3), the small gold “Hail Mary” one was a gift to me from my dad, and the rest are hand-me-downs from various family members.  A few of the frames were table frames only, meaning they were lacking hanging hardware.  After digging around and coming up short for any hardware, I made do by shooting a few staples into the back sides of the frames and attaching some twisty-ties (for the life of me, I couldn’t find the picture wire I know we have somewhere…time to reorganize).  It worked perfectly and no one will ever know…except you!

  collage 006  collage 005

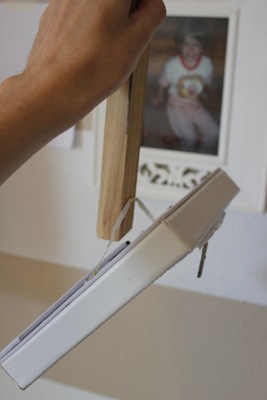
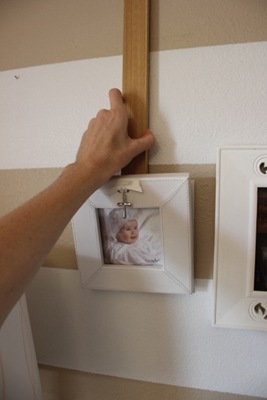
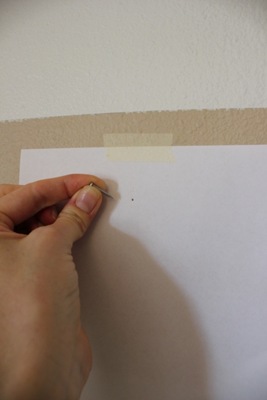
To hang the collage I used the same pinterest-inspired technique I used to hang the collage in our dining area – my handy dandy picture hanging scrap of wood.  Basically, I hammered a nail through the end of a thin-ish piece of wood to which I hang the picture at hand.  Then I just tapped the picture very lightly to puncture the wall (or paper) behind, showing me where my nail should go – no measuring required, just like I like it.

collage 007 
collage 008 
collage 009

I have yet to fill the frames with artwork and pictures but so far so good.

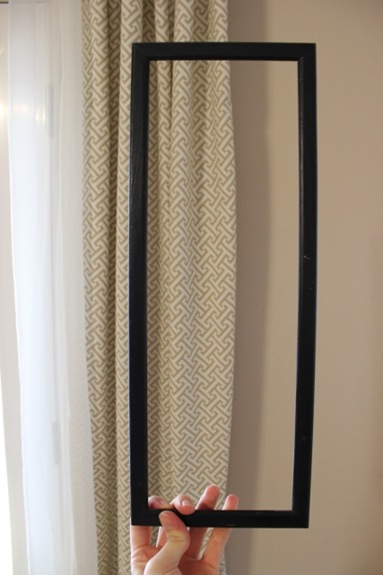
Moving on, let’s talk about the dark frame on the far left and get to the stain and sniff part.  It initially looked like this (I took the glass and back out for the following project): collage 010  
(Except in real life it’s not really bowed…thank you camera.)

However, I’m going for white, gold, or wood frames in this collage so black has no place.  So, the first step was sanding it down to the wood.  I thought a nice dark stain would be perfecto to tie in the dresser but I don’t have any wood stain on hand.  Lucky for me, my genius sister once used coffee to stain a wood frame (she had an awesome tutorial on her blog but she’s currently on vacation from blogging…boo!)  So, I winged it (wung it?).

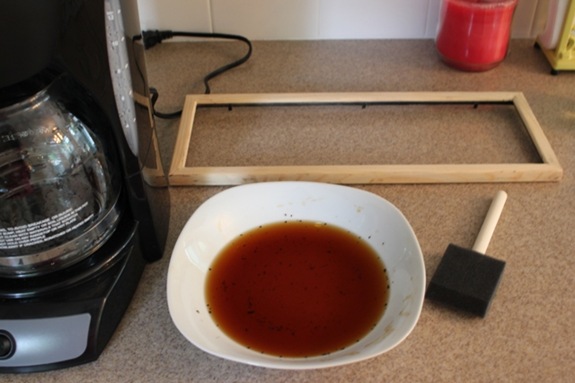
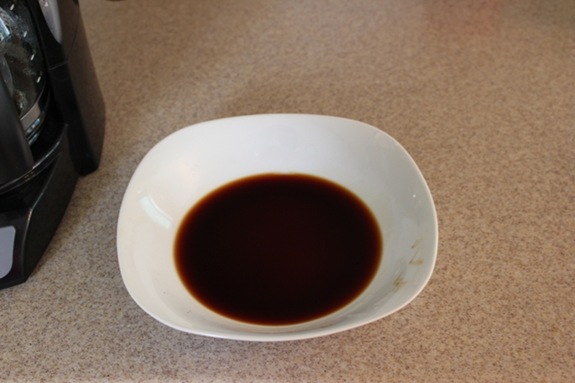
First I ran 1/3 cup of water through the used coffee grinds of our daily joes one morning this week to get this:
collage 011

Then, using a foam brush, I simply brushed the coffee over the frame without wiping it off and letting it dry in between coats.  One coat, barely a difference.  Two coats, no change.  Three, nada.  The wood just looked wet.  Time to change gears. 

I needed a darker mix and I wasn’t about to go brew a ton of our good coffee just for painting so I rummaged through the fridge for the decaf we have hidden away from pregnant days past and scooped six tablespoons into our maker along with pouring in a 1/3 of water.  Muy darker, no?collage 012

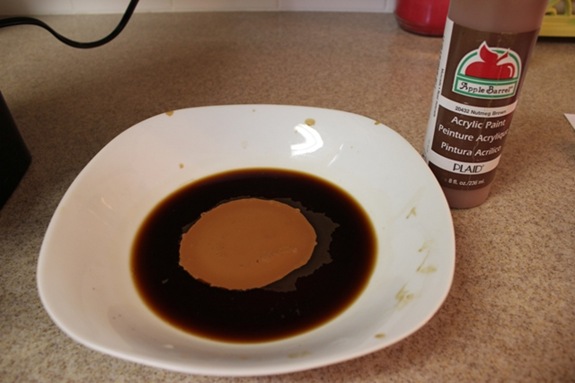
One coat, eh, a little darker.  Two, the tiniest bit darker.  Three, the tiniest bit more.  At this rate, I’d be brushing coffee for daaaays.  So, I let my impatience get the best of me and threw a tad bit of brown acrylic paint into the coffee.
collage 013

It worked but I’m not liking the color.  It’s got some ugly hint of red or orange or poop in it that’s just not flying with me so I’m skipping the clear acrylic layer and getting the white spray paint out as soon as I can to change all that.
collagetoo 012

Until then, I’ll chat you up some more and tell you about the buttons.

When the girls were born, the hospital gave us the above button pins that had the girls tiny footprints stamped on them.  I thought it’d be fun to display them so I wrapped some leftover fabric (from this project) around the backing of the frame and glued the buttons to the fabric with washable glue in case I want to switch up the art someday…ooooor until, while looking at the pictures I’m posting, I realize I glued Cecilia’s footprints on backwards:collagetoo 011
Oops on the right.

I think the whole thing will look much better with that white spray paint that’s coming it’s way but until then, I’ll bask in the smell of coffee stained wood for a couple of days.  I’ll be working on filling the rest of the frames this week, including sideways Jesus, and writing up a post all about it.  Also, I’ve got some pretty grand painting plans this week so stay tuned!

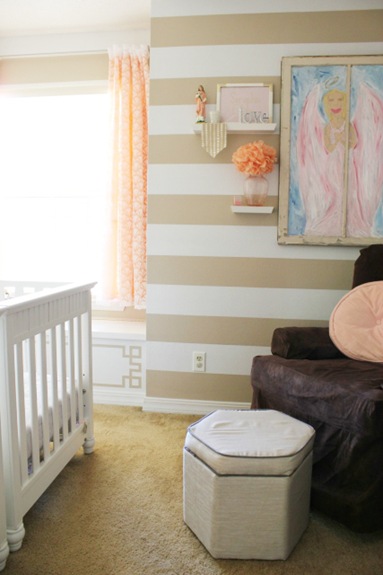
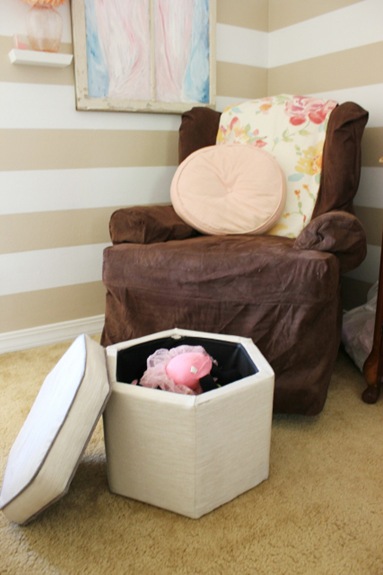
And just because I don’t think I have quite enough pictures, here’s one more nursery update.  I found this Target ottoman at Dirt Cheap for $20. 
collagetoo 009

My plan was to sew up a pouf for feet-resting but when I saw this and thought of the storage potential, I couldn’t resist.  Cute, huh?
  collagetoo 008 

Now the only thing that remains to be asked is, has anyone ever used coffee grinds to stain wood?  How’d it turn out?  Maybe it looks great like my sis’ project or maybe the only thing it should’ve been paired with is some delish creamer.  Speaking of, coffee’s sounding really good to me right now so I’m off to brew a cup.  Anyone else? 

.           .           .

P.S.  Cassity at Remodelaholic asked to know what everyone’s working on these days via a link-up so I’m heading over to spill it!

Painted Glass

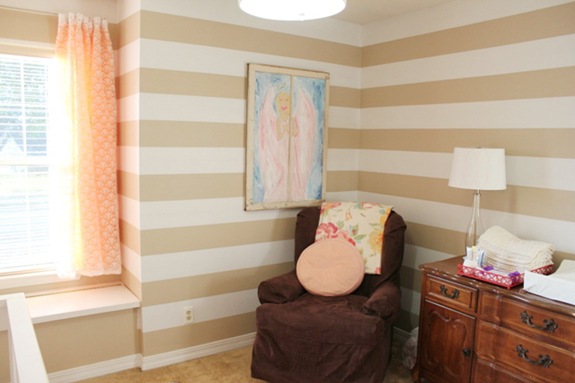
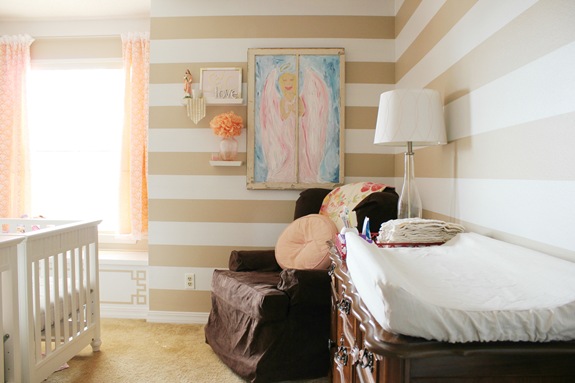
Our first order of hanging-business in the twins room was getting the big painted window pane up.  A friend gave it to us for the nursery and so we couldn’t wait to get it up.  I even had the perfect spot…

feb82012 008

…and then the stud-finder shattered my decor dreams by telling me there wasn’t a stud dead center in the middle of the far wall.  Ever had that happen to you?  You want to hang something heavy somewhere, you go to find a stud, and the only one is like a foot to either side?  It’s one of my decorating pet peaves.  Either way, my two options were 1) rip out the wall and put a new stud where I wanted it or 2) improvise.  After pleading my option #1 case to the handy man around here, I took my shut-down to option #2.  I know what some of you are thinking, “Why didn’t you just use a heavy-duty dry-wall anchor?”.  If you came over and lifted this thing, you’d know why.  It’s a beast!  To be honest, we probably could’ve gotten away with a super-super-super duty anchor but I wasn’t taking any chances.  The last thing I want is a glass angel crashing into me while I’m rocking away. 

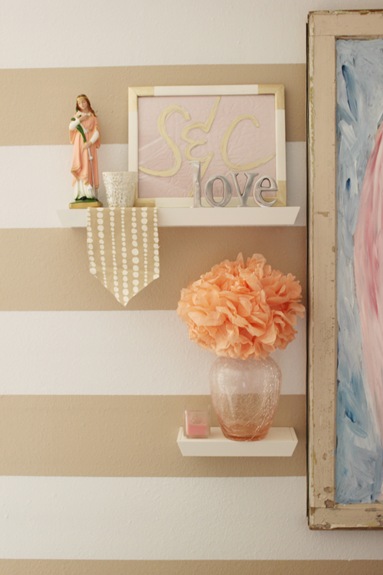
So, back to option two – improvising.  That’s exactly what we did when we added these Target shelves I found for $3 (at Dirt Cheap) to the left side of the painted window last weekend:nursery32013 004 
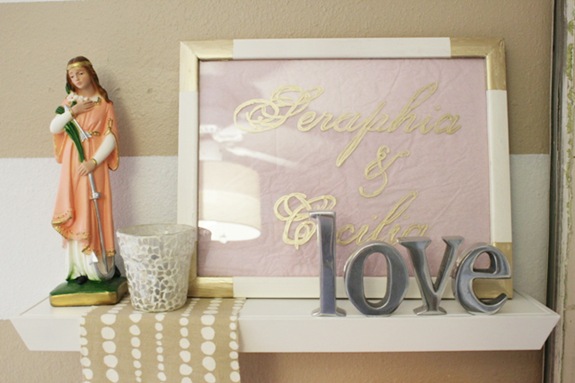
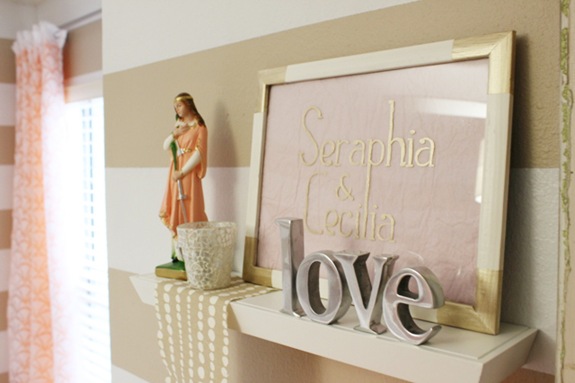
To accessorize them I just used things we had laying around – a St. Philomena statue (love that girl), a candle from my sis, a piece of fabric I cut out from a tablecloth, metal l-o-v-e letters I found at Goodwill for a few cents a long time ago, a candle votive and vase from my mom, a tissue paper pouf (good tutorial here) made for my baby shower by my friend Jenn, and a jazzed-up Dollar Store frame showcasing some homemade, 10-minute art.

Today you’re gonna get to know the art and how that all went down.  You see, when we put these shelves up last weekend, I needed an easy way to fill the frame so I simply place a few sheets of tissue paper inside and then painted the girls’ initials onto the front of the glass with the same gold paint I used on the mirror over their bed and the corners of the frame, which I’ll get to later.  I got the idea from it’s side-kick, the angel painted on window, and thought it’d complement her by copying.  Not to mention that down here in the South, monogramming is the bees knees so I figured I’d semi-cave to that trend.  At least everyone knows now that “s & c” live here, right?

nursery32013 001 

But, I wasn’t in love with the way the initials turned out – I meant to make them smaller – but this was a late night project and I wasn’t in the mood to re-do them.  So, the next day I snapped some pictures for the Fresh Coat of Paint feature and went on my merry way.

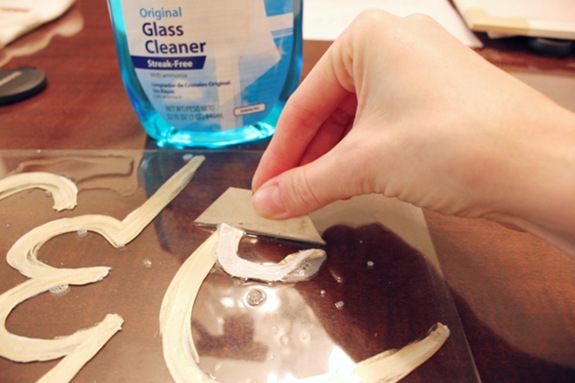
A couple of days passed and, perfectionist being my middle name, I had to do something about my frame art.  Since I had just painted right over the glass, removing the initials was as easy as spraying some glass cleaner and sliding the paint right off with a razor.    frameart 003

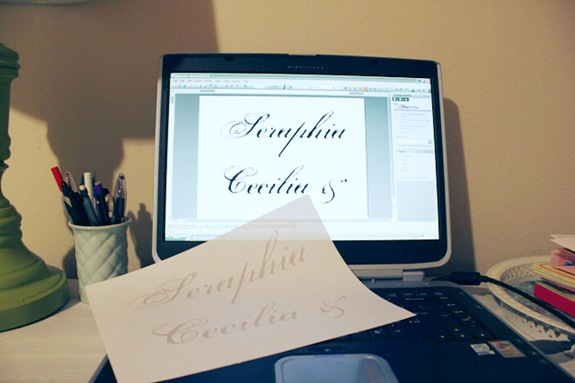
This time around, instead of trusting my free-hand again, I went to work on Word where I simply typed up the girls’ names (free font:  Porcelain), printed it out…

frameart 002 

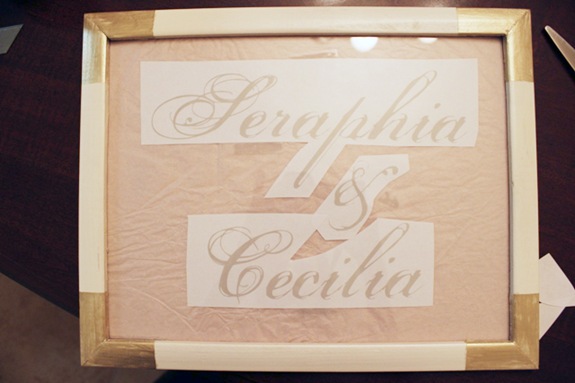
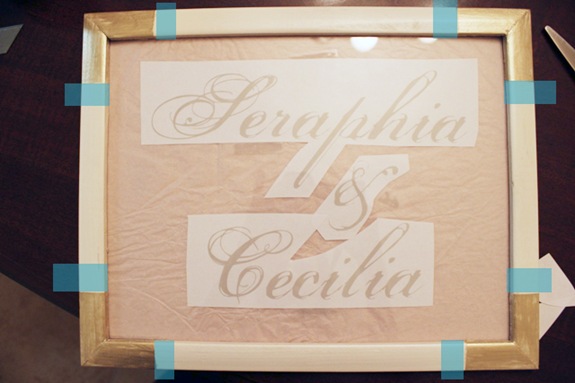
…cut out each word, and taped them underneath the frame glass to be painted over like so:frameart 005 

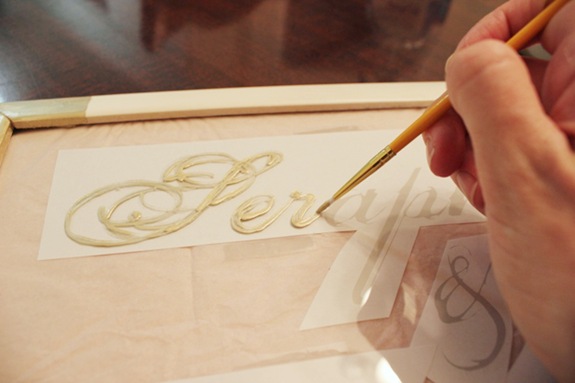
Then I got out a smallish paint brush and started painting right over the letters.frameart 006

Ten minutes later it was done and up.frameart 009

And, once again, I wasn’t satisfied.  "Seraphia” was a tad crooked and the whole thing a tiny bit off-center, and all-in-all a little fancier than I thought it’d be.  So, a glutton for painting, out came the glass cleaner and razor for another go at it and off I went to Word, where I created these two new designs:

options

After  much debate (inside my own head of course), I ended up going with…frameart 010 
…option #1 (free font:  Matilde except for the ampersand which I randomly picked).  I painted it on the same way I painted the previous design, but instead of cutting each word out, I stuck the whole document behind the frame to make sure everything would be nice and straight.  So easy and just imagine the options.  You could print just about anything, paint over it, and have some great looking art…and then you could get out the glass cleaner and do it all over again, and again, and again…fun, fun, fun.

And that’s that…but wait!  The frame.  I could’ve sworn I took pictures of how I painted the corners of my $1 frame, but alas, they are not to be found.  Either I hid them from myself or I’m just losing my mind.  Probably the latter.  But, in case you’re interested in knowing, all I did was lay pieces of tape a couple of inches from each end, painted within the taped areas, and removed the tape (while the paint was still wet to reduce peeling).  I whipped up a little diddy in pixlr.com for ya below to further explain:frameart 005tape
The blue lines represent where I taped.  It was a super-easy way to dress up a frame and I love how it turned out.  I’m thinking I might have to do the same elsewhere in our abode.  Maybe a whole gallery wall?  Who knows. 

Anyway, that’s the story on the shelves and their contents.  My nervous twitch cause by the off-center angel is now settled and it’s on to the next (and final) wall of the nursery – the one over the dresser.  It’ll have a frame collage with a side of unconventional art.  Stay tuned to see how that turns out!

Until then though, I’m off to brush my teeth, put some real clothes on, tame my hair, etc… (the stuff I should’ve done before I sat down to blog… lucky for you, we’re separated by a whole world of web) before the twins wake up from nap numero uno. 

Have a great weekend y’all!!!!

P.S.  I’m back (still have to do the aforementioned things) to tell you that you have to check out my Godchild, you simply have to.  If you need a smile, you’ll find one, an ab work-out/laugh, you’ll get it, fashion ideas, you’ll get them, a sense of care-free living, you’ll get that too.  GoI promise you won’t be disappointed!!!!!!!!!!!!  (Just one more.)  :)

The Cheapest Mirror of Them All

Before I dive into the details of this mirror on the wall, Deme is featuring the girls’ nursery today over at her blog, Fresh Coat of Paint!  There’s some never-before-seen shots of their room and a few updates that we spent last weekend completing!  You should go check it out…but make sure you’ve got some time on your hands when you do because you’ll get sucked in to the all of the beautiful details of her home and all the diy that goes on over there just like I do!  My favorites are the curtains she made from a duvet cover, her stenciled and painted interior door, and her polka dot closet.  Needless to say, she’s making me seriously consider switching out our plain curtains for some bold black and white’s, every door in our house is yearning for some tape and paint, and you might venture over to see the girl’s closet dotted with gold one of these days.  :)

.           .           .

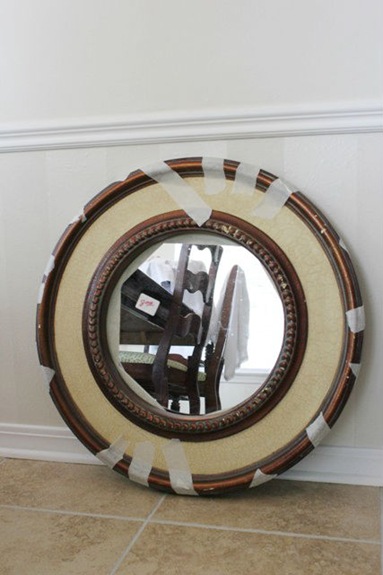
Remember the $8 mirror I found at a thrift store while on an excursion to visit my sisBeller Girls2

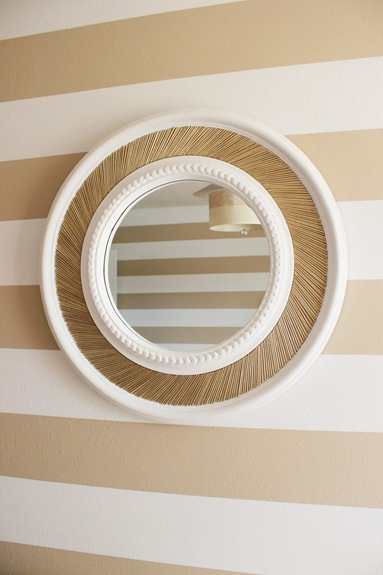
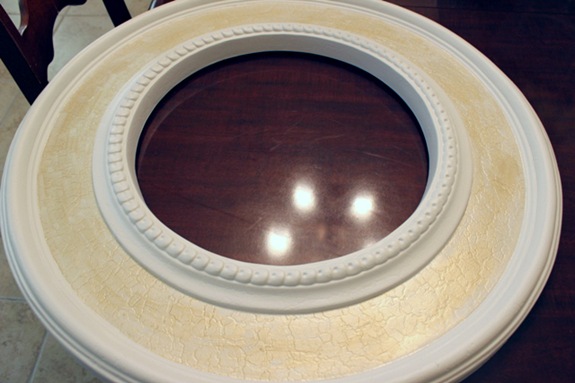
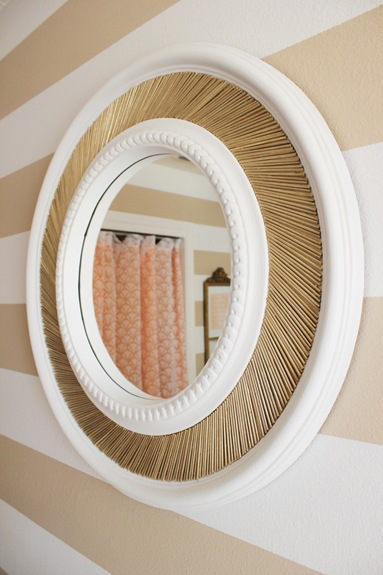
Well, it lost the dull and took up the glam in a whirlwind diy project that took me much, much longer than I anticipated…or that I wanted.
nursery32013 013  
Big change, huh?  The hours of naptimes and bedtimes spent working on this thing paid off!

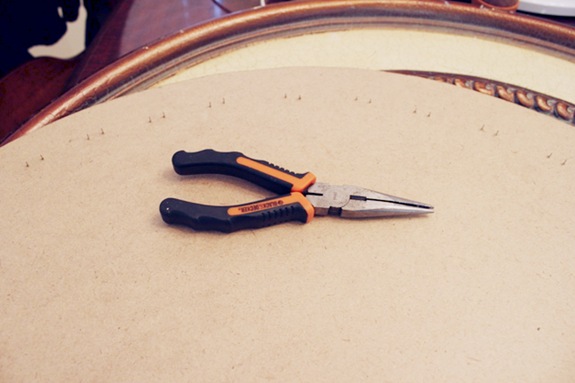
To get it to where it is now, I first had to rip off all the tape holding it together and rip out the staples that someone thought would maybe hold the back on…they obviously didn’t hence all that tape.  mirror 001

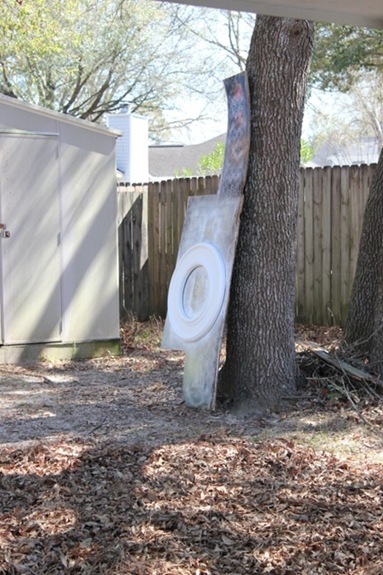
Then I gave the frame a good scrub down and the two of us took it outside where it got a coat of primer (Rustoleum)…mirror 002

…followed by a few thin coats of white spray paint (Valspar   cZ VJ UMMMMMMMMMMMMM—>thank you Seraphia—in a satin finish).
mirror 003

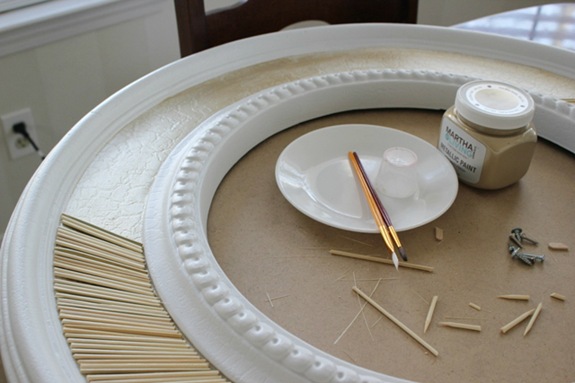
Then I got my inner King Midas on and gave the recessed area of the frame a few coats of gold.mirror 004

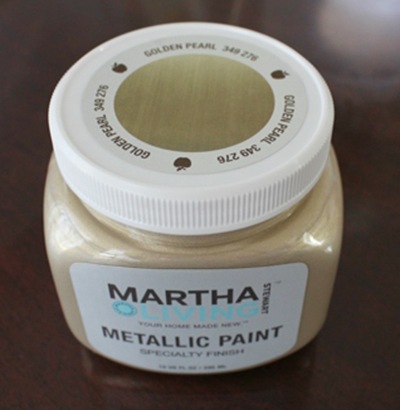
All thanks goes to Deme, who introduced me to this maaahvalous paint from Home Depot:mirror 014

(Speaking of gold, Anthony once told me, during a conversation about investing in a house, that “You can build a house out of solid gold but that doesn’t mean you’re going to get every penny you put into it back out when you sell.  It all depends on the neighborhood.”  Well, we’ll see about that mister.  You might come home to a gold house courtesy of Martha Stewart and her metallic paint one of these days.)

Anyway, there’s more gold in the imminent future so keep reading. 

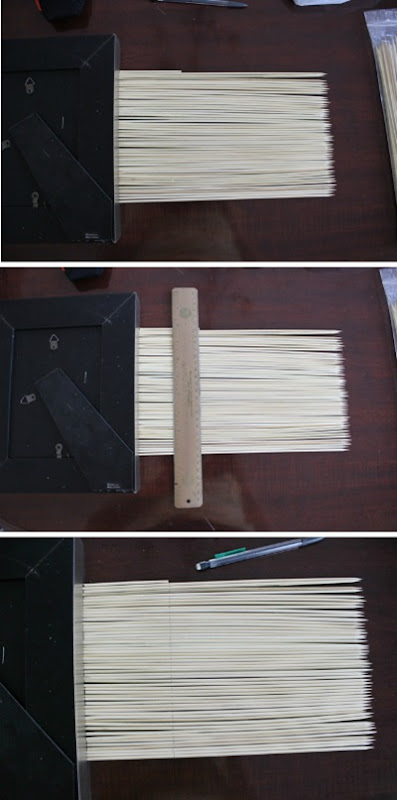
Next up was hatching a skewer-to-mirror plan.  I wanted to do something unique to the recessed area, something on top of just painting it gold so, I went to the local grocery aisle #8 and picked up some 12 inch skewers.  Of course I couldn’t do anything with a whole twelve inches of bamboo so I cut them into four inch pieces.  Using one, cut skewer as a guide, I laid out a bunch of full-sized ones in a row with the rounded ends against a picture frame, laid a ruler over the top of them, and penciled a line along them.  It went a little somethin’ like this:   cuttingskewers 

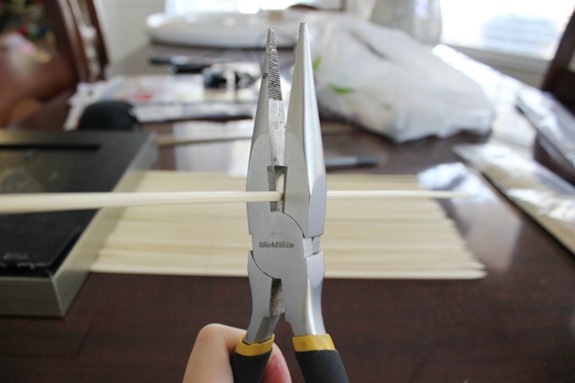
Then I painstakingly cut along the penciled mark on each skewer (and cursed myself for having and executing this idea in the first place) until I had over 300 four inch pieces of round bamboo.  mirror 012
(Side note:  Take a hint from this smarty pants here and, if you ever decide to use short pieces of wood to adorn anything, go buy yourself some toothpicks on Amazon…they come in lots of sizes!  Until you do, I’ll be shaking my head at my impatient and desire to do it the hard way.)

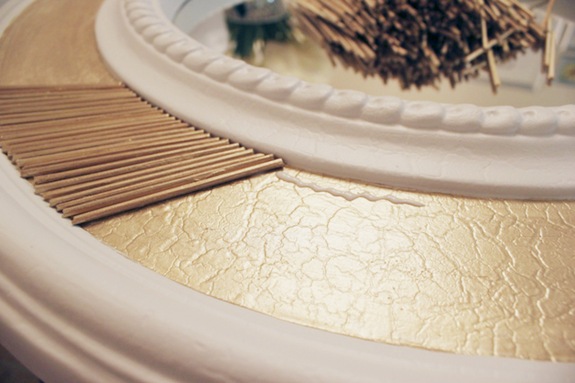
After I had all of my skewers cut (and a case of pre-arthritis setting in), I did a dry fit onto my mirror frame to make sure my idea would actually work and look decent (translation:  Anthony was skeptical and made me question myself).  For a little flare, I laid each skewer at an angle so that each end was touching the edge of both sides of the recess, like so:mirror 005

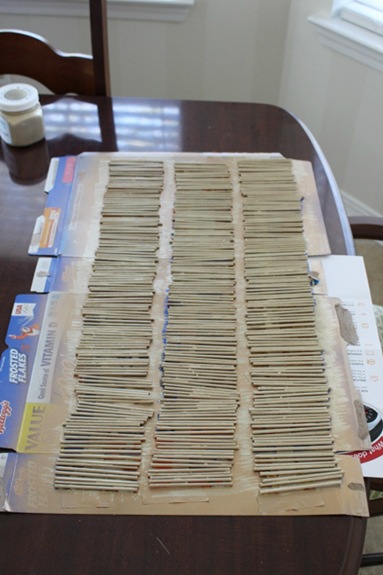
So, hour 53094 into this crazy project and here I was, needing to paint the skewer pieces.  Are you surprised?  You didn’t think I was going to leave them did you?  I debated staining them a deep, dark brown but, oh no, I love that gold paint to no end.  However, it’s the littlest bit opaque when it goes on and so, to save me the insanity that would’ve been brushing 3+ coats of it onto hundreds of small bamboo rounds, I first coated them with a layer of gold spray paint followed by Martha’s tub ‘o goodness.  Tony the Tiger helped with this step.  I used his box to tape three strips of masking tape upside-down to which I stuck the skewer pieces to hold them in place while painting.  It worked GREEEEAAATTT!!  (Cheesy?  Yes, that’s me.) mirror 013 

Last and late last Friday night, I used regular old Elmer and his glue to attach my gold sticks to the mirror frame.  I made sure to only place the glue close to the inner edge of the recess, where the sticks were closer together, lest it be seen through the spaces towards the outer edge.mirror 015
My initial thought on using Elmer’s glue was that it’s washable so, in case the desire strikes to ditch the skewer pieces someday and go with something else, I can simply pluck them off and wash off the dried glue residue.  However, after seeing the finished product, I don’t think those skewers will ever be coming off.  :)

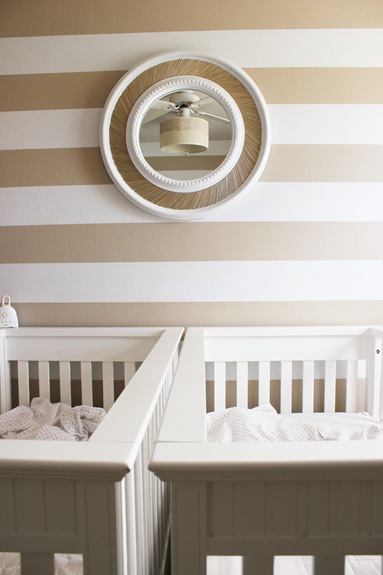
So, after attaching every last stick and letting the glue dry overnight, Anthony attached the mirror to the frame with some caulk (we would’ve used glue but the mirror is relatively light and I like the idea of having it semi-removable in case I have the urge to re-paint the frame someday…) and then attached the frame backing with three screws drilled into the back of the frame.  We hung it centered over the girls’ cribs, where there wasn’t a stud (grrr…) so we made sure to use a heavy duty drywall anchor.  Luckily, the entire frame + mirror weighs around 15 lbs. so the super-anchor is a little overkill but it’s better to be safe than sorry when you’re dealing with cute, little chicklets?  Am I right or am I right?

nursery32013 012

What do you think?  The pictures don’t do the glorious shine of the gold any justice but I absolutely love it!  I swore to myself over and over and over that I’d never do something like this ever again in-process but after seeing the show-stopping result, I’ve changed my mind and just might be crazy enough to take another stab at it someday.

And, as the title alludes to, here’s the jar-full of change it put us back:
Mirror:  $8
Skewers:  $4 (two packs and we still have half a pack left for summer shish kabobs…yum)
Gold Paint:  $6 (not even sure this counts since I used like 1/20th of the jar)
Spray Primer:  free (already had)
Spray Paint:  $4.50 (still have over half the can)
Grand Total:  $22.50 (or $14 if you subtract my actual usage of material)

I think “The Cheapest Mirror of Them All” about covers it, huh?nursery32013 009


Anyone else tackled a mirror revamp lately?  How about using skewers as decor?  Fallen in love with gold metallic paint?  Crazy mom of two or more hopelessly addicted to decorating and doing?  Anyone…?  Anyone………….?

.           .           .

P.S.  It’s party time!!  I’m pulling this one out of the archives and linking up with East Coast Creative’s Upcycle link-up