Showing posts with label Nursery. Show all posts

Not Mythology, or Salad, or Big, Fat Weddings

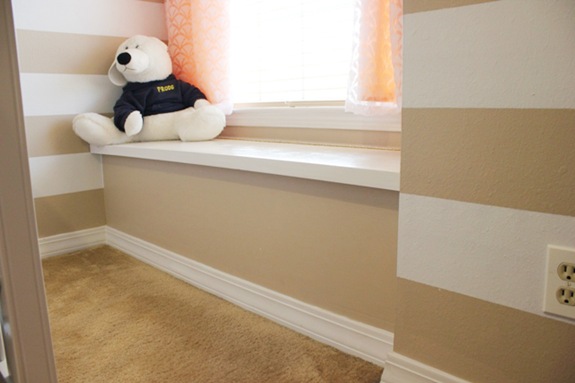
Nope, even though I love me a good greek salad, this post has nothing to do with those and everything to do with the window seat in the girls’ room.  I’ve had it on my to-do list to paint it white for awhile now, an easy project that just got pushed aside.  feb82012 003

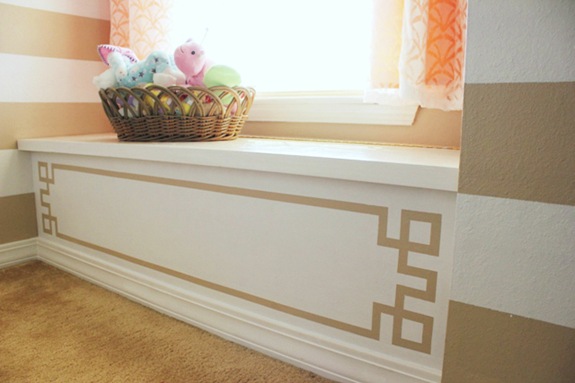
Then that “easy project” picked up a little more time and effort as I threw around stencil options and whatever else my brain could conjure up.  I finally settled on taping off a greek key design to add a little more pattern and punch to their room.
wandgk 002

Per the usual, here’s the what and how:

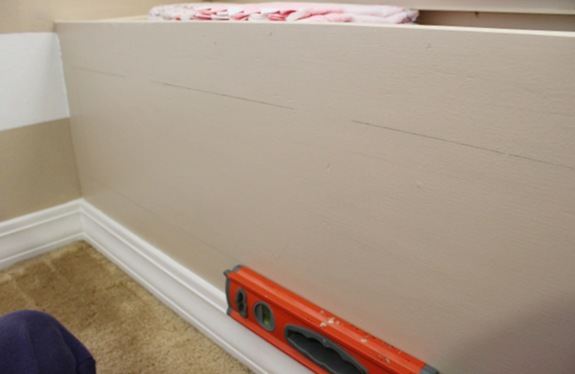
First, I drew a big’ ole box close to the perimeter of the front of the window seat using our level to make sure my lines were on the straight and narrow.wandgk 003

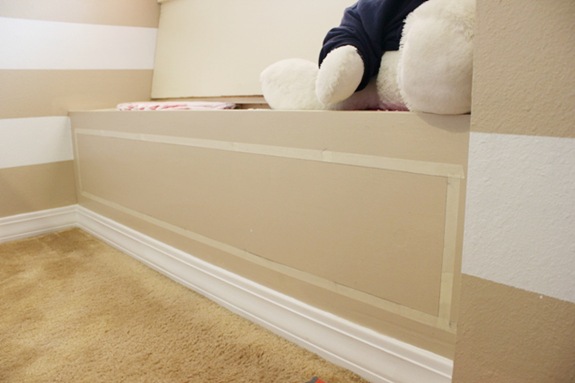
Then, using 3/4 inch wide masking tape, I taped along the outside of my newly penciled box.wandgk 005

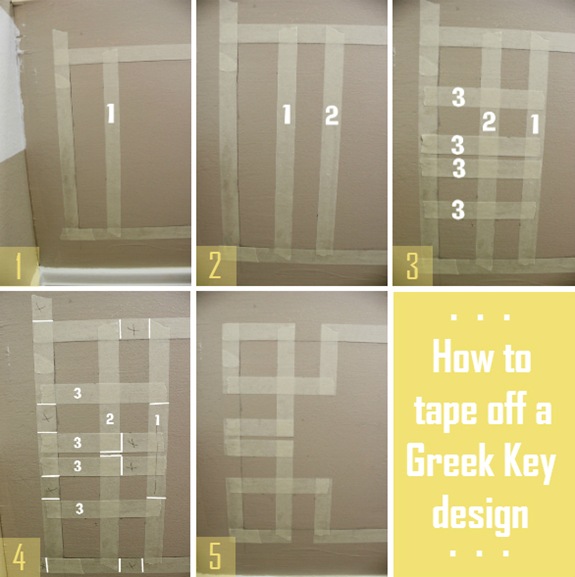
Next, I taped off the pattern as follows:greekkeyinstr1 – place one strip of tape horizontally and parallel to the edge of the big rectangle
2 – place another strip of tape parallel to tape strip 1
3 – place four strips of tape across strips 1 and 2
4 – mark the areas of tape that will need to be removed and cut them off using an exacto knife (the photosh0pped lines show where I cut)
5 – done!

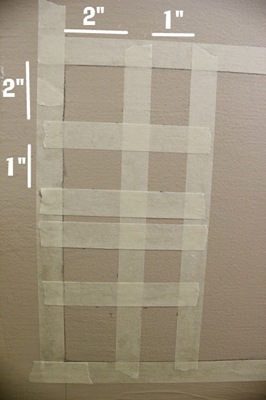
And, in case you’re wondering, here are the measurements I used:
wandgk 009
They’re the same on both the upper and lower half and on each side.  I might also mention that after I was done taping, I wasn’t happy with the spacing in the middle, so I ripped off the bottom half of my taped design and moved it down an inch or two.  The above measurements stayed the same.

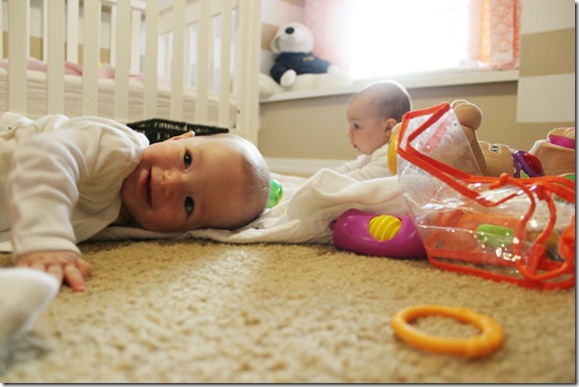
Pardon the interruption, but while I was taping I had the girls in the room playing and I looked over to see Seraphia clapping for the first time ever.  So, I snatched the opportunity:

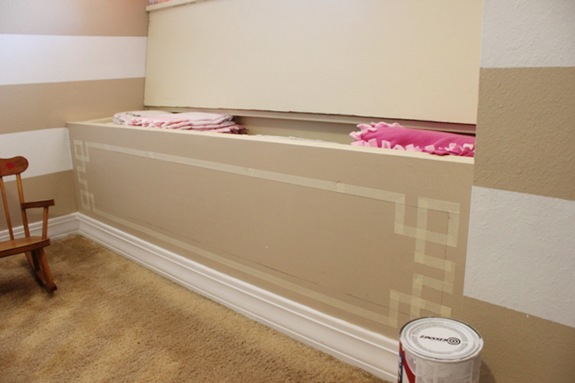
Sooo, all clapping aside, here’s what the entire design looked like sans taping, cutting, moving down, and taping and cutting again:wandgk 012

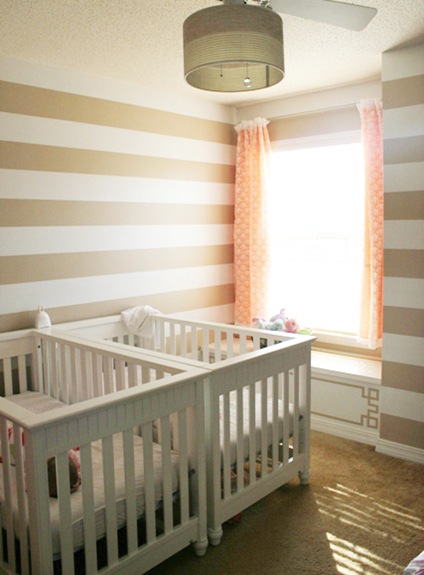
Last, I rolled on one coat of white primer followed by one coat of white paint leftover from painting the stripes, took off the tape right after painting, and…wandgk 026 …greek key everyone…and a free one at that.  I used things I already had on hand…love those kinds of projects!   

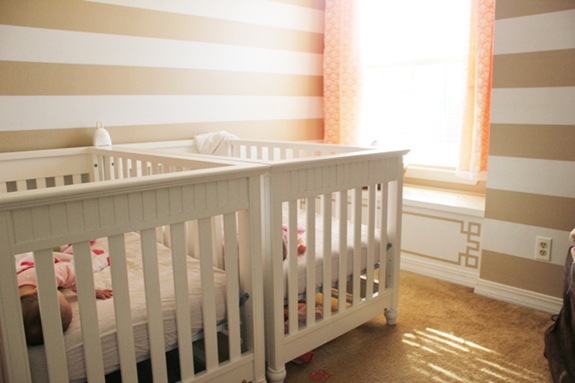
You might’ve also noticed we moved/squeezed in the second crib which means that the girls have officially taken up residence in their own room!  As a matter of fact, I snapped these pics right after laying them down for a nap that day.  Little angels I tell ya!  :)  wandgk 031

Well, the only thing left to do for the window seat is to make a cushion and that’s it.  I’m still hunting for some cheap fabric for that so it’s on to another project involving a mirror, some pretty paint, and some sticks.  Stay tuned!

wandgk 023

.           .           .

Anyone else used tape in creating recently?  How about painting a greek key pattern somewhere?  Speaking of greek key, how cool would it be to turn it up a notch and greek key an entire wall, the front/top of a dresser or desk, or a box of some sort, or the bottom of a tray, or around a mirror…the possibilities are endless! 

DIY Changing Pad Cover

As my less-than-clever title suggests, this is a story about a changing pad and it’s desire…umm, my desire…for it to be covered.changingpadcover 021crop   The existing plastic doesn’t scream warm and cozy to me and the thought of four little warm buns repeatedly being shocked by it’s chill at every diaper change is haunting and insensitive so I set out to change that.  When searching the web for a good tutorial on how to make my own cover, I came across this one at Prudent Baby.  It seemed like the one with the greatest detail for someone like me who’s a little freakish at the thought of sewing from scratch.  It was also the simplest I could find.  I followed the tutorial word-for-word for the most part (opting to not use two different fabrics), but made a few adjustments and added an extra couple of steps at the end to get the custom changing pad cover of my day dreams.  I’ll lay it all out for ya in case you’re in the market to give some baby buns a warm landing spot as well.  Oh, I forgot to mention the best part of this whole undertaking - you’re making a changing pad cover out of ONE piece of fabric!  No sewing lots of different pieces and sections together which can get overwhelming and way too involved, especially since if you’re making this, chances are you’ve got a babe or two (or three, four, five…) of your own that’s vying for attention too.
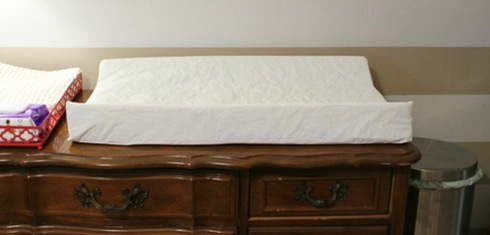
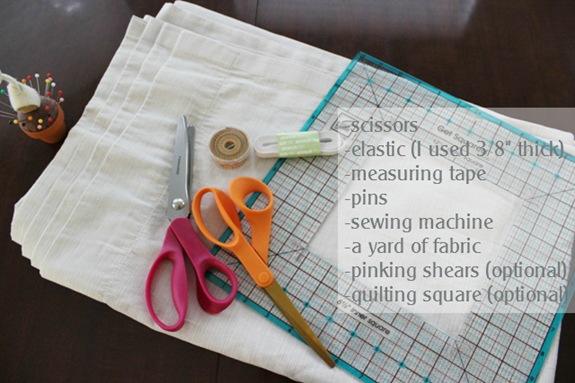
So, first things first – fabric.  You’ll need a little under a yard of 54” wide fabric, a 48 x 32 inch piece to be exact.  I used an 84” long, Target curtain panel I found at Dirt Cheap for $3.  I only used half so the plan is to make a spare cover with the other half lest one get stained with excrement…which we all know never happens…  Also, make sure you wash your fabric beforehand…unwashed might mean shrinkage later along with a few choice words.  Second, this tutorial is for a standard, contoured changing pad measuring 34” x 16”.  We own this one.  Third, this is what you’ll need:changingpadcover 001
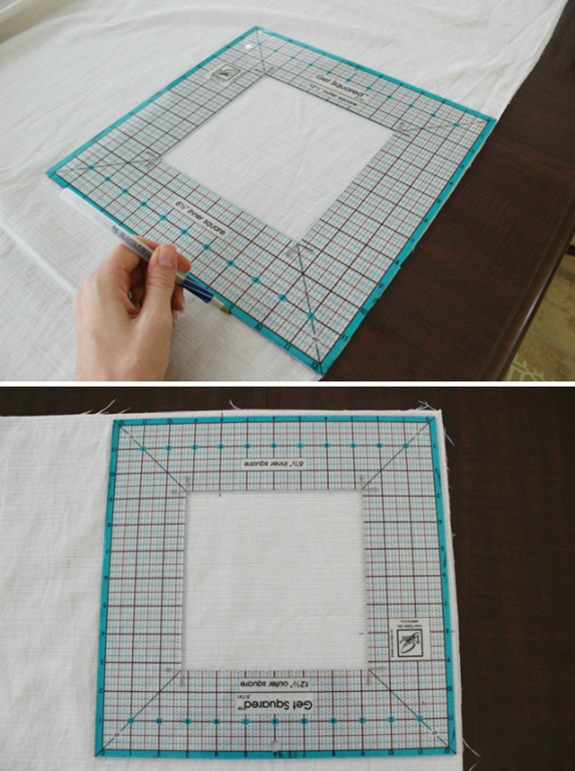
To start, cut a 48” x 32” piece of fabric.  I used a plastic quilting square I picked up at JoAnn’s to get straight edges and perfect corners.
Untitled

Once you have your 48” x 32” piece, fold it in half length-wise with the right sides facing each other and then in half width-wise.  Draw an 7.5” x 7.5” square on the corner where there are no folds.  (I followed Prudent Baby’s instructions and drew an 8” x 8” square however, now that the cover is finished, I’ve realized I could use an extra half inch at each corner, so next time I’m going with a 7.5 inch square.) 
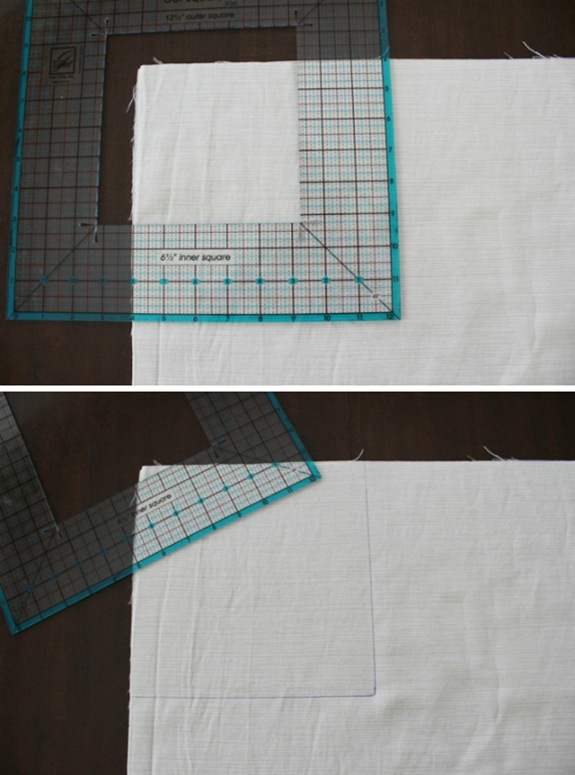
Untitled2 Again, my quilting square comes in handy.

Next, cut out the square making sure you cut through all four layers of fabric.
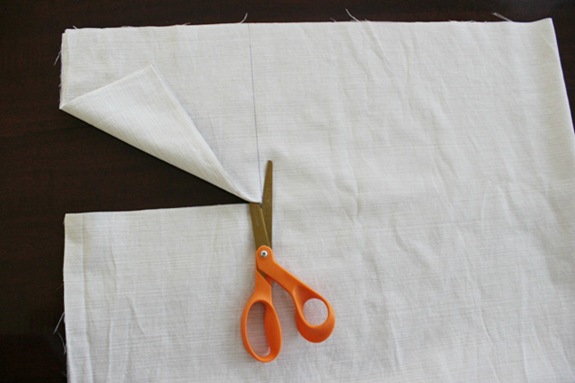
changingpadcover 007

When you unfold your fabric, it should now look like this:
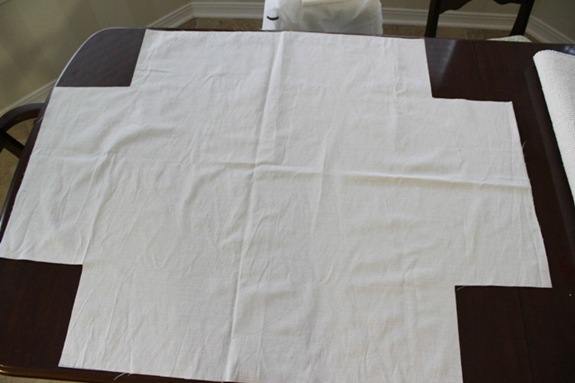
changingpadcover 008

Now, sew the two sides of each square cut-out together, making sure the right sides are facing each other.
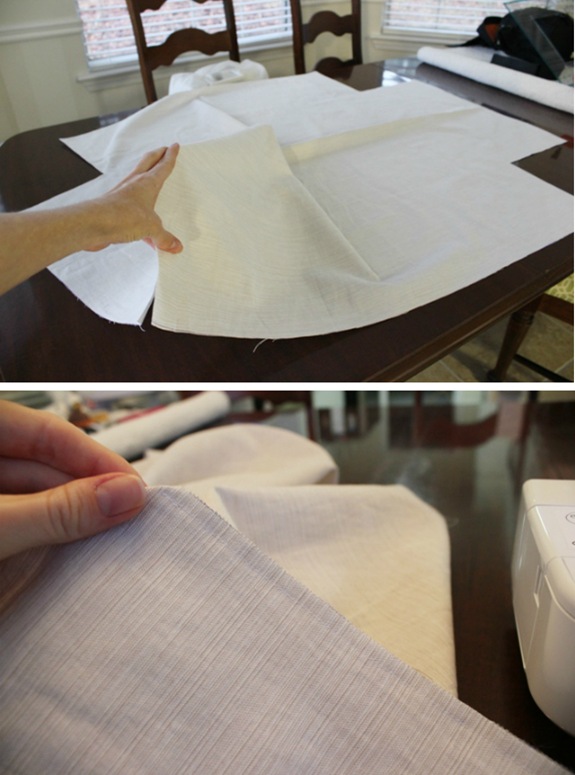
Untitled3

After you’ve sewn your square sides together, you’re former piece o’ fabric will look like this:changingpadcover 011
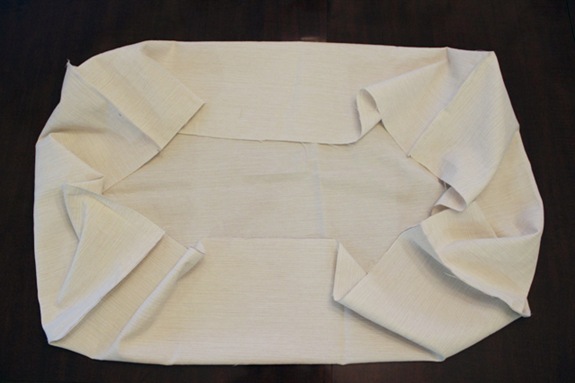
Got it so far?  Good!  Let’s move on!

Next up, fold over the bottom, raw edge of your future cover one inch and iron it down.changingpadcover 012 
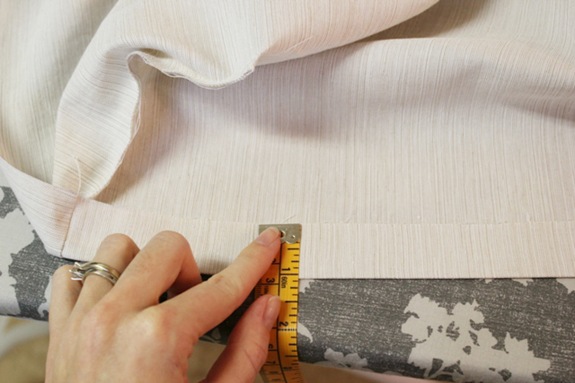
And then fold it over one inch again, ironing and pinning in place this time.
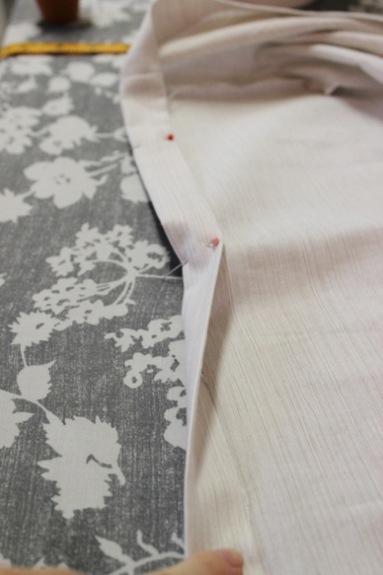
changingpadcover 013 
  The elastic will run through this seam. 

Once you’re done ironing and pinning, sew your hem, keeping as close to the folded side as you can and making sure to leave a couple of inches unhemmed where you’ll insert the elastic.  Also, make sure you backstitch at each end of your hem to make sure it doesn’t come undone!
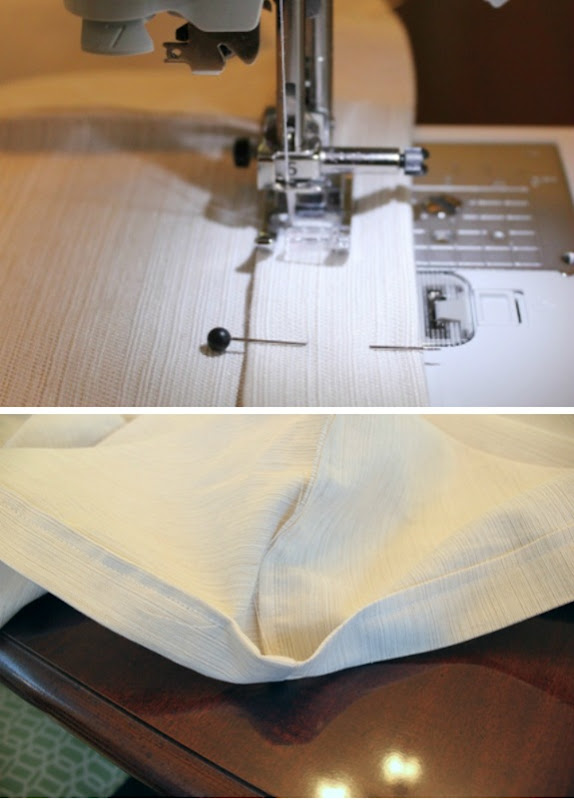
Untitled4

Now, grab your elastic and cut a 52 inch piece.  (Prudent Baby instructs to cut a 36 inch piece, but I found that my cover was way too tight, pressing and pulling on the corners of my changing pad.  So, after a few indignant huffs and puffs, I pulled out my seam ripper and veered from her path.)   Thread it through your new hem by pinning one end to your cover and sticking a safety pin through the other end. 
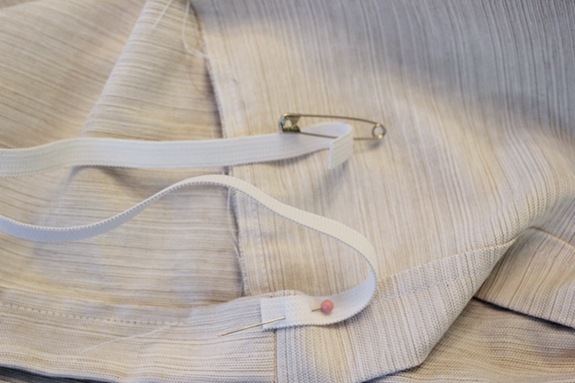
changingpadcover 017

Simply guide the safety pin end through your seam, sew the two elastic ends together, and stitch up the hole you left for the elastic.  (Never mind that mine is as crooked as Pisa’s tower.  It does the job.)  Untitled5
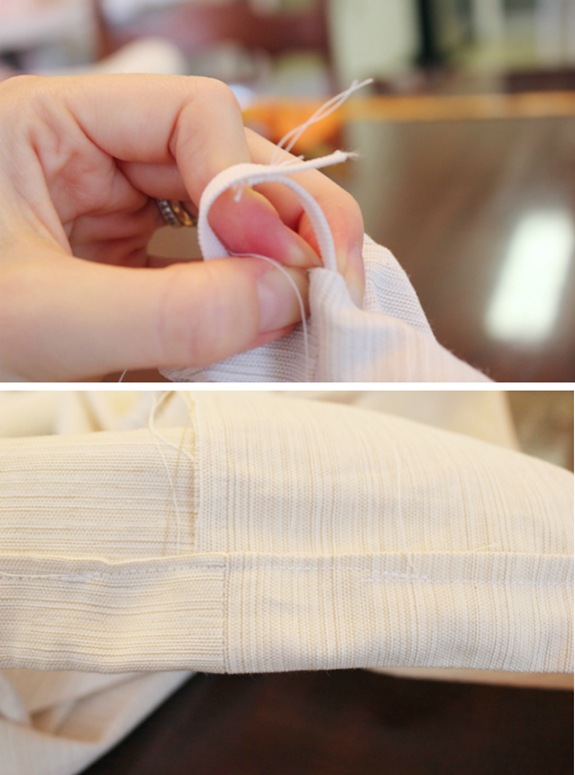
(At this point, I thought I was done.  But after putting the cover over the pad, it was a little too loose and a lot too frumpy in some areas than I liked.  So, I customized it.)

Next, put your newly sewn cover over your pad inside-out and gather the loose fabric near the ends, pinning it in place right over the contoured edges like so:
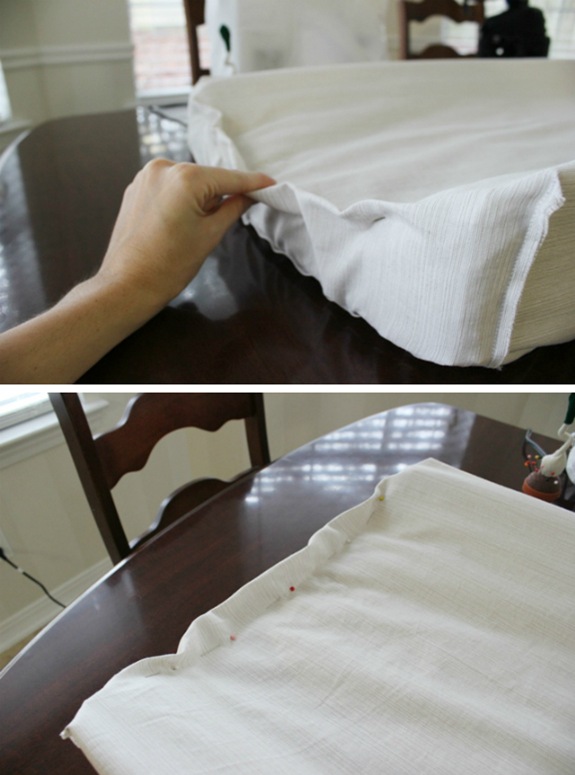
Untitled6
Make sure you do this to both ends.

To make my life easier, I drew a line across my pins along which to sew. 
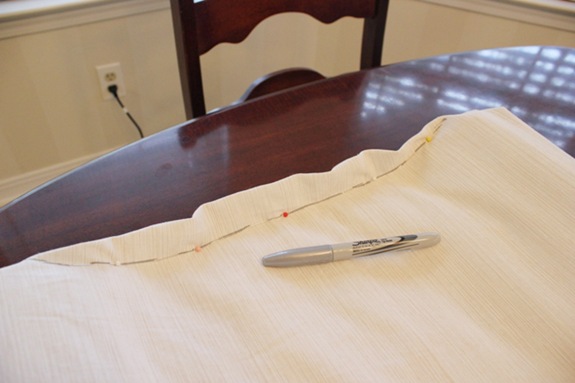
changingpadcover 025

Take your cover back off and, while it’s still inside out, sew a straight stitch along the pin line, making sure to backstitch at each end.
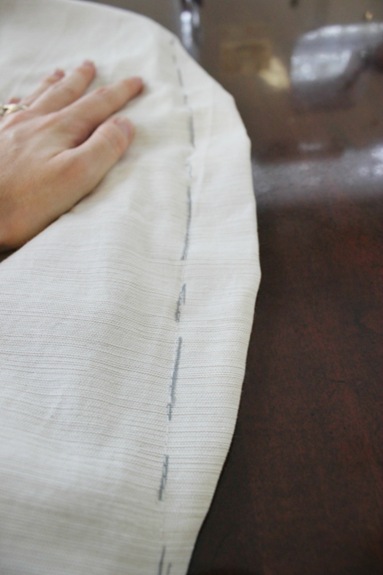
changingpadcover 028 (You can cut the excess fabric off with a pinking shears, but I found that it’s not at all noticeable after you put your cover on.)

After all is said and done, your cover should now look like this:
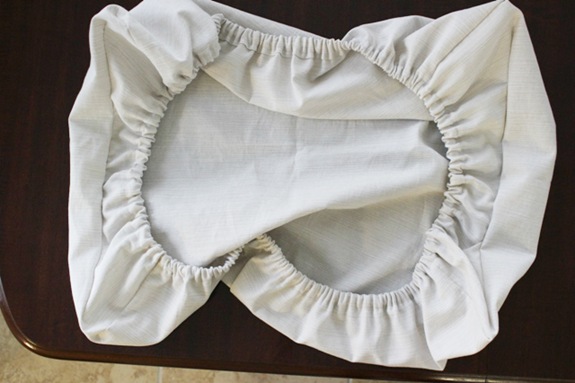
changingpadcover 029

Now go ahead and change some diapers in style!
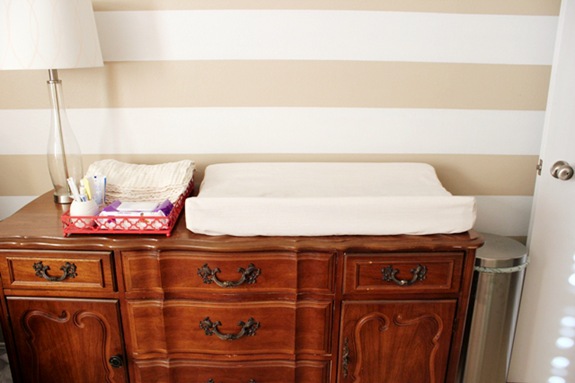
   changingpadcover 033

 changingpadcover 034

 changingpadcover 035

Whew!  Talk about a lot of pictures!  All in all, this project took me about an hour and a half to complete and that’s with correcting the inadequacies mentioned above.  I promise you it’s easier than it looks and much more budget-friendly (and way more chic) than buying a cover!  This cover cost me $5 to make - $2 for elastic and $3 for the curtain panel I used half of.  The twins’ bums will never again be subjected to a cold mat while I clean up their acts and I will be forever smug in the fact that I won’t have an ugly plastic pad ruining my decor vibe.

.           .           .

If you take on a changing pad of your own using this tutorial, let me know how it turns out!  I’d love to see your “buttiful” creations!  Ha!  Butt seriously, post pictures on Bean In Love’s facebook page or leave a link in the comments section below! 

Have a great weekend everyone!
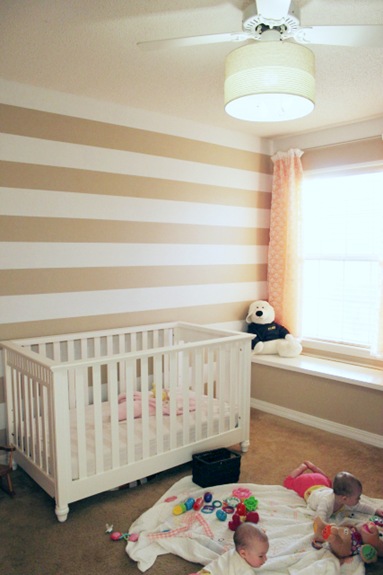
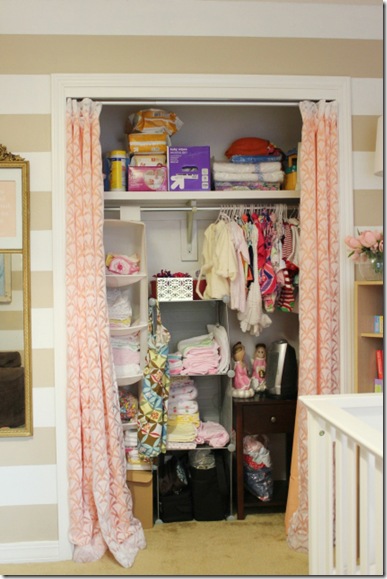
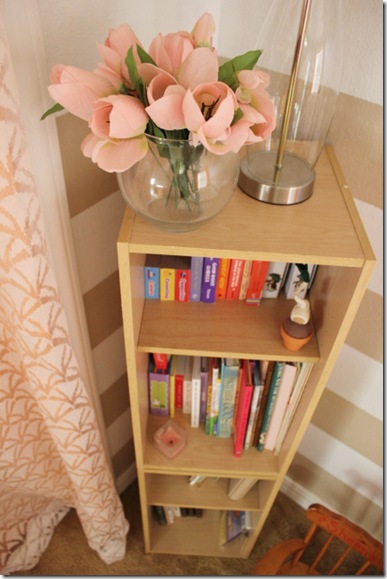
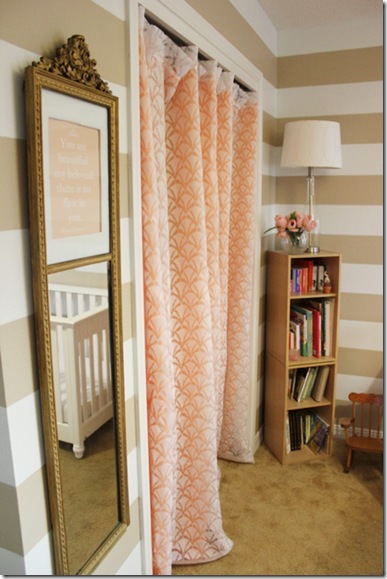
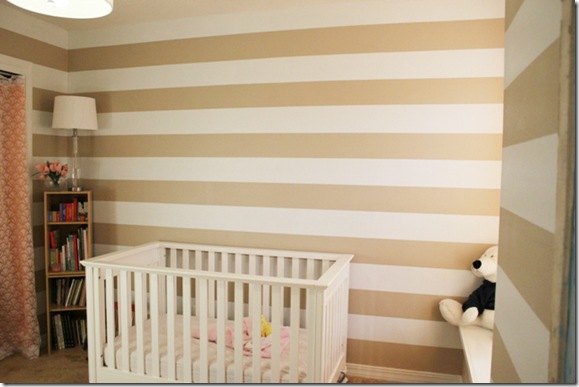
Nursery Progress

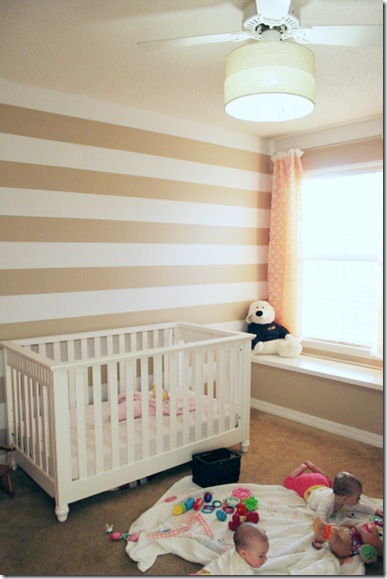
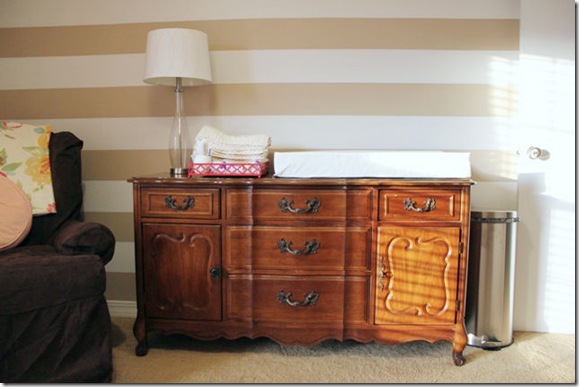
I’m long overdue on a post about the current state of the girls’ room so I’ll save a project post for Ana’s Valentine's Day! Cabin! Fever! Creativity! Link-Up! (how can you not get excited with all those exclamation marks!) and give a little run-down on what’s done and what’s yet to do. 

I know most people finish their nurseries before their kids pop out but not me.  The plan was to have it done but then we just kept getting stuff for the girls and all that stuff kept getting piled into their future room and big ‘ole pregnant me just got a little overwhelmed with the material chaos of having two at once and procrastination set it and…well, you get the point.  It’s not done.  But, tis otay because technically they have yet to inhabit it.  They’re still rent-free in our room at the moment which buys me some time to slowly work towards a completed nursery and time to work on other projects as well.  You know me, I like to jump around…kitchen to shoes to nursery back to kitchen and then to the entry way.  It keeps things hoppin’.  I go where the inspiration blows me.

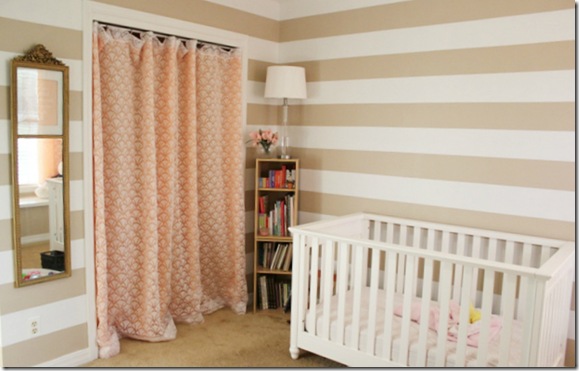
So anyway, I give you progress:feb82012 005
feb82012 004
feb82012 025 feb82012 007
feb82012 014
feb82012 006
feb82012 003     feb82012 008
feb82012 011  feb82012 017

Still left to do:
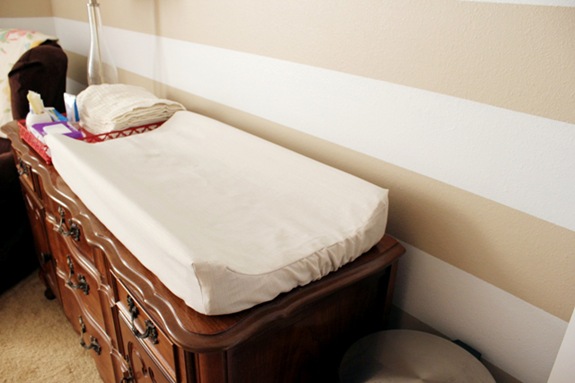
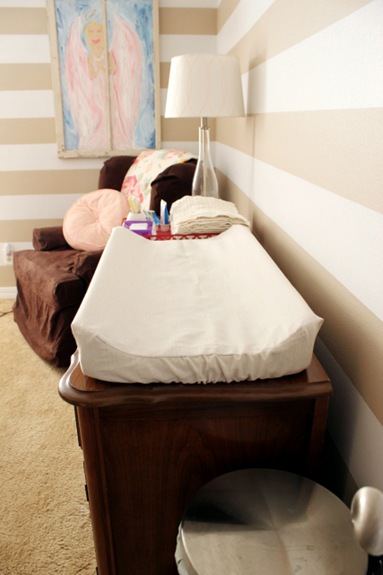
- make a cover for the changing pad (yes, we’ve been using it but the plain plastic is getting to me)
- make a fabric pouf/ottoman to pair with the rocking chair which…
- needs to be reupholstered or covered with a new slipcover – both diy options
- recover the lampshades
- stain the dresser?  paint the dresser?  still tossing that around in the nog…
- hang frames and art and lots of it (next to the angel window art and above the dresser…I’m thinking a collage of some sort)
- revamp and hang the mirror I picked up thrifting whilst visiting my sis
- diy a rug/floor cloth (I bought a round tablecloth for this purpose…will it work?  I guess we’ll see.)
- paint the front of the window seat and jazz it up somehow (a cushion, pillows, the stuffed zoo the girls have inherited?)
- lots tweakings and stuff I haven’t even thought of yet
- eventually move the twins in which includes squeezing in the second crib

Whew!  Is that it?  At the rate I’m going it’ll be finished just in time for the girls tenth birthday…  But you bet I’ll fill you all in on all the deets cause that’s how I do.

Have a great weekend…and don’t forget about Ana’s link-up!  :)

P.S.  It’s party time!  Linking up at Watch Out, Martha!  Head on over and see some more Martha-esque posts!
Upholstering a Frame Mat

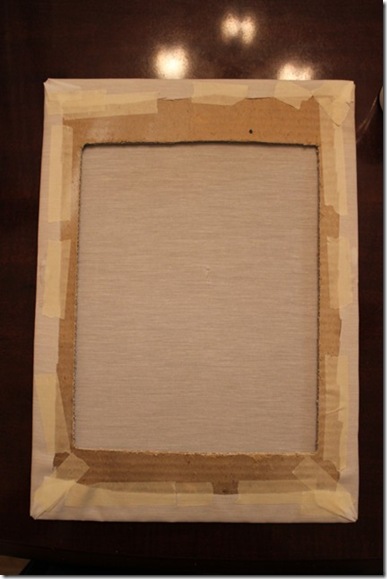
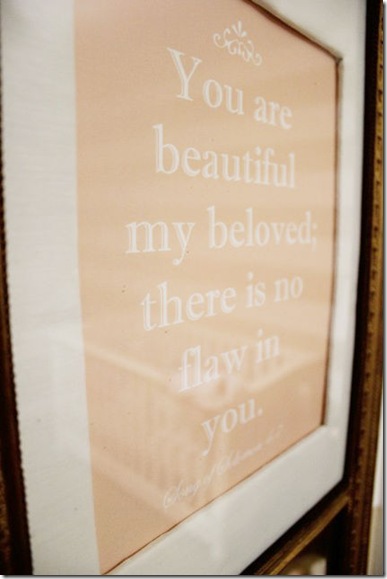
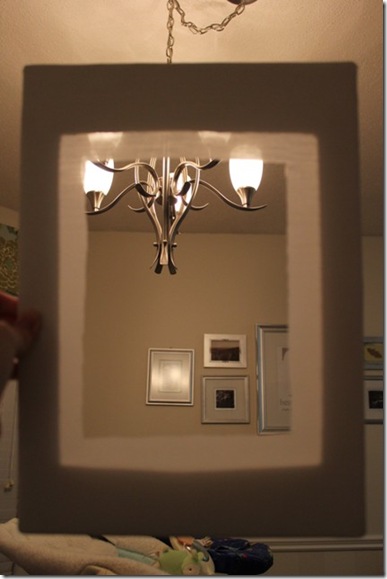
Remember the word art I whipped up for the twins nursery?  Well, I mentioned that the homemade mat I made using the existing cardboard backing looked a little shoddy around the inside edges and so one night while the twins were tucked away in their crib I reupholstered it to get a much nicer facade.

I used some leftover curtain lining I had laying around from our dining area valance project, some masking tape, a little craft glue, and a scissors.

First I cut out a rectangular piece slightly larger than my cardboard mat: jan42012b 014

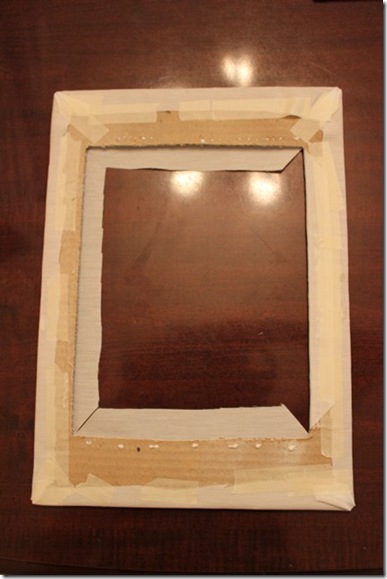
I didn’t worry about cutting the edges perfectly straight since they were going to be attached to the back of the cardboard and therefore unseen like so:jan42012b 015To get a snug fit I secured the middle of each side first and worked my way to the corners.  I didn’t have to worry about getting perfect corners either because they’d be hidden under the frame.

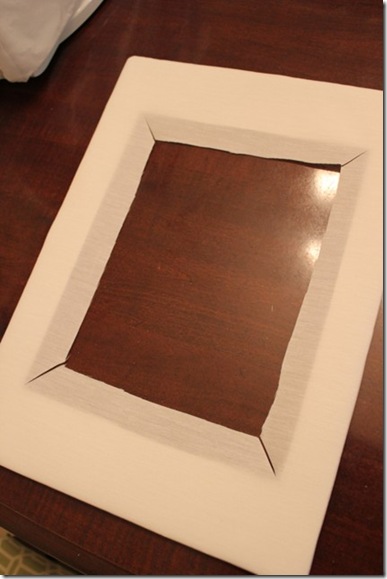
Then I cut the excess fabric out of the middle:jan42012b 016

And cut some diagonal lines at the corners so that I could again wrap the fabric around the back:jan42012b 017

I then put a few droplets of craft glue where the fabric would be laying on the back (to keep it extra tight and secure since the inside edge would be seen) and taped it down the same way that I did the outer edge:jan42012b 018

Finally, I put the whole shebang back together and hung it up revealing a much more polished reminder for our girls:jan42012b 019

Never will I pay to have a custom mat made for an odd-sized frame while I’ve got some cardboard and fabric laying around!  Think of all the options too!  Colored and/or patterned fabric or even scrapbook paper would be fun to spice up any artwork or photograph!  Decorative edges or even matted shapes would be so cool too!  Anybody else feelin’ the excitement?!  Anybody else made their own mat?  Lay it on me!  I’d love to see!

.           .           .

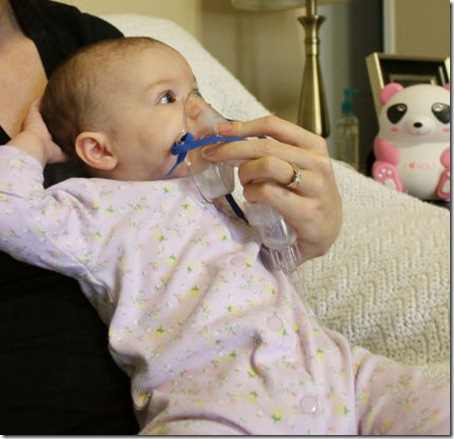
I hope everyone has a great weekend!  I’m looking forward to catching up on some projects after a great week with family!  My two sisters, my niece, and my mom were all here for the week and we had so much fun sewing up a storm and loading up on sweets!  Now that they’re gone our house is too quiet and I’m really missing the extra hands, especially since Cecilia has gotten RSV and a double ear infection…boo.  Poor thing has to be attached to a gas mask every six hours and it breaks my heart.  It’s her first real sickness and I’m hoping the last for a long while.  On the plus side though, we’re now proud owners of a pink panda nebulizer!  How cute is that?!  :)feb12012 032
Unconventional Artwork

I had big plans for the shades of these two lamps.  I executed and they looked awesome…only, that was all in my head.  What actually happened is another story.

It all goes back to the curtains I whipped up for the girl’s room. 4 005

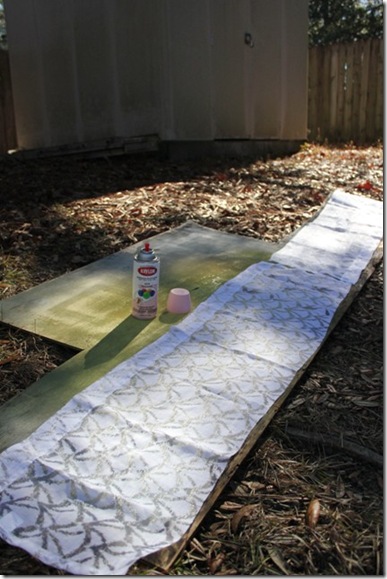
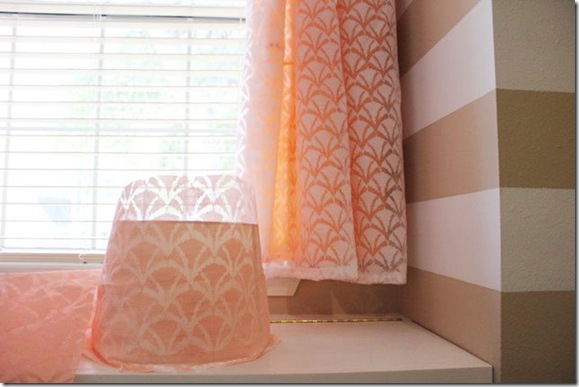
After shortening the ones I made for the window, I had a foot of so of extra fabric.  My thought was to grab some pastel pink spray paint, paint the leftover fabric, and then reupholster the not-so-perfect lamp shades, thereby putting that pattern to good use elsewhere in the room.  Out to my good ‘ole spray painting plywood I went:jan42012b 001 (Yes, the fabric was too close to the edge of the board and I knew in advance the ground would get tainted pink but lucky for me our lawn needed to be raked real bad so up with the leaves meant up with the spray paint.)

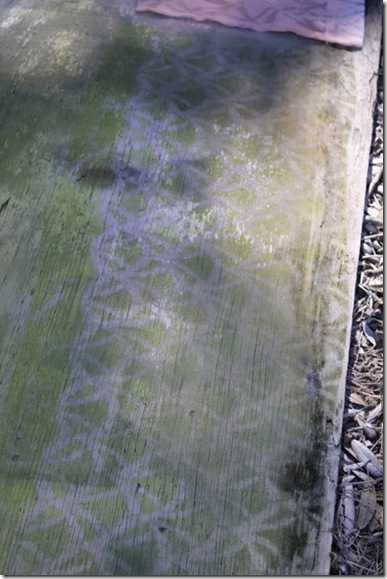
On a side note, how cool is the pattern left behind?  I’m envisioning it on dresser drawers or maybe a rug?jan42012b 002

So, I painted, it dried, I came in, and…jan42012b 004 …not what I wanted.  For who knows what reason (maybe one too many coats?) the ‘pink’ spray paint turned out ‘peach’ and too matchy-matchy with the curtains.  It definitely didn’t look bad; I was just going for a difference in color.  So I sadly put away the now peach fabric remnants for later use.

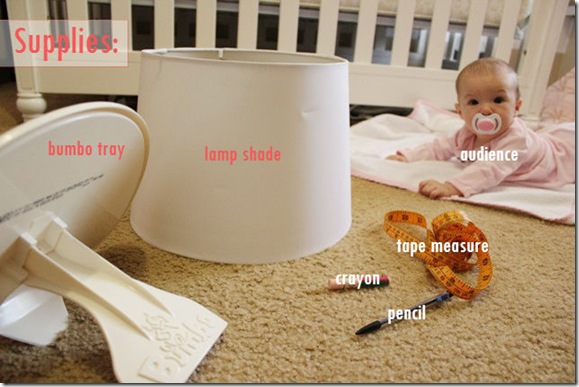
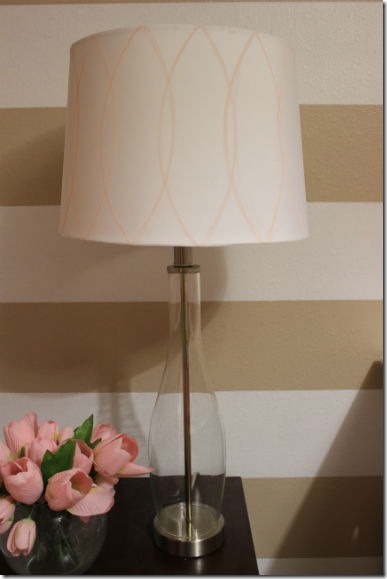
After a little brainstorming, I came up with another, very temporary idea until I can find some fabric I like to reupholster the shades.  I drew on the shades with crayon.  Yup, pink crayon.  Putting my second grade skills into good use folks.  Here’s what I used (mind you, it was what I had on hand, a.k.a. FREE):jan42012b 005sup Little Seraphia was bound and determined not to miss the action during naptime and Mommy was bound and determined to spice up these shades and not deal with a crying baby hence, my audience.  :)

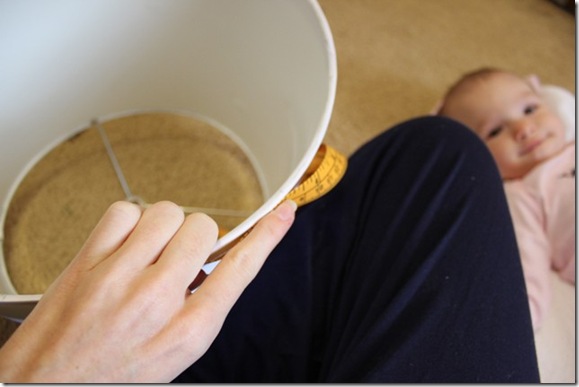
First I penciled some tiny, equally distant marks around the entire base of the shade.jan42012b 007 

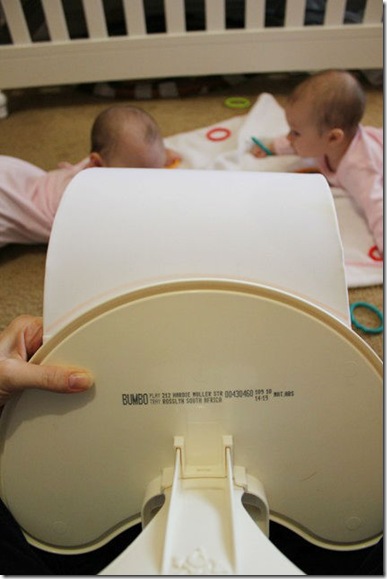
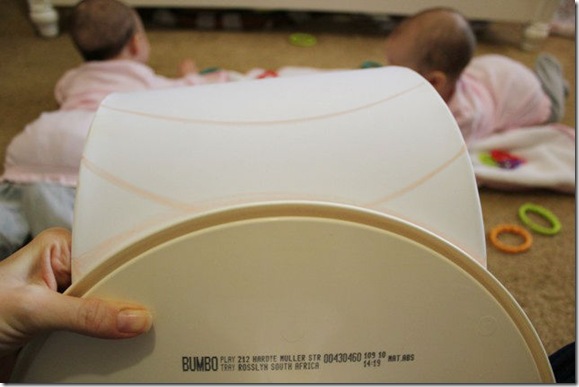
Then, using the ever-so-handy tray of the bumbo seat for it’s nice curves, I traced a curved line from one pencil mark to the opposite side of the shade.  (And added to my spectators as Cecilia decided she’d had enough sleep.) jan42012b 009

All the way around and now I had this going on:jan42012b 010

To create a geometric vibe, I did the same thing again only backwards, causing my curved lines to overlap:jan42012b 011

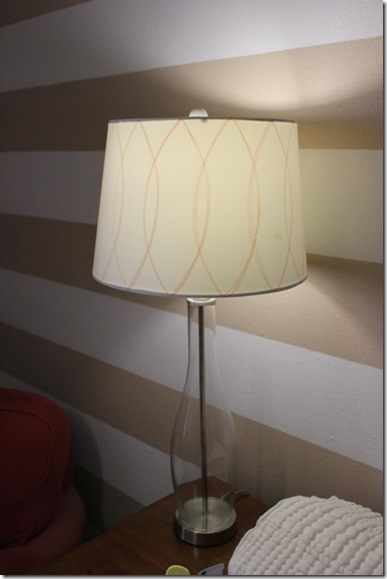
Done:jan142012 002

And done: jan42012b 013

Like I mentioned above, I’m still going to reupholster these shades because they’ve got a few little dents and scratches that a nice layer of fabric will hide but at least they have a little bit of flair while I hunt down some perfect (and cheap) fabric! 

Anybody else drawn on lamp shades or other unconventional mediums lately?  It feels quite adventurous and a little bit rebellious, don’t you think?

.           .           .

P.S.  I know I owe y’all an updated picture of the nursery and I promise I’ll getcha some…next week maybe?  Stay tuned.

P.P.S.  In the mood for a party?  I am!  Linking up with fellow DIYers over at Watch Out, Martha!