Showing posts with label Painting. Show all posts

The Inspired Coffee Table

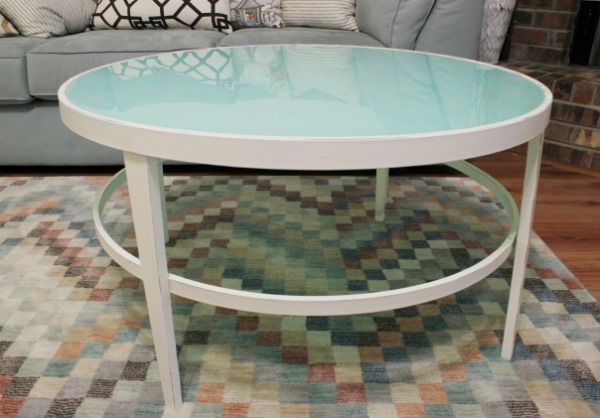
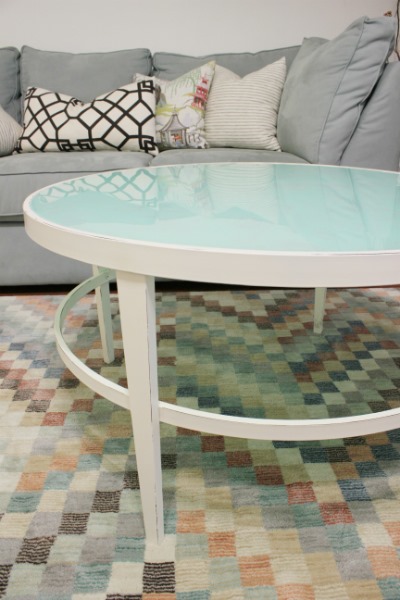
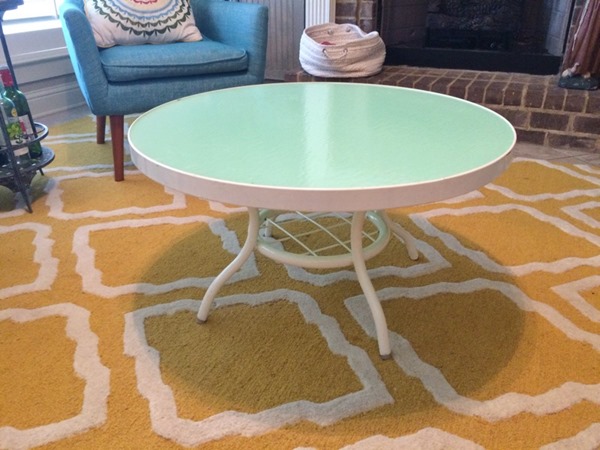
She painted the underside of the glass, my friend Lauren. 
IMG_1773

A couple of weeks ago we went over to spend time with some of our bestest friends and there in the middle of their den was this gorgeous, new coffee table.  I just assumed they got it at some cool store and maybe it was even one-of-a-kind (and it is!).  That cool store happened to be her Grandmother’s house and the one-of-a-kind piece it is is because Lauren made it that way.  She took the hand-me-down table and painted the underside of the glass so that it looks like a beautiful, saturated, minty green sea set atop the original creamy white base.
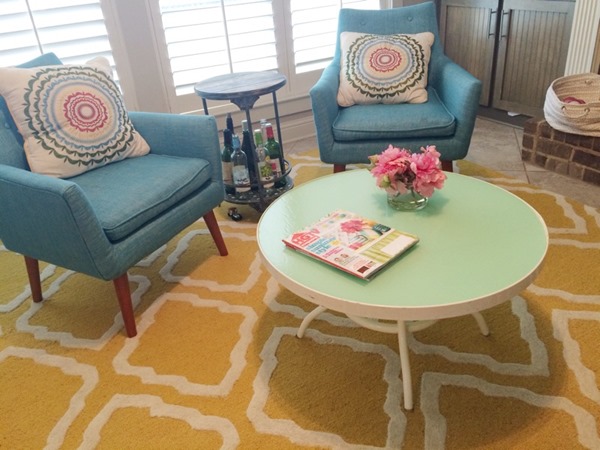
IMG_1774By painting the underside, the green shows through the slightly mottled top but it won’t scratch, like paint can do very easily on glass.

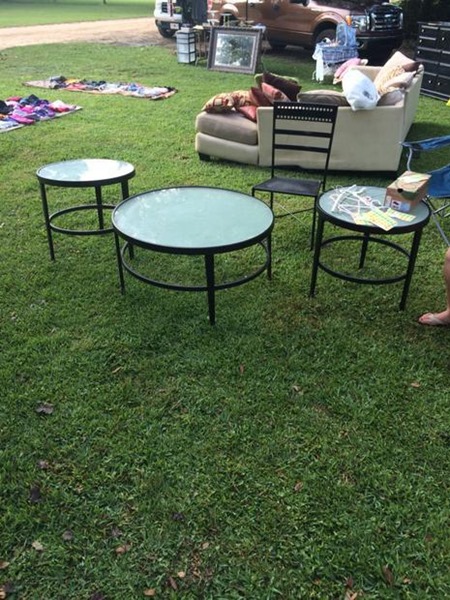
I loved it.  I loved it so much I had to do it.  The next week, this coffee and end table set popped up on my go-to, second-hand sale site and I snatched them up real quick like, and for only $35.
061f830d78c241e957d4968d5332f091
My plan was to paint the coffee table just like Lauren did hers and turn the end tables into stools for another project.  We don’t have a need for another coffee table since I’m not ready to part with our tufted ottoman but I thought, since I needed the end tables, it’d be fun to do a little makeover for someone else.  (Stay tuned for the end tables…they’re too big to be stools like we wanted so we’re going to keep them end tables.)

So, first I removed the glass (which was just set in) and gave the whole base a quick coat of primer.  The legs of the table were wood while the rings were metal so I used Rust-Oleum Clean Metal primer* (cheap if you add it to an existing Amazon order!)   IMG_1647
To make sure I got every inch of the table, including the tough to reach areas under the rings, I first turned it upside-down and sprayed what I couldn’t easily get while it was right-side-up.

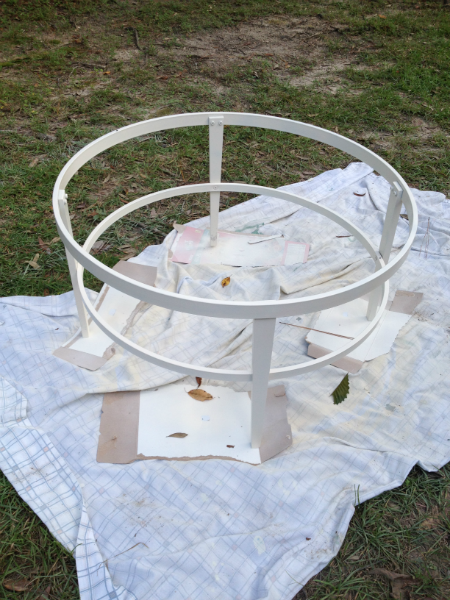
Then I turned it over, set the legs on some pieces of cardboard so the very bottoms wouldn’t get missed (since I was using a sheet as ground cover), and primed the rest.
IMG_1648
And then I repeated the same process with the spray paint.  I used Rustoleum’s Heirloom white.  It’s a beautiful creamy white – not too ivory and not glaringly white.
IMG_1655
Last, for the base at least, I added a little more interest by giving it a slight distressing.  Basically I put some very fine sandpaper onto a palm sander (that we’re still borrowing from a friend two years later…Thanks Gina!) and went around gently tapping it to the edges/corners of the base.  I didn’t sand along every edge fully but very sporadically.  This close-up shows the variation – some corners are sanded, some still are painted:
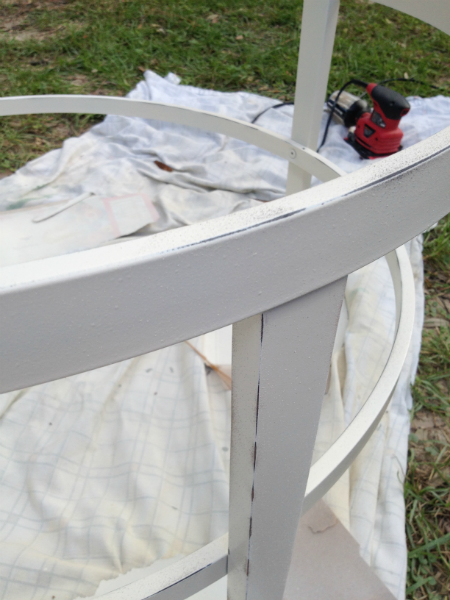
IMG_1656
Next up was the glass top.  After a good cleaning on both sides, I turned it over so that it was upside-down on our kitchen table to be painted.  The underside of this glass was frosted which I wasn’t aware of until I went to grab the tables.  No big deal but I would’ve preferred clear.  The fact that it was frosted though meant that whatever color I painted onto it would appear a tad more subdued from above; like a filter was placed over the paint.  So, I made sure that the color I used was a little more saturated than I want it if I were painting over clear glass.

As for the color, I loved Lauren’s minty green (she used Martha Stewart chalkboard paint from Michael’s) so I made a similar color by adding the green color I painted these lamps to an almost-empty bottle of white acrylic paint I had on hand.  To paint the glass, I used a foam pouncer (from my trusty Martha Stewart set*).
IMG_1661
Basically, I just squirted the paint onto the glass and swirled it around.  I worked in fairly large sections until the whole thing was covered.
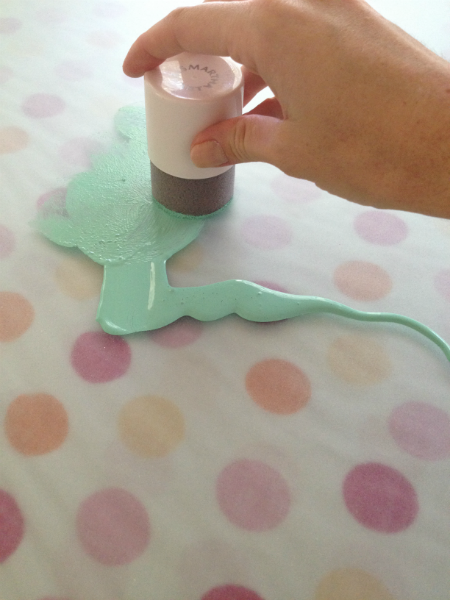
IMG_1662 You can see a video of me swirling the paint around here.

Here’s what it look liked after it dried and was placed back on the base:
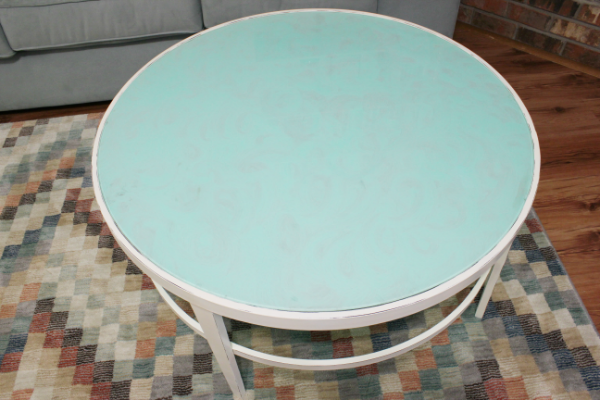
IMG_6464
The color looks a little more blue in the above pic vs. the truer-to-life color it is two pictures above but you can see the swirl effect.

It gave a fun effect however, I think I would’ve preferred it to be one solid color.  I didn’t know before I started if you’d be able to see the swirling or not once the glass was on the table since it didn’t really have light shining through it but you can.  I’m thinking of possibly doing the same thing to the glass on the end tables and for those, I’ll roll the paint on for a more solid look.

Backing up a tad though, before I placed the painted glass back onto the table, I placed rubber bumpers onto each leg, where the glass rested.  There were bumpers there before but one was missing and they were really dirty so I just grabbed some we had leftover from past cabinet transformations.
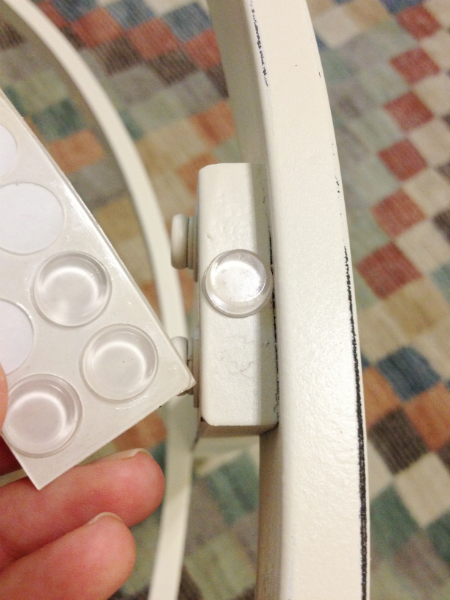
IMG_1666
Here’s the full monty: 
IMG_6461
IMG_6462 
Shortly after I finished, I listed it for sale and she went right out the door.  :)

.           .           .

So, painting glass.  Have you tried it?  I know it scratches off pretty easily so you have to either seal it or paint glass that won’t be touched.  I’ve painted behind the glass of picture frames before (here and here) but Lauren’s idea of painting the underside of a glass table was genius!  Think of all the options!  You could wash and repaint for every holiday and season!  Solids, patterns, abstract, a stencil…the options are endless!   

*affiliate links to items I used – if you purchase through my affiliate link, we’ll get a small commission but your price won’t be affected at all!  Thanks for supporting us!

Finger Painting

Let’s reach back to our five-year-old selves and pull out those finger painting skillz, shall we?  Not only will they come in handy for this tutorial but as it turns out, getting your hands dirty with pretty colors can be really stress-relieving…not that I would know about stress.  My life is all butterflies and roses…and tantrums and meltdowns and toddler woes 58%  of the time.

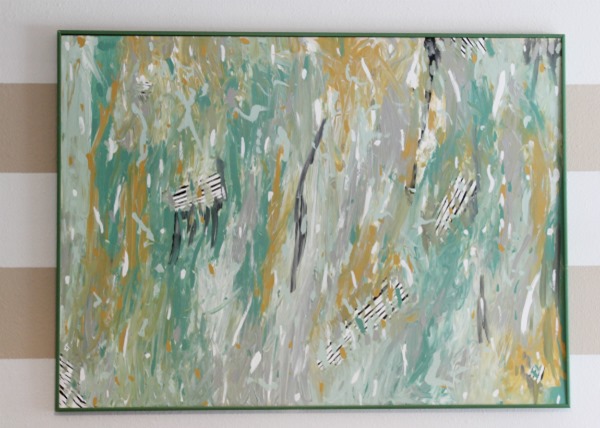
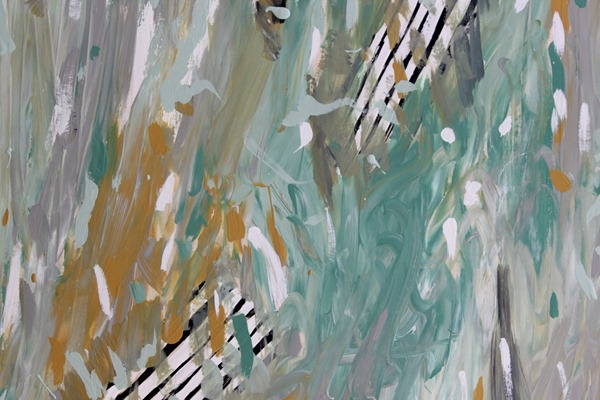
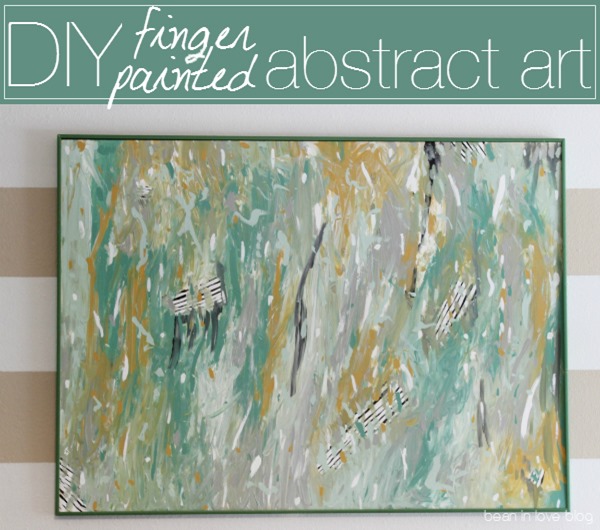
The art I painted and hung above Sebastian’s crib is 80% finger painted and 20% brushed.
sebsroom2 (6)
It was so easy to do that even if you’ve already taken once glance at it and determined that “no, you can’t do that”, you can.  Yes, you can.

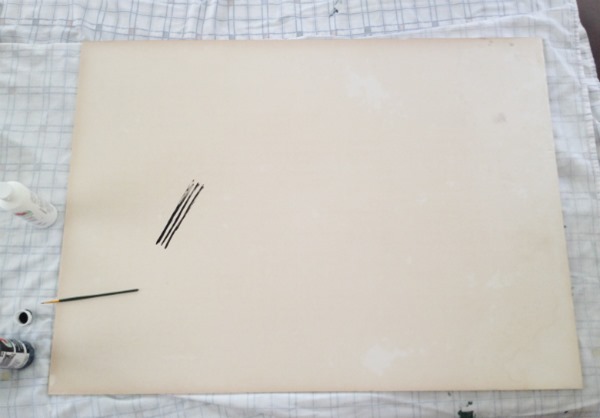
But before tell you how you can, let me remind you (or tell you in case you didn’t see this post) that I bought this green metal frame at a local thrift store for 50 cents.  It had a large piece of discolored foam board fitted inside and so I just painted right onto that foam board instead of buying a new large piece of paper/board/whatever.  The jewel green color is a latex paint (Alexandrite by Sherwin Williams for Lowe’s) and the rest of the colors are acrylics, some of which I already had and some that I purchased at Hobby Lobby.  The acrylic colors I used were black, white, mint, gray, and a yellowy-mustard color.

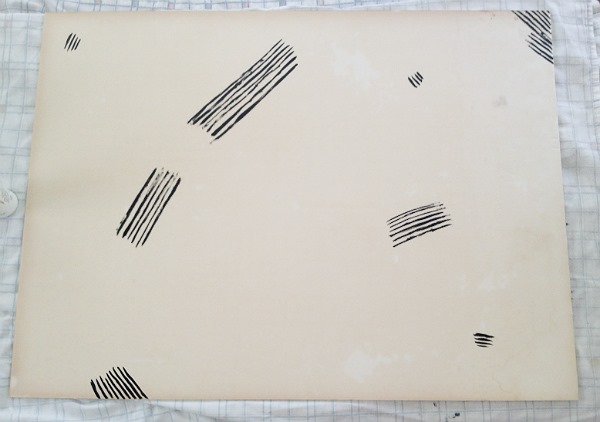
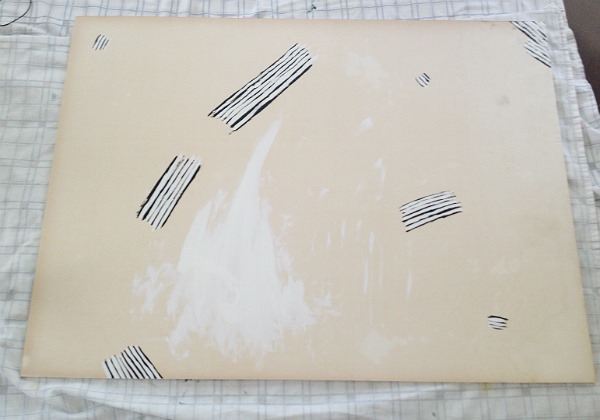
So first, just for a little interest to peek through under my finger painting, I grabbed some black white acrylic paint and painted b&w stripes in a few random places across the board.  I painted the black stripes first…
IMG_0181
IMG_0182 …and then added the white ones in between once the black paint was dry.  After I was done with the white I had a good amount of white paint left on the plate I was using so I just dumped it onto the board and smeared it around a little with my hands.
 IMG_0183

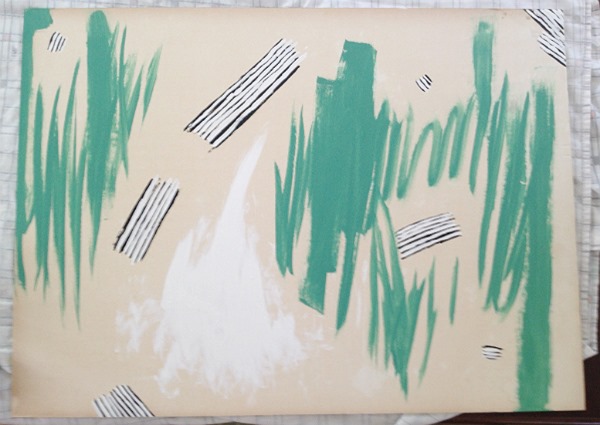
At the same time as I was painting this, my cousin Faith was at my house painting a fabric “S” for Sebastian’s room and she had just finished so I grabbed the paint she had leftover from painting that and smeared it around the board too.
 IMG_0185

Then I let all that paint dry.

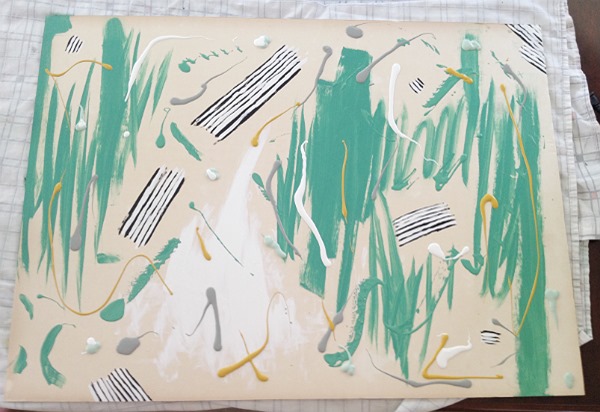
During the next free naptime, I grabbed all of the colors minus black.  Over the top of the board, making sure not to go over the stripes, I squirted different colors one-by-one in random places all over.
(Except I spooned on the green latex since it came from a test pot. Technicalities folks.)
 IMG_0187

And then I just smeared all those colors together.  The key is not smearing too much that the colors blend to make a totally different color but just blending so that they streak together.  Also, make sure you have enough paint squirted onto the surface of whatever you’re painting so that you’re not having to spread paint around too much to cover.  The more paint, the better.  And also, the more paint, the more texture which is a great addition!
 
As I was smearing, I made sure to not smear completely over the stripes I had painted.  I just smeared around them but over the edges so that they didn’t sit on an island of sorts – stripes surrounded by blank foam board surrounded by a ring of paint.  Make sense?  I just wanted them to peek through.

The painting looked really cool after I was done smearing and the plan was to leave it that way but of course, I tweaked it just a little more by going in with each color and a brush and added some dots around the piece.  I literally dipped the brush in whatever color I was using and dabbed it randomly around the painting.  I also added a few smears of black in the end.

Art definitely isn’t my strong suit but I think this one turned out pretty good, no?
And considering I only paid about $5 from start to finish (most of that went to paint of which I used not even half of each color supply) it looks even better. 
   sebsroom2 (12)

sebsroom2 (13)

sebsroom2 (1)

So, any painters out there?  Maybe some wanna be painters like me?  Abstract art is the way to go!  If you make a mistake, it just looks like you meant to!  I wish falling on your face in public was more like that…like “oops” you totally meant to do that.  “I just needed a quick thrill to wake me up.  No big deal.”  Or forgetting to zip it up below the belt.  Wearing no-zip maternity paints totally took my zip-it-up habit and tossed it right out the nursery window.

And you wonder why I like long shirts…

.           .           . 

diy finger painted abstract art

The Hutch Makeover

Or should I say ‘makeunder’ since I was going for a simpler look?  Or is it just weird that I’m writing a whole post about a hutch makeover in general?  Most DIY bloggers showcase entire room makeovers including hutches that they beautifully styled and primped.  Well, not me.  I’d show you our whole living room but the fact is it’s still a little bit of a smorgasbord of things and getting to a reveal is going to take a little bit longer for this tortoise.  But, you can see the mirror I painted here and the pillows hanging out here if you so wish.  :)

So, shall we move on?  Sure thing.

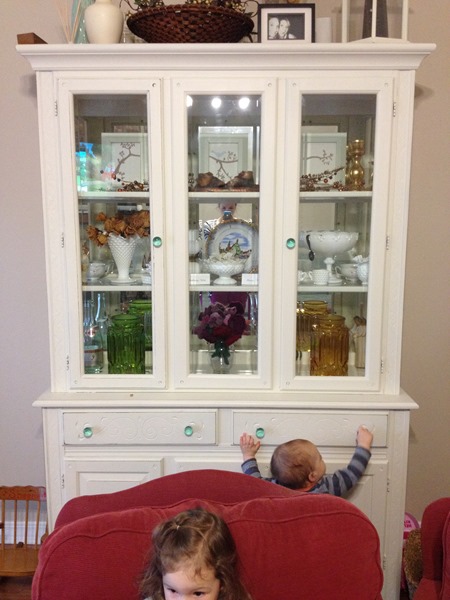
Here was the hutch a few weeks ago: 
  IMG_7530
Was.  It was filled with lots of hand-me-downs (that I truly love) like my grandmother’s milk glass, some frames with homemade art, some thrifted vases, and other random things.  Atop it was another jumble of things that gave the whole thing a little bit of a country vibe which is cool but which is also not my style.

Not on the agenda (or in the budget) though, was a change…until I got my very first issue of HGTV magazine a few months ago.  One page got me and got me good.
   IMG_7607
It was the after picture of a hutch they made over and it wasn’t really the hutch as much as the way they styled it.  As I was looking at all of the things inside it, I realized that I had a lot of similar items in my house.  So, that day during naptime, I took everything out of our hutch and refilled it with those similar items.

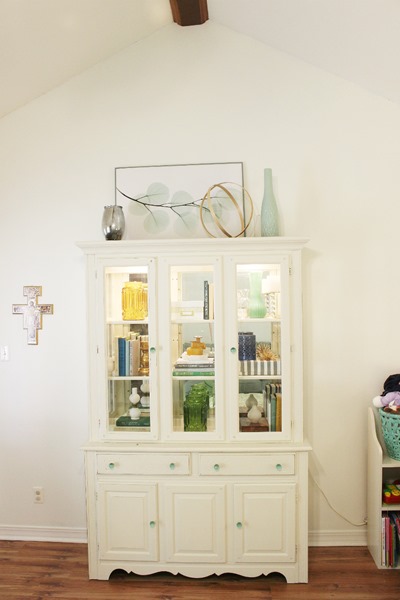
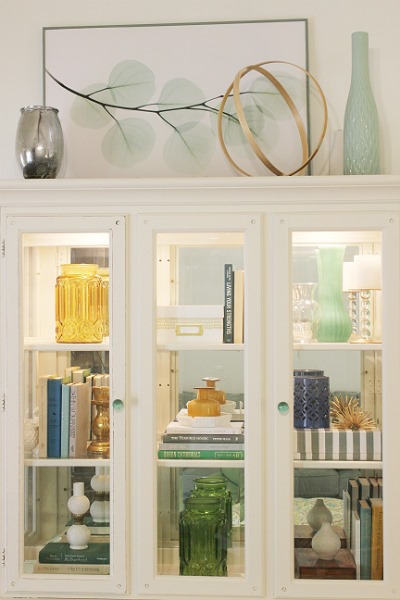
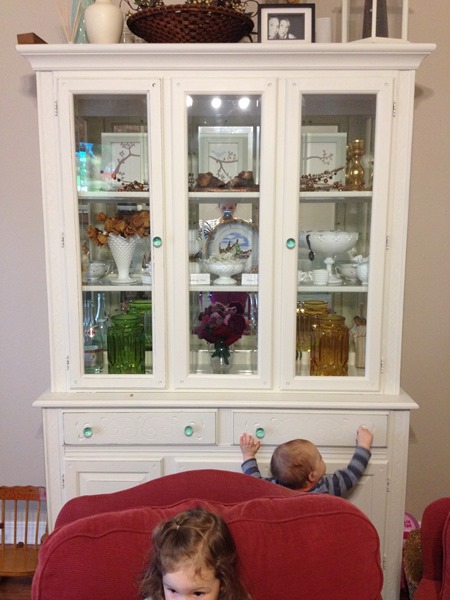
Here’s what it’s looking like today:
hutch (4)hutch (2)

On top of the things I grabbed from amongst our own things to refill it, a bunch of little diy projects went into it, and also a few thrifted treasures.  Bear with me while I elaborate.  :)

hutch (5)

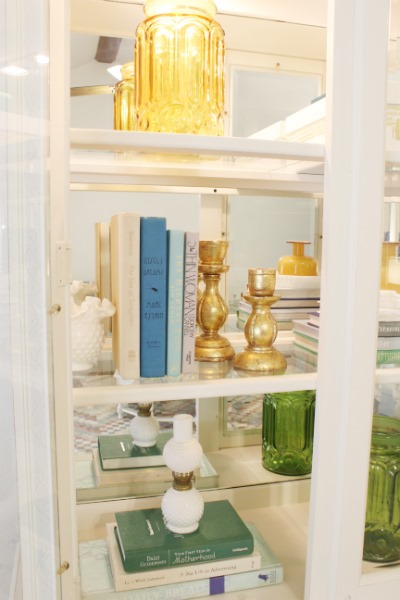
Half of the hardcover books were recently thrifted; purchased based on the color of their spine and that’s it.  The large green and yellow vases were thrifted a long time ago as were the two gold candlesticks, the aqua vase, and the clear bubble candle pillar.
Some of the milk glass made the cut to go back in and the rest will be put elsewhere in the house.

hutch (9)

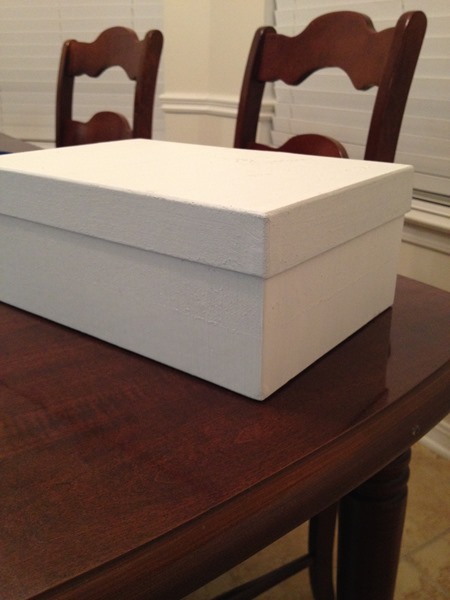
The white storage box on the top shelf was the box my best friend sent last year holding inside it a request to be a bridesmaid in her wedding (this ‘gram).  I can’t part with it.
hutch (8)

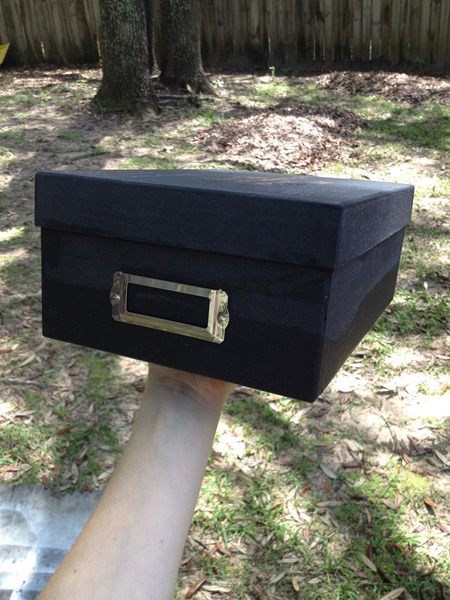
It used to be black.
 IMG_8782
You can see the rough section on the box where I ripped off the packing tape that held it closed on it’s journey here.  Off with the tape came the top layer of the paper the box is made out of.  I was hoping that, even though it wouldn’t make those spots smooth, a little paint would disguise that whole issue.

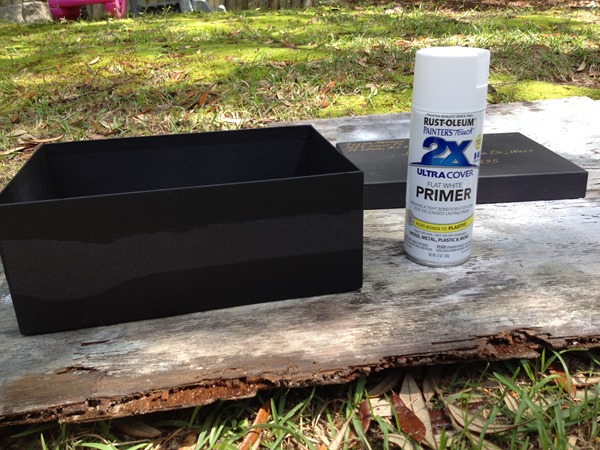
So, I gave it a quick coat of spray primer and then a coat of white spray paint.
 IMG_8783

Primed:
IMG_8784

Unfortunately, the paint didn’t do the greatest job of sticking and not soaking into the paper where the tape had been ripped off.  So, after the spray paint dried, I painted the whole box with some white acrylic paint I had and that did the trick.
IMG_8814

Then I grabbed my gold paint pen (purchased for this project but that failed) and added a little fun to the area where the tape was to further hide the roughness.
IMG_8820

Now it fits right in.
hutch (1)

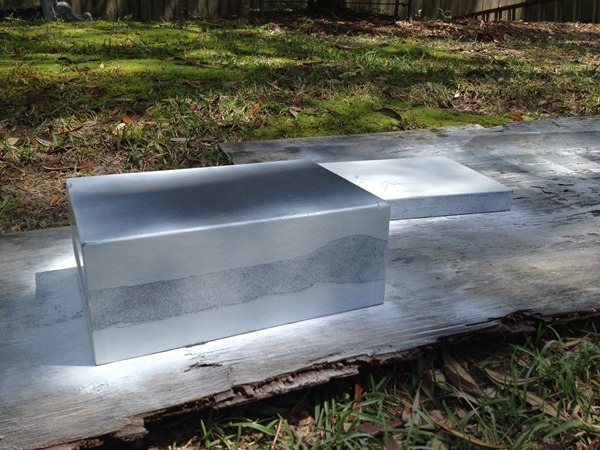
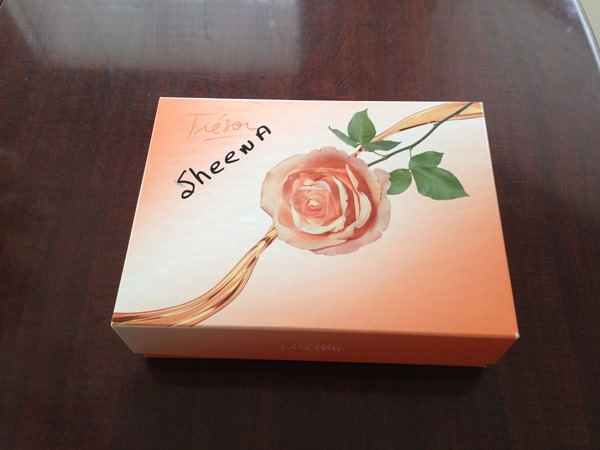
The gray and white striped box on the right side of the hutch was a perfume box I’ve had pictures stored in forever.hutch (7)

IMG_7968 
It’s made of heavy duty cardboard.  I just spray painted it white and then laid some tape across it in strips.  Then I painted over the taped and un-taped stripes using some gray paint (leftover from this stenciled rug project), and then carefully removed the tape to reveal the new gray and white stripes.  The blue cut-out vase atop it was a Dirt Cheap find and the sea urchin was diy-ed (tutorial here).  The wood box on the bottom shelf is a bible box I’ve had since I was a wee girl.  I thought about sanding it down to get a more natural wood look but it has a few small latches and hinges to go around and just seemed a little too tedious of a project.

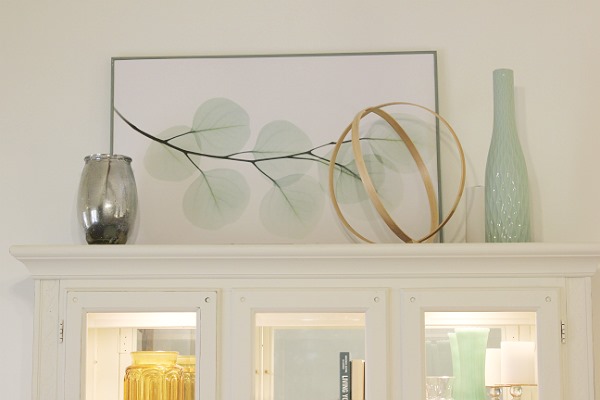
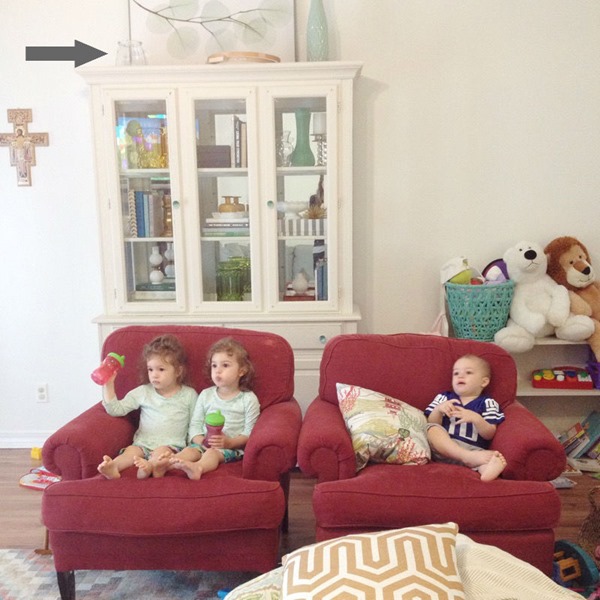
On top of the hutch I did some much needed restyling.  The mercury glass vase was diy-ed (tutorial here in yesterday’s post).  The orb-ish thing is just an embroidery hoop that I bought several months ago for a project that didn’t come to fruition.  The minty vase was a thrift find.  The large frame was an amazing thrift find a few weeks ago!  I got it for 50 cents!  It’s big and metal and it’s the same mint-green color as our sectional.  The print inside it was a thrift find from a few years ago but I just saw the same print on clearance at Hobby Lobby a few weeks ago for under $2.  I cut it to fit the frame.
  hutch (11)

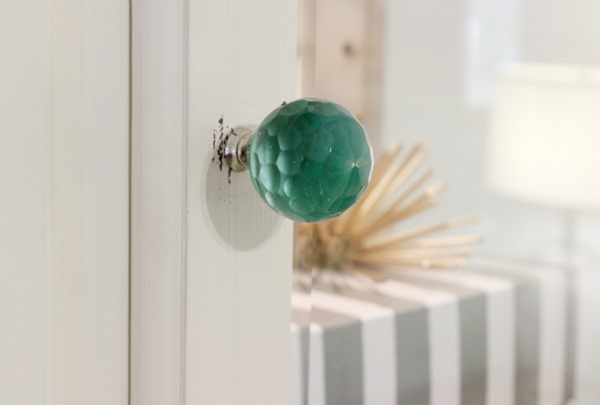
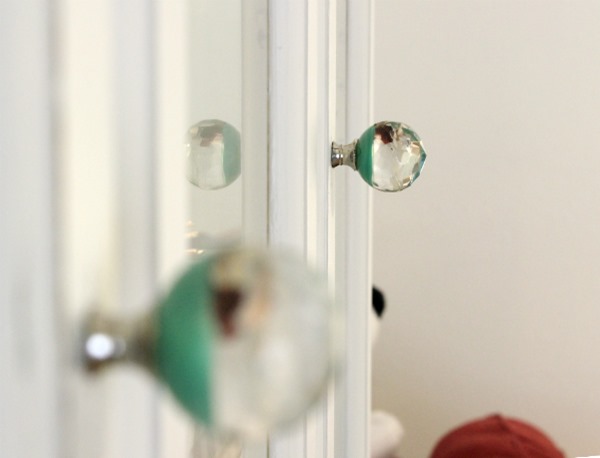
You might’ve also noticed the gorgeous knobs this sweet thing’s sporting.
hutch (12)

I am in la-la-love with them.
 hutch (13)
[And I also have yet to touch up the paint the old knob scratched up behind them.]
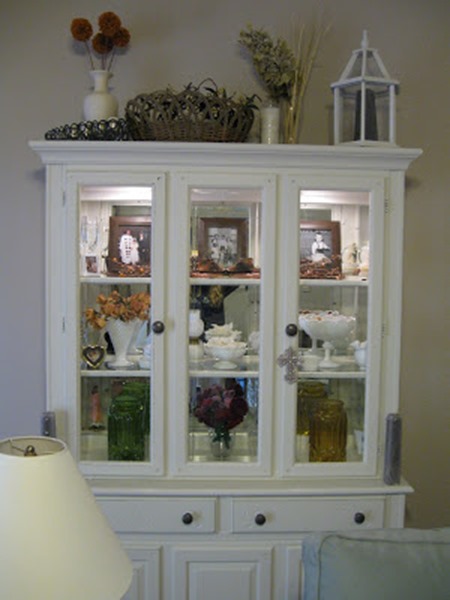
I saw these beauties at Hobby Lobby many moons ago and wished I could snatch them all up and replace every knob in this house with them.  Then, a few months ago, I went through a big closet purge and sold a bunch of my dresses and with some of that cash, I went and bought my knobs.  They were 50% off the week I bought them so I got eight of them for around $16.  You probably don’t remember because they didn’t make the greatest impression, but the original knobs on the hutch were plain, stocky wooden ones that I spray painted with some hammered brown spray paint…blah.  These make all the difference in the world.
hutch (15)

And that’s it!

But, for more kicks, let’s do a whole history.  Here’s what the hutch looked like when we first got it from a friend (we traded a twin mattress for it):
hutch before

Then after we moved to Alabama, I painted it:
artbyme 001

Then the knobs made things a little happier:
IMG_7530

And last, HGTV happened:
hutch (2)

What a journey, no?
hutch b&a 

I think I am so passionate for decorating right now because it’s really a challenge.  We don’t have it in our budget to spend much, if anything on home decor right now, so finding ways to make things pretty while only spending a little bit is so fun!  Call me crazy but it’s the truth.  This hutch is the perfect example of that!  But then again, that challenge puts these crazy ideas in my head too which don’t always work out like I picture.  For example, I looked into getting the cranberry-colored clubs chairs in our living room reupholstered and the cost was way, way, way out of our budget.  So, this crazy person is going to try to do it herself.  I haven’t found the perfect, cheap but quality fabric yet to do so, but when I do, look out…and wish me luck.  Lots and lots of luck…and wine, and help, and maybe advice?  :)

TGIF

DIY Mercury Glass

Thanks to the sweet thoughts and therefore actions of friends and family, we’ve collected many a glass vase over the years that once held flowers.  Usually, I store them away under the hutch for a rainy day or a potential project.  To this day I think I’ve done zero things with all of them…until now.  I forgot to take a good before but you can see half of the vase this post is about atop the hutch in this ‘gram:
   mercury glass b4
The plan?  To go all mercury glass with it.  Here’s how.

First, the supplies:

- clear glass vase
- Looking Glass spray paint (Krylon)
- spray bottle filled 1/4 of the way with a 50/50 mixture of water and white vinegar
- a few paper towels

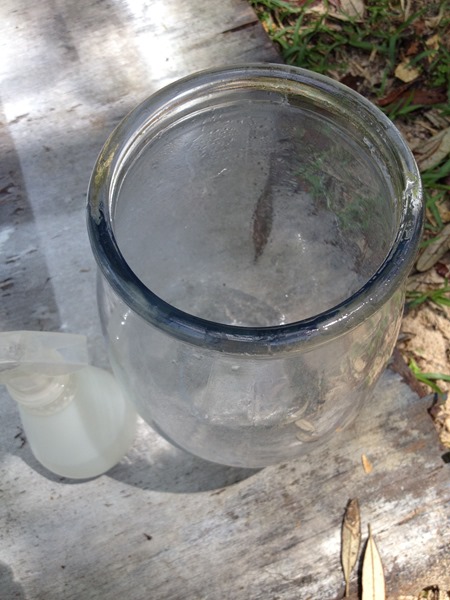
There are a few tutorials online on how to do this but in the end I just winged (wung?) it with my own rendition to see what happened (hint: it turned out awesome!)  First, I gave the inside of the vase a few sprays with my water/vinegar mixture.  The mixture beaded when it hit the surface.  I probably spritzed about 3-4 times; not too much.  Just enough to wet the entire inside without forming a pool at the bottom of the vase.  (If you do spray too much, just dump it out and move along.  No big deal.  Mercury glass is very imperfect as it is so mistakes aren’t really mistakes in this project!)
   IMG_8785
[It’s hard to tell how much I actually sprayed in pictures but you can kind of see the foggy, vinegar/water covering on the inside of the vase.]

Then I grabbed the looking glass spray paint.  My Aunt gave me this spray paint three years ago for my b-day and I finally got around to using it!
71OwyfFGRTL._SL1500_
You can find it here on Amazon (my affiliate link) but I know for a fact that, if you arm yourself with a coupon, it’s cheaper at craft stores (Michael’s and Hobby Lobby sell it).

Next, I sprayed three light coats of the looking glass spray paint inside my vase, waiting about two minutes in between each coat.  Note:  The spray paint started pooling at the bottom of the vase after the second coat so I just picked up the vase and swirled that paint around the inside.  What little still pooled I just left.  IMG_8786

After I had sprayed the three coats, I let the vase sit for 10 minutes and then I carefully dabbed the inside of the vase with the paper towels, removing the beads of water/vinegar.  I also rubbed a little harder in a few larger spots to get a more imperfect look.  (A lot of the tutorials I read called for a light coat of the looking glass spray paint on the outside of the vase after the inside was done but I didn’t do that.)  After dabbing away the vinegar/water, I let the vase sit to dry. 

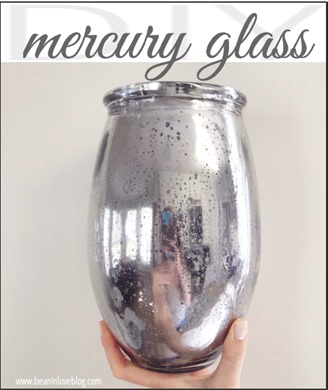
Behold, our new mercury glass vase:
IMG_8800

This would be such a fun project to do for a holiday tablescape – grab a bunch of clear glass vases at your local thrift store and mercury them.  Then line the middle of your table with them.  :)

Ours went back to the top of the hutch which I’ll be sharing in it’s fullness tomorrow (if all goes smoothly in this household today, otherwise it’ll be Monday for sure.) 

I’ve also been working on a super fun project that I was hoping to share before this week is over but it’s looking like it’ll be next week instead because nap times just aren’t long enough…which is totally okay.  :)  You can get a sneak peek here though.

What have you been working on?  Maybe you’re smart and have started spring cleaning instead of dabbling in silly projects like me.  ;)  Anthony told me a few weeks ago we should definitely wash all of our windows soon, inside and out, and guess who hasn’t even started.  I’ll just throw that one over to fall cleaning and blame the rain.

Hope to see you tomorrow!

.           .           .


If you like it, you should put a pin in it:
diy mercury glass