Saturday Post…Wha?

Well, Saturday has come and almost gone and I’ve been mulling all day over the fact that I have yet to whip up my normal Saturday post.  The twin belly has given me some quite uncomfortable nights so my brain is not quite up and running so the thought of writing a detailed post sounds as exciting as eating dirt right now.  However, I’ve got progress I’d be happy to show. 

june122012 490

And that’s it.  :)

I’ve actually spent most of today washing baby clothes…lots and lots of baby clothes.  Next up to hit the machine – burp cloths, cloth diapers (which need to be washed four times before their first use – goodness gracious), towels, and blankets.  Maybe after that all of our girls stuff will be ready for them to get here…just like me.  :)

Have a great rest of the weekend!

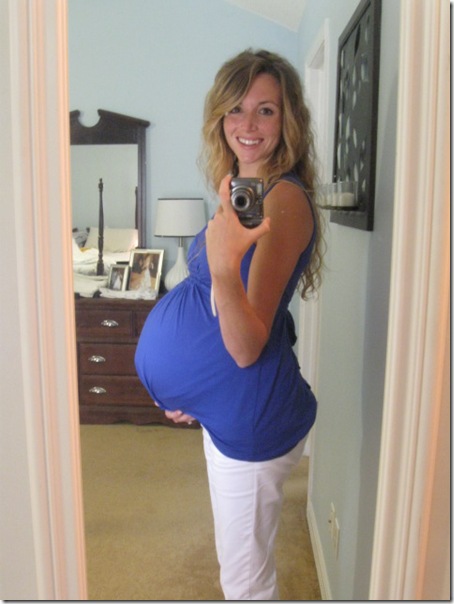
Twins: 33 Weeks

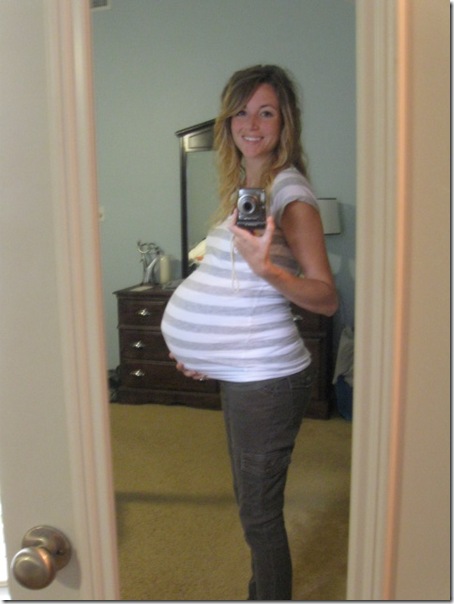
33 weeks

As you can see…or if you can see…we seriously need to someday soon invest in a tripod of some sort because I apparently don’t have the steady hand I thought I had.  I’m not sure if the blurry nature of my photos makes me look bigger or not, but who really cares.  The fact has to be faced….I’m BIG!  BIG as in my belly at this very moment is measuring no shorter than 42 inches!  Scarlett O’Hara would pass out at the very mention of this very matter.  Funny though, I don’t feel as big as pictures portray.  My legs and back have apparently profited from painting rooms upon rooms and pretty much everything else as they’re carrying all of this extra weigh without much of a complaint.  :) 

Hung Up

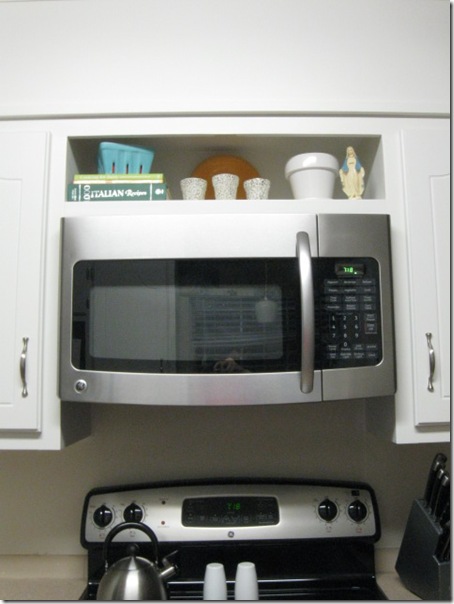
FINALLY!  The new (new as in we bought it brand new over a year ago and it’s been sitting in a bedroom closet since) over-the-range microwave is up!june82012 005 
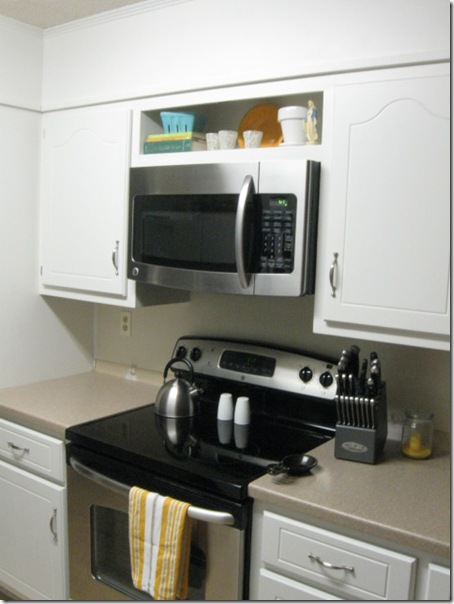
Here’s how we did it:

Since we didn’t have the somewhat “required” upper cabinet to attach the microwave to, we had to improvise.  (We actually used to have one there but it hung too low, making any microwave we attached to it lower and closer to the stove than it was supposed to be – the stove top should be at least 16 inches from the bottom of the microwave.)  After searching the internet on how to hang a microwave without an upper cabinet, all we came up with was the option of buying this ‘hanging kit’ that supposedly existed but that we couldn’t find anywhere.  In came Anthony’s great idea to build a shelf that would basically be a built-in cabinet of sorts only without the doors.  We could’ve had doors made to fit or tried to somehow cut ours down to fit but we kinda liked the idea of having an open shelf to store cookbooks and such, not to mention that custom doors would’ve been expensive and over our budget and cutting up our own, risky.  So, a shelf it would be.

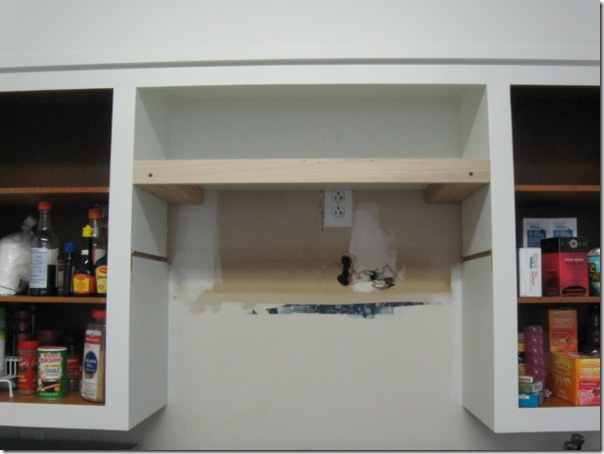
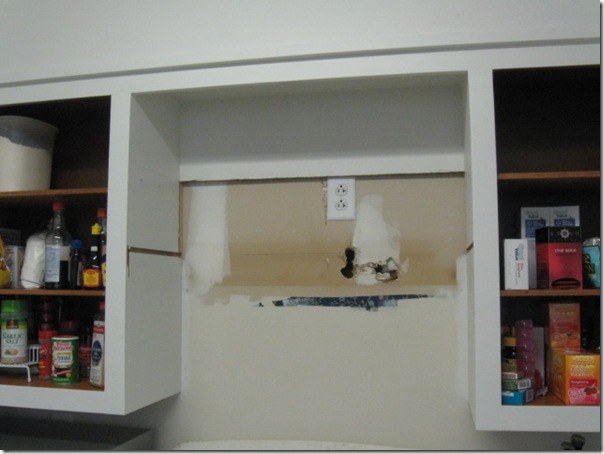
So, after we took out the old cabinet (our cabinets were built in place so that’s why there are two notched-out lines in the sides of both side cabinets), I primed and painted the area during my kitchen painting spree a few months ago.mar172012 002  The gaping hole in the wall is where the old electrical wiring for the hood vent came through.  Since neither that, nor the old cabinet notches were going to be seen sans microwave installation, we didn’t bother to fill them in.  Lazy?  Maybe.  Aware of the unnecessary?  Definitely.
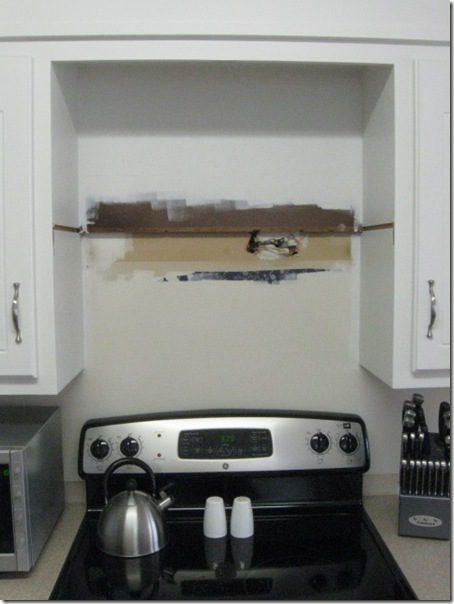
Next, Anthony shortened the back of the old cabinet a tad more so that he could use the old vent hood wiring to put in a new outlet for the microwave. may262012 009
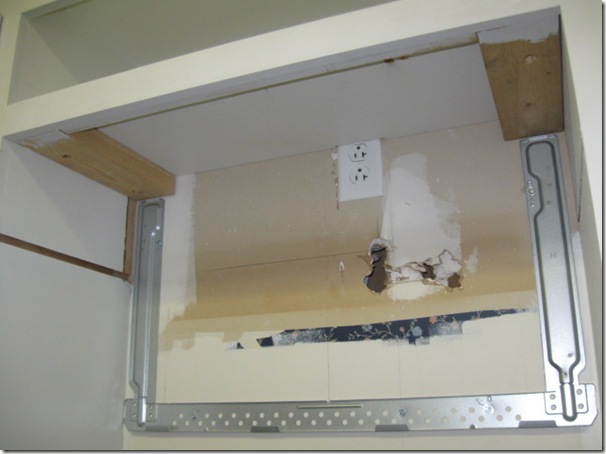
Then, up went the new shelf.     may262012 010

The actual ‘shelf’ is a 3/4 inch piece of plywood that was cut-to-size and then screwed on top of two pieces of 2 x 4.  The two pieces of 2 x 4 were firmly attached to each neighboring cabinet and then a two-inch wide piece of wood was attached to the front to make the shelf look built-in.  For added support for the shelf, Anthony also installed a scrap plank of wood behind the front piece of wood but under the shelf.   Get it?  Hopefully the picture helps explain.

After all that, we filled in the screw beds and went to town priming and painting.

The next thing to go up was the wall support that came with the microwave…  june82012 002
…followed by the microwave itself.june82012 006Meanwhile I went ‘house-hunting’, grabbing things from different places in our house to temporarily fill up the shelf until I find some colorful cookbooks to take up the space.

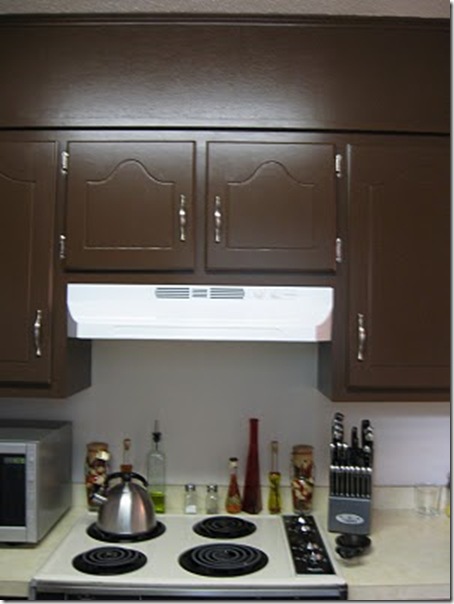
It’s definitely a far cry from where we started circa 2009:cupboard 003
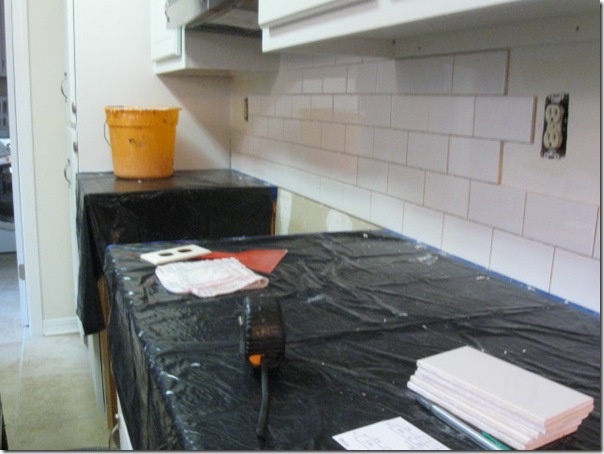
Next thing to go up?  The subway tile backsplash.  At the rate we’re going, we’ll be done with that right before the twins first birthday.  :)  However, we may or may not be planning to start on it tomorrow.  I guess you’ll just have to wait and see.

Twins: 32 Weeks

32 weeks

I’m getting antsy…  That’s one hand, but on the other hand I feel like I’m going to birth these two and then after they’re shown to me for the first time I’m going to be like “Aww…  Cute babies!  Whose are they?”.  Is that weird?  It’s just so surreal.  You’d think watching and feeling them move and poke would hammer into my head the reality of the situation(s) at hand, but no, disbelief at what my eyes can’t see has me stunned (and maybe confused).  Any other first-time mothers have/had that feeling?  Please tell me I’m not crazy!

Other than my confused, crazy mental state, things are going great!  We had a OB appointment this morning complete with a hand-held ultrasound check-up that showed the two sprouts, both still head down (they’ve thankfully been that way for the past two months and here’s to hoping they stay that way until B-Day), both hearts beating like mad, and lots of amniotic fluid to boot.  Lovely, lovely, lovely.

Other happenings this week:

- While walking into Wal-Mart the other day, an employee walking towards the doors as I was coming in literally stopped dead in her tracks and proceeded to back out of the way (way out of the way) as if I were driving a Hum-V through while loudly excreting from her apparently unfiltered lips “WHOA!  You must be ready to go any day now!”  Not concerned at all about my present disproportionate figure, I simply smiled and said “Darn right!  And, could you please back up a little more?  I’m going to need at least 10 more feet of clearance to get to the first item on my list.  As a matter of fact, why don’t you just widen all the isles for me as I’m not sure the current set-up is going to work. “Yes, ma’am”. -

- This past Sunday, our youth group kicked off the summer with their new, handsome youth minister – Anthony Tobin – at a pool party.  There was great food, incredible desserts, and even some “contests” including an off-the-high-dive belly-flop contest and a cannon ball contest.  Much to my disappointment, I was specifically told I wasn’t allowed to compete in the cannon ball contest as I would surely win… -

- In an incoming order of newborn cloth diaper covers that arrived this week, I got a coupon saying “Get a free Milk Daze Nursing Cami with your next purchase of $50 or more”.  Knowing I need at least $50 of cloth diaper paraphernalia still (and a nursing tank!) and not being one to shy away from a bargain, I quickly looked up this soon-to-be-mine-for-free cami just to see what I’d be getting.  I’d like you all to know it has, what they call, a “sexy criss-cross bodice” and the picture portraying this alluring piece looks exactly like this: miikdaze  “Quick sweets!  Get me my pearls!  The babies are hungry!”  Or should I say, (in my sultriest, sexiest voice) “Darling love, you handsome creature you, waltz over to me my pearls.  Our offspring are in need of what only mama can provide.” -

Tulle-ing Around…Again

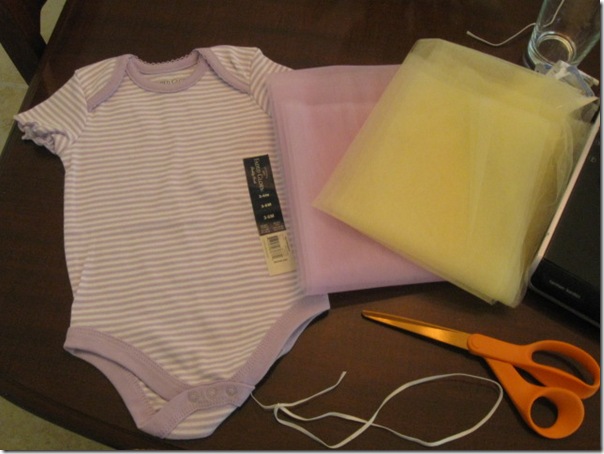
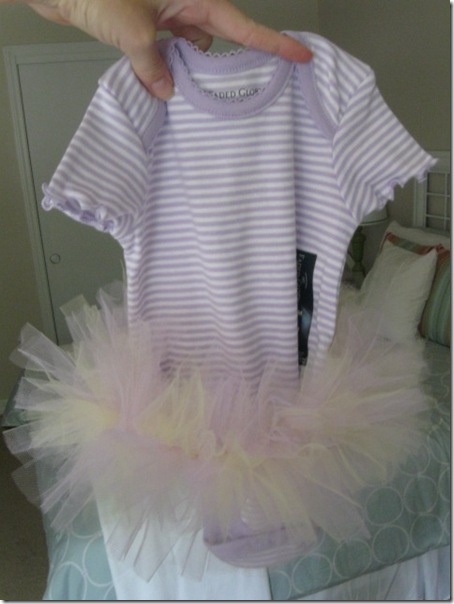
I’ve been playing with tulle again, purple and yellow tulle this time though in contrast to the ivory of the past.  In the spirit of all things girlie, I constructed a little tutu to adorn the cute belly of a friend’s newborn.  Here are the supplies I used:     june22012 001A onesie, tulle to match (as few or as many colors as you’d like – I used a half yard each of yellow and purple), a pair of scissors, a piece of elastic (I went with a thin, 1/4 inch strand), and (not shown) permanent fabric glue and a needle and thread to secure the knot you’ll make in the elastic.

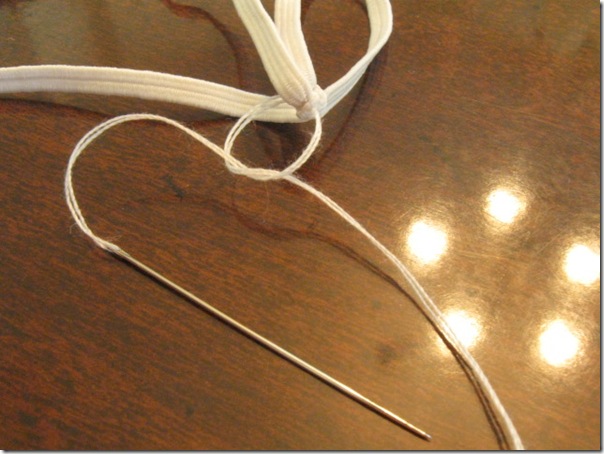
Speaking Writing of the elastic, I wanted to make sure that once tied to fit around baby’s belly, it wouldn’t come undone so I after I tied a double knot, I ran a strand of thread through the center of the knot and double tied it.june22012 002Then, overachieving or not, I dabbed the entire knot with some permanent fabric glue (making sure to let it dry before attaching the tulle).  Let’s put it this way, baby Colleen can move and twist to her hearts content and her skirt will never fail her.  :)

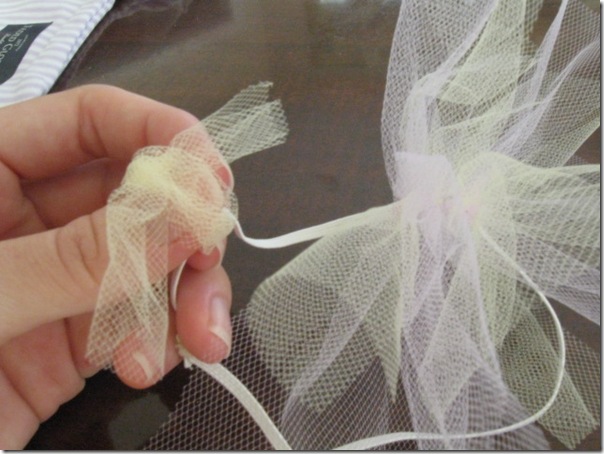
On to the next, most tedious step in this fun project – attaching the tulle.  I didn’t do the greatest job of photo documenting so I hope my explanations do the trick.  First, I laid out the entire piece of tulle, folded it in half, and then folded it in half the same direction again to create a quadruple layering of tulle.  Then I cut 6 inch strips, giving me three long strips out of which I cut strips two inches wide.  So, in the end I had around 200 or so 2 x 6 inch strips of tulle.  To make things a little less tedious, you can cut wider strips (4 x 6 or even 6 x 6) but I wouldn’t go much longer unless you’re going for a dress look over a tutu.

Next, I tied each individual piece of tulle to the elastic band while watching tv.  It took me a good hour or two to get all of them on.  I only tied one knot and made sure each piece was super-close to the next one which usually required me tying the knot loosely, sliding it over until it touched the previous knot, then tightening. june22012 003

Unfortunately, the only babies I could easily use to model the finished product won’t make their debut for another month or so so once again, you’ll have to rev up that imagination to see how adorbs this would be on any baby girl.june22012 004

I can’t wait to make more for the twins!  I got planz yo…planz for head bandz, belly bandz, and mo…