Showing posts with label Our Kitchen. Show all posts

You Know I Love Stripes

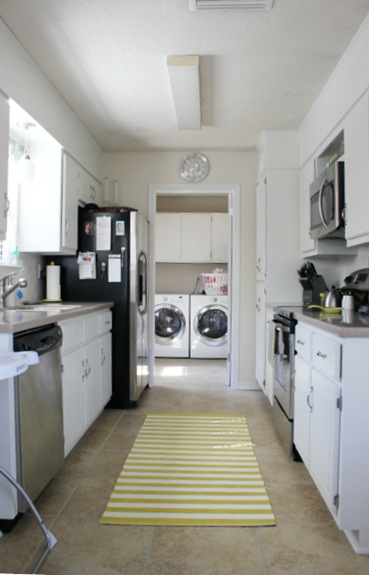
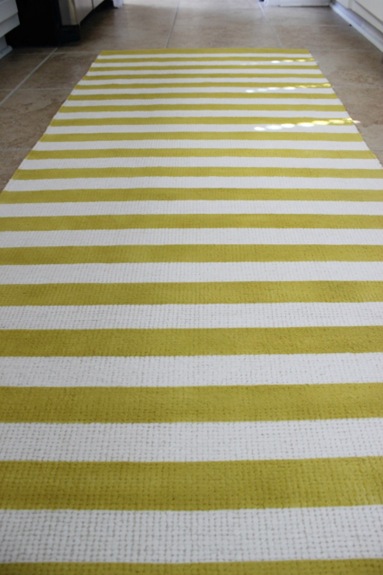
And so it shouldn’t be much of a surprise that I did this:
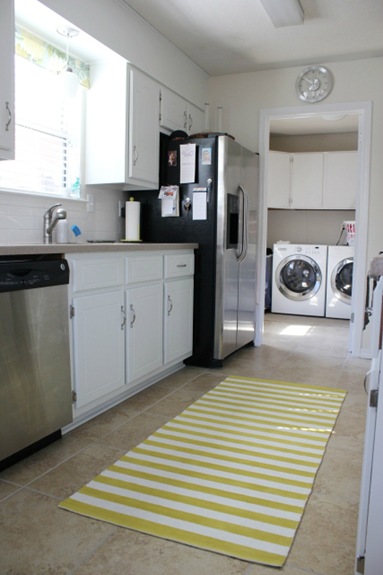
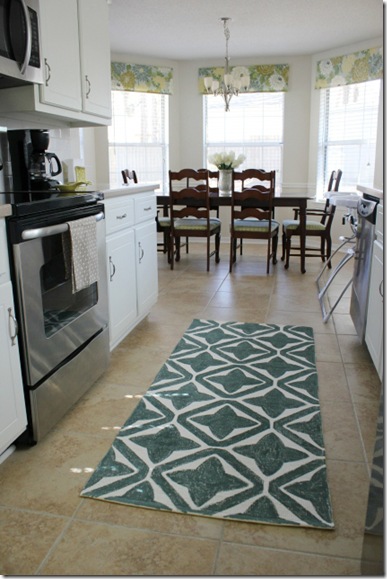
feb92012 025  to the other side of our newly stamped kitchen rug.

I debated a few other options – diagonal stripes, chevron, etc… – but in the end I loved the idea of the horizontal stripes not to mention that it was the easiest option because all it involved was laying down tape and painting…no cutting, trimming, or measuring.

All I used this two-inch wide masking tape (from Target) to create the stripes: feb92012 020
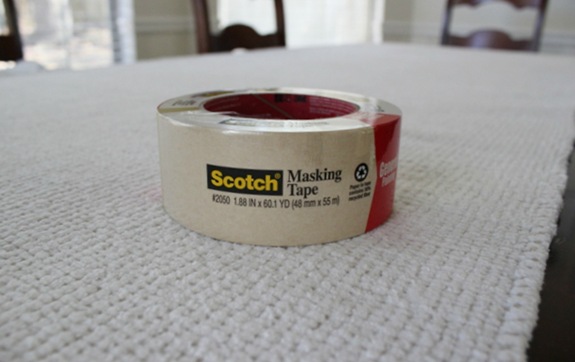
Before I started I ripped off a small piece of tape and stuck it to my rug to make sure that when removed, it wouldn’t ruin the rug.  Lucky for me, it came off as clean as can be.

So, starting at one end, I laid strips of tape about two inches apart…feb92012 021 
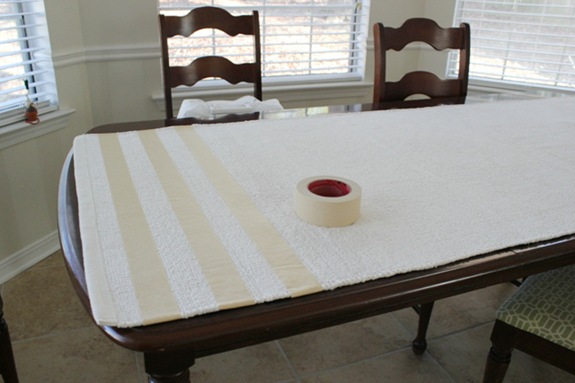
giving me lots of even stripes all the way down the rug.feb92012 022(I actually started laying two pieces of tape together for thicker stripes, but then changed my mind and went with the thin stripes.)
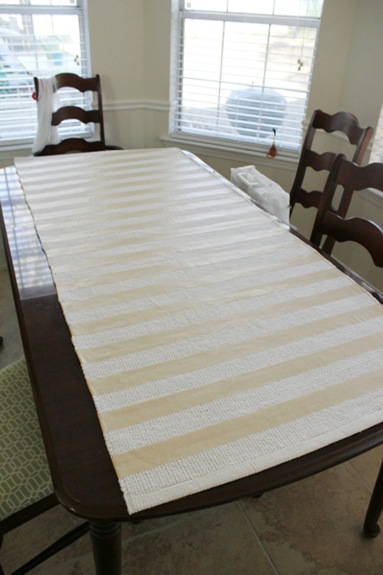
I made sure to wrap the tape around the sides and under the rug so that, if any paint got on the sides, it’d still be where it was supposed to be – part of a stripe.feb92012 023 
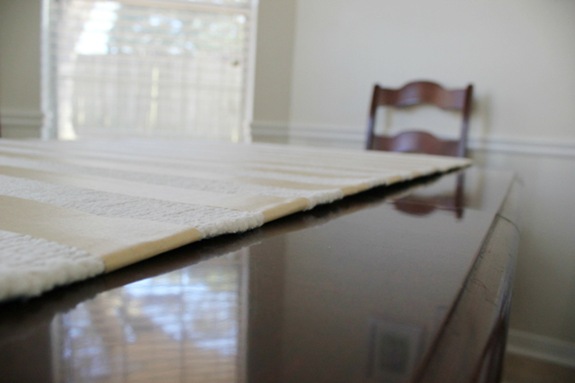
Then I carefully took the rug outside and gave it a couple of coats of spray paint, letting the first coat dry (about 30 minutes) before I sprayed the second coat.  After a few hours of leaving it outside to rid it of the paint smell, I brought it in, carefully removed the tape, and laid it in our guest room for 24 hours before bringing it into the kitchen to be walked all over.

feb92012 026

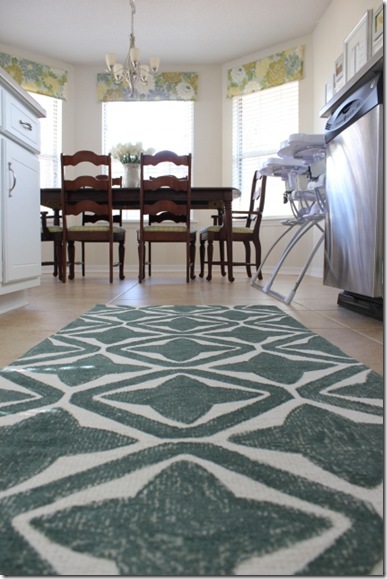
We love it!  It seriously looks like it was bought this way.  I noticed that the spray paint preserved the texture of the rug much more than the sponged on latex paint did.

[Update:  Read about how the rug is holding up here!] 

feb92012 031

Budget breakdown for this side:
Tape:  $4 (used only about 1/8 of the roll)
Spray Paint:  $4 (used one leftover can and half of another)
Total:  $8
…which brings the Grand Total of the entire project to:  $34
Thirty-four beans for a reversible rug that we can flip and reverse depending on our mood, that can be easily washed, that adds some much need pattern and color into our kitchen, and that gives our dish-washin’ footsies a soft place to land.  Not bad, I’d say!

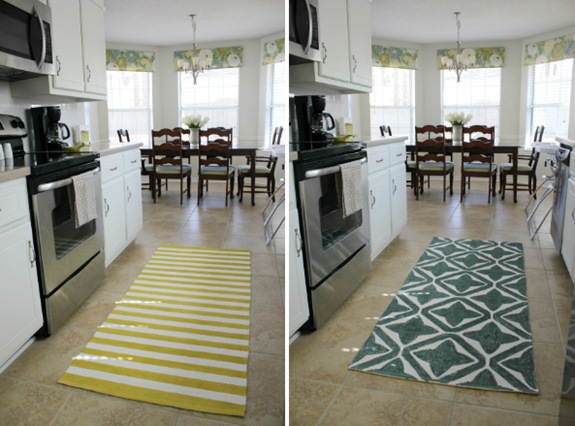
So, the only question that remains is, which side do you like better?reversi      stripes                                                  or                                             patterned   
.           .           .

I’ve been busy in the nursery and I’ve got a good read/tutorial coming your way this weekend!  Hope to see you then!

P.S.  It’s party time!  Linking up at A Bowl Full of Lemons, Ginger Snap Crafts, and Gingerly Made!

A ‘Rug’ged Outlook

We’re still trying to infuse some much needed color into our white, white kitchen and I knew that one of the biggest steps I could make in that direction would be putting down a rug.  I wanted a runner but, you know me, I didn’t want to spend a bunch of cash on one.  I wanted something with a big geometric pattern but unfortunately, unless I settled for a plain old solid, nothing with a price tag low enough (say under $25) was popping up.  Never fear, pinterest is here (my new mantra?).  I’ve seen dozens and dozens of stenciled and painted rugs before and those rugs usually hailed from IKEA, which we don’t have anywhere close.  Lucky for me, I’ve got a friend named Allyson who does.  She.saved.the.day.  She’s going to school 30 minutes from an IKEA and so I had her swipe up a rug for me and bring it down home last summer.  Well, then the twins were born, I lost a bunch of sleep, I was feeding them allthetime, other projects got in the way, I couldn’t decide what color, yadda, yadda, yadda…  But, last weekend while Anthony was away on a trip to St. Louie, I got my rug on.

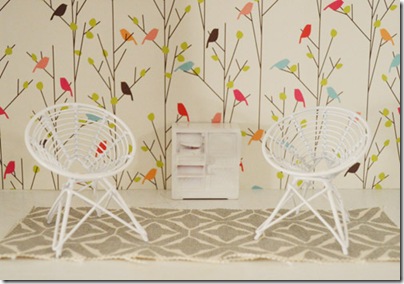
First of all, the inspiration.  John and Sherry from Young House Love created the ultimate dollhouse for their little girl, Clara, and this is one of the rooms:kitchrugpattern

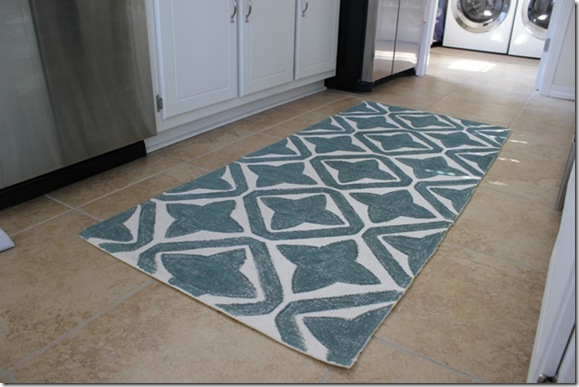
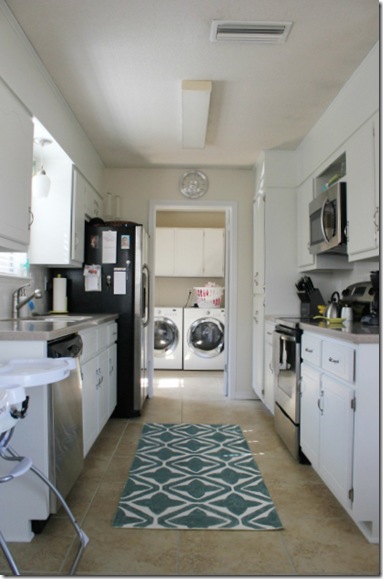
When I saw it, the first thing my eyes went to was the “rug”.  I had to replicate the pattern.  So, I did.

feb92012 045

And here’s how:

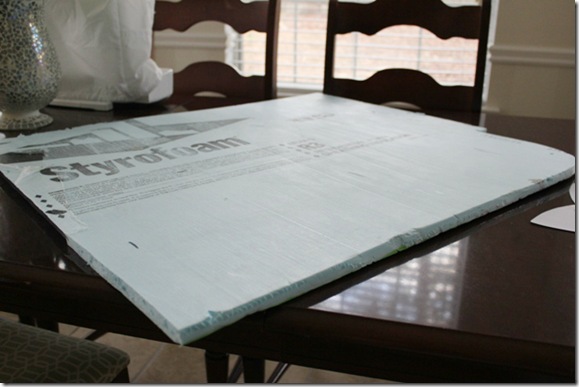
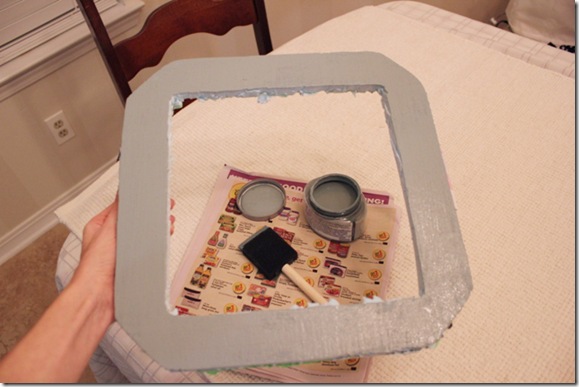
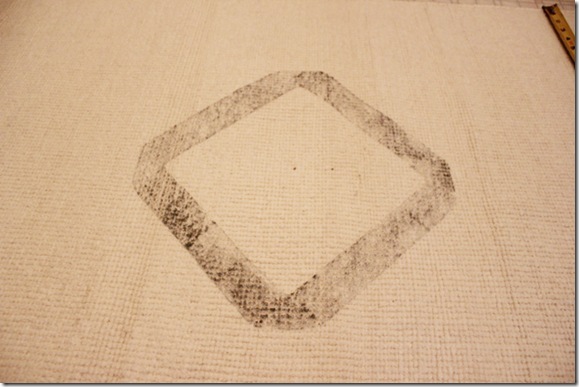
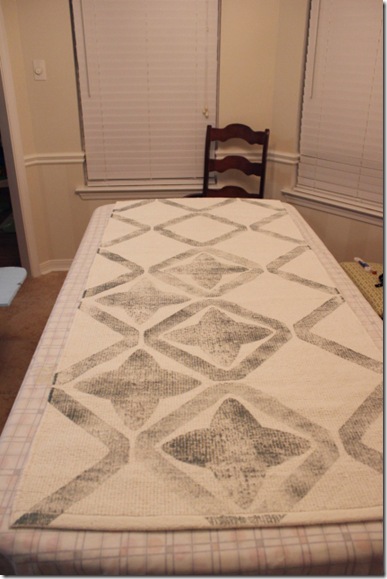
feb92012 005I used a 3/4 inch thick piece of insulation styrofoam to make a stamp and stamped the design over the entire rug.  You could probably use a thick piece of cardboard or a piece of packing styrofoam as well.

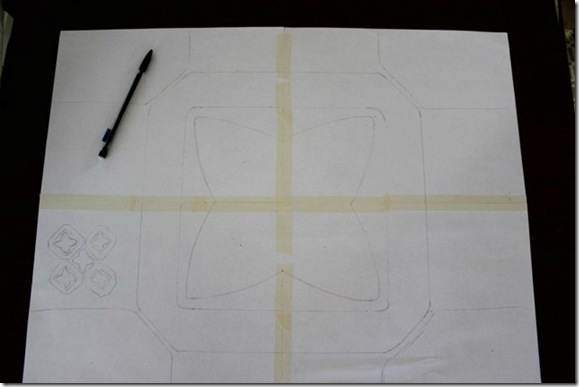
The first thing I did was draw up the design.  I made the outside square one foot by one foot and  guessed at the rest of the design’s measurements.   feb92012 001

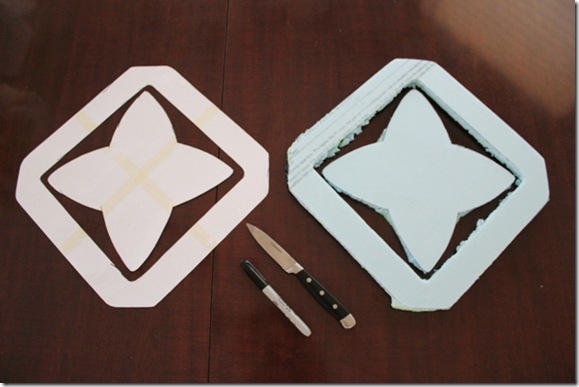
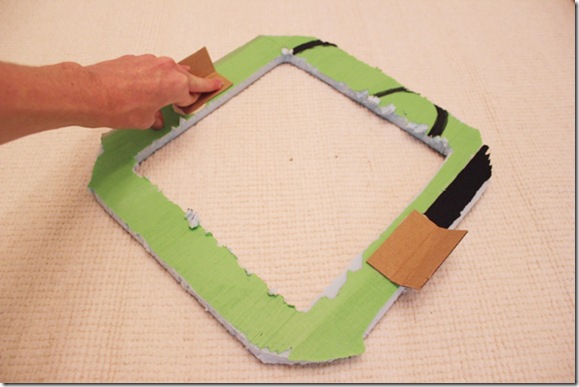
Then I traced it onto my foam piece and cut it out using one of our knives (I really, really need to invest in an exacto knife).  I made sure to get a clean cut on the side of the foam that I’d be stamping with.  The other side crumbled a little as the knife cut through but since it wouldn’t be touching the rug, it didn’t matter.
feb92012 006

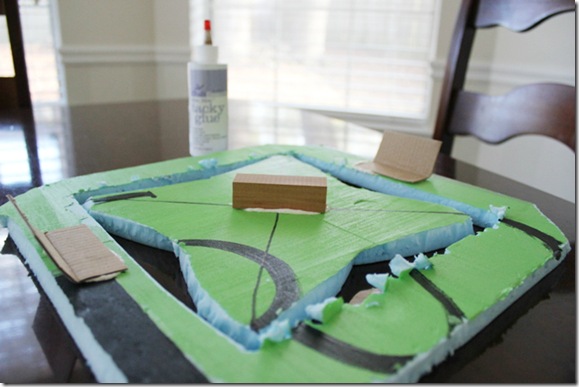
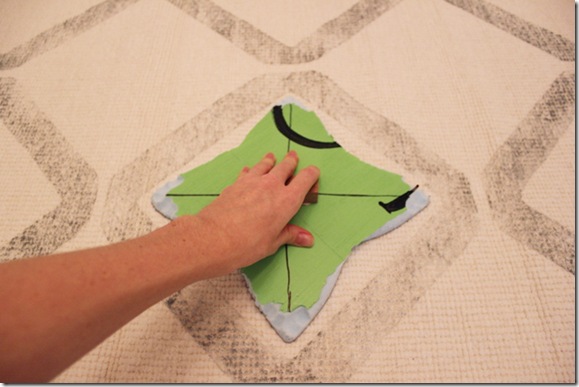
To give me something to hold onto while I stamped, I glued a wood block to the back of the inside stamp and two folded pieces of cardboard to the outer square. feb92012 008

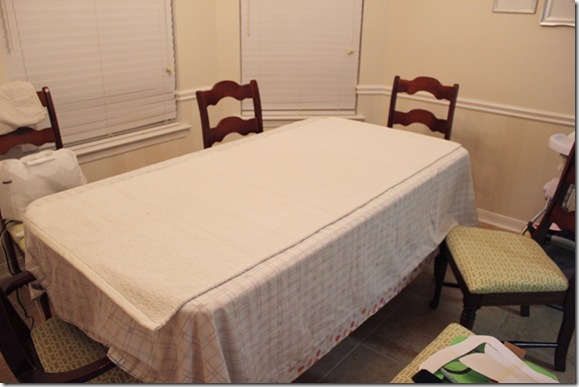
Enter the rug.  Lucky for me, it’s almost the same size as our dining room table so I had a perfect work surface.feb92012 009

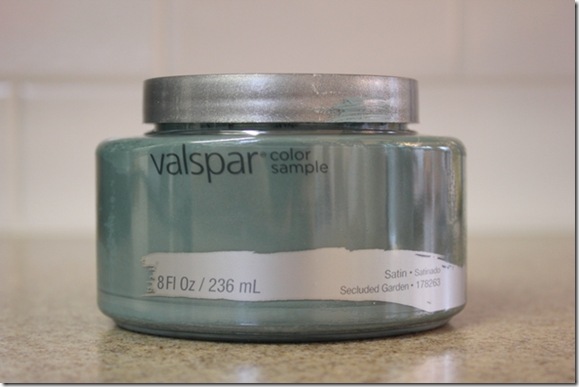
As for the color, I finally decided on this:  feb92012 019
Valspar’s Secluded Garden.  It’s part of their pre-mixed sample selection at Lowe’s this season.

So, starting with the outside square of my design, I brushed a coat of paint onto the foam using a small foam brush.feb92012 010

Then I stamped the very center of the rug, which I measured for and found beforehand.feb92012 011

feb92012 012

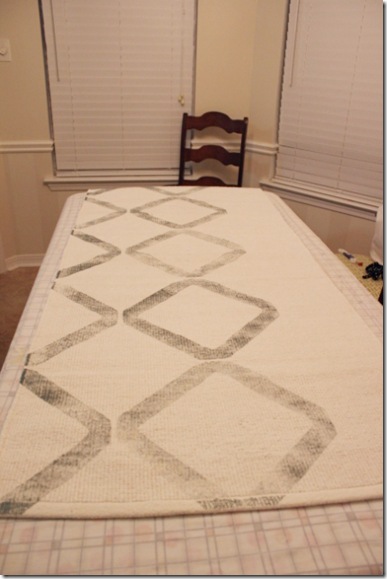
I worked my way out and around the entire rug… feb92012 013

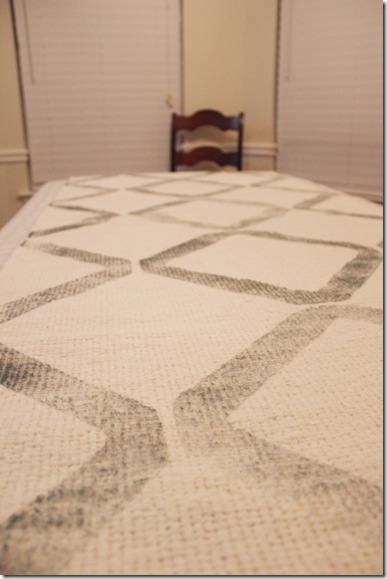
until I had a basic lattice design. feb92012 014

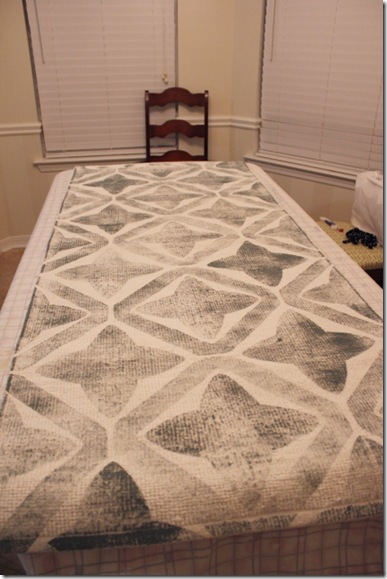
Next I grabbed the inside of my design and stamped it inside each square.feb92012 015

 feb92012 016

 feb92012 017

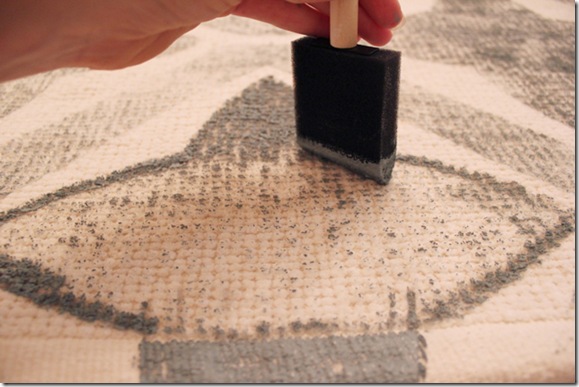
After I was done stamping, I filled in the design by sponging on paint using my foam brush.feb92012 018

I let it dry for 24 hours before I laid it down for fear that if I didn’t I’d be tracking blue paint all over our house…a nice surprise Anthony would’ve loved to come home to, I’m sure.

[Update:  Read about how the rug is holding up here!]

feb92012 041

The cost?
Rug:  $20
Paint: $6 (two sample-sized jars)
Foam:  already had
Foam brush:  already had
Total:  $26

feb92012 039 

 feb92012 040 

But wait!  There are two “sides” to every story, including this one.  I’ll let you in on the other side sometime this week.  Until then, I’m linking up with Ana and her infamous Valentine’s Day Cabin Fever Creativity Link-Up and this weeks Martha Mondays.  Go check out the craftiness that’s flowing and have a great weekend!

P.S.  I’m back from the future and linking up with Remodelaholic here!  Check out all the DIY goodness!
Project “Add Some Color”

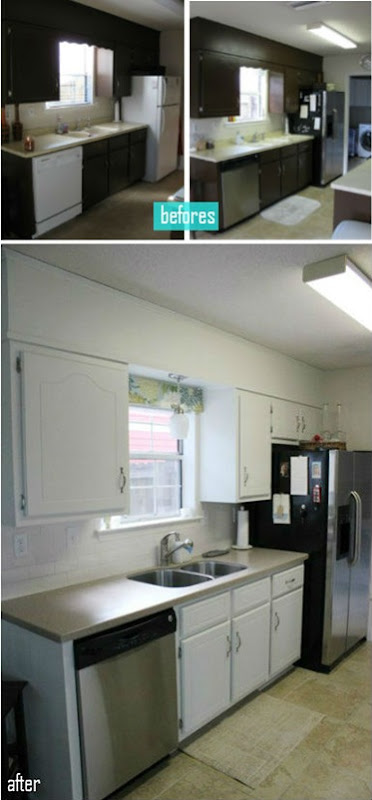
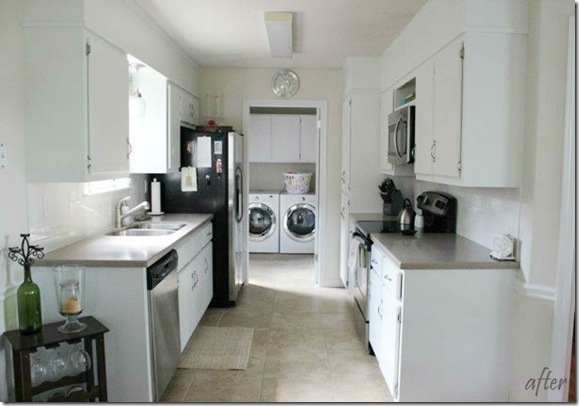
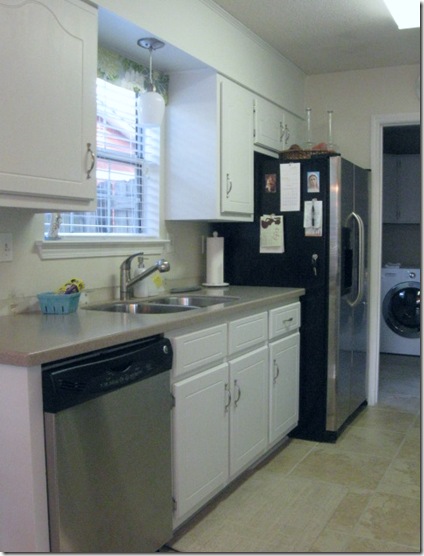
You might remember that a few months ago we gussied up our kitchen with white paint, new countertops, a new sink and faucet, a newly installed microwave, and a subway tile backsplashsept122012 041

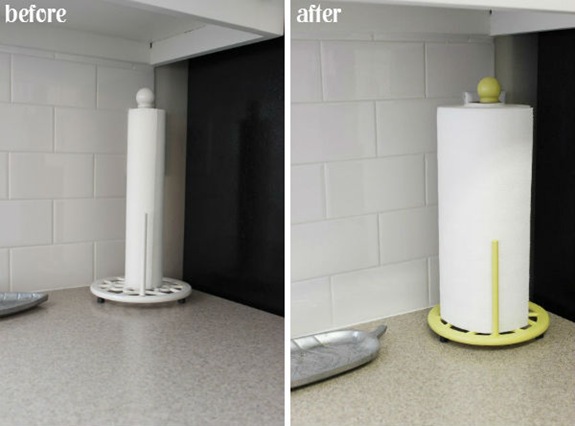
It looks mighty fine and we love how bright it is now, but it’s lacking some serious color infusion.  Well, I started that infusion with a few tweaks involving spray paint.  For example, see the dark brown spoon holder to the right of the stove in the photo above?  No?  It’s there.  It’s just melded into the color of the cook top, no individuality whatsoever. 

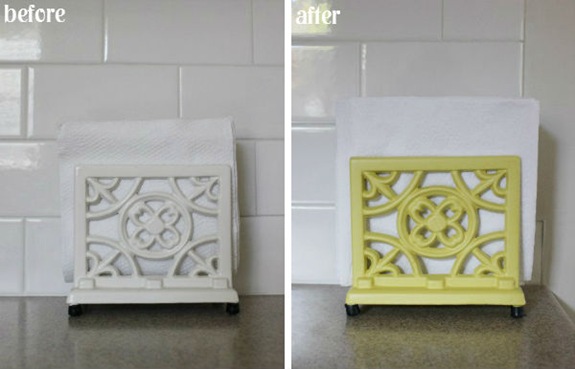
Well that spoon holder’s singing a new song these days to the tune of “Lemon Grass” by Rustoleum:dec72012 023

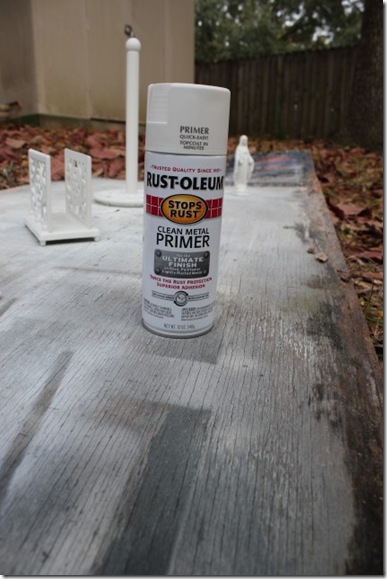
If I’ve written it one time I’ve written it a thousand buuut, all I did was spray each of my items to be colored with a thin coat of primer, let that dry, and then sprayed them again with a few thin and even coats of color, making sure to spray at every side and angle of each item to get full coverage. dec72012 009 You might’ve noticed my multi-tasking as I primed up Mama Mary at the same time.

So there we have it, a leedle bit more color in our stark white kitchen.pt

nap

The best part about this whole paint party is that it only cost me $4 for the spray paint.  I already had some spray primer on hand and the napkin, spoon, and paper towel holders were wedding gifts from Target five years ago.

Still on my back burner are a hand-painted/stenciled runner, some colorful cookbooks, random decor here and there, and maybe a spray-painted coffee maker?  Not sure about that last one but I’m not going to lie and tell you I positively won’t do it…

dec72012 020

Happy weekend!

Dreamin’ of a White Kitchen

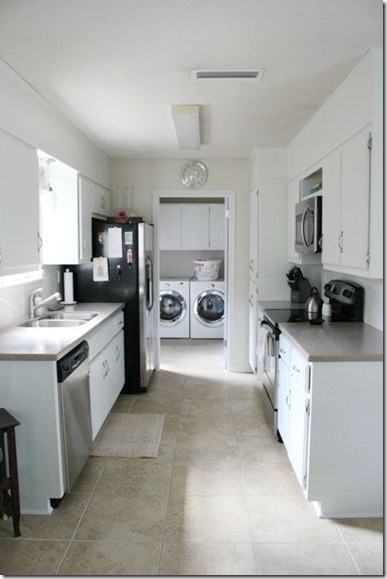
Day dreamin’ that is because it’s finally d-o-n-e!  AND it cost us just under $1150 (not including the appliances we bought a couple of years ago)…dirt cheap when you talk kitchen remodels!

sept122012 040

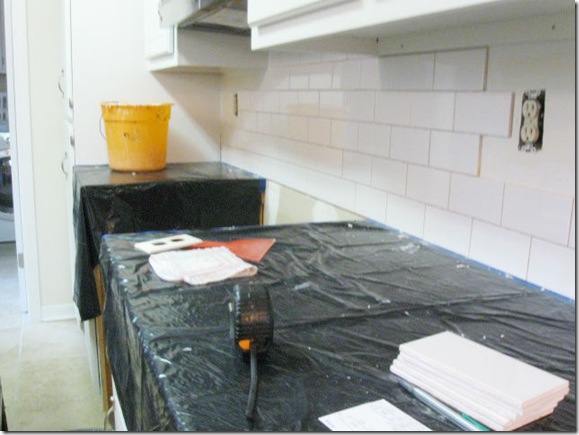
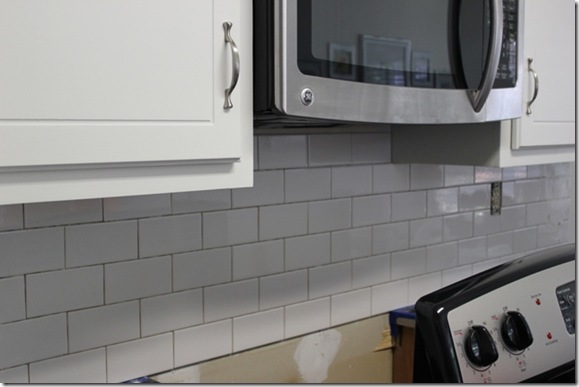
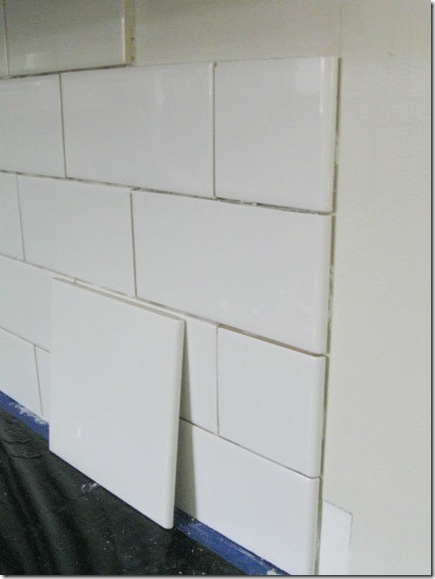
Let’s see, where’d we leave off twenty million weeks ago…oh yeah, the tile backsplash.  Had we gotten it done sooner than the week right before the double troubles came, I woulda coulda shoulda written up a detailed tutorial but you’ll have to settle for the nutshell version and seek out more wiser sources if you’d like a splash too.  So, first we washed down the wall real good like and then took some sandpaper to it to get it nice and rough for good adhesion.  To protect our nice, new countertops, we simply taped some garbage bags all around.  Then, it was spread mastic on a small section of wall and place tile, repeat, and repeat again…over and over until… 

june122012 490

…there was full coverage of the most modest kind. aug272012 001 

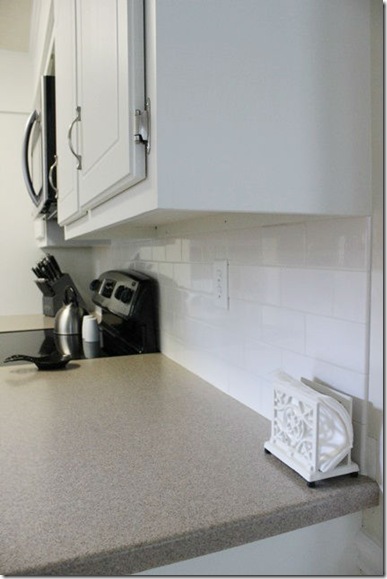
The ends were a source of much deliberation.  We could either have ended the tile aligned with the top cabinets or the bottom, the latter sticking out a couple inches more.  We chose the top cabinet line-up.  Also, we chose to have a bull-nosed look on each visible end  by grabbing some larger bull-nosed tile (we couldn’t find bull-nosed tile in the 3 x 6 variety in stores) and cutting it down with a tile saw.june122012 491

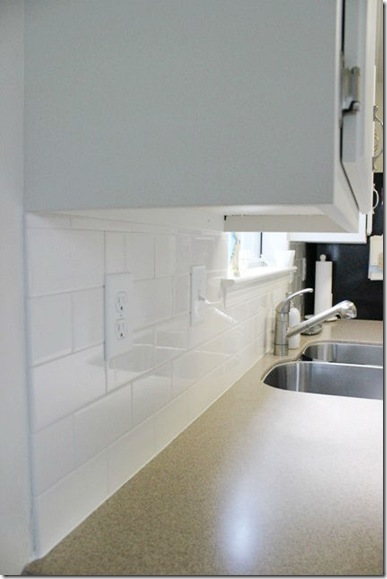
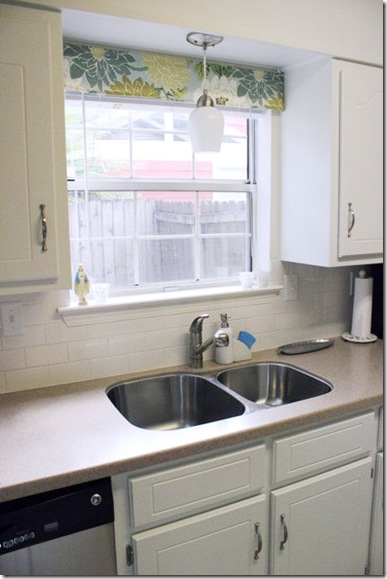
Then it was in with white grout and a strip of caulk between the bottom row of tiles and the countertop and wala, a shiny new surface had we. sept122012 045sept122012 046

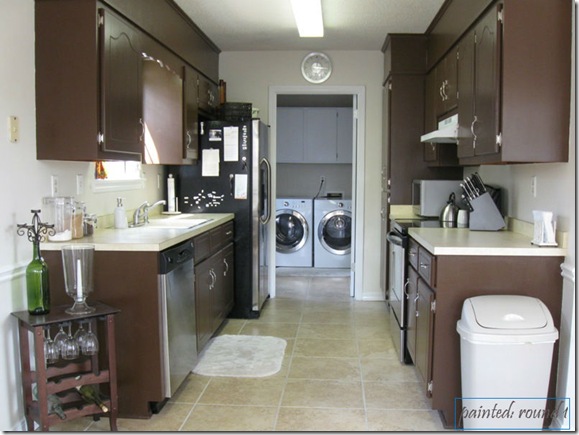
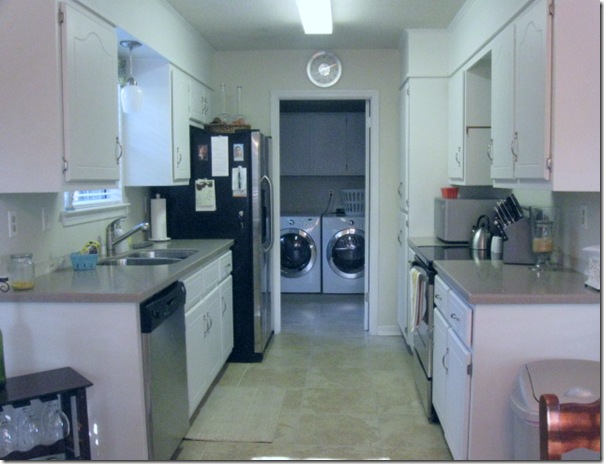
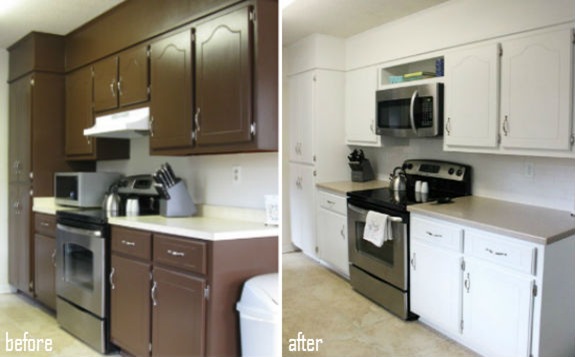
But anyway, back to the bigger picture.  Look how far we’ve come since I took leftover brown paint to the cabinets a few years ago.lsidepixd

Using my highest status of wifey quite efficiently, I finally persuaded Anthony to rip out the ugg wooden overhang and mini florescent light over our sink (but  not before I tried to rip them out myself) and replace them with a new pendant and seven more necessary inches of light.  Hello 2012.sept122012 047

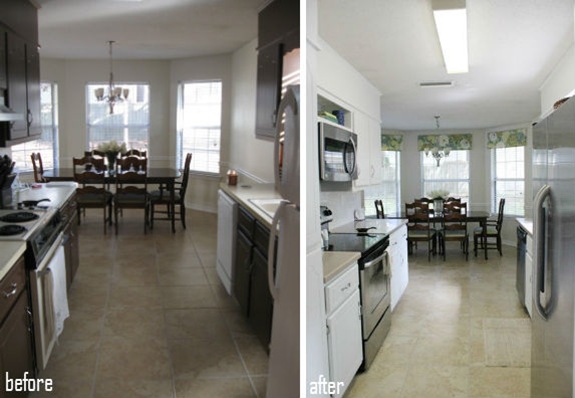
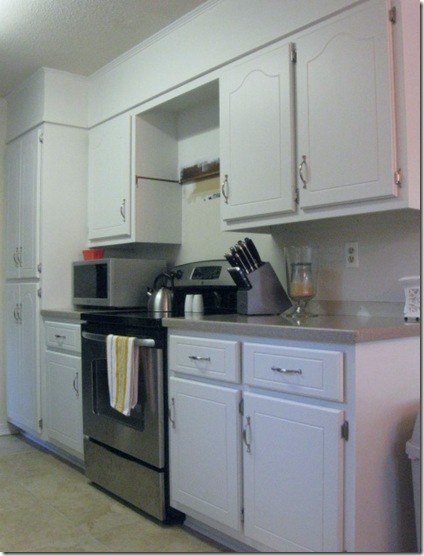
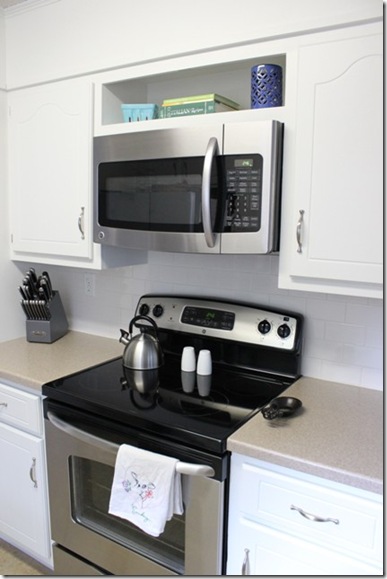
And here’s the other side, taken from a mixed metal mess to sleek stainless with the addition of the microwave.rsidepixd

Read about how we went from cabinet to shelf and microwave here.  Any day now I’ll fill up that shelf with some more colorful cookbooks, probably of the dessert kind just to stay with my craving trend.  Much better than before, don’t cha think?sept122012 048

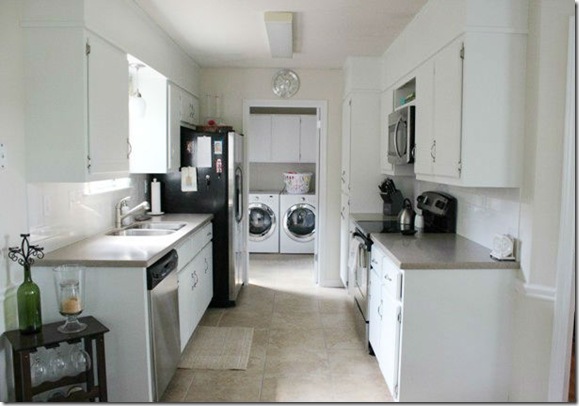
Then, just for a 360 feel, here’s the before-new-appliances/present view from the laundry room:anoangpixd

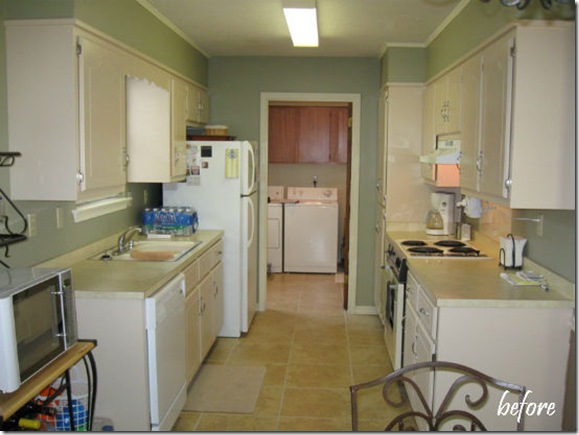
And now for the whole shebang: kitchen1(right before we moved in)

kitchen fsbo3pixd

sept122012 041pixd

I still have plans to add some much needed color with a painted runner and a couple of other nick knacks and maybe someday we’ll replace the florescent light and Anthony will let me repaint the laundry room with leftover guest bathroom paint but for now we’re loving the new, lighter and brighter look!

Here’s what it cost us:

Countertops:  $850 (Staron solid surface - Home Depot on sale, with a 10% off coupon, and 5% off matching Lowe’s credit card offer)

Sink: $120 (found clearanced from $420 because of an unseen-once-installed tiny-ish dent)

Faucet:  $80 (Southeastern Salvage)

Pendant light kit:  $15 (Home Depot)

Pendant light glass cover:  $15 (Lowe’s)

Wood and supplies for shelf above microwave:  $20

Primer:  free (already had)

Paint (Valspar’s Promenade):  2 quarts at $13 each

Sander:  free (borrowed)

Sandpaper for said sander:  $5 (Lowe’s)

Deglosser:  $5 (Crown Liquid Deglosser NEXT from Lowe's)

Labor and sick skills of one pregnant lady and her adoring husband:  free

Support and safety enforcement of two buns in the oven:  priceless

Total spent:  $1136 ($3350 if you include the appliances)

.           .           .

And now I must go love on our little bobble-headed babes…happy weekend everyone!

P.S.  I, Miss Pretty D. Proud, typed this entire post with one hand.

P.S.S. Tag Camille, you’re it…get your kitchen reveal up pronto!  :)

Kitchen? Painted.

apr72012 001apr72012 002apr72012 003   Yes sir, this is what I walk into every morning nowadays, usually to scope out my first breakfast and plan for my second, third, and fourth.  No, it’s not done in the full sense of the word, but the hardest part – painting the cabinets – is.  We have yet to hang the new over-the-range microwave, build the shelf above it, and install a subway tile backsplash until we call it quits with our mini-reno.  Then of course I’ve got a few little things to do to keep me busy until Twin A and B come like taking some paint to a runner that will anchor the floor and hanging a picture collage on the wall between the dining area and the kitchen.  All in slow pregnancy time my friends. 

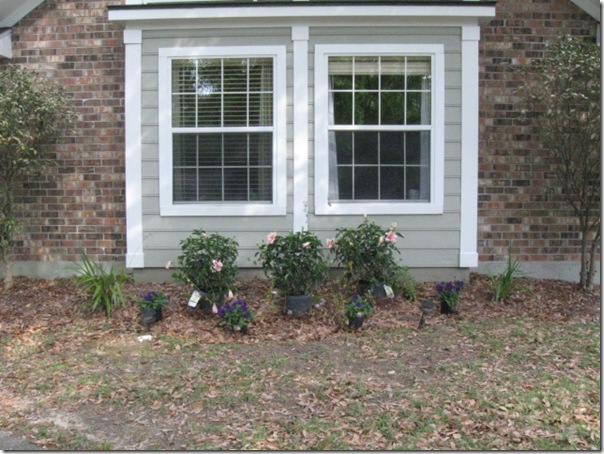
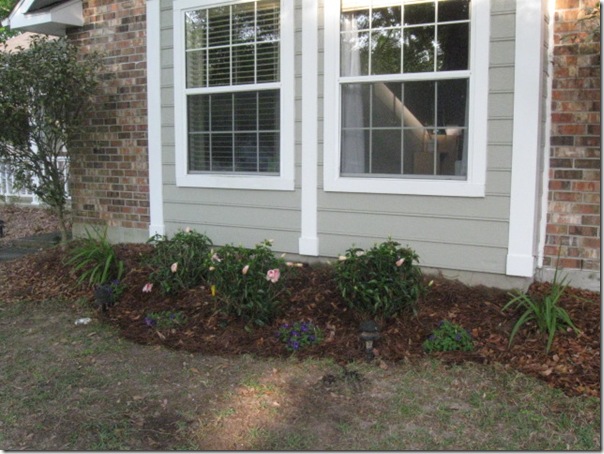
However, while waiting for Anthony to finish a couple of grad classes so we (more like he and a strong friend) can install the microwave, I’ve been taking advantage of the sweet southern weather and spending a good amount of time outside lounging and even putting in a little sweat equity.  As I mentioned in the twins 23 week post, I had enough energy to sustain a small army last week so I used some of it to improve our love-lacking landscaping.  In particular, one of the beds in the front of our house was looking a little shabby.  You might remember that a few years ago we overhauled our curb appeal, taking it from drab to fab, except since then, a couple of plants we chose had to be replaced.  I was in charge of buying the replacements last year and thought I scored a really good deal when I got a few plants for under five bucks.  So, I planted ‘em, thought they looked good (they always look good at the store) but this year, they grew back looking like weeds.  I should’ve taken a picture but I didn’t.  What I did do was, armed with a little more cash and sense, grabbed a few hibiscus (which are perennials down here) and a few annuals and went to work.

First, I set them in their soon-to-be spots just to make sure I got the spacing right:
apr32012 001  

And then I defied the probable wonderment of every passer-by thinking “look, it’s a pregnant lady with a shovel!” and dug, dug, dug until I got here:
apr32012 002
All of the landscaped beds around our casa need a new layer of pine straw (which we use as mulch down here) and some grass seed needs to be sown throughout the yard, but at least our curb appeal isn’t a ‘lack of’ anymore.  And, if I've made the right plant decisions, the only tweaking of landscaped beds we should have to do in the following years is adding some annuals and maybe pine straw.  Fingers crossed. 

 Anyway, I’ve got a rather long list of to-do’s today before Easter that includes making some nips and tucks on some maternity wear, basking in the sun, and possibly some spray paint, so off I go.  I need to keep my mind busy to improve my mood – I found out last night, after finally doing our taxes, that the federal government was bound and determined to swoop in on my parade and take every last cent we had saved up for a new dslr camera.  Lovely.  Sometimes it’s harder to live on a budget than others but, we’ve got blessings galore and for these I am thankful.  :)

  I hope to get some more substantial Saturday posts in the form of tutorials and such on this here blog soon so stay close!  Oh yes, and most importantly, have an incredible Easter!  Thank you Lord Jesus for the sacrifice you made on the cross for us, that we might live and one day be united with you!