A Story of Two Friends

I’ve been hinting and hinting and hinting again over the last year (or two?) that I was going to type up our infertility (fertility!) story but I’ve never had a chance to sit, think, and put it all into words.  I started writing it out one day several months ago while I was sitting in the peace and quiet of Eucharistic adoration but since then, peace and quiet have evaded me (hmm, wonder why?); giggles, screaming, whining, gibberish, and toddler talk taking their place.  Fine.  I can write to background noise, right?  In college I would’ve told you no, but it looks like somebody’s going to have to do some adapting.

Anyway, all three kids are sawing logs at this moment (guh-lorious!) and so there’s no better time than the present.  I’m going to share our infertility story, but I’m going to do you one more and go back to the beginning – when Anthony met Sheena.  If I’m going to type up a story I might as well type up the whoooole thing, right?…’cause nothing’s more interesting than reading about someone else’s life when you’re just trying to live yours.  Skip it if you will, read it if you want to.  :)

.           .           .

So, the year was 2004, Franciscan University in Steubenville, Ohio, fall semester.  I was a senior and had just lost my dad the May before.  The summer before this semester was a period of great growth for me.  I was fresh out of an unhealthy relationship; one to which I clung to keep all of the problems going on in my family at bay.  I thought I needed someone to hold on to.  Another human being.  A boyfriend.  How wrong I was.  As you can imagine, I was distraught when that relationship ended.  My world came crashing down at the loss of my father and now this.  I felt like I had nowhere to go and no one to turn to.  I was the oldest in my family so I had “to be the strong one”.  Also during this time, my relationship with my mom was akin to walking on broken glass and my two sisters and I moved out of our home and in with our Aunt who lived a half hour away.  Nothing was concrete anymore.  Nothing.

Anyway, so that I don’t backtrack too far, the summer was a rough one but a great one in that I realized that the only one I needed was God.  No one else.  Just Him.  I knew that but I never unfortunately had it sink in until then.  I gave everything to Him that summer – my joys, my pain, my loneliness, everything.  Little did I know that only after I handed my life over that He would hand me another life – Anthony.  I had heard “don’t go looking for him, let him find you, let God bring him to you” in college over and over about that crazy thing called true love, and girls, if you’re searching for your one true love (your earthly love, that is), stop it because it is true, God will bring him to you!

So there he was.  Anthony Tobin.  Some freshman, probably immature but really easy on the eyes.  However, I’d NEVER date anybody younger than me so, yeah, moving on.  Ha!  He was friends with my roommate, Nicki, and that’s the closest relation to me that I thought he’d ever be.  But then he said “hi” to me once in passing and I got those butterflies in my stomach that one gets when excitement hits.  They lasted a few seconds and I was back to the same conclusion that I’d never allow myself to like or date anybody younger than me.  It just didn’t make one ounce of sense.  College life moved on, studying, sleeping, eating, hanging, repeat.  I ran into Anthony a few more times in passing and we exchanged polite “hi’s” and then something crazy happened.  I started to be really interested in him.  I was drawn to him.  I found myself going out of my way sometimes just to run into him.  There was this one crazy time when we were both up at the fields where intramural flag football games were going on.  I was the spectator, he was the pre-gamer.  Needing to get back to my dorm room for whatever reason, I found myself re-routing myself so that I’d go allllllthewayyy around the field just to pass him.  I’ll never forget it.  He was wearing his black Under Armour garb under some black gym shorts and we smiled at each other and said “hey!”
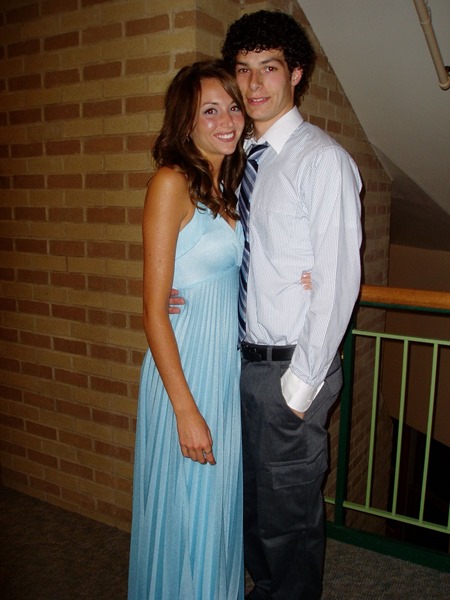
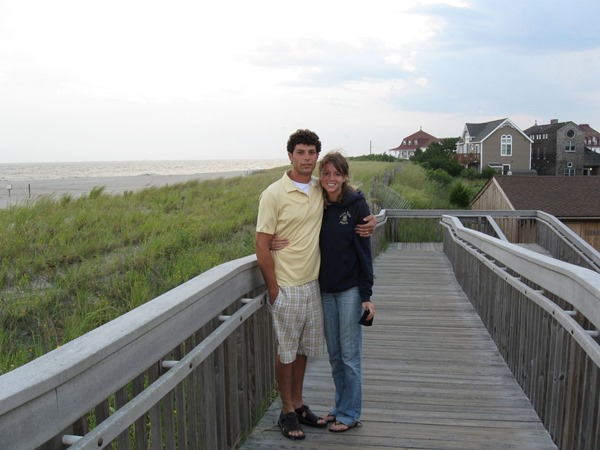
P1010081
[At a college formal dance…circa 2005?]

Fast forward a couple of weeks as I was heading up the stairs to my digs when I walked past him and my roommate Nicki chatting on a couch in the dorm lobby.  I said hi to them both but kept walking until I heard “Hey Sheena…” in a voice I only knew to be his.  Not breathing I turned around and answered, “yeah?”  “You wanna go with me on AMDG’s date night?”, spoken in that bold accent of a New Yorker.  (Side note:  AMDG is a household at Franciscan which is similar to a fraternity but not at all.)  I told him I would but I can’t even remember how I said it or what happened in the next five minutes because I was on cloud 909. 
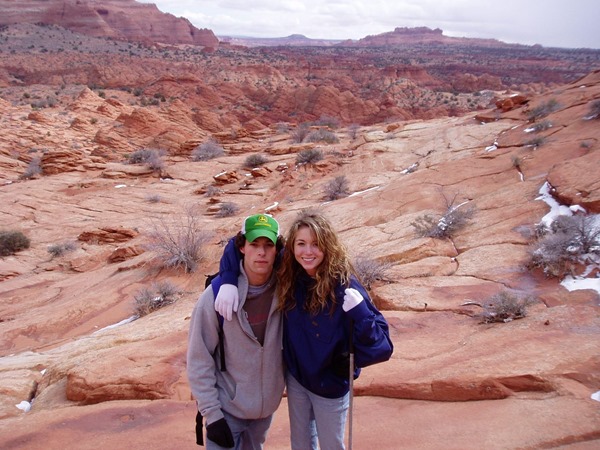
engagement 002
[Hiking to the The Wave in Arizona – Spring 2006]

Plans were made and we went on that date night together but we ended up going separate from the household group.  He picked me up in his (and now our) good friend Dan’s old Toyota wearing a blue and white striped button-down that he still wears.  We ate at an Italian restaurant in our college town and then headed to a casino in West Virginia where we gambled away 40 bucks.  It was so fun and I was giddy the whole time.  During the weeks following, we saw a good amount of each other.  We’d meet up to go grab dinner or lunch at the caf and we went on lots of walks around campus, spending tons of time just talking.  I loved it.  I loved that we didn’t rush into anything but that we just spent our time getting to know each other.  Obviously, we were both wondering what the future held for “us” and I spent a lot of time thinking and praying for clarity.  The more I got to know him, the more I didn’t care about our almost-three-year age difference.  (Actually, one day during that time I clearly remembered learning about average life spans of men and women in second grade and how that of a man is 73 and of a women is 76.  It’s probably changed since my second-grade years but either way, it’s like it all clicked to me in that flashback moment…of course it makes sense to date somebody younger than me so that we’ll die together!  After that, I could’ve cared less.)  The tough things to think about were how we would make it work since I was graduating and moving home or the fact that he was going to Austria to study during the fall semester. 
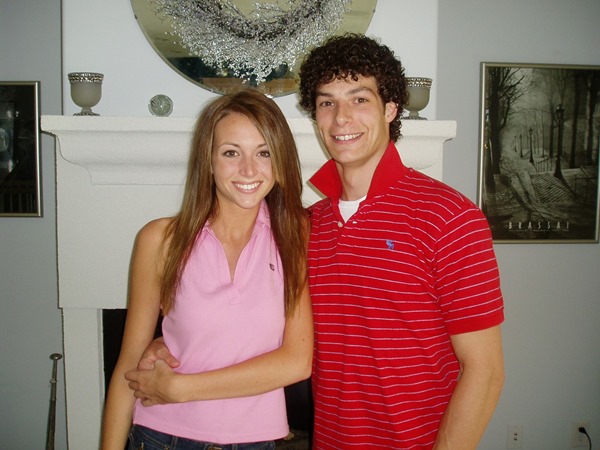
Sheena 153
[Circa sometime in 2006 – pre-engagement]

So, one night during one of our frequent walks we were headed up a hill towards my dorm, Kolbe/Clare, and passing the big steel cross on campus when it got awkwardly quiet (something that was rare) and after a minute Anthony goes “so, what’s up with us?”  I’m over here thinking, “did he really just say ‘what’s up with us?’”  Yes, he did.  I guess when you’re a New Yorker, being blunt is just natural.  After a stifled laugh (because the guy was serious), I managed an “I don’t know (this is so awkward…what the heck do I say…disguise giggle as *cough*), what do you think?”…lame-o answer to a pin-pointed question.  A little chat about whether we should really pursue this boyfriend/girlfriend thing ensued and by the end we were ‘official’.  The day was December 1, 2004. 

To be continued…   

Random 036
[Summer 2008 – Wildwood, NJ]

Made by Lisa

You guys.  I’m up to my eyeballs in a mini-redecorating sesh in the living room.  While I’m having so much fun scheming and planning and making ideas come to life, it’s taking me f.o.r.e.v.e.r.
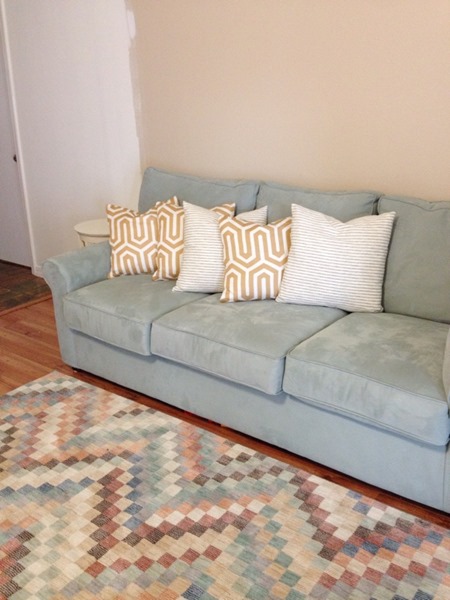
Here’s a sneak peek at the progress:
Image-1 (2)  

So, while I’m busy painting and sewing during every free moment (nap and bedtimes!), let me share with you this sweet nursery that Lisa whipped up for a special family she knows. 

She emailed me to tell me about the nursery and how little she spent putting it together a few months ago.  By using things she already had, a few gifts, and shopping with a thrifty mindset, she got away with only spending about $55 total!  She’s a girl after my own heart!  You don’t have to spend a lot to get a whole lot of cute!  Proof:
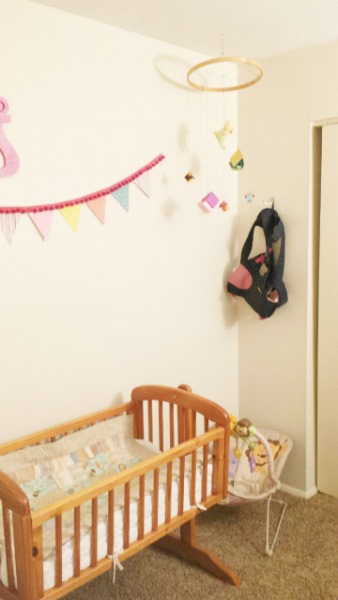
 nursery basinnette mobile and wall hook 
The mobile in the corner is made of small birdhouses that Lisa had and painted bright colors.  A friend of hers made the mobile by stringing them onto an embroidery hoop.
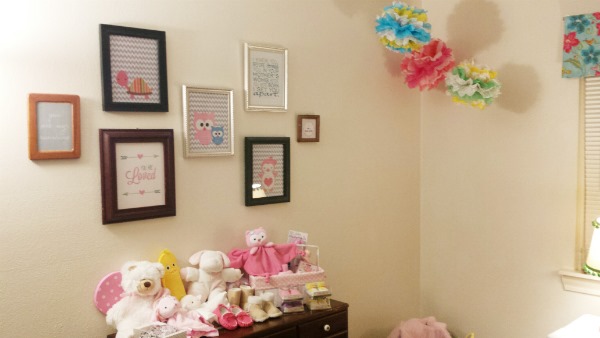
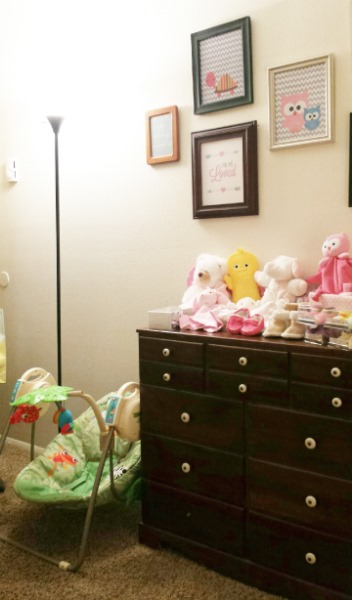
 nursery gallery wall and poofs
Some of the frames above the dresser were new, some were thrifted, and some were already owned.  The art in the frames were all printables she found for free online.  The three poufs hanging from the ceiling corner were made from tissue paper she already had on hand.
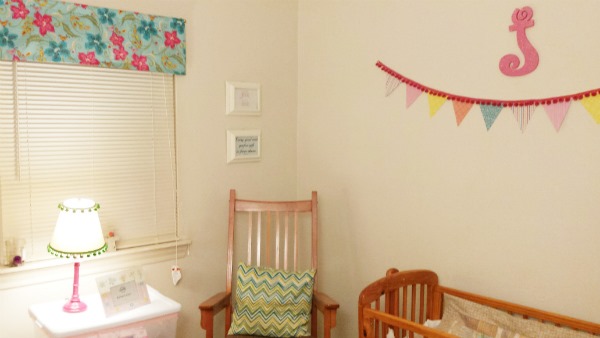
nursery rocking chair lamp etc
Lisa made the window valance with her new sewing machine and followed an online tutorial to do so.  The fabric was some she had from a project that never came to fruition.  I love the color it adds to the room!  The lamp was something meant for another project that didn’t happen.  For the nursery, she spray painted it pink and added green pom pom trim to the shade.  The bunting on the wall above the bassinet is made of colorful cardstock hot glued to a strand of pom pom trim.  The letter above it was found at Hobby Lobby on sale.  The rocking chair was one Lisa and her husband had gotten for free so they gave it to this family and Lisa used an old pillow that she had spiced up with a new cover to add to the chair.
 nursery torchiere lamp
The floor lamp was a steal at $15 and the dresser was one the family already had.

The best part about this whole little makeover was that it was a surprise and the family that received it was a family in need.  I love seeing beautiful people do beautiful things like this.  Thank you so much for sharing Lisa!  :)

.           .           .

I hope you’re all having a fantastic Monday!

Oh, and Happy belated St. Valentine’s Day!  I hope yours was full of lots of love!  We stayed home and Anthony  made the most amazing dinner – teriyaki steak shish kabobs with warm red potato salad and strawberry crepes after.  It was the best dinner I’ve had in a long time; packed with a ton of flavor and a ton of love and I tried so hard to savor every bite but I think ‘gobbled it up’ would be a better description of the way it went down my hatch.  So, so good…just like my personal cook.  He’s so, so good and while I’d rather Valentine’s Day sentiments were shared everyday around the world, it was a sweet day to remind each other how much we love and value one another.  ‘Bean in love’ is what we’re all about anyway, right?  :)    

2D Flatware

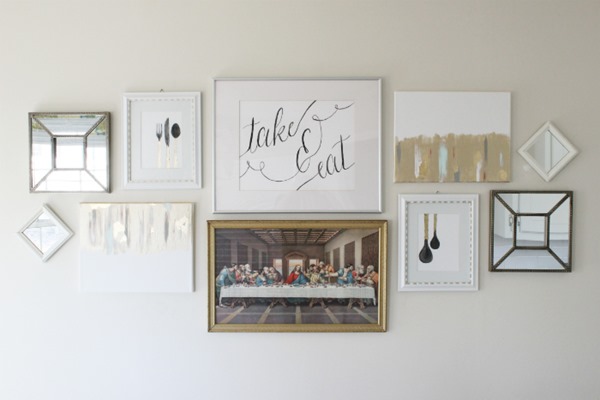
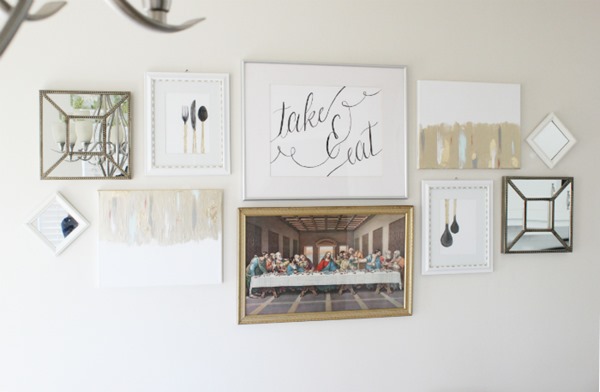
Last post about the new gallery wall in the kitchen, promise.  Let’s talk about the utensil art.
IMG_5791

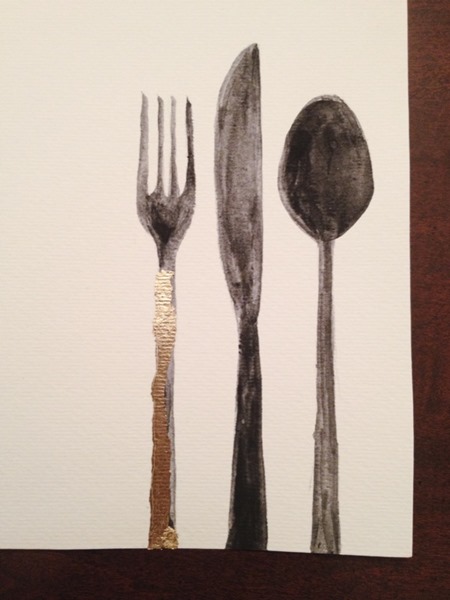
Initially I was just going to find a couple of free printables online, print them out, stick ‘em in and up and that’s that.  But I couldn’t find anything that didn’t take away from or compete with the ‘take & eat’ so, after I found these great (and free) printables from The Questionable Domestique, I got an idea.

My plan?  To transfer her printables to my kitchen by painting a couple of the designs on some watercolor paper and hanging them.  They were simple, kitchen-related, and didn’t draw attention to themselves instead of Jesus.  Humility at its finest.  ;)

So, first I penciled the designs onto my cut-to-size watercolor paper and mixed some watercolor (using the same acrylic/water mixture I used on the ‘take & eat’).  Then I just painted in the lines and let it all dry. 

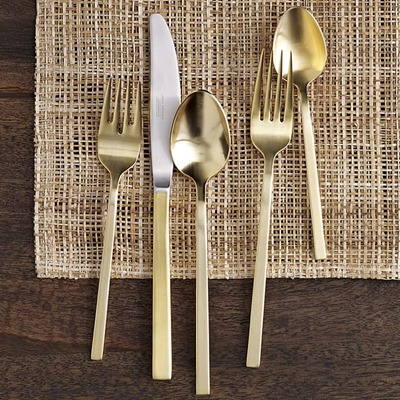
Then, like I usually do, I took it a step further after being inspired by this gorgeous flatware set from West Elm:
img18o
 
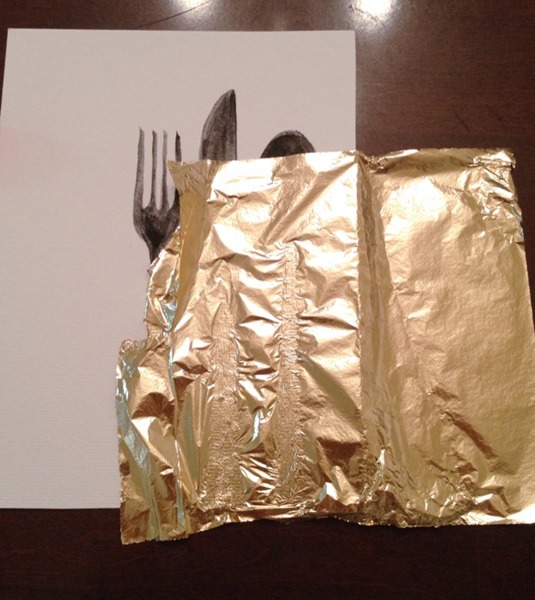
Using more gold leaf, I jazzed up the stems of each 2D utensil.  Things didn’t turn out exactly as I had pictured in my head though.  I wanted straight lines and no watercolor showing on the stems.  When I attached the gold leaf to the fork, I brushed Elmer’s school glue onto the stem, hoping that would give me the straight, clean lines I wanted.  Nope.
 photo 1 (12)
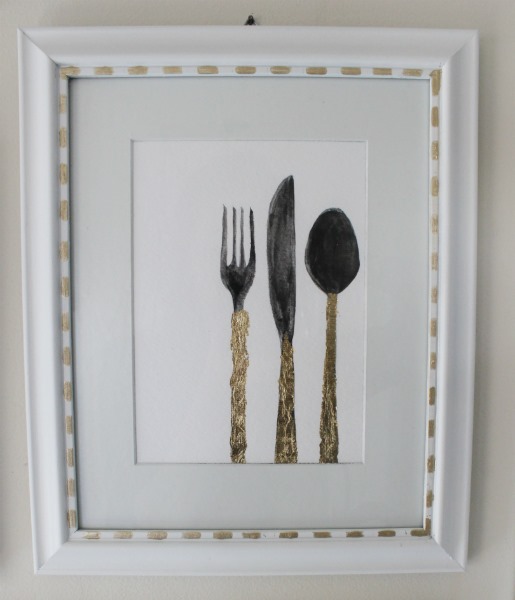
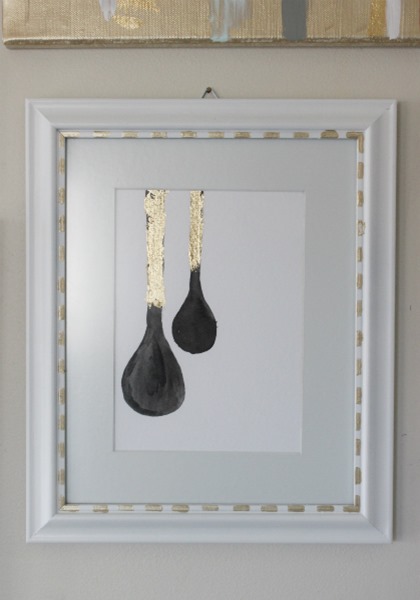
I don’t know what happened but things looked a tad crazy...the glue might’ve dried too quickly?  I don’t know.  I tried to scratch off the gold leaf but it wouldn’t budge so I laid my cares aside, filled in the right side a little more, and just let it be.  The rest of utensils got the same gold treatment as their abstract art neighbors – a glue stick plus gold leaf plus a pat and a rub-down when dry.
 photo 2 (19)

The final products:
IMG_5796

IMG_5800

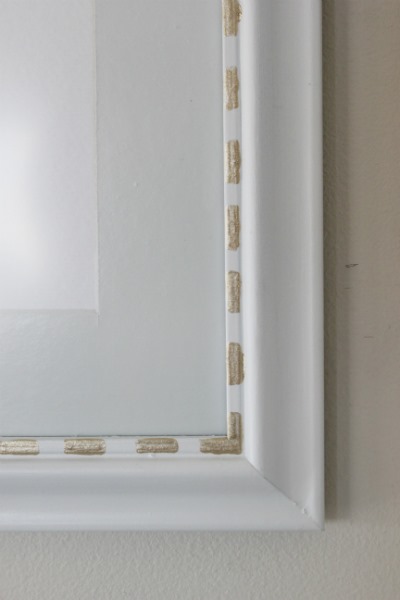
Oh and I spiffied up the frames a bit too.  These frames were actually in the previous collage but I spray painted them white and added a dotted border with some gold paint along the inside edge. 
IMG_5801
I just used a small, flat paintbrush to dab on paint.  No measuring.  All eye-balling.  Perfectly imperfect.  :)  It was such an easy way to add a little flare to an otherwise plain frame.

And speaking of flare, I hope your Monday is full of it!  Adios for now!

Mrs. Mix-A-Lot

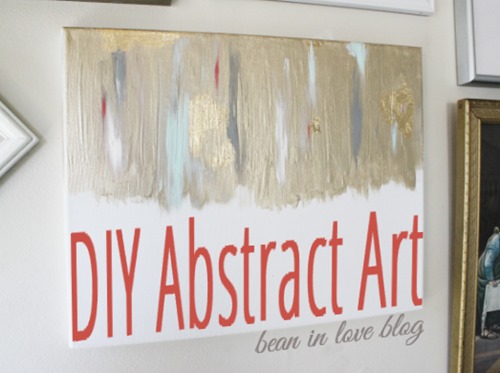
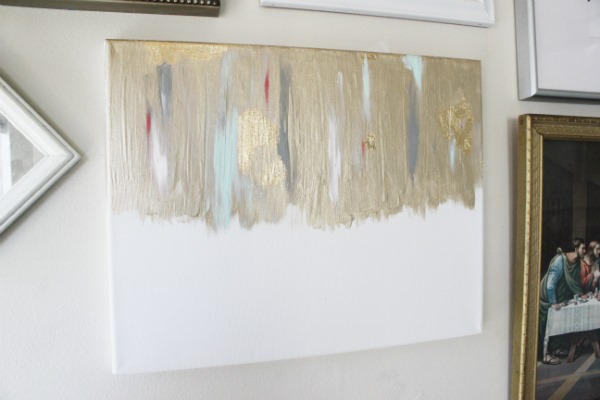
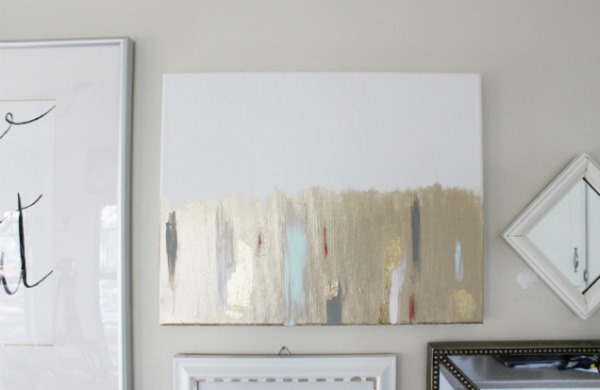
Abstract art.  Anybody can do it.  Seriously.  You can even get all fancy by mixing colors and adding some gold leaf like I did.  I found this tutorial by Virginia at Live Love DIY and didn’t even wait until naptime to start.  Turns out, if I work on top of the (unheated) stove, I can get a lot done without little hands seeking and destroying.  :) 

diy abstract art

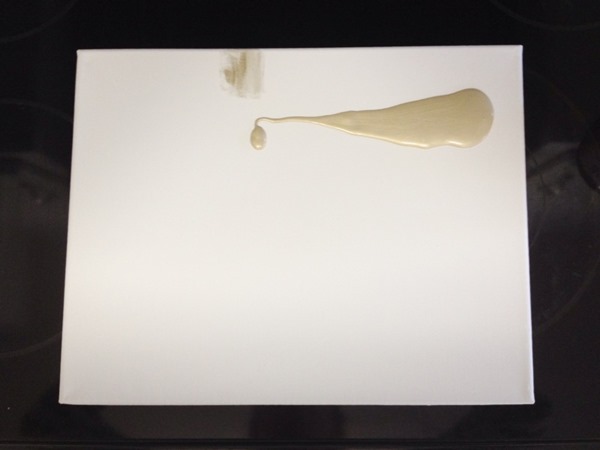
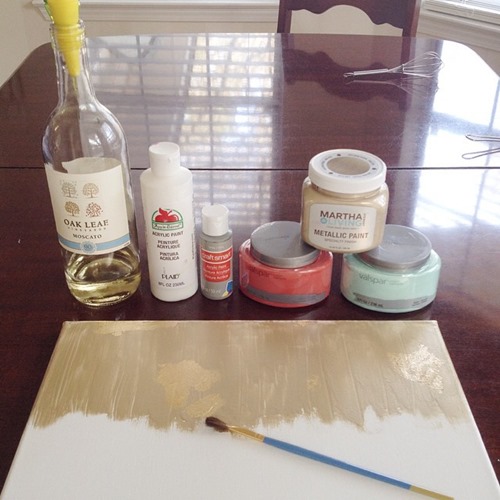
For this art project, I used two 11 x 14 inch canvases that I bought at Hobby Lobby (it was a two-pack on sale for $7.99).  I also used paint and brushes that I had laying around at home.  First, I dumped some paint directly from the pot onto one side of each canvas (I was going for a half-sided look).
photo 1 (6)

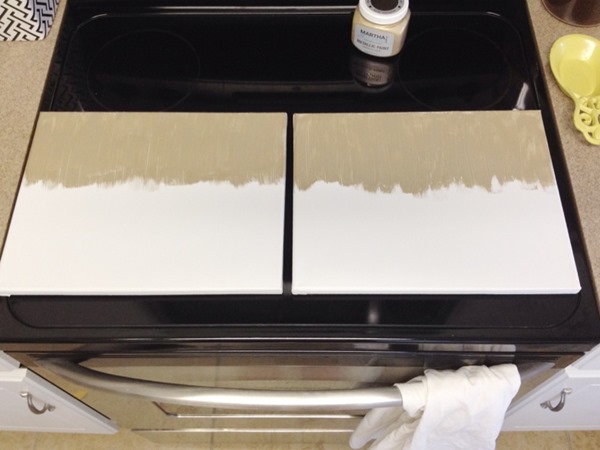
Then, I painted about 1/3 of one side of each canvas by starting at one edge and pulling the paint down in lines.  I didn’t use sweeping, back-and-forth motions, but just kept brushing down down down all the way across the side of the canvas.  Also, painting down towards the middle of the canvas vs. from middle to end gave me an unfinished edge where the paint ended, which is what I was going for.
  photo 2 (17)
Since I was going to add some gold leaf and more color, I didn’t drag the paint down all they way to where I wanted it which was about halfway across the canvas.  I figured I’d use more gold paint when I mixed it with the other colors I wanted to use so I’d finish pulling it down then.

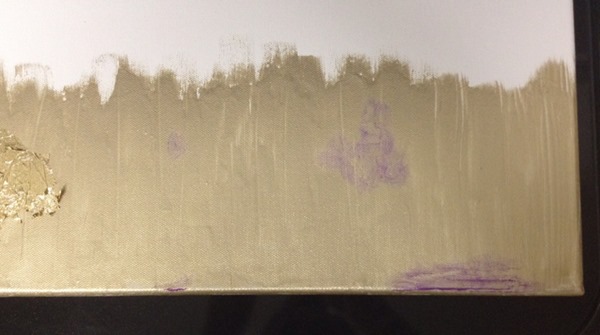
So, when the gold paint was dry (I waited about six hours), I grabbed a glue stick and just smudged it onto my gold paint in random areas
photo 3
[The purple spots are glue – I used the Elmer’s glue stick that goes on purple and dries clear.]

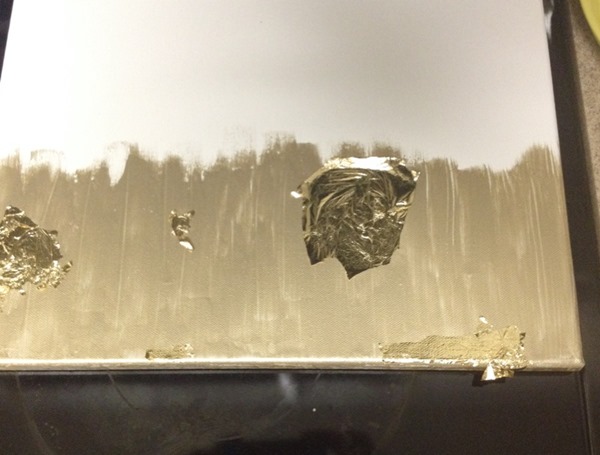
Then I grabbed a sheet of gold leaf and laid it over the glue spots, patting it down lightly to make sure it was stuck for good.
photo 4 (3)
I waited another six or so hours until I was sure the glue was dry, held the canvases over our big trash can, and brushed off the excess, loose gold leaf with my fingers.

Next up came more paint.  I pulled a few colors out of the Last Supper to use on my painting – gray acrylic, a coral-red latex, light blue latex, and white acrylic – and I also grabbed the gold to layer onto the existing gold and extend the end of my paint line to about halfway down the canvas.
1546338_813384789650_7151013133039556309_n

I waited until naptime to do this part to make sure I wouldn’t have to stop after I had started and to add a little more calm to the whole idea, I grabbed the Moscato.  Wining and dining painting.  The way to go.  :)

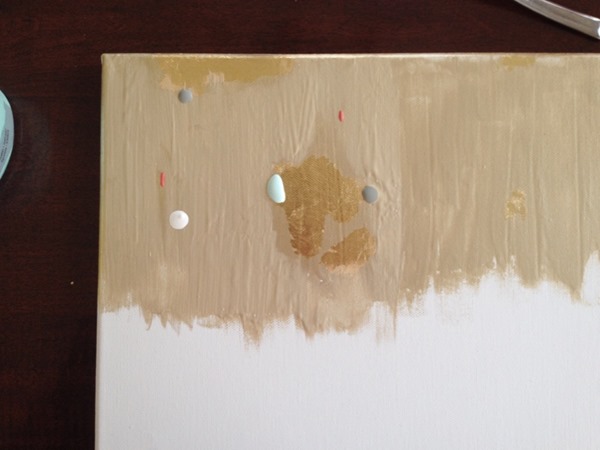
First I added more gold.  Then I just put random spots of color onto the canvas (I did one half of each canvas at a time to ensure I had time to mess around with the paint before it dried but I think I probably could’ve just done the entire thing at once) and brushed each dot into a big splotch (abstract talk, I guess?), trying to also mix it in a tad with the still-wet gold paint.
 photo 1 (10)

I brushed in one color at a time and wiped my brush off onto a dry paper towel between each color.
photo 2 (18)
  
I tried to brush color around each gold leaf spot just so the gold leaf looked more incorporated into the painting…if that makes any sense at all. 

I hung them before the were dry (rebel!) and that was that! IMG_5795

 IMG_5799

So, have you ever tried your hand at abstract art?  Maybe you have a five-year-old that has because, like I said, anyone can do it.  :)

.           .           .

I’ll be back early next week to drag this collage project out into one more DIY and then I promise it’s enough talk of it.  We’re in the middle of painting our living room, entry, and hallway (again) so there will be lots to share and show on that soon!  TGIF!

Take & Eat

I think watercolor might be my new favorite medium.  I like it because it kind of has a mind of its own once you put it on paper.  It just sinks in and marbles a little depending on how much water/paint there is on your brush.  Mistakes can just be attributed to the mind of the paint vs. the hand of the artist unlike thicker paints like acrylics and oils which need to be maneuvered.  However, and that’s a BIG however, I’m no professional artist.  I’m not even an amateur.  I’m a very beginning beginner when it comes to painting as an art so you should probably let my opinion on the subject go in one ear and out the opposite. 

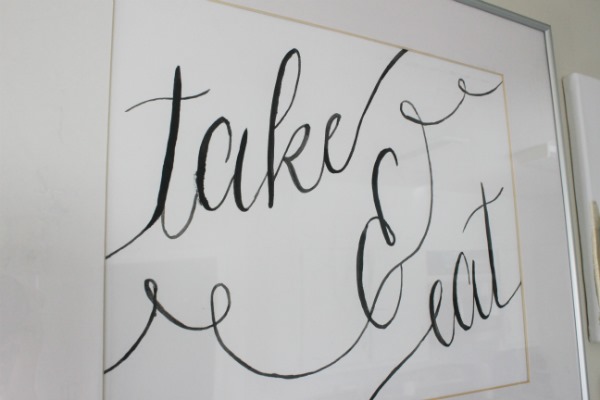
That being said, I used a watercolor technique to create the ‘take & eat’ art in our new gallery wall. IMG_5792

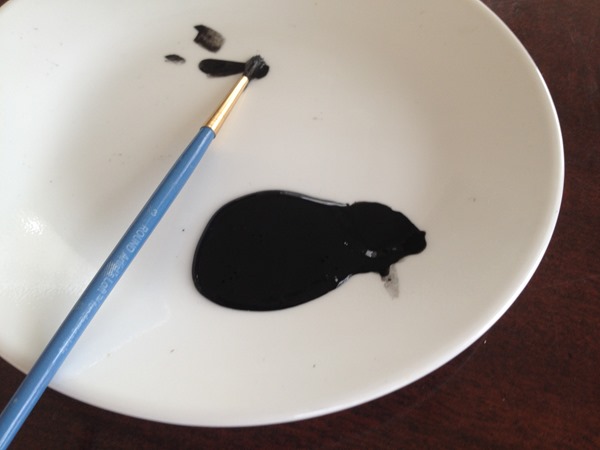
I didn’t use actual watercolor though; I used black acrylic paint mixed with water because I didn’t have any watercolor and wanted to use what I had on hand.

  photo 1 (1)
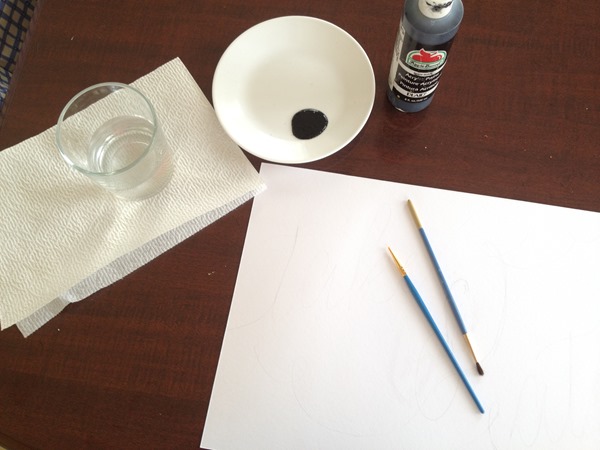
My other supplies included a plate (an old one I use exclusively for painting), an 11 x 15 in. piece of watercolor art paper, a cup of water, a paper towel (that I didn’t end up using), and a paintbrush (included in a pack I thrifted but originally from Michael’s).

I didn’t get any pictures of the process of painting this because I was in a big hurry; hoping to start and finish this and another painting project before the kids woke up.  Sorry!  I’ll try and explain the process the best I can.

The first thing I did was write out the ‘take & eat’ onto my watercolor paper as lightly as I could with a pencil.  I’m not good enough to paint without guidelines.  :)  The lighter the better in case any erasing has to happen.  I really like this Asterism font, so I tried to copy it as best I could.

Then it was time to paint.  I grabbed my brush and dipped it into my cup of water and then into the little puddle of paint I had poured out onto my plate.  I repeated this a few times until I had a little puddle of watered down paint.  To paint, I dipped my brush into my diluted paint, brushed some excess paint off onto a clean part of the plate, and drug my paintbrush away over my pre-penciled on design, grabbing a little more paint every couple of inches. 
 photo 2 (12)

The paintbrush I used was pointed at the end vs. a flat-edged brush.  I tried to vary the thickness of the lines I was painting by only using the tip of the brush for thin lines and the thicker middle part of the brush for thicker lines. 

Up close, you’ll notice a few mistakes.  The ‘a’ in ‘take’ has a rough left side and I could’ve made it thicker to fix the edge but I was too afraid of it looking too thick so I just let it go. 

IMG_5802My lines are far from perfect and my hand wasn’t 100% steady (thanks to being in a hurry!) but I don’t mind the imperfections.  :)

I had to buy watercolor paper (I bought this pack from Hobby Lobby with a 40% off coupon) but had everything else I needed for the project so, if you factor in the fact that I only used one of the 12 pieces of watercolor paper in my new pack, this little project cost me under $1. 

Cheap and aesthetically pleasing…just like I like it.  :)