What I Wore Sunday ~3/3/13~

Also known as “What I’m Wearing Sunday” because as phenomenons would have it, it’s three and a half hours before Mass even begins (even though technically I have music practice at 4…so two hours) and I’m rarin’ and ready to go, blogging while the girls nap.  This.never.happens.  I’m usually pressing the shoot button right as I’m walking out the door juggling the two tidbits.  Today however, I’m in control and I had a hott photographer whose name begins with A and ends with Y.  Yessiry.

This is what I’m in:    wiws3313 002(I hate posed photographs…next week we’re going candid.)
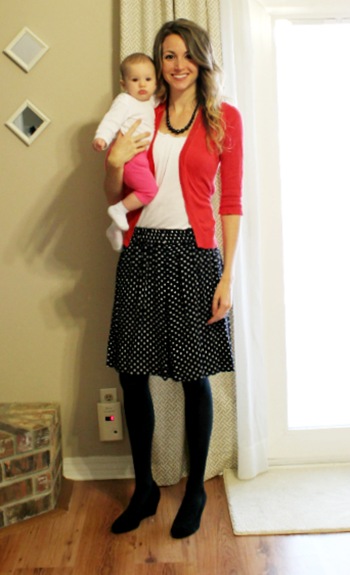
On top:  Old Navy
Skirt:  thrifted and altered
Tights:  ?  (either hand-me-downs or Gabes)
Wedges:  Target via Dirt Cheap
Necklace:  vintage from my Grandma

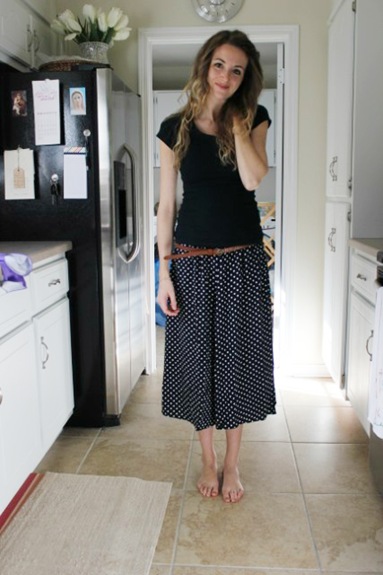
Once upon a time before there were husbands and children involved, my sister and I would make regular trips to our local Salvation Army at home on the hunt for skirts.  During one of those care-free outings I found this polka-dotted one thinking I’d shorten it.  polka dots Well, somewhere between here and there I lost it or forgot about it or somethin’ and then it resurfaced last summer.  Fast forward to a couple of weeks ago when, during one synchronized nap session, I finally took off some inches and then pulled it on for Mass tonight.  And that’s that.
.           .           .

Let’s talk about Lent.  I don’t have a homily to gather from since I’m still to hear it but I do have some thoughts on the season.  It has been a great Lent for me so far.  I’m constantly being reminded of how much I lack and therefore, how much I need God.  Recently I’ve been confronted with situations involving people that get on my last nerve.  You know those kinds of people, right?  I’m a pretty empathetic, sensitive person but sometimes I get so angry and fed up with other people’s words and actions and this week, the poop is pretty far up there.  Well, amidst all of the annoyance, I’m constantly being reminded by our Lord that I need to be even more sensitive and even more loving to the people that are driving me the most crazy.  In particular, I feel myself called to pray for them verses fuming and having venting sessions in my mind or with others.  When I do pray for them, the black cloud over my head (or theirs, depending how you look at it) usually disappears and it becomes so much easier to deal with them and ultimately to love them.  Some people, oftentimes through no fault of their own, just don’t get it (sometimes that person is me).  We live in an imperfect world full of imperfect people with a perfect God who wants us for His own.  As long as we keep working for Him, life will only become easier.  Difficult situations may and probably will arise, but under God’s command we will have the strength to deal.  Carry on trials, carry on.  For you are what make me turn in my tracks toward He who loves me and He who will make me strong.  :)

.           .           .

Linking up with Fine Linen and Purple along with lots of others in their Sunday best.  :)

It’s A Shlaque!

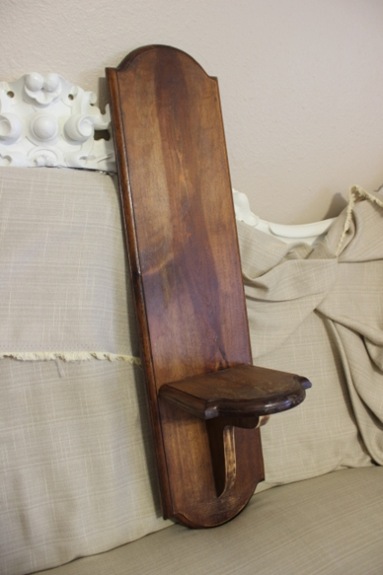
A what?  A Shlaque!  A what?  A Shhllaaque!  Oh!  A shelf plaque.

shlaque 001 
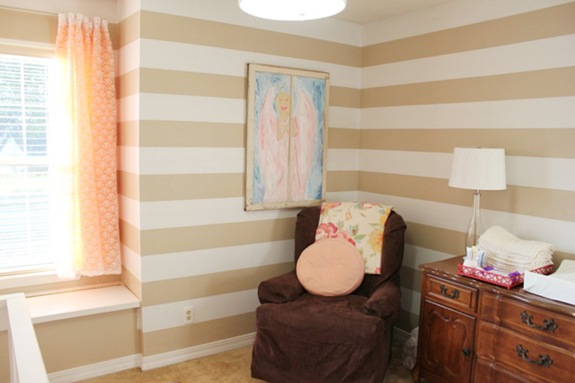
That’s the only way I could think to describe this combo of shelf-and-plaque-in-one.  It used to hang in my grandparent’s “house in town” (that’s what we called their home while we resided on the farm) and once Christmas a couple of years ago, I spotted some decor potential in it and asked if I could have it.  I had some flowers painted on it but I had a different sort of paint job in mind, so I sanded them off right after I got it home.  And then it sat until the past week when I thought I’d hang it to the left of the off-center angel in the girls’ room:feb82012 008

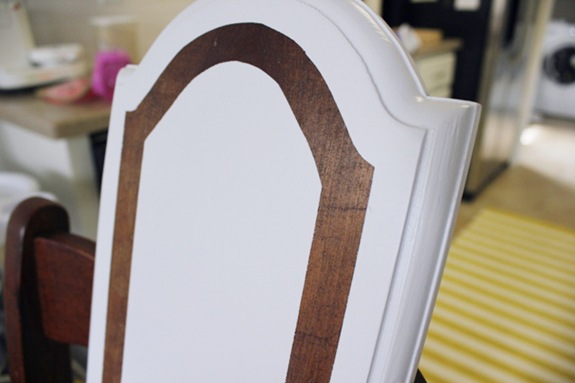
And then I changed my mind, but not until after I took some tape and spray paint to it.  Here’s what I did:

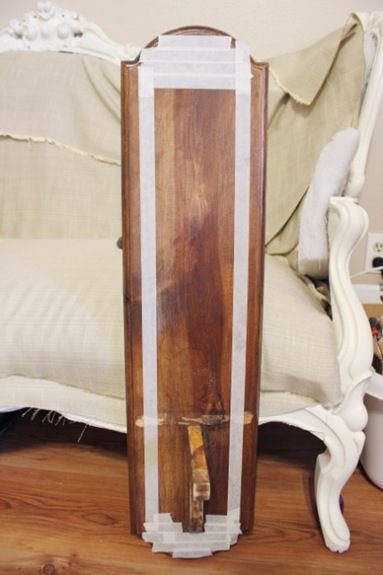
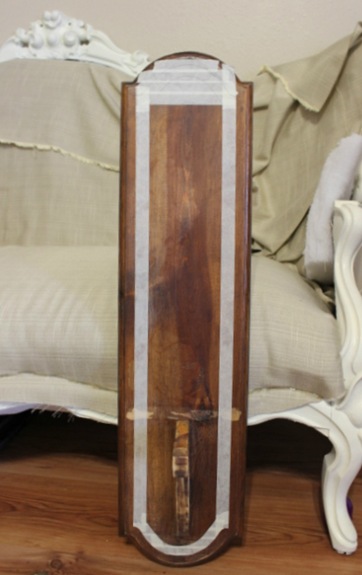
I wanted the entire thing to be white, except an outline design close to the edge of the plaque.  So, I taped off the area I didn’t want painted: shlaque 002 (Side note:  The shelf broke off in transport from Nebraska to here and so that’s why it’s missing some of these pictures.  A little Liquid Nail will come in handy to reattach it, which we still haven’t done.)

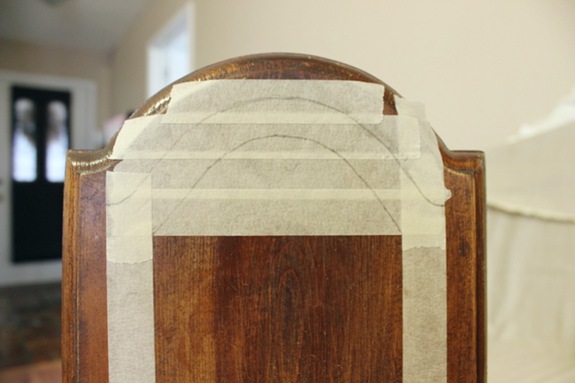
Then I drew a design mimicking the curves of the top and bottom of the plaque right over the tape:shlaque 003

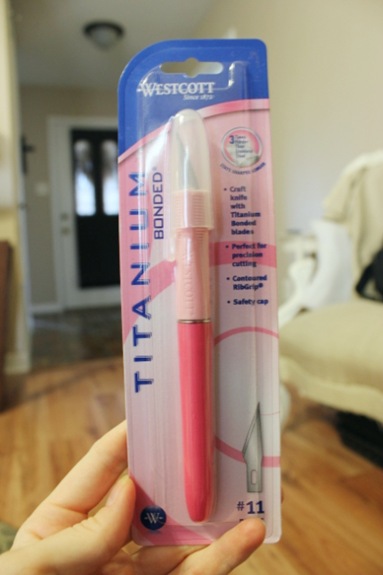
Next I whipped out the craft knife I bought at Target this week ($5.50)…shlaque 005

…and cut around my penciled lines on each end.shlaque 006

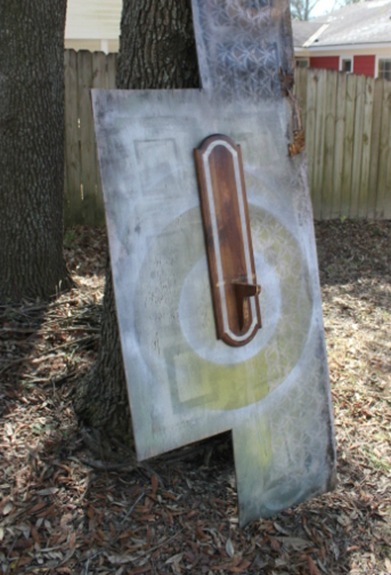
Outside I went where I propped up my good ‘ole spray painting plywood, popped a nail in, and hung up the shlaque.  (I hung it because I’ve been getting annoyed with bugs jumping from grass to newly spray painted surfaces while my board is on the ground.  So, prop-and-hang equals no bugs, no sanding bugs off, and no post-bug touch-ups.) shlaque 007

I sprayed on one coat of white primer followed by three thin and even coats of white spray paint, doing the same thing to the unattached shelf.  shlaque 008

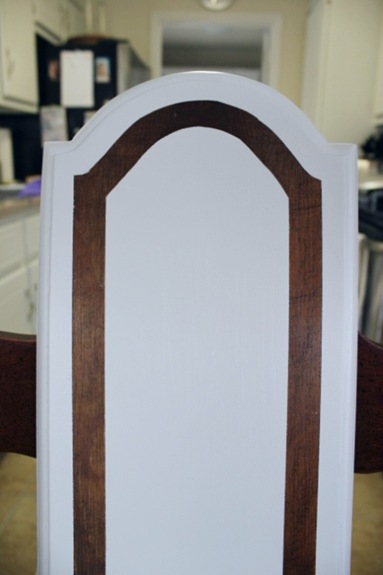
Then, after letting it sit outside for the remainder of the day lest it smell up my house, I carefully peeled off the tape and: shlaque 009

it went from old school to new and cool real quick like. shlaque 010

Except when I held it up next to the painted window it didn’t quite jive.  I’m not sure if it’s the color (maybe I should’ve gone a light coral or add a little distress or…) or adding more lines to an already striped wall but I’m not in love and so I’ve got another plan for that space.  For now, the shlaque is patiently waiting another wall home.

shlaque 011

By the way, I’ve seen gobs of these things in thrift stores.  Go snatch up a shlaque for yourself and show me what you can do!

Have a great weekend!

Borderline Gluttonous?

One of my good friends took a picture of Anthony feeding Cecilia this past weekend while we were visiting him at the youth conference he was happily tied to.  I loved how well she captured her insatiable appetite and how much this kid of mine loooves food.  Where all of it goes, nobody knows…well, I do actually.  I’ve seen her diapers.  Anyway, I could go on but I guess the more appropriate thing would be to show you the picture so you can see for yourself.

c eating

Hope that brings you a smile today!!!

What I Wore Sunday ~2/24/13~

Once again, putting aside the sweatpants and tees for Sunday Mass along with all of the lovely link-up ladies at Fine Linen and Purple.

I could write so much about this particular Sunday.  It was a jam-packed day fo sho.  For starters, I was once again home alone with the infants going on teenagers this weekend while my husband, their father, was out causing Christian chaos with a bunch of teens at a youth conference.  So, being the brave madre that I am, I decided to go to Mass alone with the girls for real this time (last time I was solo I made sure some friends were going to be there with extra arms).  If you happened to be there, you probably didn’t miss me.  I was the spectacle with a baby strapped to her front side, a nothing-short-of-a-suitcase diaper bag slung over my left, and a car seat laden babe swinging on my right arm, carefully taking each step as if it were my last (because it just could’ve been with one tiny misstep) and breathing a hurricane-force wind every two seconds.  And people wonder why I’m “so little” after having twins…
Well, my first and last stop was the cry room and as soon as I sat down I said a little prayer that God protect me from melt-downs, outbursts, and big, bad diapers when who walked in but my friend Kerstin, her mom, sister, niece and nephew.  Praise the Lord for extra arms and for answering my prayers!  I hadn’t yet worked out a plan for how I was going to get to Communion but God had – Kerstin.  She carried Cecilia while I toted her sis.  And all was well with the Tobin women.  We walked out of that church alive in more ways than one.  :)

After Mass I fielded multiple “how do you do it?” questions from the masses, to which I always respond “I have no clue”, and headed on over to my equally-husbandless-for-the-weekend friend Lauren’s house for Emma’s birthday party.  It was five-year-old princesses and princes all up in there and a darn good time.  (She’ll be sure to write up a good hundred words or two about it that you should definitely check out, especially to see the cardboard castle we whipped up while our five cumulative kids vied for our attention.)  After the celebratory medieval fest, I ran a few errands and moved up the age ladder to hanging out with teenagers for the remainder of the day.  Needless to say, neither of my girls got in a real nap today so I’m crossing my fingers and pre-counting my sheep that I’ll be able to sleep over half the night before being awoken by a cranky, hungry twin or two.
And now I sit, writing it all out for you and yours when I should be showering, doing dishes, or washing diapers.  On to the point:
wiws22413 007 
What I wore.

Blazer:  Target (altered – see below)
Tee:  Target
Tank:  Forever 21
Mints:  Target
Peep-toes:  Wal-Mart
Necklace:  a b-day present from my friend Linsey (I’m not really a jewelry wearer per say, but I LOVE this necklace!  It comes with different colors of stones you can switch out (pearl white today) AND it’s simple…so perfect.)

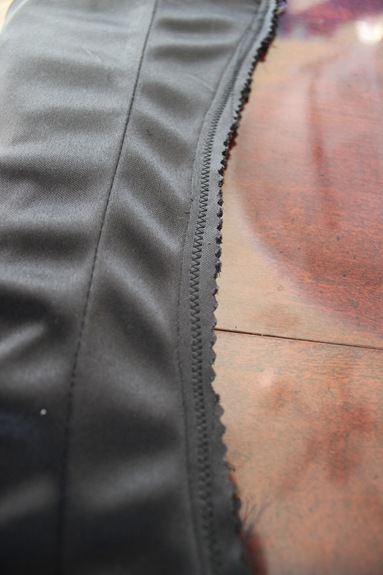
Moving right along, I’m just going to go ahead and make this a smorgasbord of a post and tell you about my blazer.  I found it at Target a few weeks ago for $8.  The fit was okay, the price cheap – just like my diy lovin’ heart likes it.  My sis pinned it for me while it was on and I sewed through each side, lining and all, to get a tailored new blazer.  Straight stitch, zig zag in lieu of serging, and pinking shears and that’s all she wrote…about that.
wiws22413 003  

Last, words that struck me during the homily this morn that I’ll pass on to you.  “What are you holding on to in this life that you’re risking the Kingdom of heaven for?”  I was trying to keep Seraphia’s baby ADD at bay for most of the homily, but she did let me pay attention enough to hear that.  It made me think of heaven and how I’m really not willing to risk my chances of getting there one day yet I repeatedly do.  Oh humanity, why must you be so fickle!  Thank God for Lent, the ultimate time to take a hammer to those stubborn habits and faults!  I don’t know about you, but this one is kicking my butt and we’re not even half-way through.  Keep on keepin’ on, the rise of the Son is on it’s way!

DIY Changing Pad Cover

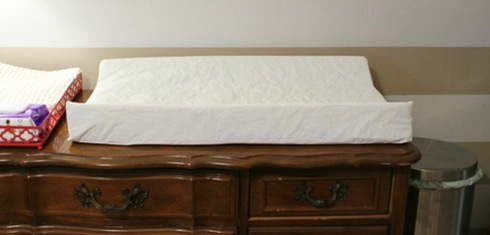
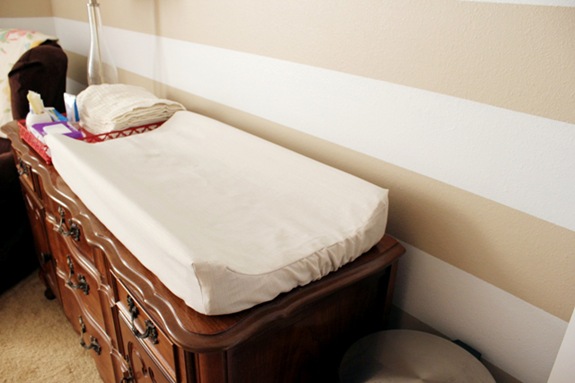
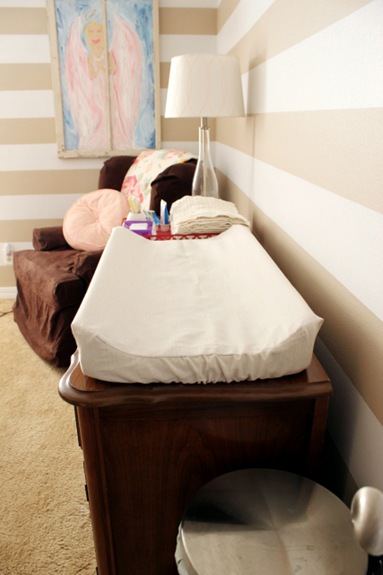
As my less-than-clever title suggests, this is a story about a changing pad and it’s desire…umm, my desire…for it to be covered.changingpadcover 021crop   The existing plastic doesn’t scream warm and cozy to me and the thought of four little warm buns repeatedly being shocked by it’s chill at every diaper change is haunting and insensitive so I set out to change that.  When searching the web for a good tutorial on how to make my own cover, I came across this one at Prudent Baby.  It seemed like the one with the greatest detail for someone like me who’s a little freakish at the thought of sewing from scratch.  It was also the simplest I could find.  I followed the tutorial word-for-word for the most part (opting to not use two different fabrics), but made a few adjustments and added an extra couple of steps at the end to get the custom changing pad cover of my day dreams.  I’ll lay it all out for ya in case you’re in the market to give some baby buns a warm landing spot as well.  Oh, I forgot to mention the best part of this whole undertaking - you’re making a changing pad cover out of ONE piece of fabric!  No sewing lots of different pieces and sections together which can get overwhelming and way too involved, especially since if you’re making this, chances are you’ve got a babe or two (or three, four, five…) of your own that’s vying for attention too.

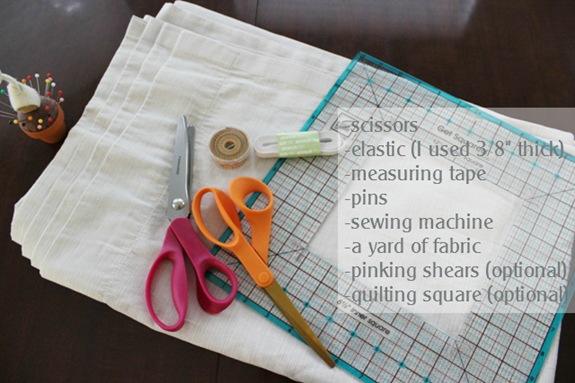
So, first things first – fabric.  You’ll need a little under a yard of 54” wide fabric, a 48 x 32 inch piece to be exact.  I used an 84” long, Target curtain panel I found at Dirt Cheap for $3.  I only used half so the plan is to make a spare cover with the other half lest one get stained with excrement…which we all know never happens…  Also, make sure you wash your fabric beforehand…unwashed might mean shrinkage later along with a few choice words.  Second, this tutorial is for a standard, contoured changing pad measuring 34” x 16”.  We own this one.  Third, this is what you’ll need:changingpadcover 001

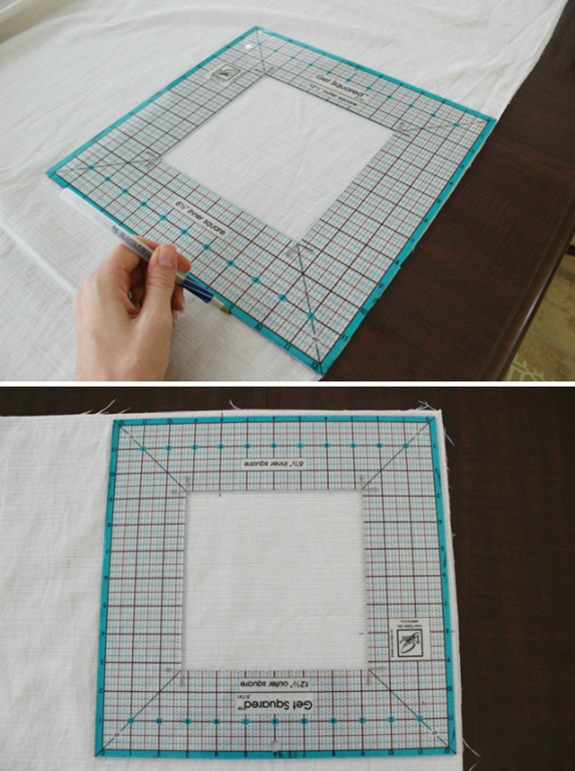
To start, cut a 48” x 32” piece of fabric.  I used a plastic quilting square I picked up at JoAnn’s to get straight edges and perfect corners.
Untitled

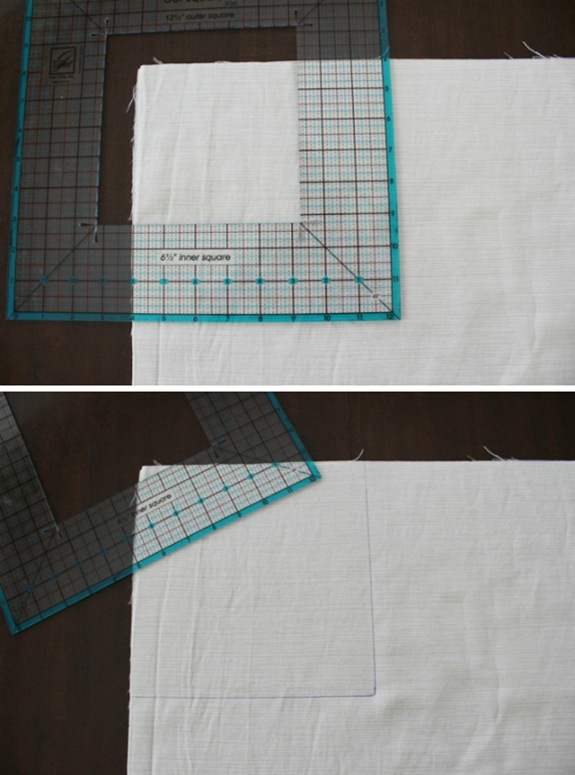
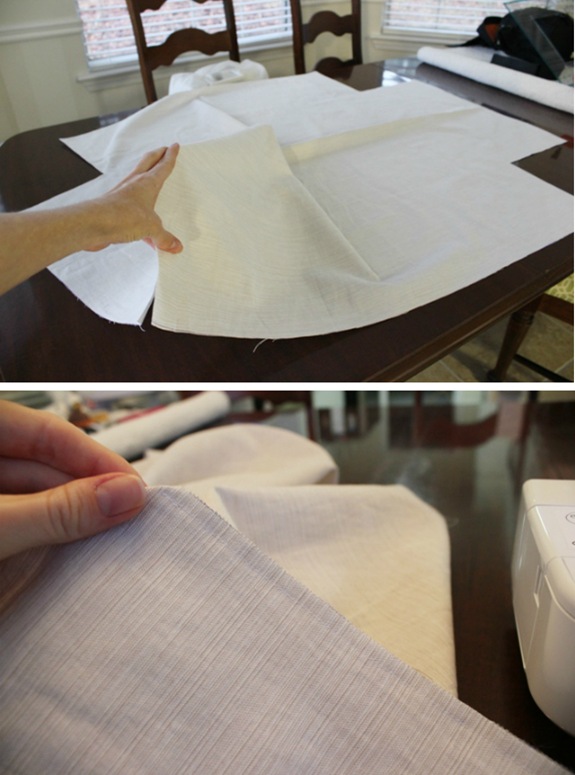
Once you have your 48” x 32” piece, fold it in half length-wise with the right sides facing each other and then in half width-wise.  Draw an 7.5” x 7.5” square on the corner where there are no folds.  (I followed Prudent Baby’s instructions and drew an 8” x 8” square however, now that the cover is finished, I’ve realized I could use an extra half inch at each corner, so next time I’m going with a 7.5 inch square.) 
Untitled2 Again, my quilting square comes in handy.

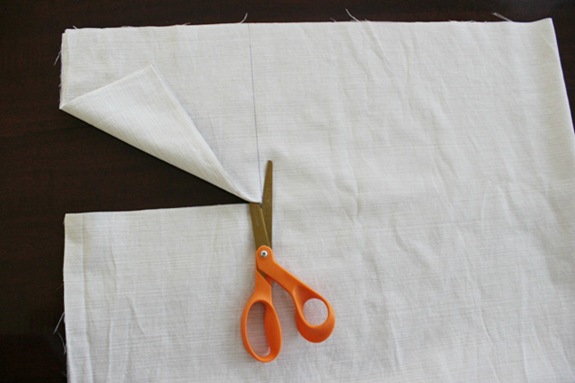
Next, cut out the square making sure you cut through all four layers of fabric.
changingpadcover 007

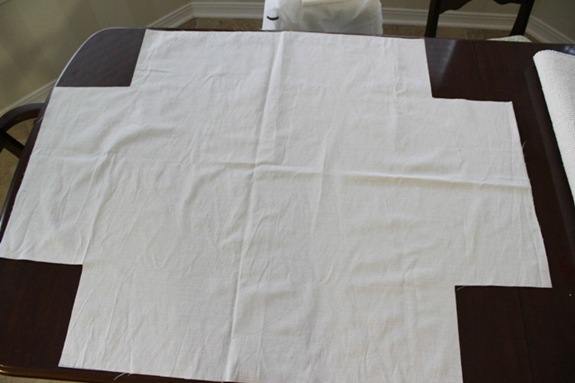
When you unfold your fabric, it should now look like this:
changingpadcover 008

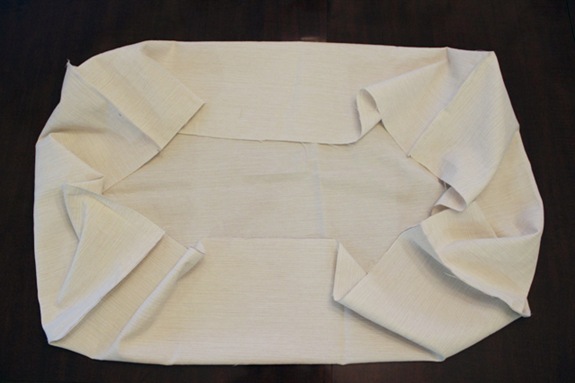
Now, sew the two sides of each square cut-out together, making sure the right sides are facing each other.
Untitled3

After you’ve sewn your square sides together, you’re former piece o’ fabric will look like this:changingpadcover 011
Got it so far?  Good!  Let’s move on!

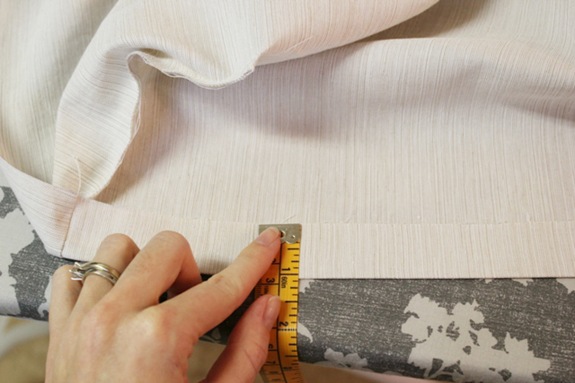
Next up, fold over the bottom, raw edge of your future cover one inch and iron it down.changingpadcover 012 

And then fold it over one inch again, ironing and pinning in place this time.
changingpadcover 013 
  The elastic will run through this seam. 

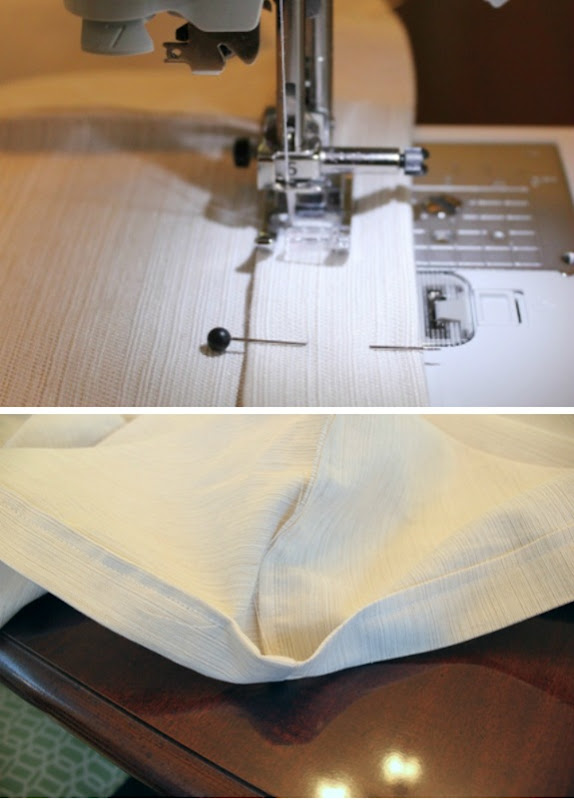
Once you’re done ironing and pinning, sew your hem, keeping as close to the folded side as you can and making sure to leave a couple of inches unhemmed where you’ll insert the elastic.  Also, make sure you backstitch at each end of your hem to make sure it doesn’t come undone!
Untitled4

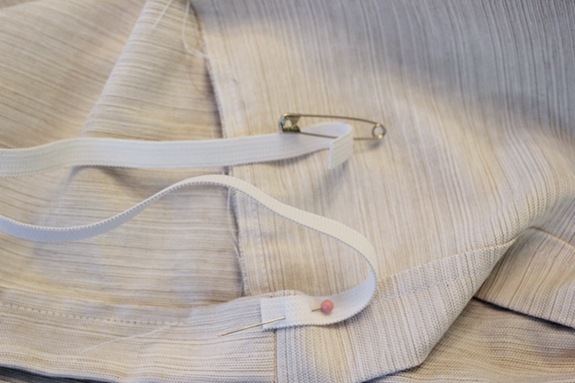
Now, grab your elastic and cut a 52 inch piece.  (Prudent Baby instructs to cut a 36 inch piece, but I found that my cover was way too tight, pressing and pulling on the corners of my changing pad.  So, after a few indignant huffs and puffs, I pulled out my seam ripper and veered from her path.)   Thread it through your new hem by pinning one end to your cover and sticking a safety pin through the other end. 
changingpadcover 017

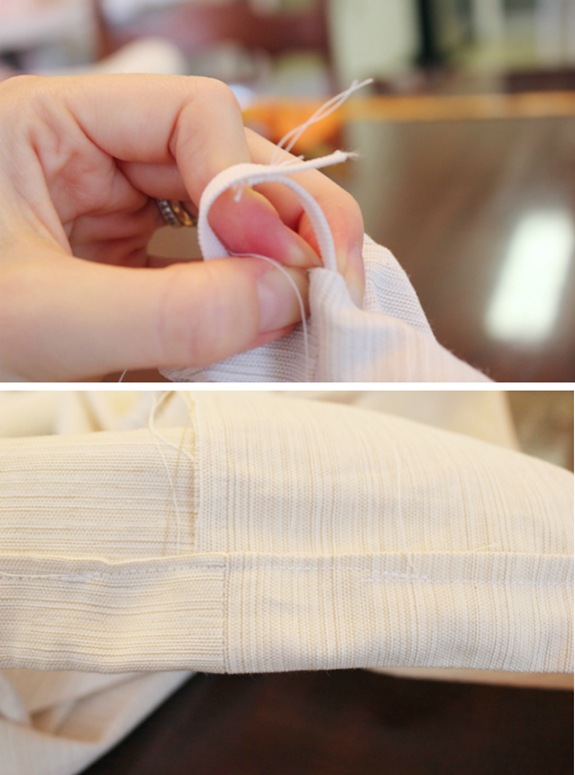
Simply guide the safety pin end through your seam, sew the two elastic ends together, and stitch up the hole you left for the elastic.  (Never mind that mine is as crooked as Pisa’s tower.  It does the job.)  Untitled5

(At this point, I thought I was done.  But after putting the cover over the pad, it was a little too loose and a lot too frumpy in some areas than I liked.  So, I customized it.)

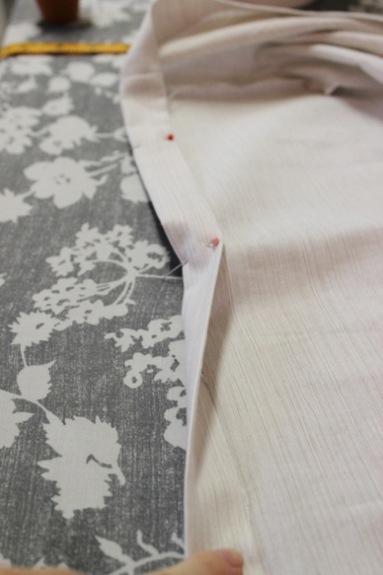
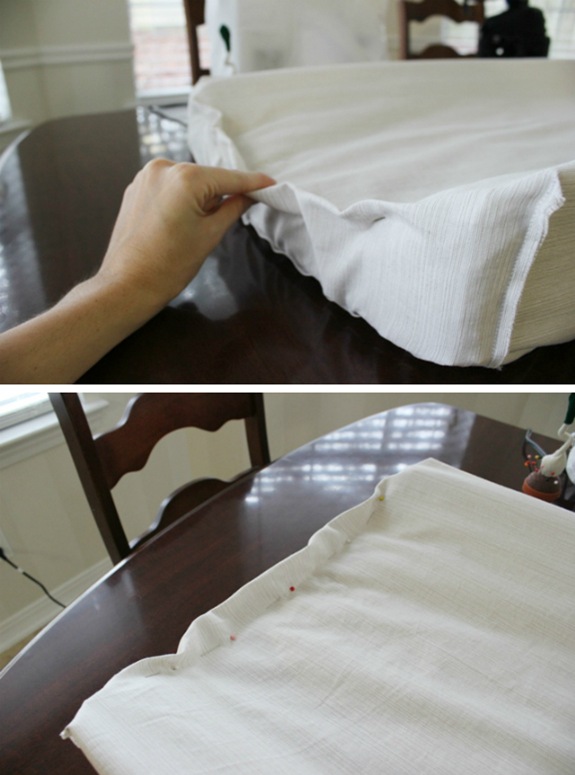
Next, put your newly sewn cover over your pad inside-out and gather the loose fabric near the ends, pinning it in place right over the contoured edges like so:
Untitled6
Make sure you do this to both ends.

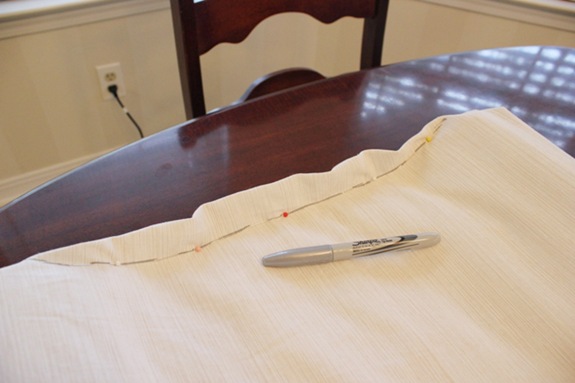
To make my life easier, I drew a line across my pins along which to sew. 
changingpadcover 025

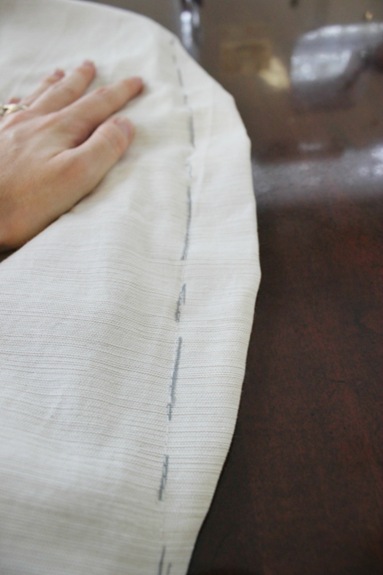
Take your cover back off and, while it’s still inside out, sew a straight stitch along the pin line, making sure to backstitch at each end.
changingpadcover 028 (You can cut the excess fabric off with a pinking shears, but I found that it’s not at all noticeable after you put your cover on.)

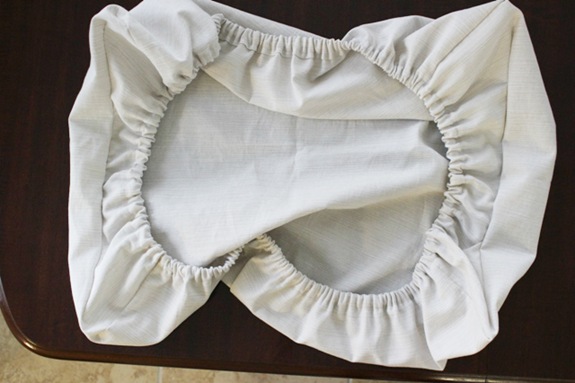
After all is said and done, your cover should now look like this:
changingpadcover 029

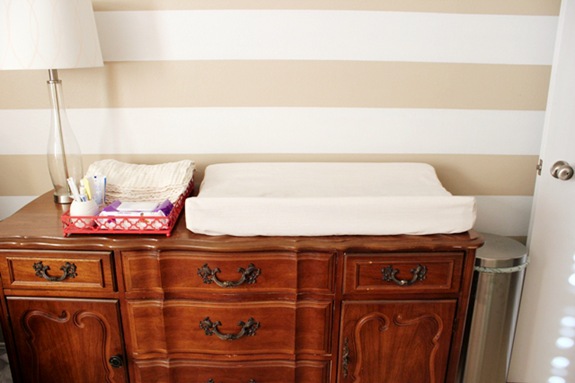
Now go ahead and change some diapers in style!
   changingpadcover 033

 changingpadcover 034

 changingpadcover 035

Whew!  Talk about a lot of pictures!  All in all, this project took me about an hour and a half to complete and that’s with correcting the inadequacies mentioned above.  I promise you it’s easier than it looks and much more budget-friendly (and way more chic) than buying a cover!  This cover cost me $5 to make - $2 for elastic and $3 for the curtain panel I used half of.  The twins’ bums will never again be subjected to a cold mat while I clean up their acts and I will be forever smug in the fact that I won’t have an ugly plastic pad ruining my decor vibe.

.           .           .

If you take on a changing pad of your own using this tutorial, let me know how it turns out!  I’d love to see your “buttiful” creations!  Ha!  Butt seriously, post pictures on Bean In Love’s facebook page or leave a link in the comments section below! 

Have a great weekend everyone!