Alright, where did we leave off on the concrete countertops? Oh yeah, the SINK! I can feel that ugh feeling coming right on back...
(Pssst...click here to read about the Part I of our new countertops.)
In our first post about the prepping and pouring, I wrote about how much of a pain it was to install the sink form. We hoped the pain would end once the concrete was poured but when we removed the form, we had all these big voids.

The frustration was real but we had to move on and start with the process of finishing the counters before we figured out how to make the sink look better. So, let's talk about the finishing and come back to the sink.
With the concrete completely dry (about five days after pouring), it was time to grind them down so the tops were smooth. Even with screeding and then floating the concrete after it was poured, the counters still felt rough to the touch, slightly more smooth than something like our sidewalk but definitely not smooth enough for a kitchen sponge to glide over.
In Z Counterform's
tutorial, they use a regular orbital sander with their
Z Grit Discs to smooth the counter after it dries. Because we choose to use a concrete mix with a little bit of aggregate in it, we weren't confident that sanding route would get our countertops smooth enough. So, we went with what we knew would work because we've done it before - we used a
grinder* with
diamond pads* attached. This route involves wetting the counters so, to contain the mess we knew would happen, we taped
plastic sheets* from floor to ceiling all around the counter. We also taped off the cabinets underneath and laid plastic on the floors.
Then, after bedtime a couple of nights and a few afternoon free moments, we ground down those countertops like nobody's business. Using that grinder and diamond pads, Anthony started with a low grit (200) and worked his way up to a high grit (1500) to get a smooth finish. Before grinding, he wet the counters so he had a bucket of clean water at his side to scoop water out of. He'd wet the section of counter he was working on, grind it, then sponge up the now dirty water, and squeeze that sponge into another empty bucket. I was the "water girl" - emptying the full, dirty bucket and filling up the other with fresh water. He repeated this process of wetting, grinding, sponging, and squeezing lots and lots of times, going over the entire counter four times with a higher grit each time. It was time consuming but a definite must-do to attain those smooth counters.
This is what the peninsula counter looked like after being ground down smooth:
It doesn't look super smooth in a photo or even in person from eye level but when you ran your hand over it, it felt velvety smooth at this point. We even had a friend who, amidst running his hand over it, exclaimed "Wow! It doesn't look like it would feel this smooth!"
(Side note: That line across the counter is a trowel mark. We're still stumped how the trowel could create a line like that but, even after grinding, it was still there. We're not super happy with it but there's nothing we can do about so c'est la vie.)
After grinding, we waited a day and went over some pin holes and still-rough patches with a slurry mix or
cement patch mix. Adding a slurry atop the concrete is supposed to fill in any impressions, divots, and small holes caused by trapped air bubbles. This is where things started getting a little dicey. Theoretically, you're supposed to put the slurry on with a plastic putty knife and then wipe it off when it dries a tad or becomes lighter in color. It's a process similar to grouting. Well, we wiped it on the damp counters but had a hard time getting it to stick and stay in place It was so frustrating. When we did get it on, it all came off after we let it dry and started wiping. So, we grabbed a different slurry mix that seemed to be better but instead of using a plastic knife to put it on, we used our hands and that worked much better. Also, we didn't wipe it off as it dried. We let it dry completely (about 24 hours) and then went over the whole counter with a grinder and higher grit diamond pad (doing the whole wet, grind, wipe process all over again). However, it didn't take to the shallow impressions as well so we still have some of those. Also, the ratio of pigment to concrete didn't transfer the same way to the slurry so it came out a really dark gray, much darker than our counters. So now we had medium gray countertops with lots of dark gray speckles and spots where we had filled in holes and impressions. At first we were very annoyed but we came to embrace the imperfection in it all. Speaking of color differences though...
Despite our best efforts to get our countertops looking as close as possible to the color of our sample, they came out a lot lighter. Cue the massive disappointment. Here's a photo showing how different the final sample (top) was to the actual counters (bottom):
We think that adding the
Liqui-Crete messed with our pigment to concrete ratio - we just didn't think about that before we started mixing. Essentially, by adding the Liqui-Crete, you're adding more light-colored material so of course, you'll end up with a lighter end result.
Thankfully, Z Counterform had a remedy for us, even if it meant spending an extra $60 on another sealer. We had planned on using and purchased their
Aqua-Thane M35 sealer which has less shine - it gives more of a satin sheen. We did not want a shiny countertop. The M35 would darken our concrete just a smidge but really just a smidge. Since we now needed to go a lot darker to get back to our original sample color, we purchased their
Aqua-Thane G40 sealer. This one darkens concrete a good amount but has a gloss finish.
This is during the G40 application:
I think it lightened just a little as it dried but it definitely made the countertops darker which we were happy about.
So the plan was to seal with G40 to get that darkening effect, and then go over again with the M35 to get rid of the gloss. It was another step and more moolah spent we didn't want to have but it rectified the color situation.
So let's talk more about additional steps, shall we? I was just getting started with those. Going along with the instructions from Z Counterform on how to apply the G40 sealer, I used a foam roller. All was fine in the beginning, it went on well albeit stipply (that's totally not a word but hopefully you get my point). However, I thought that stippled texture would go away as the sealer leveled out and dried. Nope. On top of that, a square appeared right in the middle of the countertop post-sealing. It's where we had taped a piece of plastic to the countertop to see if it would collect condensation - that's how you can tell if the concrete is totally dry and ready for sealer. If water droplets form under the plastic, it's not dry and not ready. No condensation? Dry and ready for sealer. For some crazy reason, the adhesive from the tape left a mark and so we had another added step of sanding the sealer off this area to get rid of this square.
You can see that darned square and the unwanted texture in this photo:
Blah. After sanding off the square and resealing that area, we sanded the whole countertop with regular, 120 grit sandpaper to smooth out the stippling. This added a whole 'nother day to the process and at this point, we were read to be done!
Once the texture was sanded off, I went back over the counters again with the G40 sealer except this time, I used
this paint pad:
I wish I could say everything was nice and smooth this time around (I had high hopes for this paint pad since it is very similar to
the pad used in some Z Counterform videos), but instead of stipples, we had lines. However, I don't know that they're that noticeable and maybe that's just the impatience of wanting to finish talking but it was better than tiny stipples everywhere. I think the G40 is just a thicker sealer so anything used to apply it is going to leave some sort of lines or stipples. It's really unfortunate and there doesn't seem to be any way around it.
We were disappointed but didn't have any other options so we decided to live with the lines and hoped that regular use would wear down the lines eventually. Also, our counters will have to be resealed with the M35 every year or so, so the lines may disappear as time goes on and more layers of sealer are applied.
Once the G40 was dry (we waited two days), I went over the counters with the M35 sealer to get rid of the shine. This sealer is much thinner so there weren't any residual lines after using the paint pad to apply.
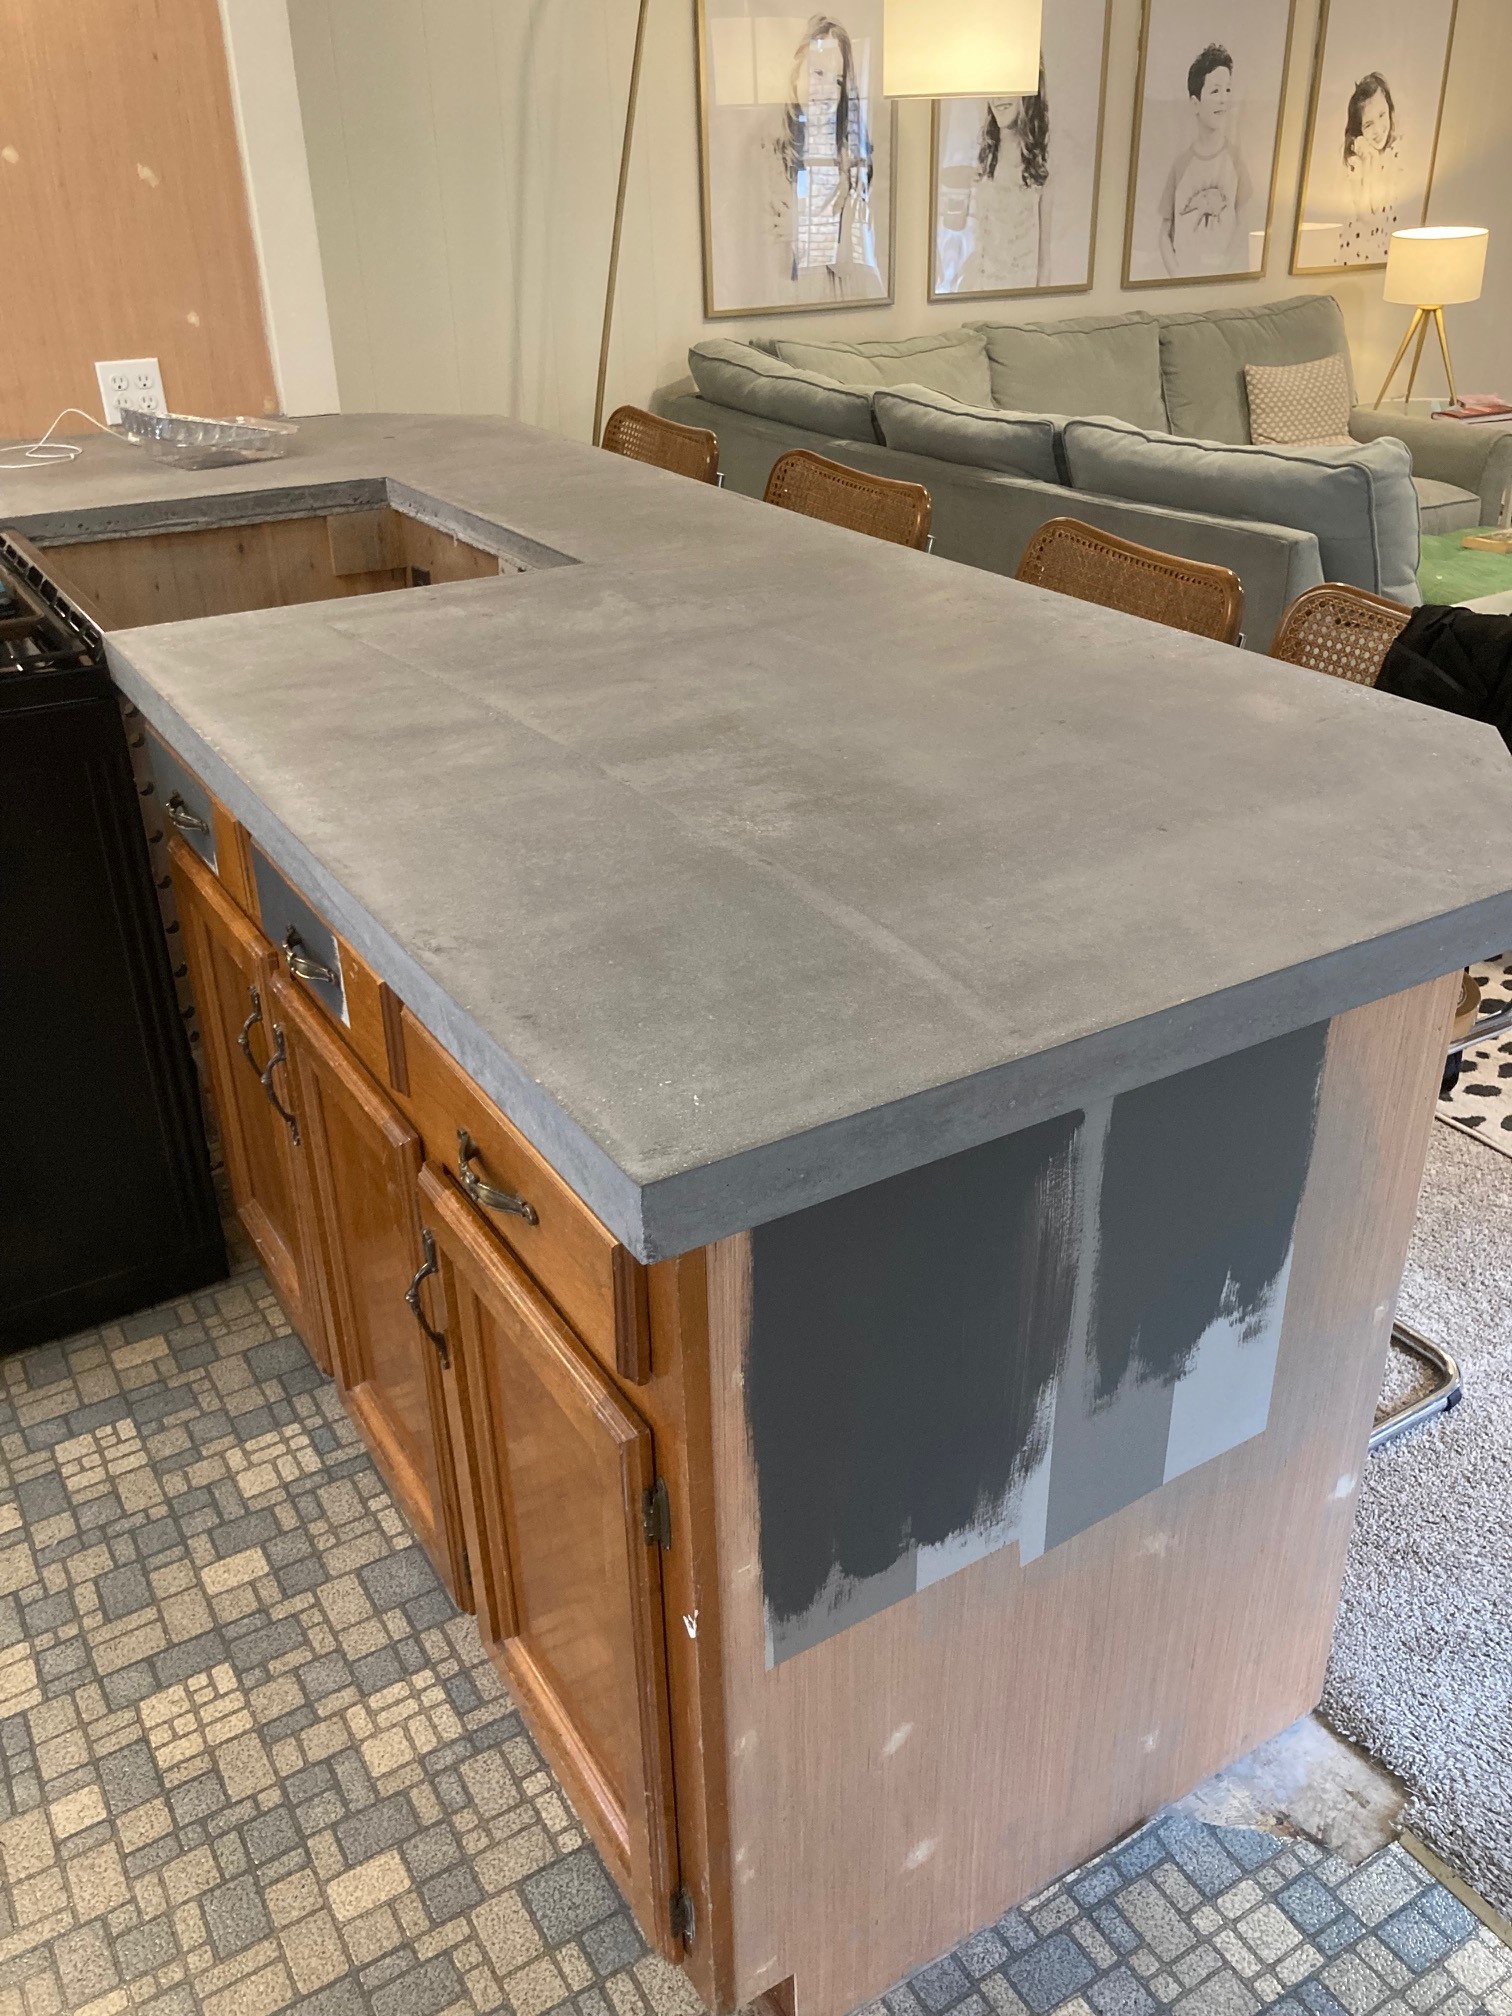
Here's the peninsuala counter all done. Can I get a Hallelujiah?!
This side is super smooth (with a few very shallow imperfections scattered here and there) and even though it doesn't exactly look like what we were going for - it has a lot more color variance than we thought it would - we've come to love it's uniqueness. It's leans more industrial and while we've never felt like that's our jam, it's beat we'll march to.
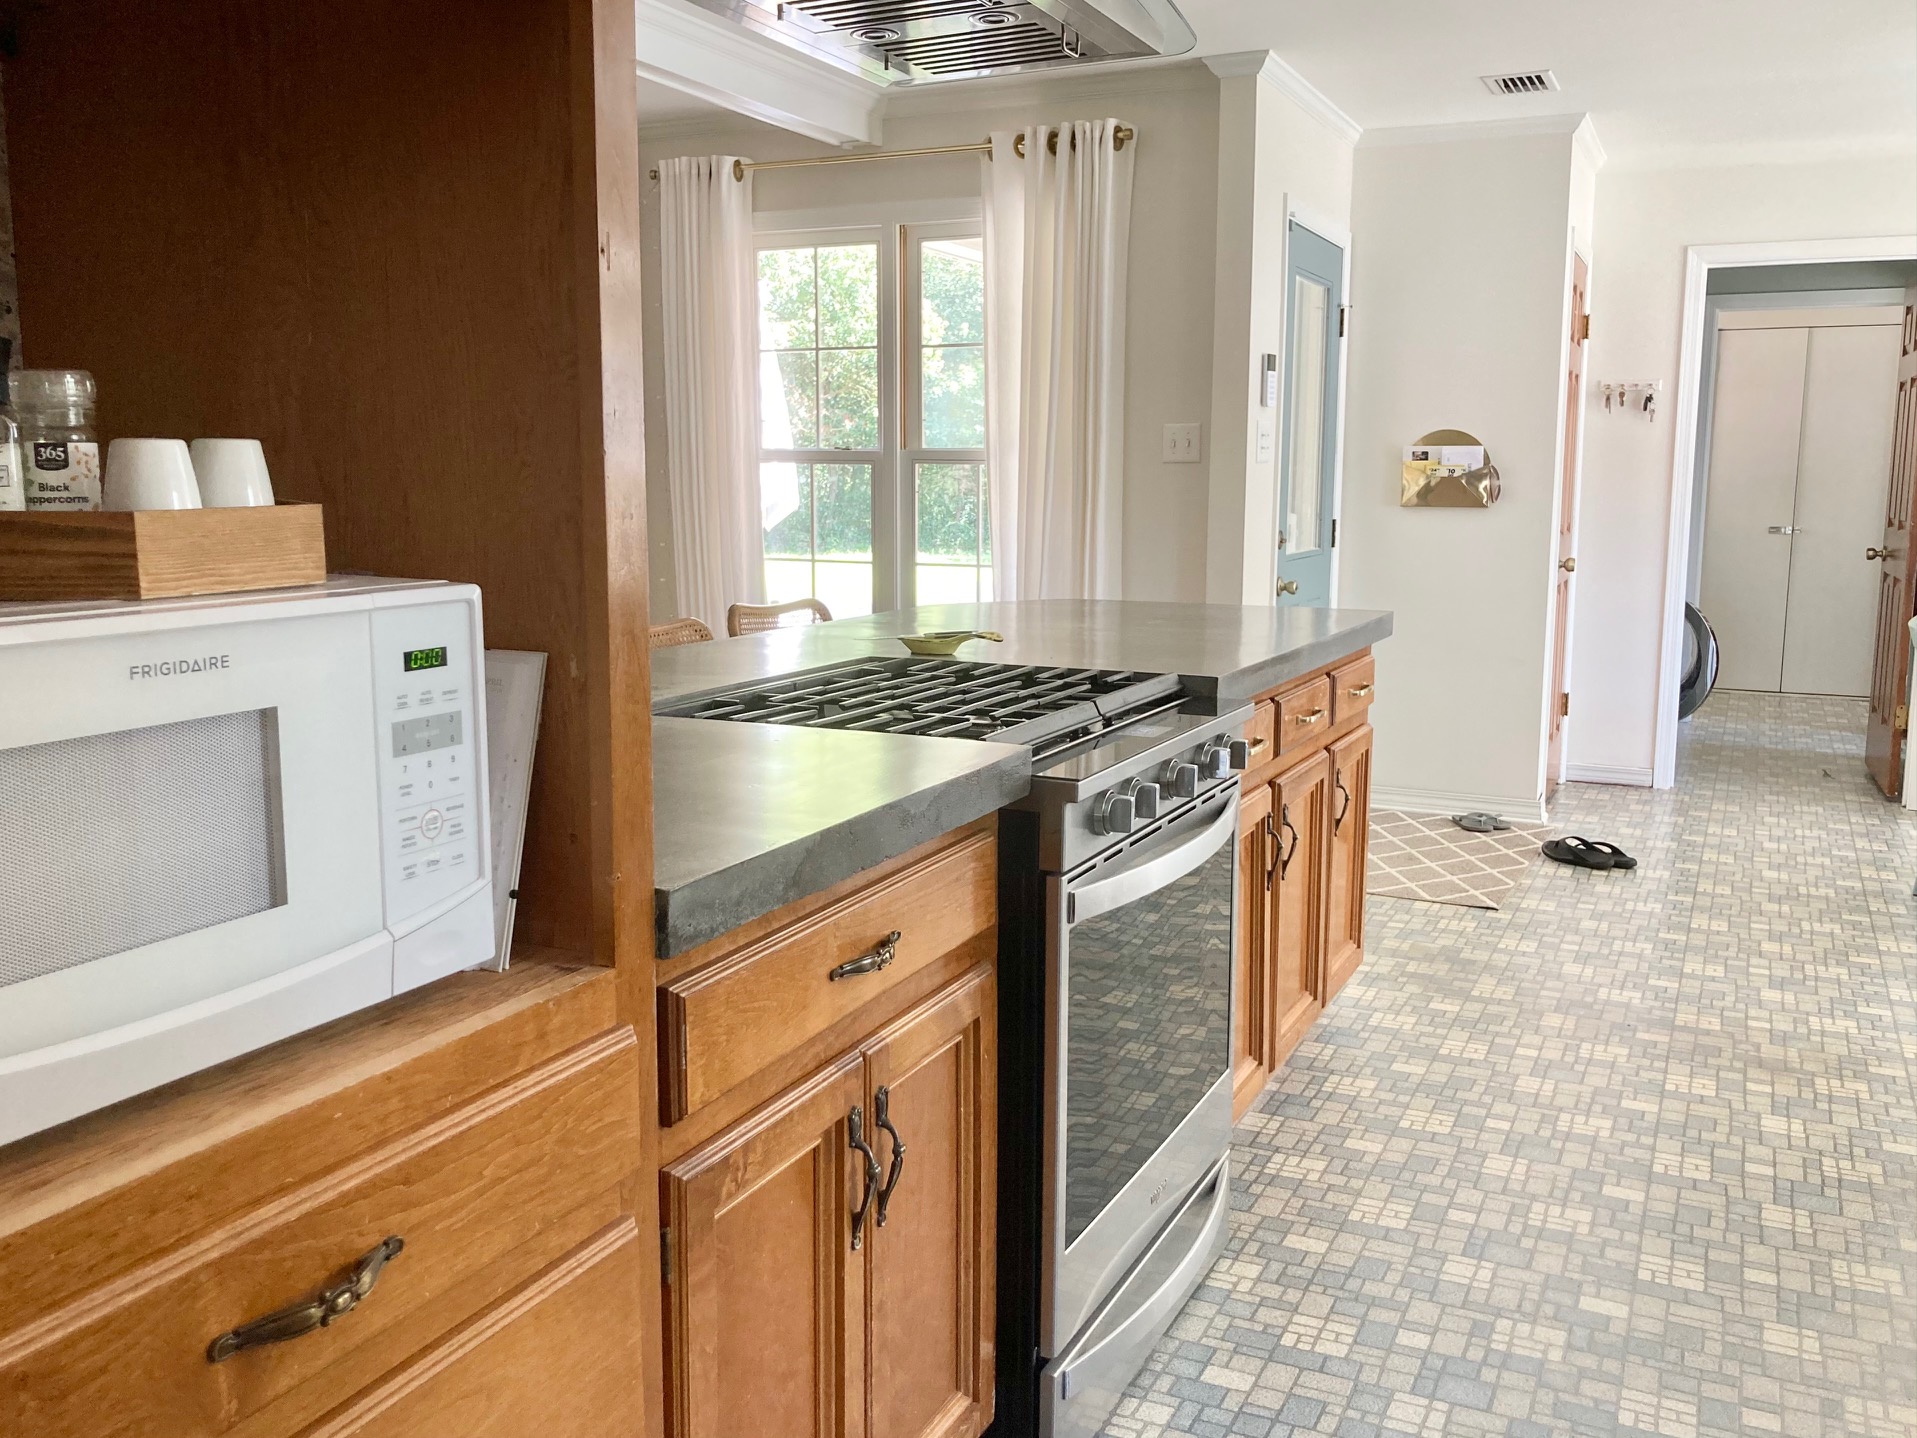
We finished the sink side the same way a couple of months later - hanging plastic, grinding, filling in imperfections, and sealing. Doing the whole kitchen at once was an option but it was helpful (especially with kids) to do each side separately so that, while we worked on the peninsula side, we at least had the use of the sink and then while we worked on the sink side, at least we had the use of the stove.
So you would think that we had this side in the bag since we had literally just poured and learned all the what to-dos and what not-to-dos, right?
Wrong. It's never that easy.
During the sealing process, we felt like the G40 looked different applied on this side compared to the peninsula side. We used the paint pad this time around to avoid the stippled texture but maybe a roller applies more evenly because we didn't feel like it went on evenly. Not only did we have the paint pad lines (which we were already prepared for), we had dark and lighter lines that went along with how I applied the sealer. The darker lines were the places I overlapped with the sealer streaks as I painted as you would overlap painting anything. It was a little frustrating and I'll just say from here on out that we wouldn't recommend using the G40 ever. It's hard to apply smoothly and seems to darken inconsistently. There is just too much unknown in how it's going to look once applied.
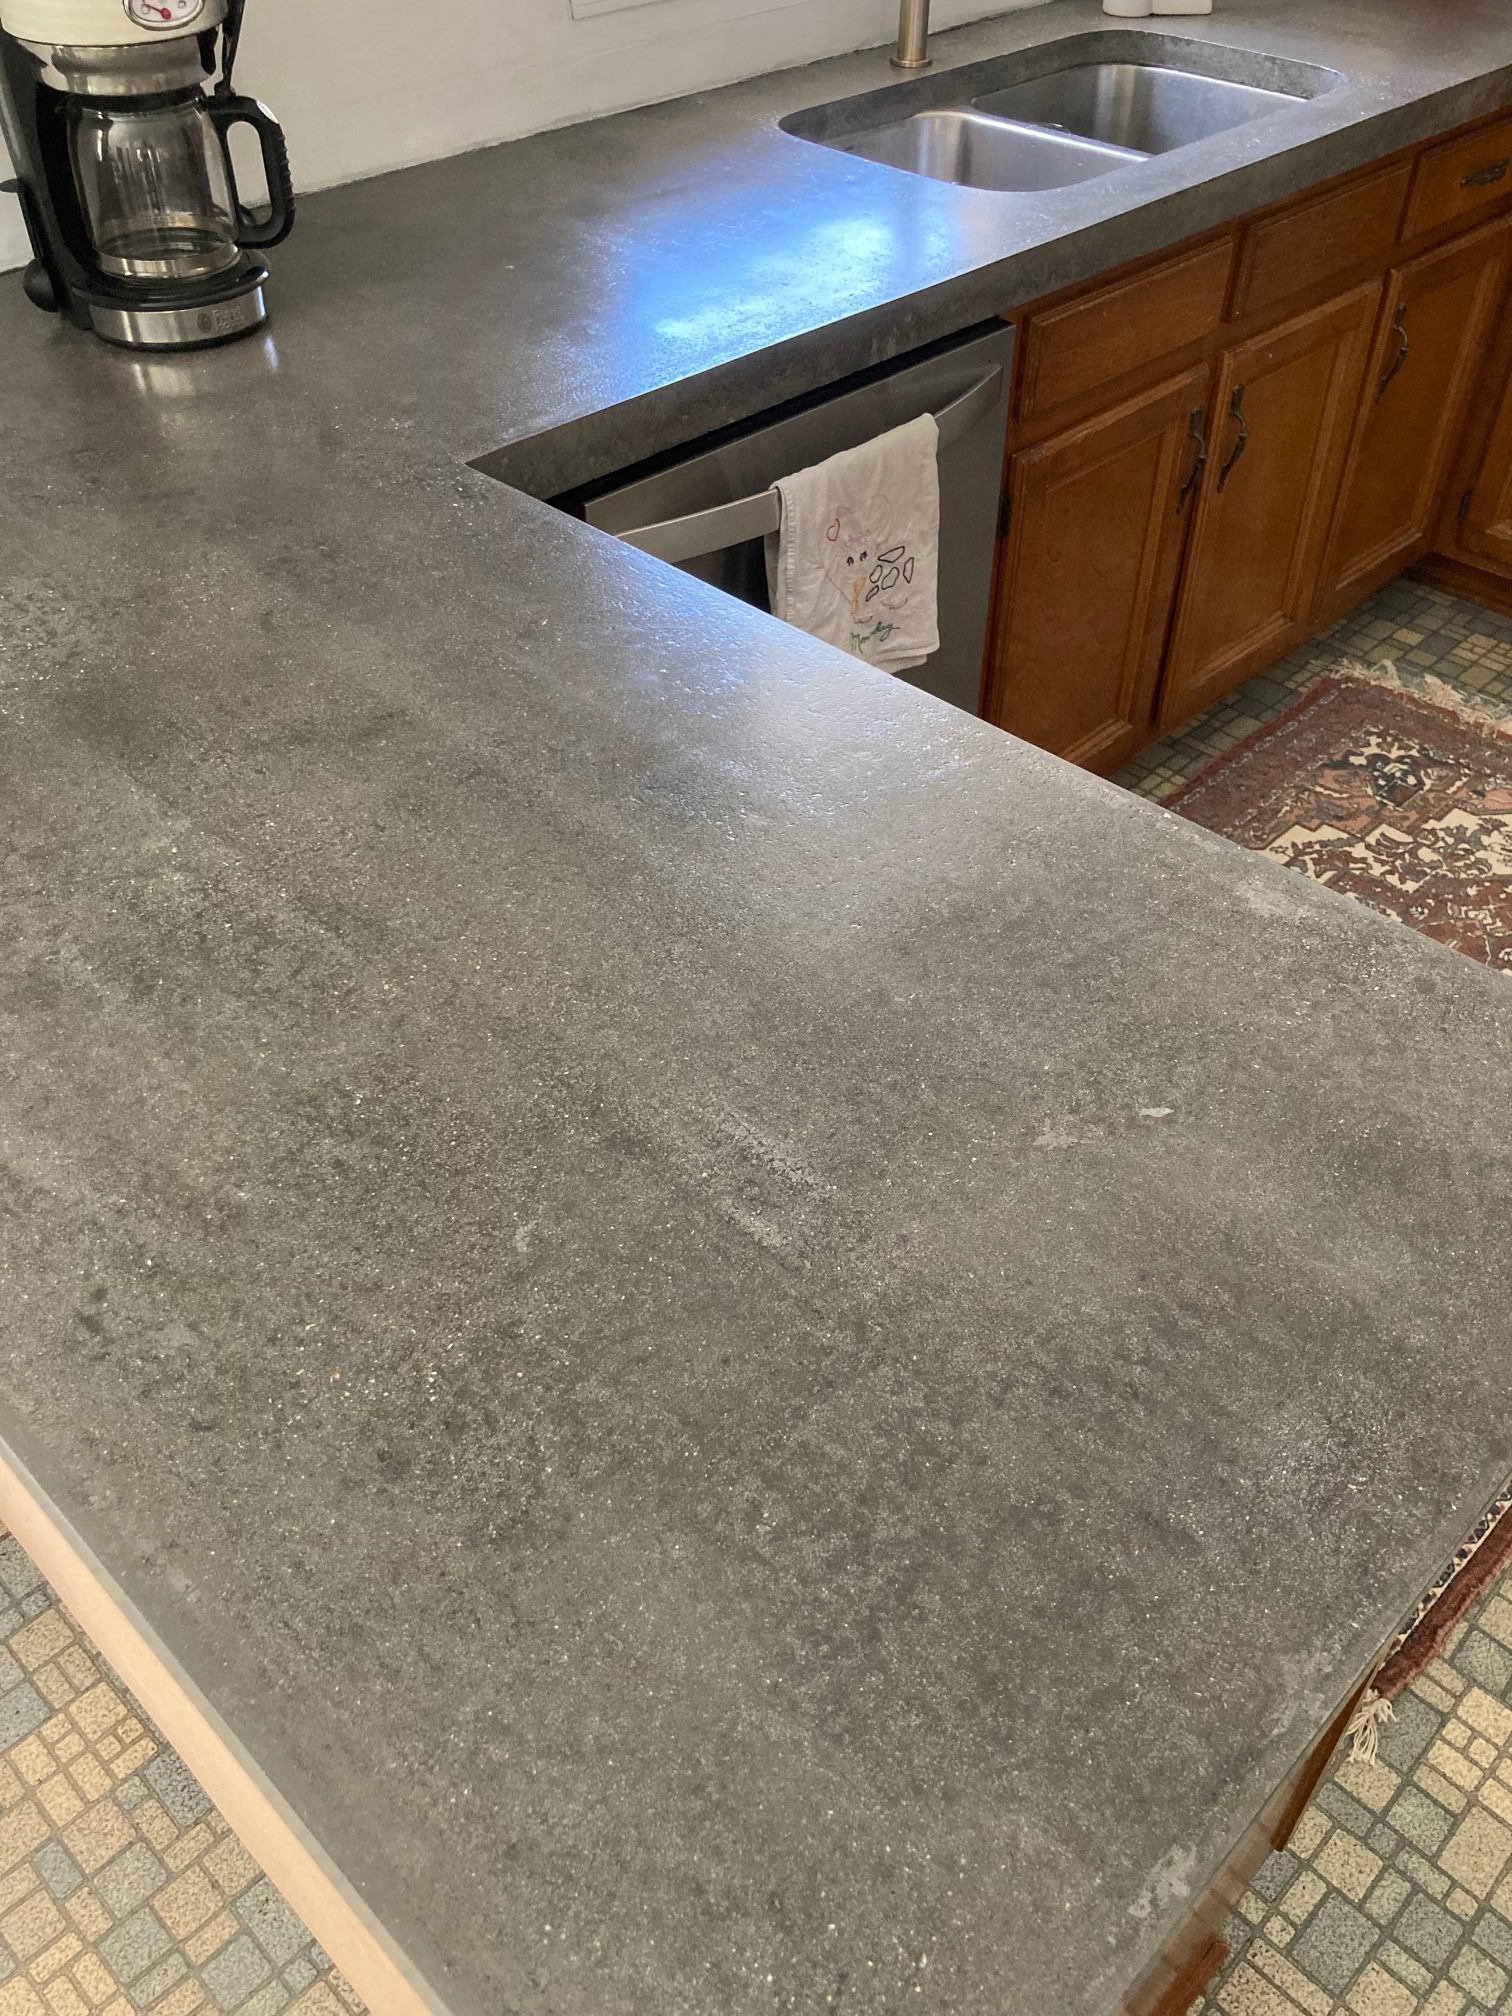
In addition, this side didn't come out quite as smooth as the peninsula side. We think we may have started grinding too early but we're not sure and we're not even sure if that would cause more texture to begin with. We waited the same amount of time as we did the other side of the kitchen but maybe it gets less air flow as it's against a wall which caused it to dry slower?
Here's a side view of this side of the counter:
If you compare it to the side view of the other side earlier in this post, you'll notice how many more shallow impressions it has. We're seriously considering backtracking here and grinding this side down more to smooth it out but we just need a break with these things so, if we decide to do that, we'll do it this summer or fall.
Now we can talk about the sink. After we ground down this side of the counter and while we added the slurry mix to the pin holes and impressions on the top of the counter, we completely taped off the inside of the sink and Anthony filled the big voids around the sink with slurry as well. Because some of the voids were along the bottom edge, where the concrete meets the sink, Anthony used a
long taping knife to help hold the slurry in place while he placed it to form that bottom edge. When we slurried the top of the counter, we let the slurry mix dry and then ground any remaining mix off. With the sink though, we applied the slurry and then wiped it as it dried, careful not to wipe too much out of the voids and holes. It was a process similar to that of applying grout.
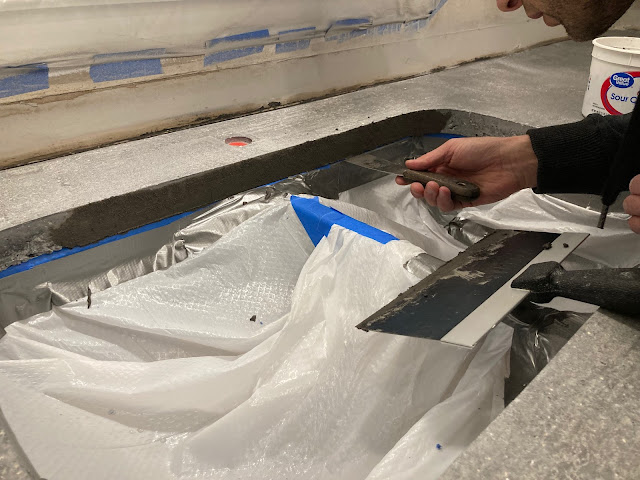
Grinding the concrete on the inside of the sink would have been almost impossible so wiping was the best option and, even though we had our expectations really low, things ended well and the sides look fantastic.
They're not super smooth but they look like hand-carved or like they're hewn out of rock and we really think it's super cool.
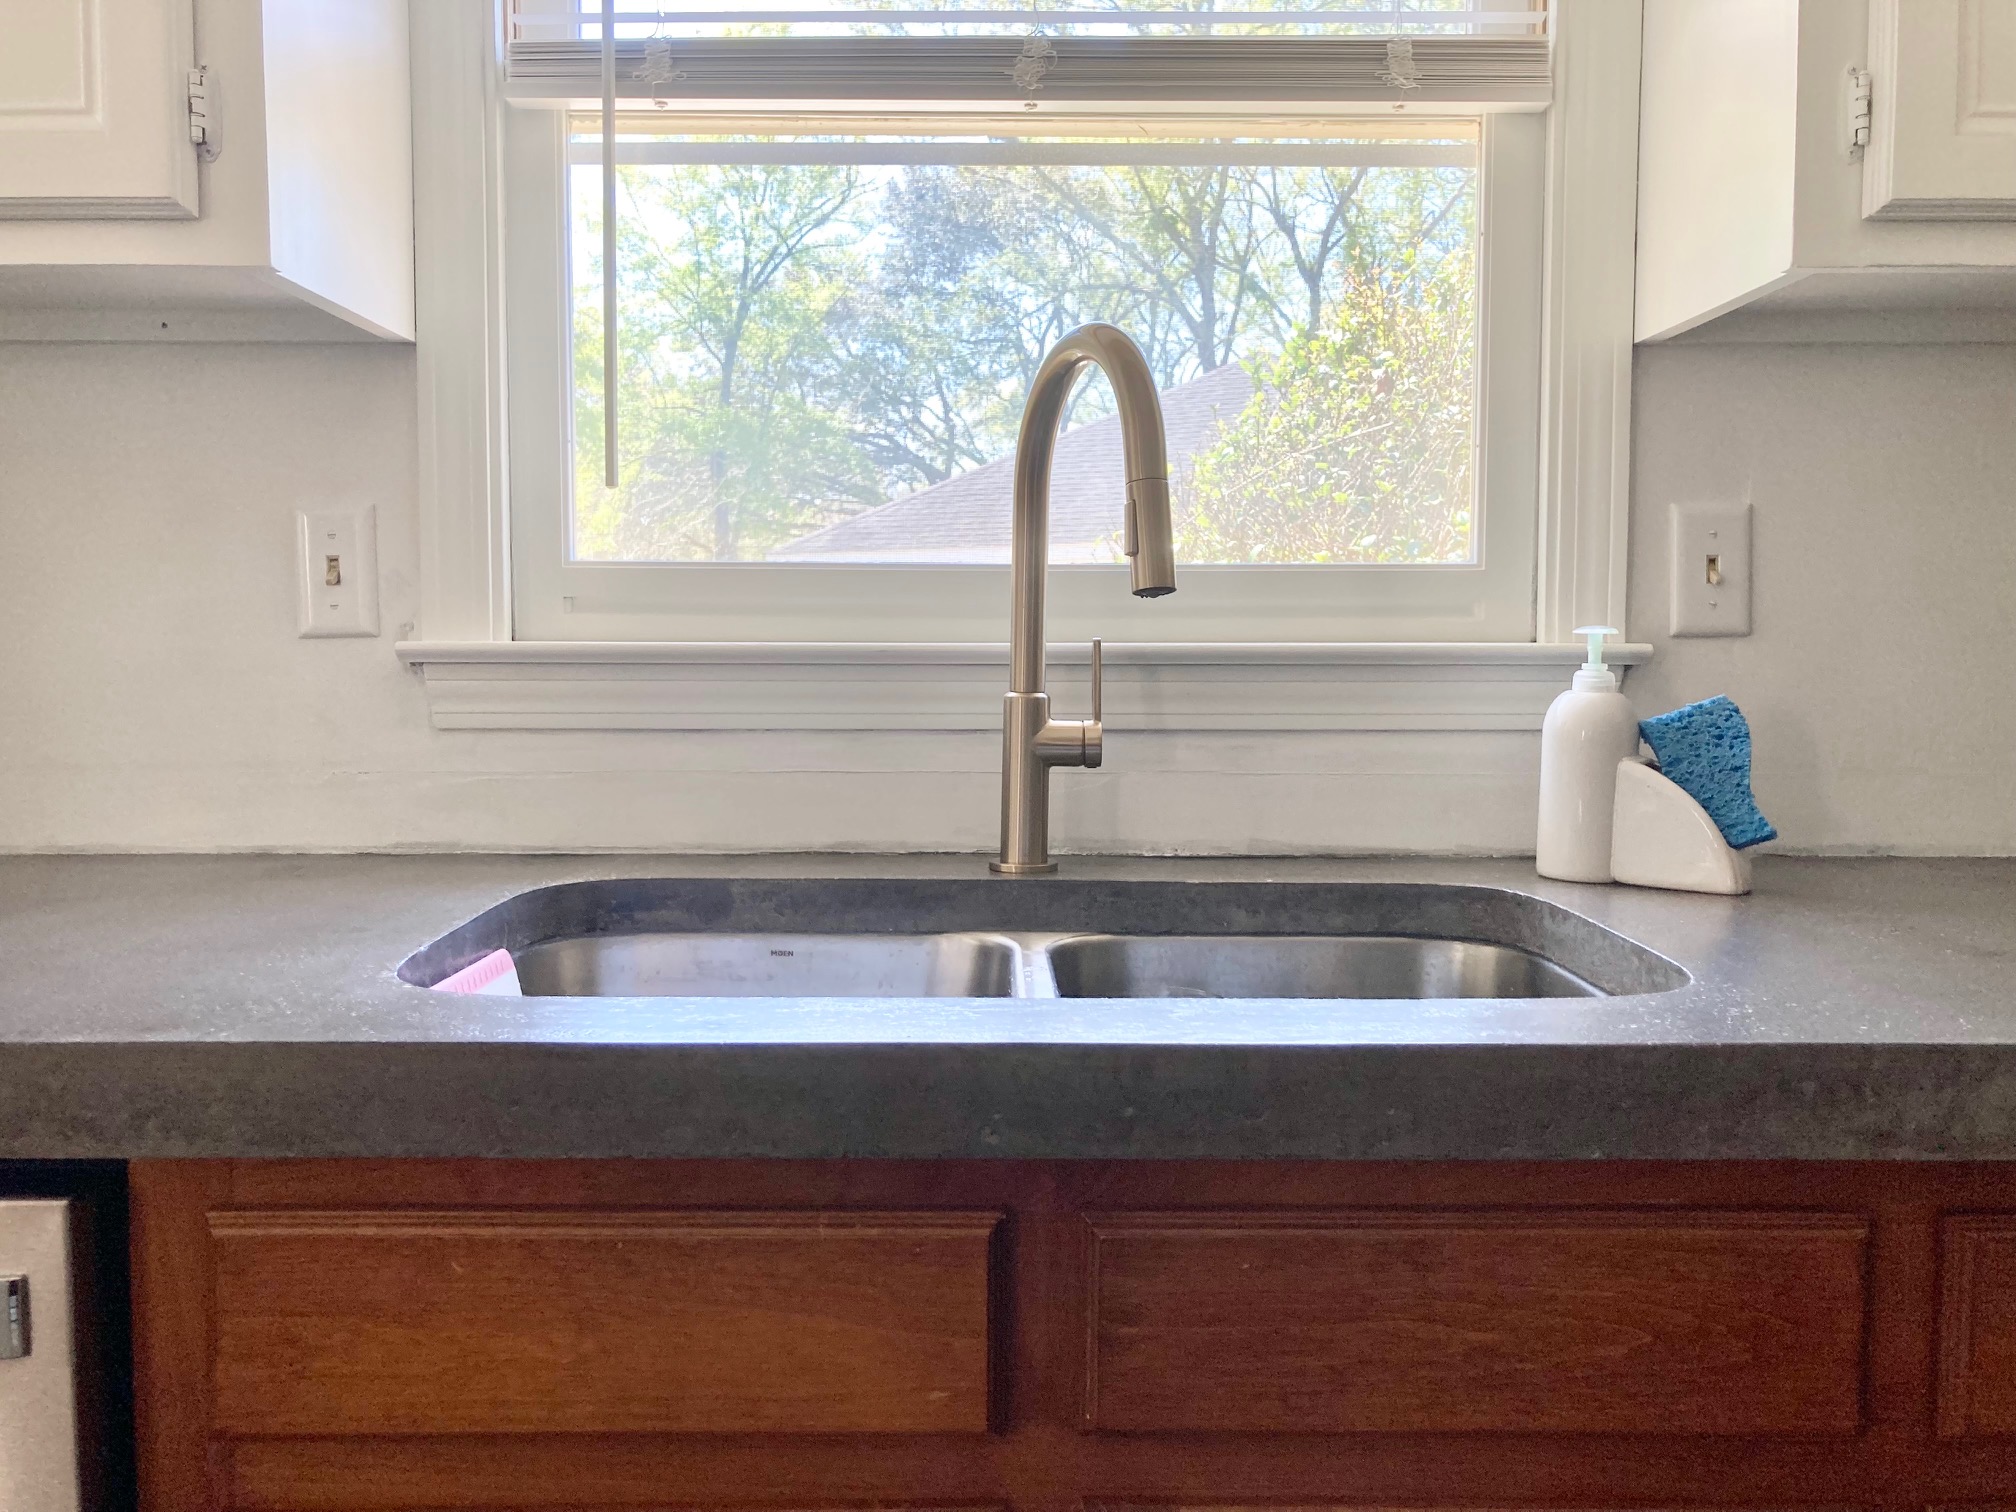
(We bought and installed
this faucet* and
LOVE it. It has a nice, smooth operating motion and the color is the most pretty champagne brass. Highly recommend.)
Last but not least, let's talk about cost. We have 55 square feet of countertop in our kitchen and these concrete counters cost us just around $1100. That includes concrete board, all of the Z Counterform supplies (which we used a 10% coupon to purchase), concrete, concrete pigment, rental of the mixer, and diamond pads. (We did already own the grinder, a few diamond pads, trowels, and all of the tools needed to cut the concrete board and forms.) The cheapest, thinnest quartz option would have cost us $3,300.
We're really, really happy about that savings and, now that it's done of course - ask me in the midst of the process and you might get a different answer, ha! - we're happy we went this route. They look much more expensive than they were and that's always a good thing in my diy book. Plus, they're unique and somewhat of a conversation starter and, as a friend reminded me, give us the satisfaction of knowing that we made these all by ourselves. <3
Time will tell how the sealer holds up to normal wear and tear a fam of six can bring and I'll be sure to update you as we go but so far, so good. The peninsula was poured five months ago and it still looks awesome - no stains to speak of but we have been diligent about wiping up spills right after they happen which is something you probably want to do regardless of what kind of counters you've got.
Patience goes hand-in-hand with progress for us slowskies over here but it's always fun to see how far we've come, even when there's still so much left to do.
March 2019:
Now:
And now the big question...
Would we ever do this again? Well, first let me tell you, we couldn't be happier that these are done, even if they didn't turn out exactly like what we had intended or thought. I envisioned a soapstone look but what we got was an industrial, imperfect, and definite concrete look. I wish this post were more cut and dry without all of the peppering of issues we had but I wanted to give you the honest truth about our experience with Z Counterform. They're a great company and the customer service was awesome. But like a lot of companies, I read lots and lots of social media and blog posts by bloggers who were sponsored by them or gifted materials, what have you, and I didn't read a single negative detail. We felt like we had this in the bag before we started since Anthony has all this experience but we had to tweak and learn things along the way so much that we don't even feel like we could tell you in words the exact process. Maybe it's because every kitchen is so different and there are just so many variables - the type of concrete you use, the color you want your concrete to be, the angles, etc... I don't think we would rule out ever pouring concrete countertops again, but I think if we ever did, Anthony would want to
pour them out of place. So, would we ever do it again? If our budget is what it is now, yes. Would we pour in place? Probably not. Either way you pour, concrete countertops are best friends with tight budgets but they do require a lot of learning before you pour and possibly a lot of learning during the process. Buying prefab is a hundred times easier, though costlier. One thing I can tell you we will never do is pour white concrete. I know it's so tempting when you see all the beautiful pictures of kitchens with them and even we weighed the option before settling on dark counters. I stumbled upon
Kristi's two year update on her white Z Counterform countertops and, oh my, my fears of white concrete counters come true. I'd love to see more updates from other people who have poured white because all you see are the brand new tops in all their glory, not the lived-in truth of what they can look like used.
So, here ends a countertop saga. Phew! Well then again, since we just might be grinding the sink side later, maybe it's not the end but we're at least done with that hard part. :) We're both happy to close that door and focus on finishing the rest of the kitchen.
Stay tuned!
+ + +
*These links are affiliate links which means that, if you click over and/or make a purchase through the link, we may receive a small commission at no extra cost to you. I am an Amazon affiliate and also use other sources to link to products. All of these links will lead you to things we actually paid for or that are similar to the item we paid for in case ours is thrifted/sold out/secondhand. This extra money helps us with the costs of running the blog and buying paint. Thank you for your support and for fueling our love to share all things DIY!


You guys are braver then we are! We did a concrete floor in our living room and I’m not a fan.
ReplyDeleteWe used cheap craft paint from
Walmart and plastic shopping bags turned inside out to paint our kitchen 1980’s blue laminate countertops. Then after we were happy with the faux granite look we poured epoxy over just like they use on bar countertops. We love it. After 7 years of heavy use we ordered more epoxy and resealed it. Wish I could share a picture of it.
Thanks for the update!
Ha! I don't know if I'd call it bravery. ;) The faux granite sounds awesome! I've always wondered how epoxy held up...did it scratch easily or no?
DeleteI wish I saw your blog before I started my outdoor kitchen countertop. I agree with EVERYTHING you stated. I expected things to go as easy as all the videos I saw from those that most likely were sponsored in some sort of way by the company. NOTHING negative from any of those videos. I am happy with how they finally came out, but nothing as SMOOTH as all the videos promised (especially around the undermount sink). I have no issues with the company but I would of loved a more "honest" evaluation of what to expect. Your pics are almost identical to mine, especially around the sink. We love the final product since we used GRAY cement and it matches our limestone almost perfectly. GREAT post!
ReplyDeleteHey George! Thanks for taking the time to share! I'm glad we're not the only ones!
DeleteHey there! I have a question for you. Did you end up using the counter patch product from the company or something else to slurry the holes?
ReplyDeleteHi! We didn't want to wait between seeing the holes after taking off the forms and receiving an order of counter patch so we grabbed some slurry from a local store. I'm not sure what the name of the product we used is but can find out if you would like to know. The Counter Patch looks promising but it seems like it's mainly for holes and voids around the edges of the countertops. The slurry we used filled those in great. It was the top surface we had trouble with.
DeleteYou have to add so many additives to concrete in order for it to not act like concrete. That being said, I love the way your countertops turned out. I do not like monotone concrete and the character of the imperfections are what make them look like pieces of art.
ReplyDeleteThanks! I think you're right, the imperfections go hand-in-hand with character. It took me a little while to realize that. :)
DeleteOnce your countertops are finished, it's important to maintain them properly to ensure they stay looking great. Use mild soap and water for regular cleaning and reapply sealer as needed to protect the surface.
ReplyDeleteLook for Augusta Concrete
This post was such an informative read! I loved how you broke down each step of the concrete countertop finishing process. Your tip about using a slurry mix to fill in the pinholes was really insightful, as I’ve seen other DIYers struggle with getting a flawless finish. It’s also inspiring to see how you tackled such a big project on your own—especially with the challenges of sanding and sealing.
ReplyDeleteI’m curious about the durability of the countertops after finishing. How have they held up over time, especially with daily use in the kitchen? Did you notice any cracking or changes in the finish as the concrete cured?
I'm glad you got something out of it Luke and thanks for the praises. So far, they've held up great and they're almost two years old at this point. I actually took some photos recently so that I could write an update on how they're doing. We have had no problems with stains but we do have one hairline crack along the front edge of the sink...I think because of a child sitting on it. It's not noticeable but there. No changes in finish but we probably need to reseal soon to keep things in tip top shape.
DeleteThis DIY project is impressive—those concrete countertops look sleek, modern, and totally custom. The finishing tips are super helpful for getting that professional, polished look!
ReplyDeleteSee more info from concrete contractor Surprise
Very insightful article! I learned so much about finishing concrete countertops, from smoothing techniques to sealing tips. The blog is easy to follow and perfect for DIY enthusiasts wanting a polished, professional outcome. Look Out Australia
ReplyDeleteIncredible transformation! Your detailed process—from grinding to sealing—was so informative. I especially appreciated the tips on handling sink forms and managing voids. It’s clear a lot of hard work went into this project. Thanks for sharing your journey! Luiz Gustavo Mori
ReplyDeleteSheena, your detailed guide on finishing DIY concrete countertops is incredibly helpful! The step-by-step process, from grinding to sealing, is so well-explained. I appreciate the honesty about challenges faced—it's reassuring to know I'm not alone in the DIY journey. Daniel Dantas
ReplyDeleteThis post is a goldmine for DIY enthusiasts! The step-by-step breakdown of the concrete countertop process—from prep to finish—is both informative and inspiring. Your attention to detail and practical tips make this project approachable for anyone looking to tackle a similar endeavor. Kudos! Luiz Antonio Duarte Ferreira
ReplyDeleteWhat a fantastic post! Your DIY concrete countertops finishing tutorial is clear, inspiring, and super helpful. Love how you explained each step with photos and tips — made what seemed daunting feel totally doable. Thanks for sharing such practical insights! Beatriz Barata
ReplyDeleteA detailed DIY guide to finishing concrete countertops—from grinding through sealing. Learn how to smooth rough surfaces, deal with voids around a sink, apply slurry mix, and choose sealers to get your desired colour and finish. Realistic, honest & budget-friendly. Veronica Dantas
ReplyDeleteThis post is fantastic—your DIY concrete countertops look stunning! The step-by-step finishing tips you shared are super clear and inspiring. I especially love how you balanced beauty with practical advice. Thanks for motivating me to take on my own project—already bookmarking this! Sidney De Queiroz Pedrosa
ReplyDelete