I'm really excited to tell you about this project! It's a goodie but definitely not my normal "Hey! Here's an easy peasy project anyone can do!" type of project. It took a little more time and effort but it was so worth the end result. Oh and hey, anyone really can do this, I didn't mean to sound deflating, just be prepared. ;)
I'll admit that there were more moments that I can count during this process that I wished I would've went down the painting route but I stuck with it, slowly but surely over the course of two weeks and golly gee whiz, they look much,
much better. 👌
Here's how we went from dark and dated to lighter and more modern...
First, I removed the old hardware (thinking about selling it on eBay?) and gave each dresser a quick vacuum. As you can see, dust and dirt had made a very cozy home behind all of those scrolls:
Little did I know what I was getting myself into at this point but this is where the adventure began - and that's the cup-half-full way of saying it. With our cheap but trusty
palm sander* and some
course grit sandpaper (probably about 10 sheets of it) I got to work sanding the varnish and stain off each drawer and dresser body. After I got down the natural wood, I did a quick sanding with a
fine grit sandpaper by hand. In the whole sanding process, I had to be careful not to sand too much because the drawers had a wood veneer atop them. It was a thicker veneer but a layer I didn't want to sand through just the same.
It probably took me about ten minutes each drawer and I did two or three drawers per day because I couldn't handle more than a half hour of my hands vibratinggggggggg so much I thought they were going to permanently stay that way. I sanded with one hand and used a small brush to brush away dust as I went to keep it out of the way.
After the first few drawers, I was already sick of sanding so I grabbed some paint stripper during my next trip to Lowe's (I really hate spending money like this when there's another option - sanding - so this should tell you how desperate I was) and attempted to strip the varnish. Should be an easy brush on, let sit, scrape off, right? It had to be better than sanding, right? Right? 😓
WRONG!
This is where I almost threw in the towel and pulled out the paint. I brushed on the stripper, covered it with plastic wrap, and let it sit overnight. But, when I went to scrape it and the varnish off, it would. not. budge. It was like someone painted a thin coat of sun-dried tar all over the drawers while I slept and when my scraper hit it, it just made small gouges and any gumminess I did get off just clung for dear life onto the edge of my scraper. I
did think it was weird when the stripper kind of resisted being brushed on and condensed in areas, leaving others bare, when I brushed it on but I didn't think anything of it because it's been years and years since I've seen stripper at work (Anthony stripped the dressers in the master of
our first house and it was messy but worked like a charm).

I thought maybe that was normal. I'll save you more lamentations but as I learned on the www in a desperate search after, 80 year old varnish can be really hard to remove with any sort of stripper.
Great.
To make matters worse, when I tried to then sand off the uber gummy, stripper mess, the heat of the vibrating sander just made the gum ball up and get stuck on the sandpaper. At this point, two drawers and the pull-out shelf were all gummed up and covered in tiny gouges made by me trying my darndest to work through the stripper.
DIY is SO FUN!
More www research led me to go buy some denatured alcohol, which is supposed to clean off gummy messes like old varnish (here goes more money). I had what I needed (or at least I hoped) plus some ultra crossed fingers but I needed a break from the gummy drawers and shelf so I put aside all of that and working on sanding other drawers and the dresser bodies for the next few days. When they were all finished, I thought I'd try to sand the gummy drawers just one more time before I resorted to using the denatured alcohol and wouldn't cha know? It worked! My guess is that by me putting them aside for a week, the stripper dried and the varnish hardened a little bit, thereby allowing me to sand it again. Things were looking up.
Phew! That was a doozy of second step, eh?
Here's the difference in a drawer before and after sanding with the coarse grit sandpaper:

The light sanding I did with fine grit sandpaper removed a little more of the splotchiness left behind by stain. Throughout this whole process, I was texting my woodworking whiz of a brother-in-law to get advice. Let me pass some of those nuggets onto you in case you ever get the itch to sand down a piece of furniture.
1) Using a belt sander is the way to go when sanding large surfaces. If not a belt sander, an orbital sander at least (this one is the sibling to our cheap palm sander). A palm sander is probably the least efficient sander. I used what we had but if I ever want to do something like this again, I might think about making the investment.
2) What a machine sander lacks is precision. It's harder but sanding certain areas by hand allows you to concentrate on small areas without sanding spots that don't need to be sanded anymore. So, it's good to do a broad sanding first and then go in to "fine-tune" after by hand. Plus, it counts as exercise. ;)
3) Try to keep the sawdust/fine finish you've sanded off out of the way as you pass over the wood with the sander. A vacuum would be helpful or you could use a brush like I did to frequently brush off the surface.
These dressers didn't have a lot of small grooves, but they did have some - like in the routed edges along the top. To sand them down, I wrapped sandpaper around the edges of a plastic putty knife and got that edge into the grooves.
Once I was finished sanding and had wiped everything down quick, I happy danced it. That was a big mountain to climb. Then, I poured a bit of straight-up bleach into an old plastic container and brushed it onto every freshly sanded surface. I didn't douse the wood because I didn't want to risk warping it but just put a thin coat on it, making sure I didn't miss anything.
Liz said that setting the pieces you're trying to bleach out in the sun would speed up the process but keeping them in the shade would let you control the lightening more as it wouldn't be quite as quick. I wanted quick and as-light-as-I-could-get so out into the sun they went where I let them sit for a few hours.
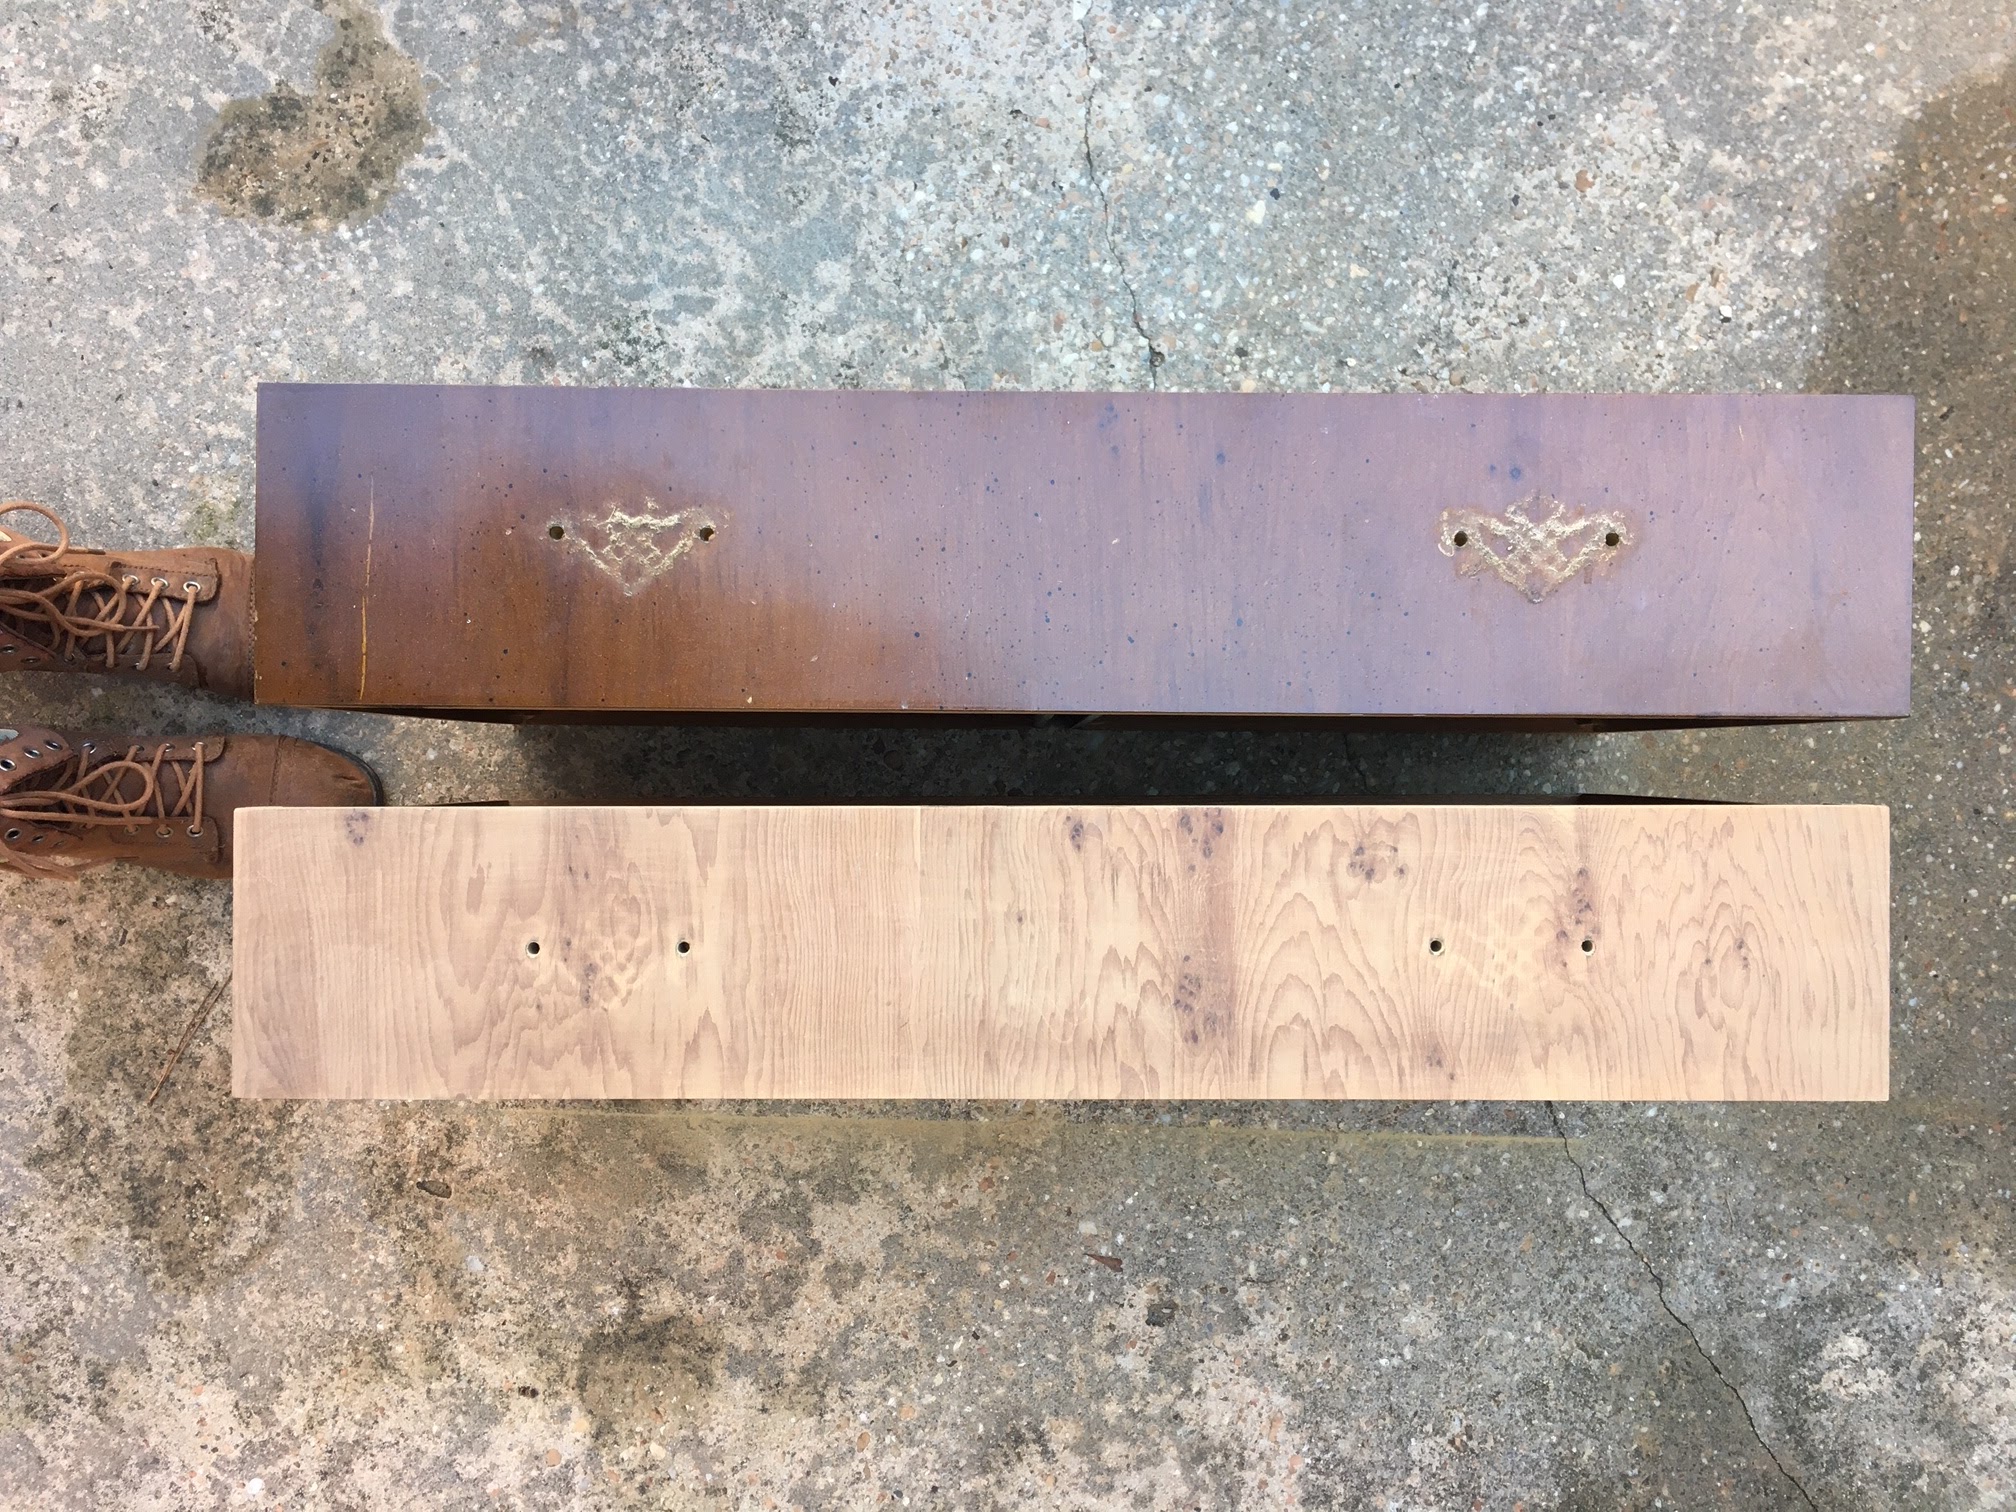
The wood definitely got lighter with one coat of bleach. In the photo below, the top drawer hadn't yet been bleached but the bottom two were.
To neutralize the bleach - stop if from continuing to lighten - you need to mix vinegar and water (at a 1:3 ratio) and wipe or brush it on the bleached surfaces. Once again, you want to make sure you go with a thin coat so as not to warp that beautiful wood you've already spent hours and lots of elbow grease on. After that vinegar mixture dried, I had to sand down the dresser parts again with a fine grit sandpaper because the bleach raised the wood grain - made it slightly rough - and I wanted smooth.
I could have done another round or two of bleach but I was nervous that, since I was bleaching that veneer layer, the risk of warping it would increase each time I brushed on bleach so I just did one and done. If I knew it could handle it, I definitely would have because of what happened after the last step...
Sealing. I came across
this sealer* a few months ago and have been excited to try it. It's on the pricey side as far as top coats go but it supposedly goes on very well, dries crystal clear, is low VOC, and can be used inside or outside. It went on great with a brush (I put on two coats with a light sanding inbetween) but unfortunately, darkened my new light wood slightly and brought out a little bit of the red tones of the mahogany. Boo hoo. My brother-in-law told me it might happen and really, it wasn't a huge deal but the wood tone was so pretty before sealing that I was a little disappointed. Liz used a finishing wax which is supposed to keep wood the same color after applying as was before but I'm not a huge fan of furniture wax. It doesn't dry hard and can scratch off a lot more easily than a hard coat of clear acrylic. But, it could keep the lightness so, six one way, half dozen the other, I guess.
Either way, I'm never sanding down an entire piece of furniture again.
Kidding.
You know me, just give me a few weeks to recover and I'll be back at it. 😆
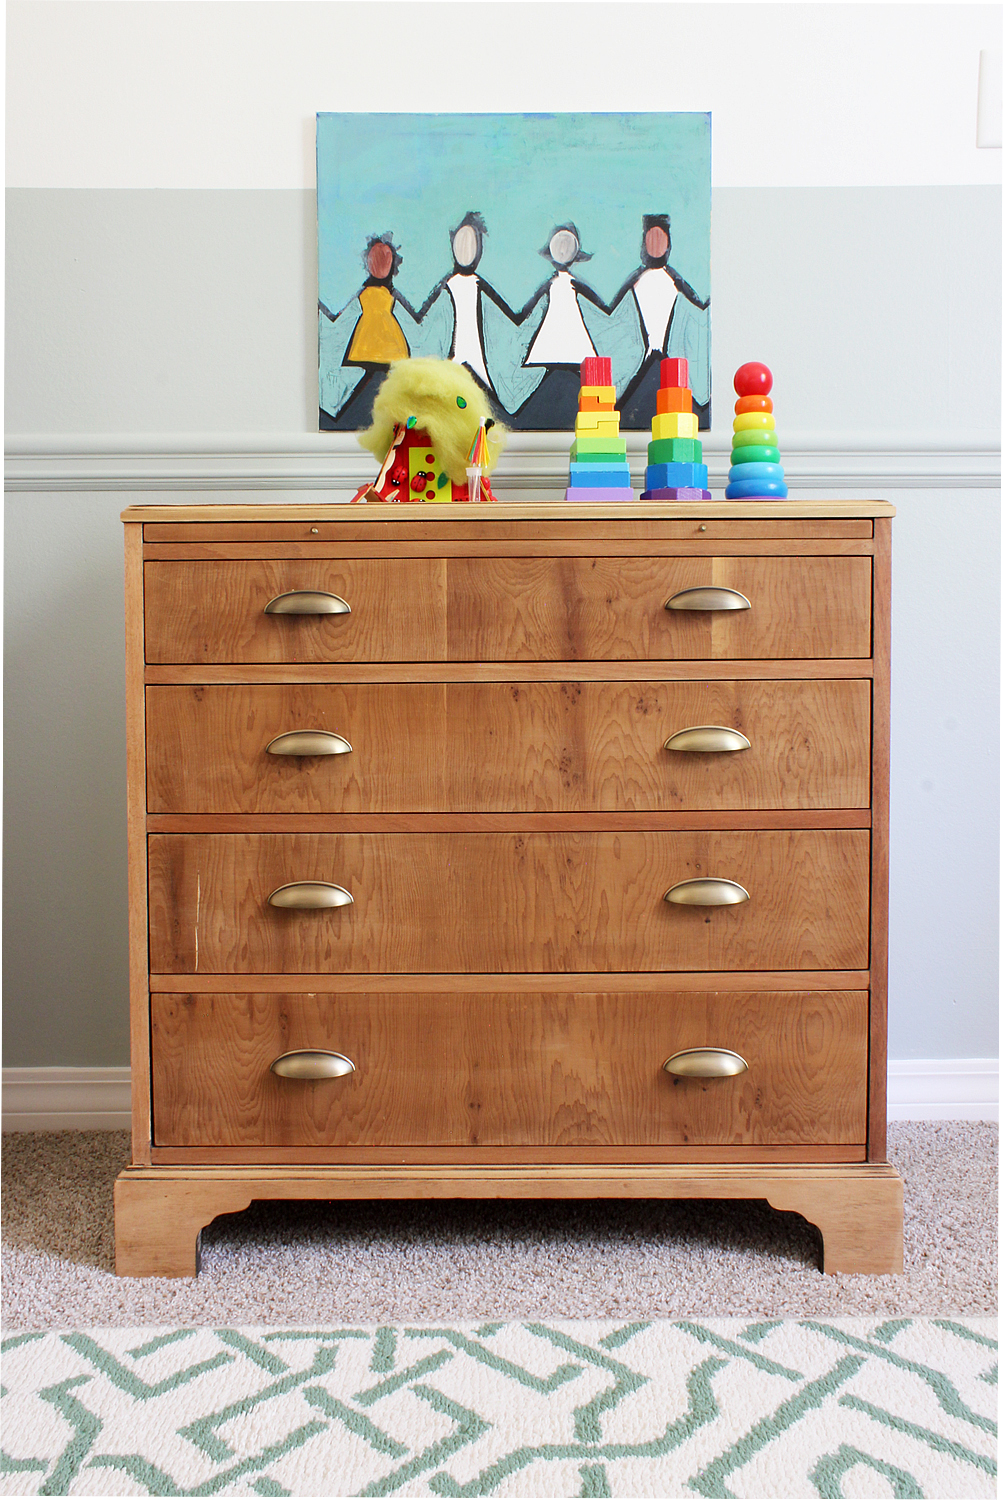
The finishing touch was in the new hardware. I grabbed
these cup pulls* that fit into the existing holes and they compliment the new finish perfectly and the color and quality is awesome. I highly recommend if you're in the market for new hardware like this.
Originally, I wanted Anthony to cut off the bottoms of both dressers so I could give them the same leg treatment as I did
this dresser, but it became a "maybe later" idea. I am going to line the drawers of each with fun wallpaper though. I'll keep you posted on that.
Both dressers have gotten their fair share of use in the past month or so that they've been working for S & G. Anthony had a grand idea that, instead of making space for a very-coveted-by-Seb desk in their room, we bring in a chair and have him use the pull out shelf as his desk. It was a genius move. He's happy. We're happy. The chair is one we've had for forever and folds up behind the door to their room, out of sight, when not in use. I heart double-duty furniture.
Speaking of double-duty furniture, wait until I show you guys what I found recently. It's currently in the office/guestroom and it's pretty awesome. Stay tuned and have a great weekend!
+ + +
*These links are affiliate links which means that, if you click over and/or make a purchase through the link, we may receive a small commission at no extra cost to you. I am an Amazon affiliate and also use other sources to link to products. All of these links will lead you to things we actually paid for or that are similar to the item we paid for in case ours is thrifted/sold out/secondhand. This extra money helps us with the costs of running the blog and buying paint. Thank you for your support and for fueling our love to share all things DIY!


I'm so not extremely incredibly jealous that you scored these for $20. Not at all. AHHH!!! I've been scouring FB here for nightstands for what feels like ages and I can't find a dang thing that isn't like $200+. And these look SO good bleached. Wow. Anywho. We had really good luck with sealing our plywood panels in the basement using Varathane's High Traffic Floor Finish in matte -- you'd have to probably do 3-4 coats minimum to get a good seal but it changed the color from unfinished plywood hardly at all. It's not a furniture product but I figure if it's meant to be walked on, it's probably sturdy enough. Anyway thought I'd throw that out there in case you wanna try something for your next project!
ReplyDeleteHaha! I wish I could clone them for you Hannah! Good luck! Something will turn up, I'm sure! Thank you for the tip! I filed that floor finish away! Sounds like a winner!
Delete