
I've painted a thousand cabinets, ok, maybe not thousands...let's see - four kitchens now, four bathrooms, and more dressers and pieces of furniture than I can count - and each time, I've done things a little differently. Each time, I learn a more efficient way, or a better way to get a smooth finish, or I use a new paint. So I can't say that I have an ironclad, tried-and-true method to painting cabinets but I can say that I've had great success in the arena. The same story follows the most recent endeavor of painting our current upper cabinets in the kitchen.
First, I removed all of the doors and the contents of the cabinets.


I wanted to replace the old cabinet pulls with new knobs so the next thing we had to do was fill in the old hardware holes and drill new holes.
This was a little bit of a process but a necessary process to make sure those old holes disappeared completely like they were never there. The step-by-step goes a little something like this:
1. Plug the old holes with a dowel that's cut to size. Standard hardware holes measure 3/16 of an inch in diameter, so anything with a diameter slightly smaller than that would work. We actually used skewers from the grocery store. I brushed a small amount of regular Elmer's glue on them before I stuck them inside the holes to make sure they'd stay. Plugging the holes means you don't have to use as much wood filler and it gives that wood filler a solid back to sit upon.
2. Fill each hole with wood filler* and let it dry completely before you...
3. Fill each hole again, overfilling this time. Our old hardware was bulky and made indentations in the wood so overfilling filled in these indentations and also ensured that the hole was completely filled in.
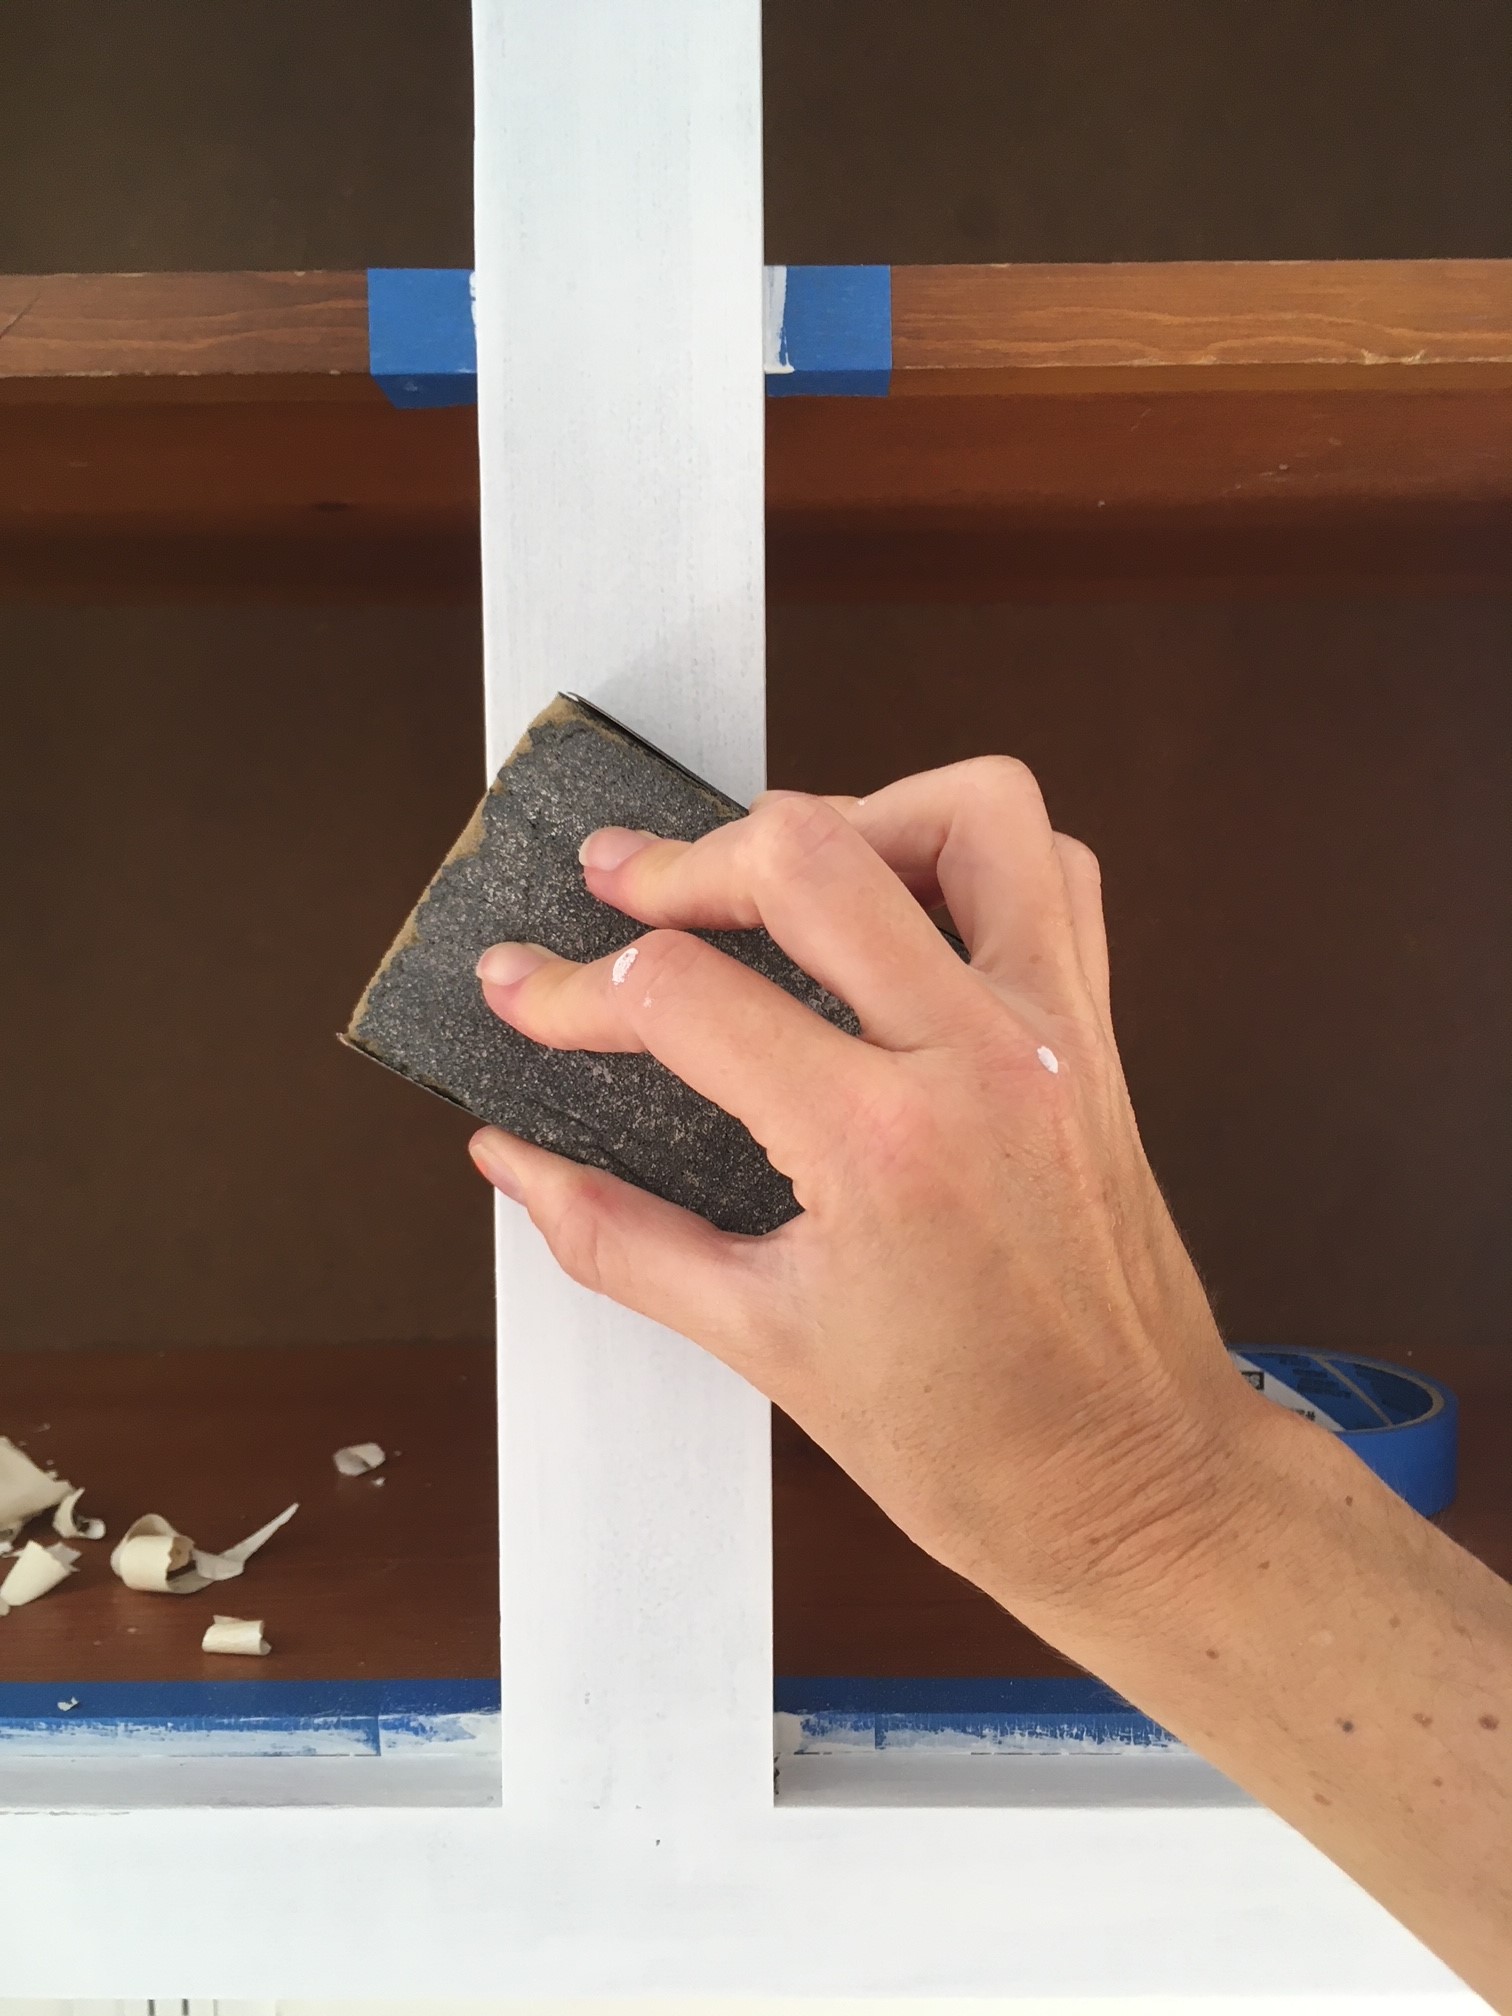
4. Use a high-grit sanding block* or sand paper (180 or 220 grit) to sand down all of the filler until it's perfectly level with the surrounding wood.
5. Vacuum using a hose + brush attachment and wipe away any sanding debris with a damp rag. (You could probably use a regular household vacuum as long as it has a high-efficiency filter but we recommend grabbing a shop vac if you don't have one. They're so useful. We have had an old version of this vac* for years and put a high-efficiency bag* inside of it when we're vacuuming fine dust.)

As far as placement for the new holes goes, I found this chart helpful. We went with the classic look. To help drill straight holes, we used this hardware jig*.
While in the process of filling old and drilling new hardware holes, we worked on peeling off old shelf liner. Kudos to whatever brand this stuff is, probably 30 years old, because it was still stuck like my dad's F-350 in a mud puddle (more like a pond) on that dirt road I thought I could get through at 20 years of age.
However, years of being used gave it a few stains and corners that were coming up. I really like the look of the natural wood shelves anyway so it was time.


After scrubbing, which was done outside, I let everything sit for a day to dry completely.
Next, I gave everything a light sanding to ensure maximum paint adhesion. Even though our cabinets are 30+ years old, they were still in great shape as far as the stain and poly goes. I know there are different paints out there that say you can skip sanding but it's a step I don't think I'd ever skip, no matter what.
I used a palm sander (we have had this el cheapo one* for three years) with 120 grit sandpaper* for all of the flat parts and a spongy sanding block* for curved areas. Not too much but enough to dull the shine.


Once everything was sanded, I used our shop vac*, complete with a high-efficiency bag inside and a brush attachment*, and vacuumed off all of the dust that had accumulated and then wiped everything down with a damp rag.
Prime time. Because our cabinets are wood with a few visible knots here and there, I went with oil-based primer vs. water-based. It's definitely not the easier option because it's a little more difficult to apply (you have to be quick and can't brush over it multiple times once you've brushed it on) and the clean up is a bear but I wanted the stain-blocking properties of it. The cabinets are sealed wood but since I sanded them a little, I didn't know if any tannins in the wood would come through water-based primer and I didn't want to take any chances and have to repaint. The thought of having to repaint cabinets shortly after having painted them a first time makes me want to keel over.
When priming the cabinet frame, I started by using a small paintbrush to get the inside edge of each cabinet.


Things were looking brighter and more modern in here already.

The next step involved more sanding. To achieve the smooth, factory-finish look I was going for, I lightly sanded down the primer once it was completely dry. It was just a quick run over with a 180 grit paper* but it was enough to smooth things out.

Finally, it was time for paint!
I didn't take any pictures of how I had the doors set up outside to prime and paint (I'll remember to take some when I paint the rest of the doors, pinky promise). I get lost in projects sometimes and don't carry my phone around with me but let me set the scene. Inside our car port, I set out a few sawhorses all in a row and laid our long ladder atop them. On top of the ladder I laid a couple of old sheets to protect the ladder from paint (we have a small stash of sheets specifically to be used as drop cloths). Then, across the extent of the ladder, I laid the cabinet doors, all in a row. I wasn't sure about over-spray since this time around I was using a paint sprayer, so I hung plastic sheeting over the brick that lines one side of the car port.
I decided to try this almost $70 Valspar furniture paint (color-matched to SW Pure White in the satin sheen) this time around and my opinion? It's meh. It's supposed to dry harder and go on better but I can't tell a difference between it and the cheaper Valspar paint I've used to paint cabinets and furniture in the past. It's unfortunate because it took a lot more time to paint with this paint because it needs to dry 6-8 hours in between coats and I had to do two coats. With life still running it's marathon, that meant I could maybe, maybe do two coats in one day if I could get started early enough. I think I managed that once though so painting took me a solid week because I had to paint frames and doors and didn't have large enough chunks of time to do them all at once.
I also broke out my new paint sprayer*. Should we talk about how I bought this thing a year ago in preparation for this and just now got to use it? No. Two thumbs way up for this thing. It sprayed fantastically and was pretty easy to clean. I don't think I'd use it to paint walls but for smaller areas like furniture and cabinets, it's perfect.
Once everything was painted, the doors went on their merry way to their respective places...but not without a couple of hiccups.
The first hiccup popped up with hinges. We had bought new white hinges to replace the old. The old hinges were dirty and bronze and I'm a huge fan of matching hinges with cabinet color if they're visible hinges. It took me a couple of tries to find the right white (these from amazon were too off-white but these were just right when paired with Pure White). The exciting moment came when it was time to get the doors back up so I screwed on the first pair of hinges and went to hang up the door when *dun dun dun* the door wouldn't close properly. The hinge was slightly wider than the old 1980's hinge - like maybe a millimeter or two. Apparently 3/8 inset hinges have changed just a tad since the 80's and we didn't get the memo.
I'm sure you can imagine how much of a sinking feeling we felt. The finish line was pushed a mile back by dad gum hinges.
New plan - scrub the old hinges clean, prime, and paint them to match the cabinets. Spoiler alert, it worked but there is a place where one part of the hinge rubs on another part and it totally removed any paint that was there. It also happens to be visible from the front. Bummer but there's nothing we can do about.

I'll quickly mention that we did look into installing hidden hinges on all of the cabinets before we started painting and because of how our cabinets are constructed - they're thick and have an outset panel on the inside - the hidden hinges that we'd need are $11 PER HINGE. Our kitchen sports 52 individual hinges so that would bring our total to $600+. I mean, in the grand scheme of things, we're already ahead since we're reusing old cabinets by making them look new but golly, that's a lot for hinges. Not to mention it'd be even more effort with the tedious measuring and adapting we'd have to do for each cabinet door. It's an overwhelming thought so for now, we're happy with the rehabbed, old hinges.
The second hiccup rolled up when we had all of the doors back up, old (made new) hinges and all. Several of the knobs looked off balance because several of our cabinet doors weren't lining up. I'm talking two pairs that were side-by-side but all of a sudden were out of line - one would slant slightly up or slightly down. This is what happens when you reuse old hinges but don't install them in the exact same order as they were prior to the makeover. The imperfect alignment might've been something only we noticed and it might've been unfortunately obvious. Either way, it bothered thee heck out of me. I had to walk away from progress in the kitchen for awhile because I just didn't know how to fix it.
A few weeks later, I finally stashed the disappointment and got to searching the www for a solution. It came in the form of this youtube video (I mean, what else?). Desperation made me try it and, huzzah! The towel trick fixed the cabinet doors that touched in the middle and Chris Browne's comment in the combox helped me align those that were separated by a frame. Straight lines and even knobs all around. I pretty much did nothing the entire rest of that day because I felt like I had accomplished something monumental. 👌


Finally (typed with allll the enthusiasm I could muster) the upper cabinets were painted...
but I wasn't done there. Let me tell you what else I did to them...
next time. ;)
+ + +
*These links are affiliate links which means that, if you click over and/or make a purchase through the link, we may receive a small commission at no extra cost to you. I am an Amazon affiliate and also use other sources to link to products. All of these links will lead you to things we actually paid for or that are similar to the item we paid for in case ours is thrifted/sold out/secondhand. This extra money helps us with the costs of running the blog and buying gas (!!!). Thank you for your support and for fueling our love to share all things DIY!


They look so good. Can’t wait to see what else you did to them.
ReplyDeleteWe did the same thing to ours in 2014 and have never regretted it. Our lowers are a dark
blue Jean color since it hides the dirt better.
It looks so much lighter in your kitchen now.
Thanks Jan! It's so great to hear yours are going strong eight years later!
DeleteLove how the painted upper cabinets instantly brighten and refresh the whole kitchen!
ReplyDelete