Showing posts with label Our Kitchen. Show all posts

Sharp Corners

Yesterday afternoon.  Lazy Sunday.  The kids were asleep and Anthony was outside primping the yard when I walked into our eat-in kitchen and beheld it.  The light.  It was amazing.  Our kitchen/dining area is the brightest room in the house as it is with all the windows it boasts but at that moment the light was brighter than any light I’ve ever seen stream through the windows.  And then I found out why.  We found a big, round pool for the kids at Dirt Cheap last week and set it up Saturday.  Well, Anthony had drained it while he was outside and turned it upside down to dry.  The bottom of the pool is stark white and it was laying right by the kitchen windows, reflecting the bright sunshine into the room.  Now I know why photographers use those light reflector things.  It makes all the difference in the world.

So, I took advantage of the light and got out our camera.  The funny thing is, I had just completed a five-minute project earlier in the day that I had planned to write about today involving the window treatments in there but I didn’t plan on getting whole room shots, until I saw the light.  #literally

IMG_5997
[No filter.  No edit.  No nothing.]

(And you can bet that I will be Anthony will be carting that pool around to the outside window of every room I photograph from this day forward.)

But anyway, let’s get to that little project quick.

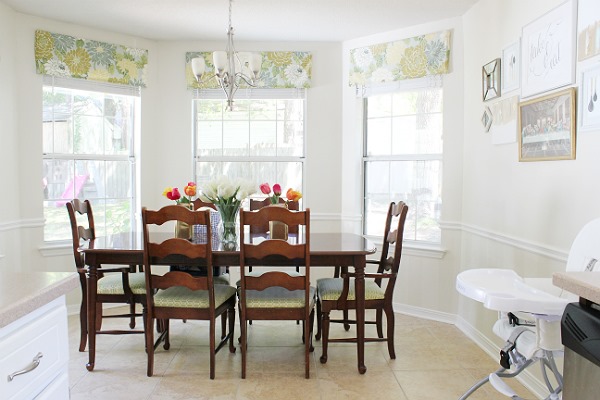
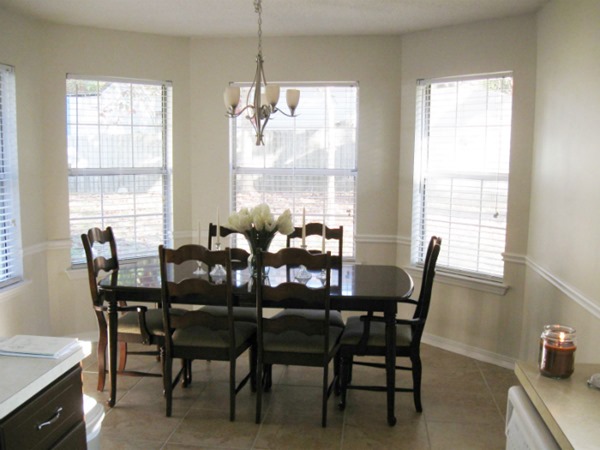
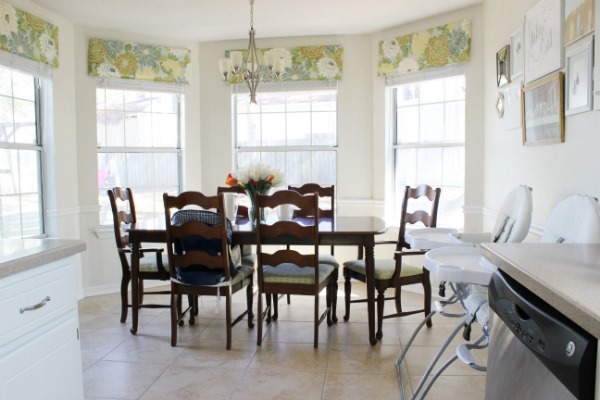
Three and half years ago we went from this...
kitchen1 (14)

…to this…
IMG_6002
…just by adding some diy-ed window valances.
Granted my after is even better because of the incredible lighting but you get the picture, right?  Also, might I mention that the after was taken yesterday (you probably gathered that) and I haven’t changed a single thing at this view besides adding a couple of vases?  I find that a tad comical considering my affinity for decorating interiorly.  ;)  But, adding window treatments makes a huge difference, no?

Well, if you’ve ever made those valances yourself or maybe are planning to one day, this one’s for you.

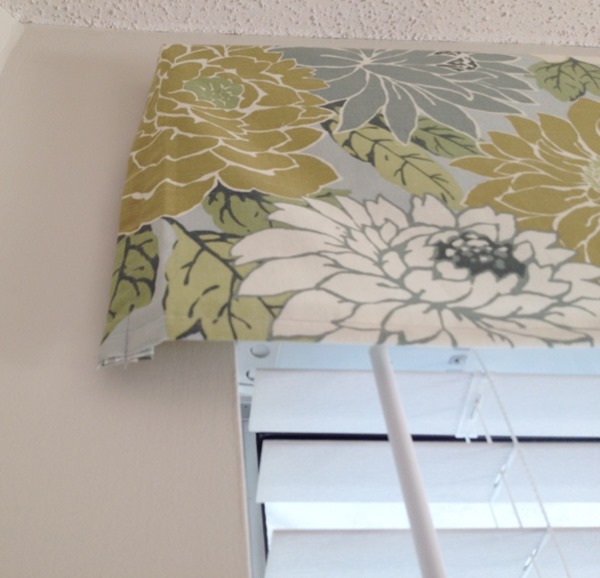
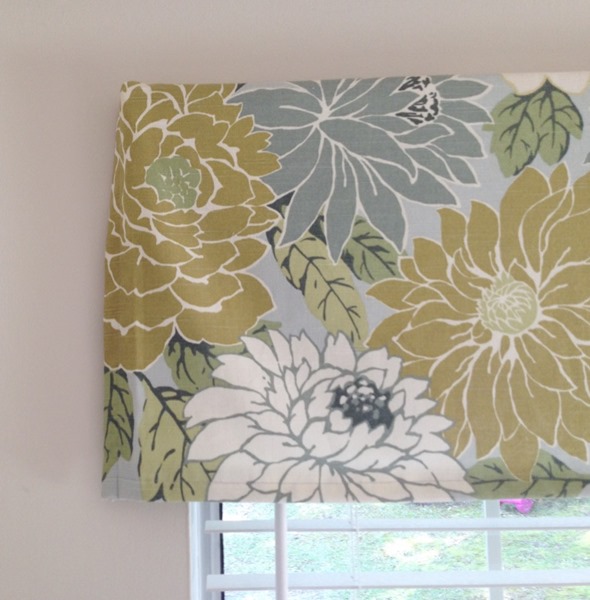
Back when we made them, Anthony ironed corner creases in them so that they’d have that slight box look.  Well, over time, the creases started to uncrease.  You can see what I’m talking about here:
IMG_9199
No more sharp corner.
 IMG_9200

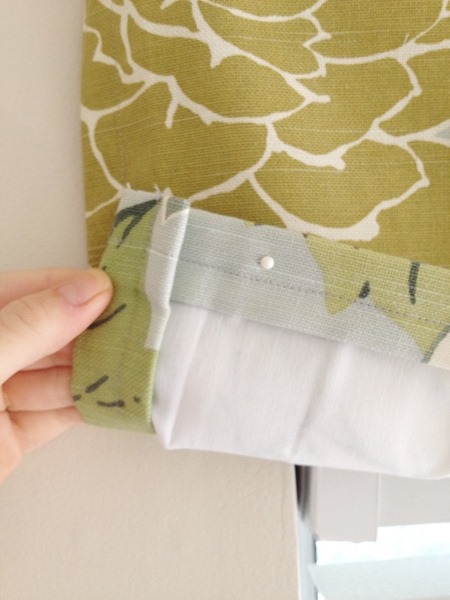
So, to remedy the situation and get those corners back, I simply stuck a sewing pin through the hem at the bottom corner of each valance that went right through that corner.
 IMG_9201
I lifted the valance up and stuck the pin in so that the point went towards the end of the valance.  I made sure I stayed within the hem so that, besides the plastic ball top, the needle wasn’t visible outside the valance.  Make sense?

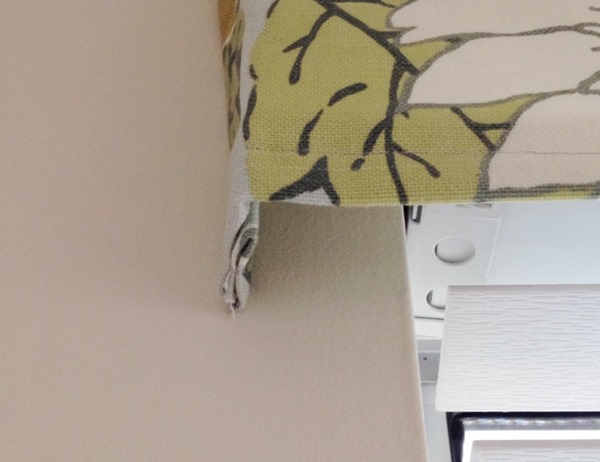
Then I let the valance down, grabbed the ends of the pin from outside of the valance, and bent it at the corner. IMG_9202

So now my pin was bent at a 90 degree angle and holding my corner so that it’ll now stay a corner…forever…or at least until I want to switch fabrics.
 IMG_9203

It was an easy five-minute project.

And that’s that.

.           .           .

On another note, I’ve really been itching to replace our dining room table.  We bought it at a thrift store for $100 right before we were married and I love it, but a lighter wood, maybe a round table, and/or something I can paint are in the forecast.  I’m going to put an ad up on a local secondhand sales sight to trade with someone and see how far it gets me.  I’ll keep you updated like I do.  :)

 IMG_5996
[Click here to see how we reupholstered the dining chairs and here to get the deets on the frame collage.]

 IMG_5998
I scored those gold hex vases at a yard sale last weekend!  They’re Nate Berkus!  I know what you’re thinking!  Why on earth would anyone yard sale those?!  No clue, my friends.  But, I’m happy they did.

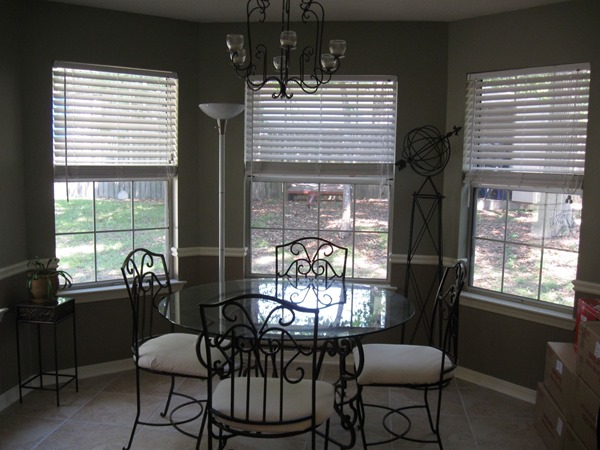
This room has come a long way from it’s sage + brown beginnings.  Ohhh yes it has.  See?
Before (previous owner’s decor):
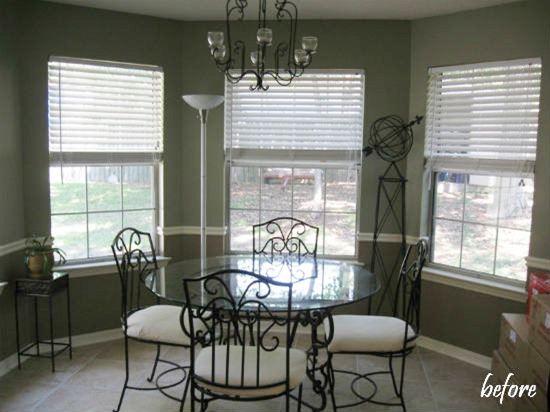
dining b4

Now:
   IMG_6003

And chances are it’ll probably look a little different the day we decide to sell.

.           .           .

P.S.  If you wondering how/why our kitchen/dining area look so clean with three toddlers running around, let me just tell you how thankful I am that the camera doesn’t pick up the goldfish crumbs littering the second chair to the right or the top of the high chair.  And speaking of the high chair and booster seat in the background, I almost moved them for these shots but then I thought I’d leave them so you get the full feel of how they’re incorporated into the design of the room.  Kidding.  They totally hamper the design but it’s ok.  That is our life.  *wink 

Last Supper

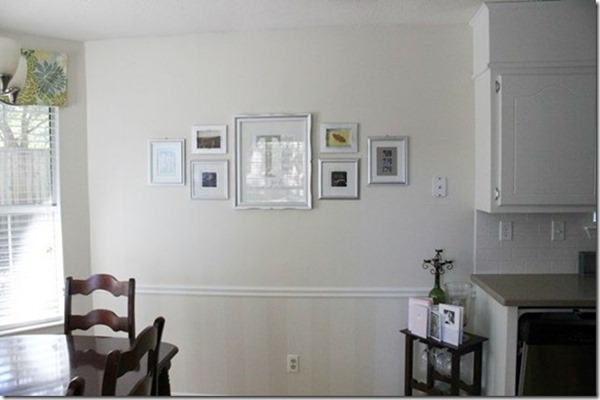
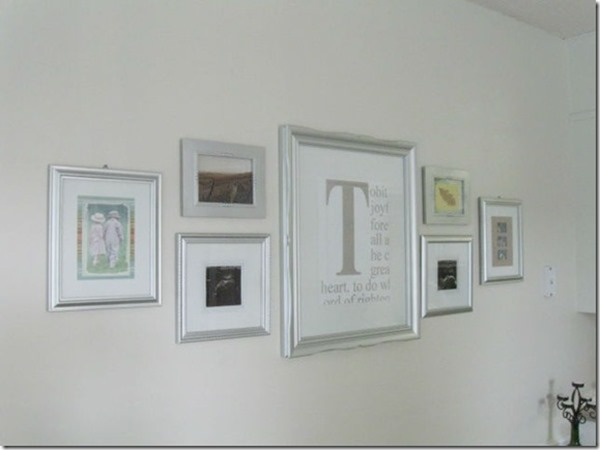
A long-ish time ago I hung a combo of frames on a big, bare wall in our kitchen and a long-ish time ago I really, really didn’t like how it turned out.

Exhibit A:
 oct192012002_thumb1
Not that bad, I guess, but definitely nothing to write home about, or blog about (even though I did).may262012004_thumb1
I thought it was a great idea to spray paint all the frames silver and haphazardly toss some art in them and call it a collage.

And so for a long-ish time I saw it everyday as I walked back and forth; to and from the kitchen and I didn’t like it each and every time. 

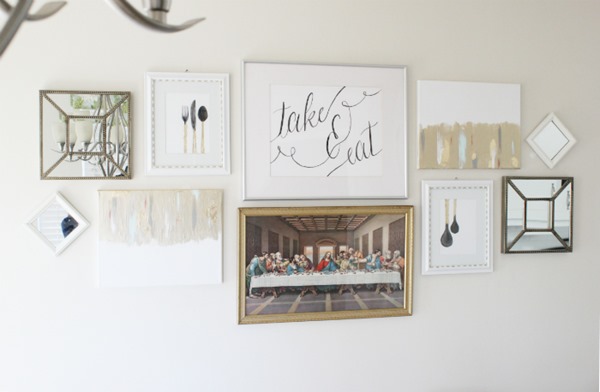
But not anymore!  Nope!  While Anthony was at the March for Life in DC a couple of weeks ago, I took the old down and started anew on a fresh slate.  It’s looking much better these days…
IMG_5792
Yes?  You think so?  I hope so!
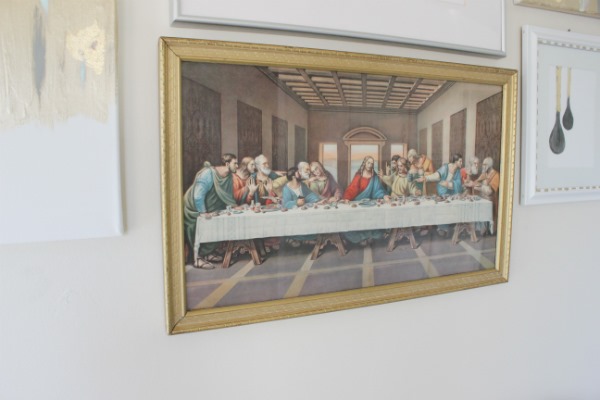
It all started with this picture of the Last Supper:
    IMG_5803 
It’s an antique that my grandma gave me a couple of years ago.  It used to hang in the farmhouse my grandpa grew up in.  I love it.  :)  And it only took me a long-ish time to finally get it hung here!  The “take & eat” above it hearkens to Matthew 26:26 – While they were eating, Jesus took bread, said the blessing, broke it, and giving it to his disciples said, “Take and eat; this is my body.”

The rest of the collage is a conglomeration of thrifted frames (that were spray painted), DIY art,  these mirrors from Target (I found them for el cheapo at Dirt Cheap because one of the three was missing a piece of mirror), and a couple of little thrifted mirrors.  I’ll be back this week to give you alllll the deets on the DIYed stuff, don’t you worry.

Now, for fun, let’s take a few steps back and to the side and then a little into the past to see how far this little eating spot has come, shall we?

A picture I took on our second visit to see the house before we bought it:Random 480

After we moved in, painted, and hung a real light fixture:
kitchen1 (14)

This morning (Feb 2015):
  IMG_5789[Of course we don’t keep decor on the table…ever.  That was just for the sake of a pretty picture…as was the two high chairs plus the kid seat on the chair.]

I would say we’re done decorating/renovating/tweaking in here but the truth is, we’re not.  We’ve been tossing around the idea of blowing out part of the wall (not visible in the pictures) to the left to open the space up a little more to the living room and I’ve really been wanting to trade in our thrifted dining table and chairs for another (probably thrifted) set.  So, time will tell.

.           .           .

What have you been working on?  Hanging any pictures?  Dabbling in art?  Taxes?…speaking of, I’ve gotta get those done.  I’m always doing them at the last minute.  Well, whatever you’re up to, I hope you’re having a good Monday (or what’s left of it considering it’s probably nearing it’s end for you as it is me). 

 
IMG_5791

In Sight, In Mind

I’m one of those people that NEEDS to have a to-do list to get anything accomplished.  I don’t know if it’s an OCD list tendency or just a love of the satisfaction of “checking” something off, but I work so much better and get so much more done when I have a list to look at.  For this purpose, I grabbed the cutest gold striped calendar notebook on super clearance at Target a couple of months ago but guess what happens?  I write my to-do list out, lay the notebook down somewhere,  forget to check it, little gets done, things get forgotten, “outta sight, outta mind”, yadda yadda yadda…

So I finally got smart and made a dry-erase board to-do list this week. 

Here’s da story:

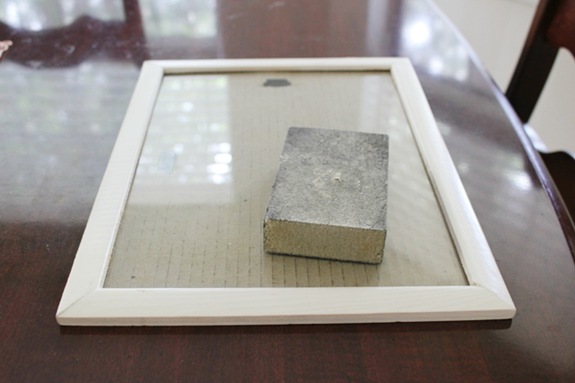
I grabbed a picture frame (I think it’s “document size”) that I bought from the dollar store several years ago.  It was originally wood but I spray painted it white right after I bought it.  After being moved and stored, it needed a touch-up coat so I quickly gave it a light sanding (fine grit sanding block) and gave it a thin coat of white spray paint I had on hand. todoboard 001
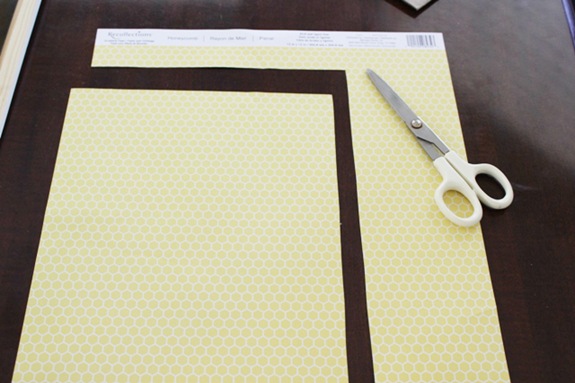
Next, I cut a piece of scrapbook paper I snagged a couple of months ago at Michael’s to fit inside the frame and be a background.todoboard 002
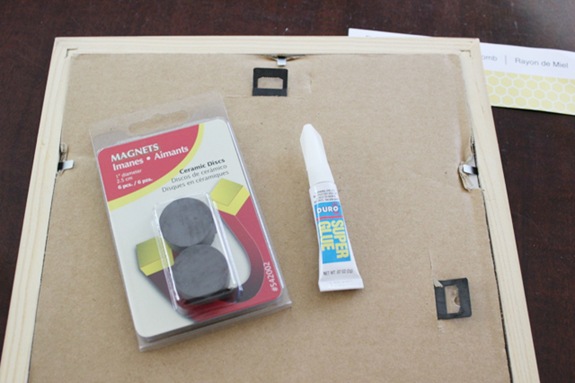
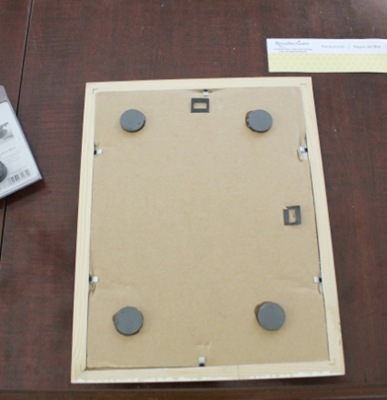
Then, using regular ‘ole super glue, I glued four semi-strong magnets (Lowe’s) to the cardboard backing of the frame. todoboard 003

Like dis:
 todoboard 005
I glued them right to the cardboard knowing if I ever wanted to, I could simply rip them off and reuse them else, albeit probably with a little cardboard residue on the backs but no big deal, right?

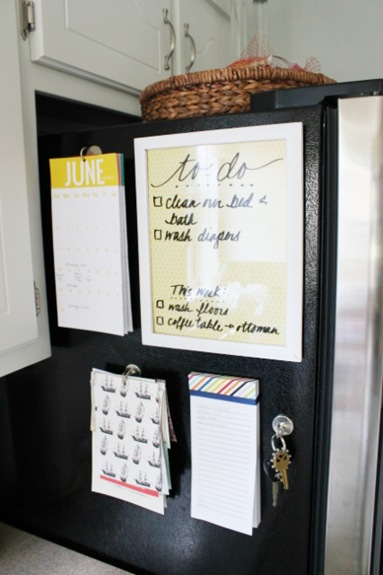
The glued dried within minutes so I happily scribbled down my jobs for the day (top) and week (bottom) with a dry-erase marker and pranced over to stick her on the fridge.  A full dose of motivation, coming right up.  Seriously.  It took me from lazy pregnant with a side of sleepy to crazy with a stick of a few magnets and the squeak of a marker…miraculous I tell ya. 

 todoboard 010

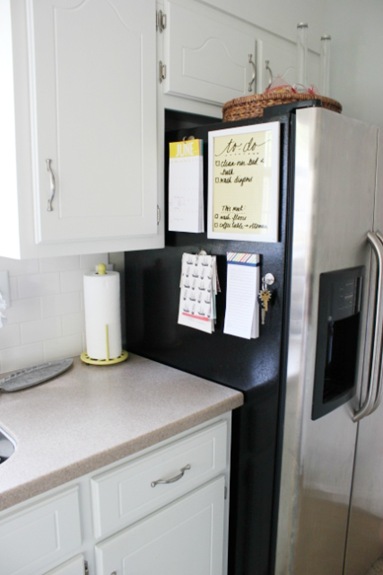
It was the perfect addition to our little “organization station” – a calendar (I made it on Microsoft Publisher…such an easy DIY), the to-do list, keys, a magnetic notepad we use for making grocery lists (I loathe grocery shopping btw), and invitations (No, we’re not that popular.  Most of those are old and we just hang on to them for sentimental purposes).  I might have to grab a little vase or something, stick a magnet to it, and stick it to the fridge to hold pens and dry-erase markers.  For now though, they’re tucked away in the drawer below.  As for the magnetic hooks holding everything on,  I got those on clearance at Target awhile ago and they’re awesome.  I know they still sell them.  I’m still dreaming of a way to disguise this black side of the fridge (bead board?) so we’ll see if that ever comes true too!  A piece of bead board and some more magnets shouldn’t be so hard to whip up someday. 

todoboard 011
(Ack!  Sorry for the fuzzy pictures…there is not one but zero DSLR whisperers in this hizouse.)

Anyone else a do-er only with a list telling them what to do?  What about grocery shopping?  Anybody willing to do mine?  I’ll feed you…  Oh but wait, I hate to cook too… 

.           .           .

Have a great weekend!! 

P.S.  I washed the rug!  The number one asked question that came up after it’s YHL debut was if it was washable.  Yes it is.  Yes I did – yesterday.  Yes, it still looks like it did the day I painted it.  Stay tuned for a whole post on it next week!

You Know I Love Stripes

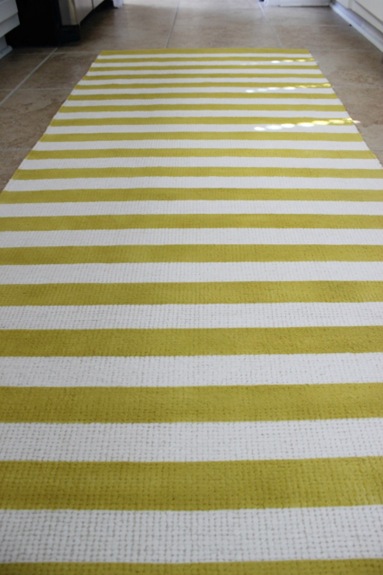
And so it shouldn’t be much of a surprise that I did this:
feb92012 025  to the other side of our newly stamped kitchen rug.

I debated a few other options – diagonal stripes, chevron, etc… – but in the end I loved the idea of the horizontal stripes not to mention that it was the easiest option because all it involved was laying down tape and painting…no cutting, trimming, or measuring.

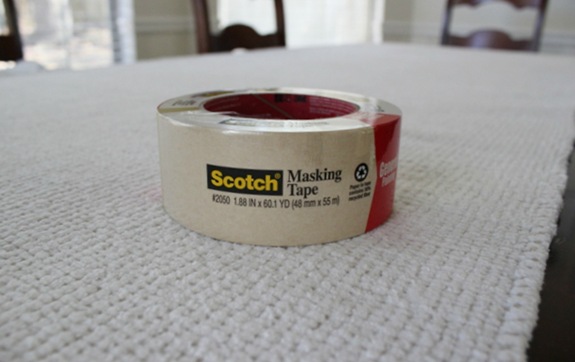
All I used this two-inch wide masking tape (from Target) to create the stripes: feb92012 020

Before I started I ripped off a small piece of tape and stuck it to my rug to make sure that when removed, it wouldn’t ruin the rug.  Lucky for me, it came off as clean as can be.

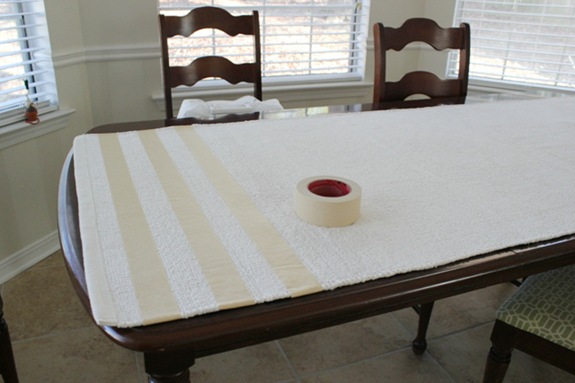
So, starting at one end, I laid strips of tape about two inches apart…feb92012 021 
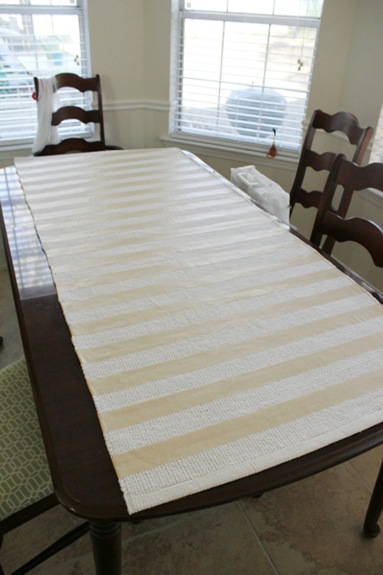
giving me lots of even stripes all the way down the rug.feb92012 022(I actually started laying two pieces of tape together for thicker stripes, but then changed my mind and went with the thin stripes.)

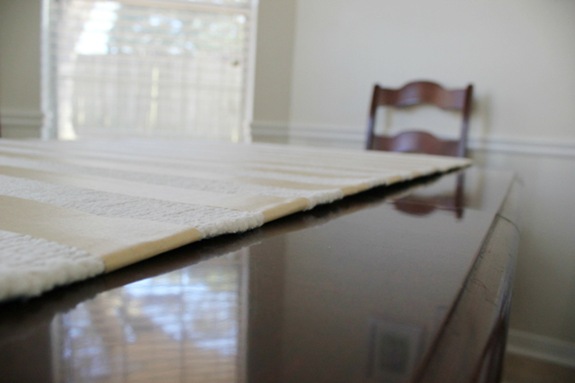
I made sure to wrap the tape around the sides and under the rug so that, if any paint got on the sides, it’d still be where it was supposed to be – part of a stripe.feb92012 023 
Then I carefully took the rug outside and gave it a couple of coats of spray paint, letting the first coat dry (about 30 minutes) before I sprayed the second coat.  After a few hours of leaving it outside to rid it of the paint smell, I brought it in, carefully removed the tape, and laid it in our guest room for 24 hours before bringing it into the kitchen to be walked all over.

feb92012 026

We love it!  It seriously looks like it was bought this way.  I noticed that the spray paint preserved the texture of the rug much more than the sponged on latex paint did.

[Update:  Read about how the rug is holding up here!] 

feb92012 031

Budget breakdown for this side:
Tape:  $4 (used only about 1/8 of the roll)
Spray Paint:  $4 (used one leftover can and half of another)
Total:  $8
…which brings the Grand Total of the entire project to:  $34
Thirty-four beans for a reversible rug that we can flip and reverse depending on our mood, that can be easily washed, that adds some much need pattern and color into our kitchen, and that gives our dish-washin’ footsies a soft place to land.  Not bad, I’d say!

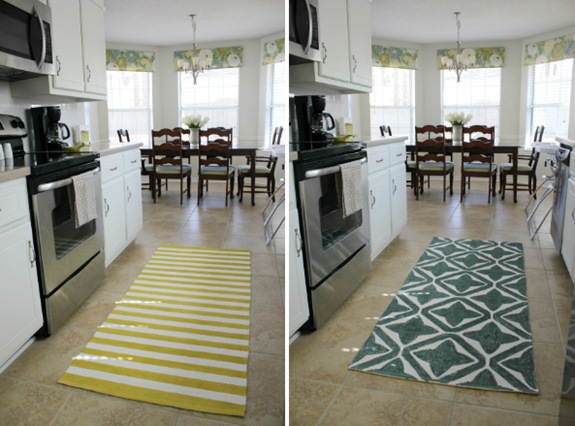
So, the only question that remains is, which side do you like better?reversi      stripes                                                  or                                             patterned   

.           .           .

I’ve been busy in the nursery and I’ve got a good read/tutorial coming your way this weekend!  Hope to see you then!

P.S.  It’s party time!  Linking up at A Bowl Full of Lemons, Ginger Snap Crafts, and Gingerly Made!

A ‘Rug’ged Outlook

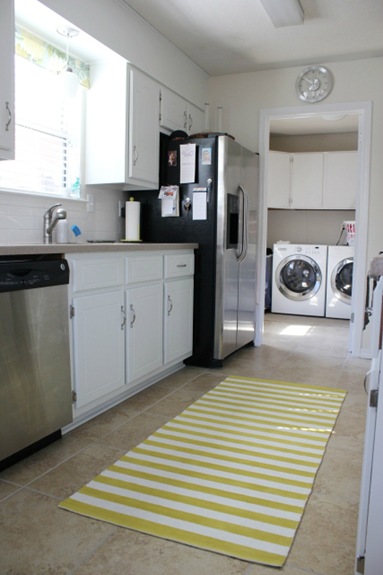
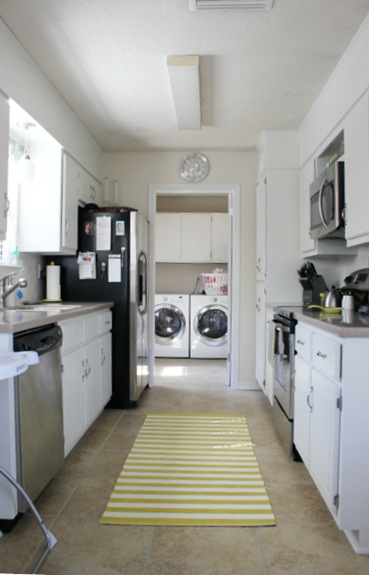
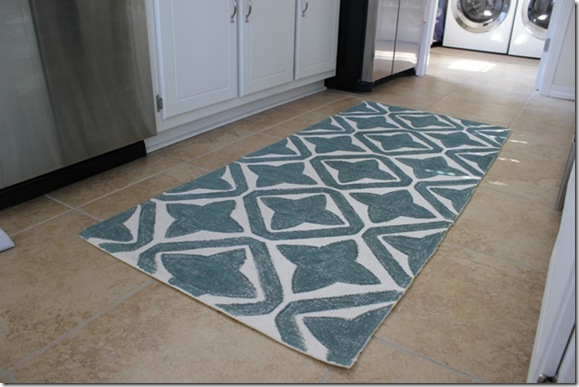
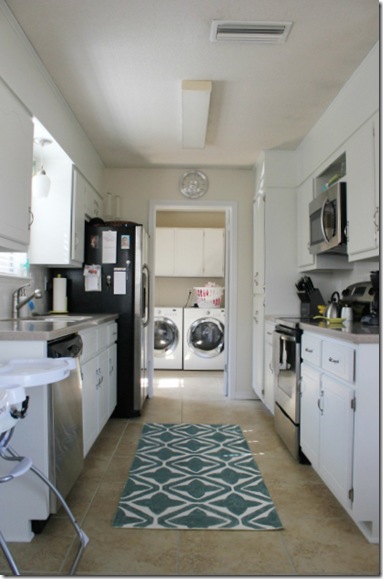
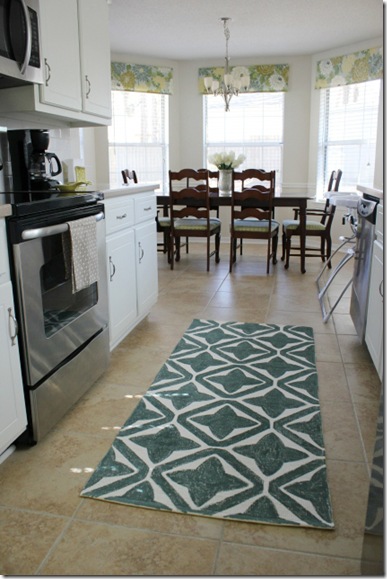
We’re still trying to infuse some much needed color into our white, white kitchen and I knew that one of the biggest steps I could make in that direction would be putting down a rug.  I wanted a runner but, you know me, I didn’t want to spend a bunch of cash on one.  I wanted something with a big geometric pattern but unfortunately, unless I settled for a plain old solid, nothing with a price tag low enough (say under $25) was popping up.  Never fear, pinterest is here (my new mantra?).  I’ve seen dozens and dozens of stenciled and painted rugs before and those rugs usually hailed from IKEA, which we don’t have anywhere close.  Lucky for me, I’ve got a friend named Allyson who does.  She.saved.the.day.  She’s going to school 30 minutes from an IKEA and so I had her swipe up a rug for me and bring it down home last summer.  Well, then the twins were born, I lost a bunch of sleep, I was feeding them allthetime, other projects got in the way, I couldn’t decide what color, yadda, yadda, yadda…  But, last weekend while Anthony was away on a trip to St. Louie, I got my rug on.

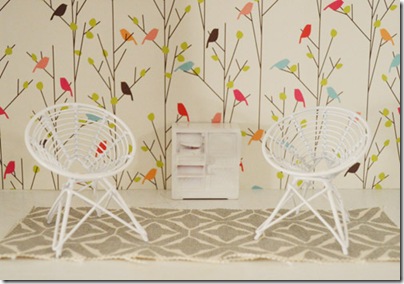
First of all, the inspiration.  John and Sherry from Young House Love created the ultimate dollhouse for their little girl, Clara, and this is one of the rooms:kitchrugpattern

When I saw it, the first thing my eyes went to was the “rug”.  I had to replicate the pattern.  So, I did.

feb92012 045

And here’s how:

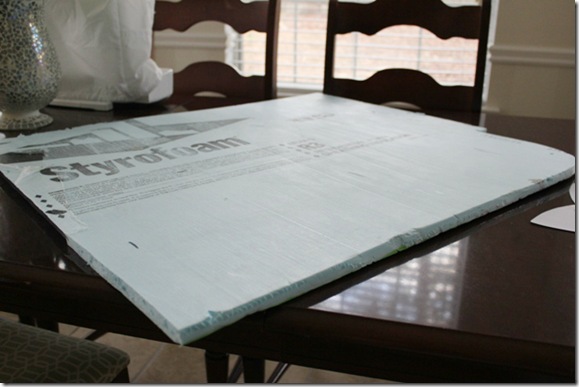
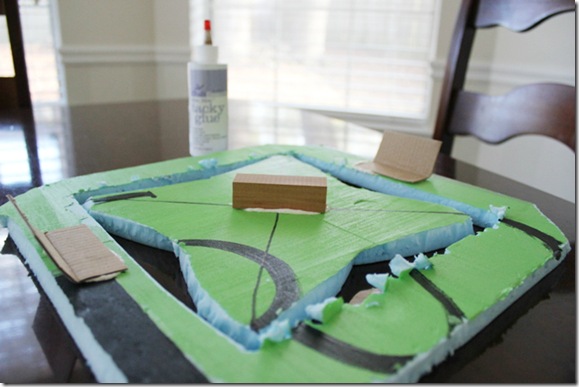
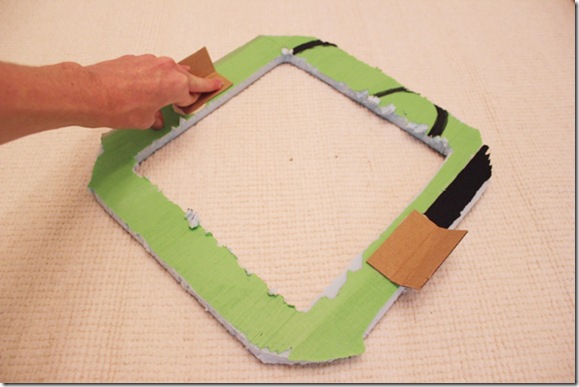
feb92012 005I used a 3/4 inch thick piece of insulation styrofoam to make a stamp and stamped the design over the entire rug.  You could probably use a thick piece of cardboard or a piece of packing styrofoam as well.

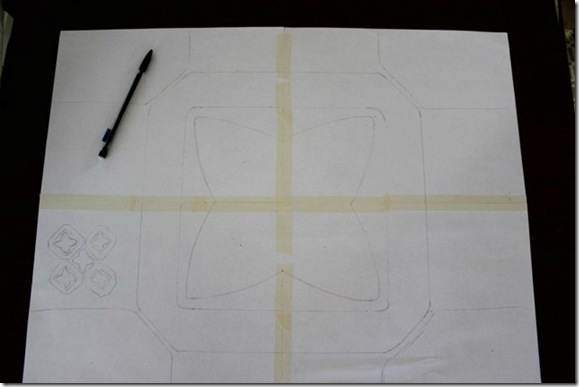
The first thing I did was draw up the design.  I made the outside square one foot by one foot and  guessed at the rest of the design’s measurements.   feb92012 001

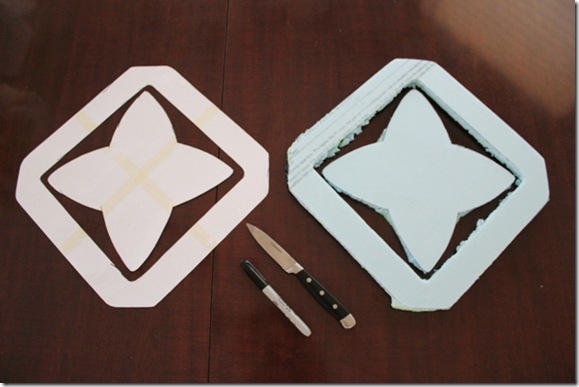
Then I traced it onto my foam piece and cut it out using one of our knives (I really, really need to invest in an exacto knife).  I made sure to get a clean cut on the side of the foam that I’d be stamping with.  The other side crumbled a little as the knife cut through but since it wouldn’t be touching the rug, it didn’t matter.
feb92012 006

To give me something to hold onto while I stamped, I glued a wood block to the back of the inside stamp and two folded pieces of cardboard to the outer square. feb92012 008

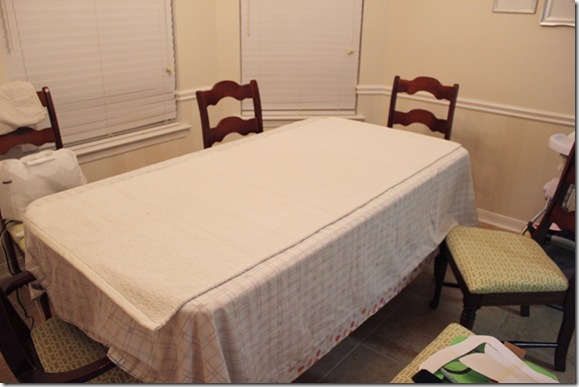
Enter the rug.  Lucky for me, it’s almost the same size as our dining room table so I had a perfect work surface.feb92012 009

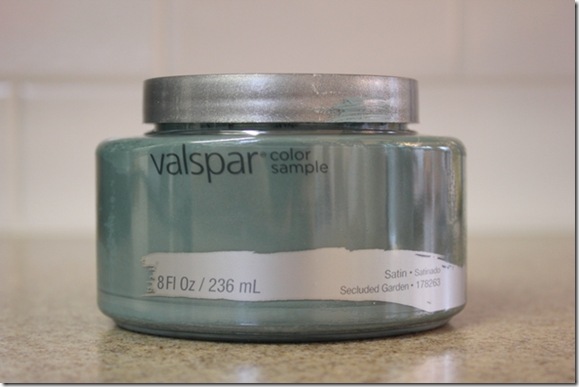
As for the color, I finally decided on this:  feb92012 019
Valspar’s Secluded Garden.  It’s part of their pre-mixed sample selection at Lowe’s this season.

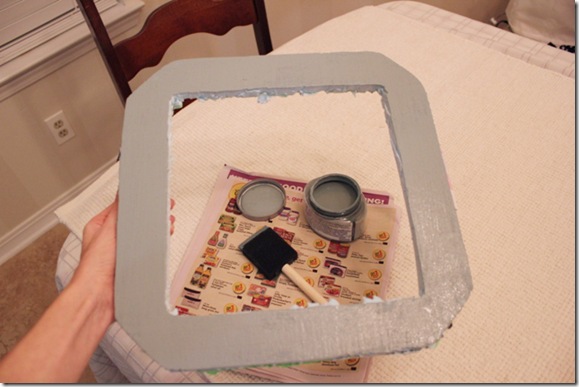
So, starting with the outside square of my design, I brushed a coat of paint onto the foam using a small foam brush.feb92012 010

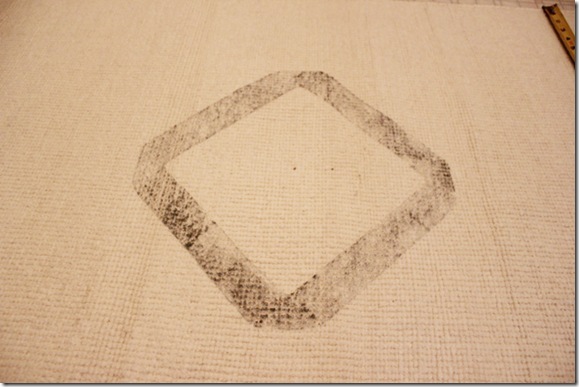
Then I stamped the very center of the rug, which I measured for and found beforehand.feb92012 011

feb92012 012

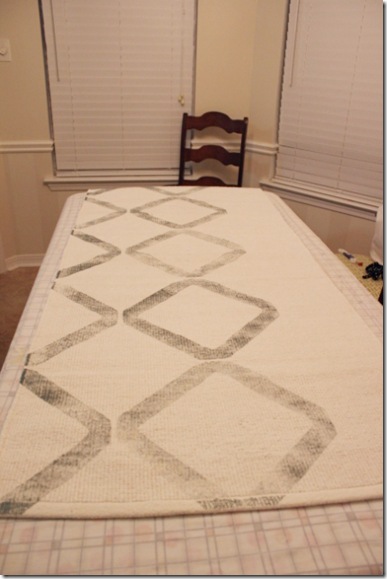
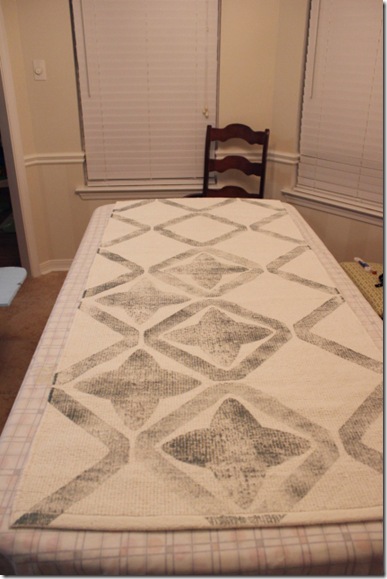
I worked my way out and around the entire rug… feb92012 013

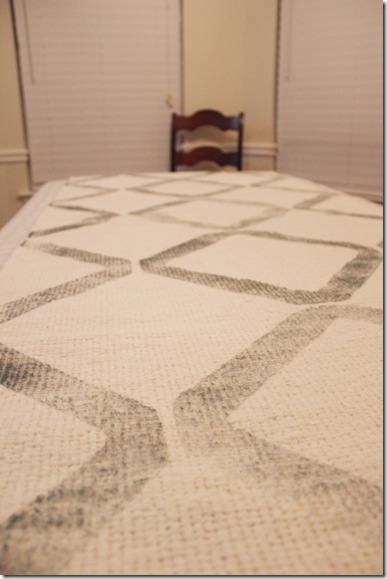
until I had a basic lattice design. feb92012 014

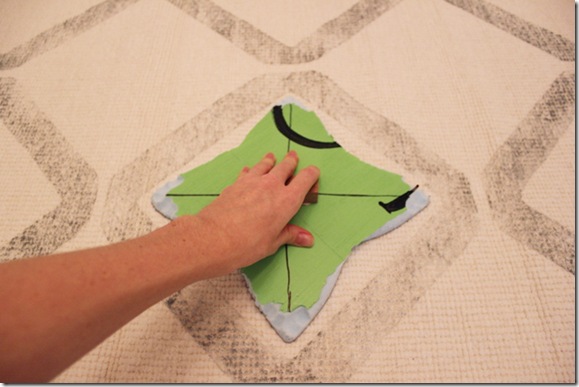
Next I grabbed the inside of my design and stamped it inside each square.feb92012 015

 feb92012 016

 feb92012 017

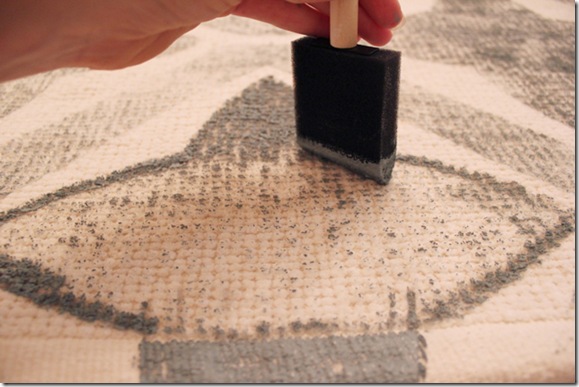
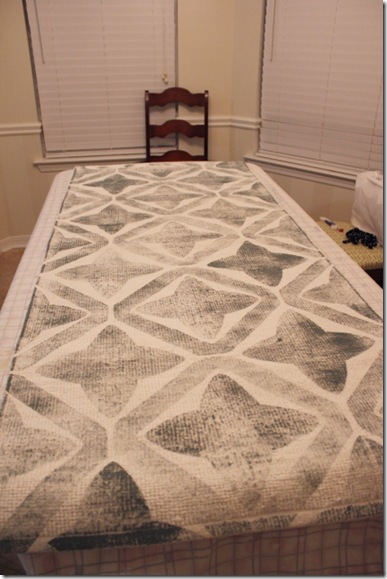
After I was done stamping, I filled in the design by sponging on paint using my foam brush.feb92012 018

I let it dry for 24 hours before I laid it down for fear that if I didn’t I’d be tracking blue paint all over our house…a nice surprise Anthony would’ve loved to come home to, I’m sure.

[Update:  Read about how the rug is holding up here!]

feb92012 041

The cost?
Rug:  $20
Paint: $6 (two sample-sized jars)
Foam:  already had
Foam brush:  already had
Total:  $26

feb92012 039 

 feb92012 040 

But wait!  There are two “sides” to every story, including this one.  I’ll let you in on the other side sometime this week.  Until then, I’m linking up with Ana and her infamous Valentine’s Day Cabin Fever Creativity Link-Up and this weeks Martha Mondays.  Go check out the craftiness that’s flowing and have a great weekend!

P.S.  I’m back from the future and linking up with Remodelaholic here!  Check out all the DIY goodness!