Add Stripes to a Lampshade - DIY

You know when you really want to do something decor-wise but you think maybe it’s not a good idea because a few months down the road you might not like it anymore or the winds of change might blow away your old decor with new or future owners might scowl at your decision?  Happens to me a lot.  I always try to make decisions in our current home based on what I like but also what would be the most transitional from decor change to decor change and, because I know this isn’t our forever home, I don’t want to give permanent things a personal vibe…if that makes any sense.  Now I’m not talking about pillows or curtains.  Those things can be switched out on a whim with very little effort (but probably some cash).  I’m talking about things that you can’t change without a lot of effort like the color you paint your kitchen cabinets or the tile in your bathroom or a big ‘ole light fixture in your kitchen.


IMG_6377
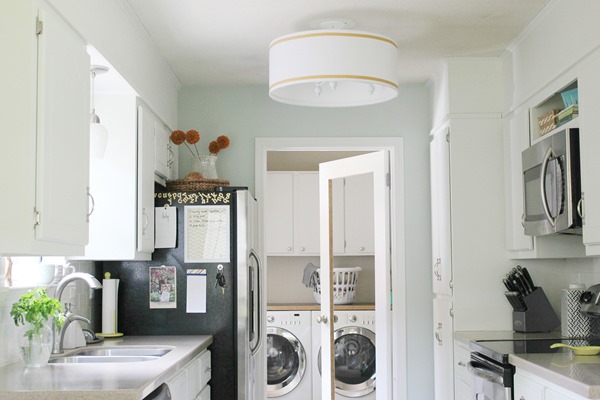
When I first envisioned this light project, I pictured a really colorful chandelier underneath a coordinating, fun geometric covered shade.  And then I talked myself down from that fun high because, in case I didn’t like that geometric fabric in a year or we put our house on the market, it would take a lot of work to replace all that color.  The lamp shade I made for the kitchen light can’t be removed unless a) you unwire the entire light from the ceiling, b) a hurricane throws our house fifty feet, or c) a hurricane known as ‘toddlers throwing toys in the kitchen and oops’ happens.

So, I decided to go all white with the light and shade and spice things up with some stripes at the top and bottom that I made with…

I’m Covered

Last week the newest issue of Mobile Bay magazine hit the stands and golly gee whiz…

IMG_0914 [Image via Mobile Bay mag’s Instagram and photography by Jenny Tewell]

I made the cover!  It is SO COOL!  I’m really so excited and really honored and even humbled to see myself on it!  But, let’s be honest, every single one of you who read these words I write on this here blog deserves to be on that front cover with me because, as much as I tell myself to “blog like no one’s reading”, I highly doubt that if I didn’t have such great readers, I’d carve blogging time into my already crazy weeks.  So, really and truly, you guys are awesome!

If you want to read the article Chelsea wrote inside this month’s issue, click here.  It was fun being interviewed and Chelsea made the process so easy and calm.  Even though, the first thing she did when she got here was show me a mock-up of what the front cover might look like.  I had no clue they were even thinking about putting me on the cover so after seeing that, I think I was in excited shock for the whole interview.  So, the fact that I could even answer questions coherently after that was all luck.  ‘';)  A week after the interview, a couple of people from the magazine and a photographer came to our house to snap the pictures.  I made sure Anthony would be home for it because there was no way any pictures would be shot without blurry toddler bombs in them lest he was here to keep those toddlers corralled.  He graciously took all the kids into the girls’ room while the ladies and I moved around furniture, rugs, and picture frames….and then after an hour passed and the kids had all but demolished their room, he swept them out of the house and into the van for a little excursion. 

Anyway, like I said above, the whole thing happened because I have such great readers who keep me doing and documenting so THANK YOU all for being so great!  Virtual hugs all around!

Lamp Shade from Scratch

I’m blogging with a fury today.  When I say that one reason I blog is because it’s therapeutical (word?  not a word?) for me, I mean I blog because it’s therapeutical for me...gathers my marbles, mends my wits, gets out the jitters…  We were involved in a big fender-bender last night, the kids and I.  A man driving a big pick-up truck with a trailer drifted into my lane while I was stopped at a red light, side swiped the entire side of the pick-up behind me, hit the back corner of our van, and majorly hit the car in front of him who hit the car in front of her, who hit the car in front of him.  It was awful and affected me all night last night…and I had the least amount of damage.  So, here I am, frantically pounding away at the keyboard, still thanking God for protecting all involved, and thinking happy thoughts about…

lamp shades.

Let me put aside all the scary thoughts about car accidents in lieu of telling you fine readers how you can make your own.

diy lamp shade
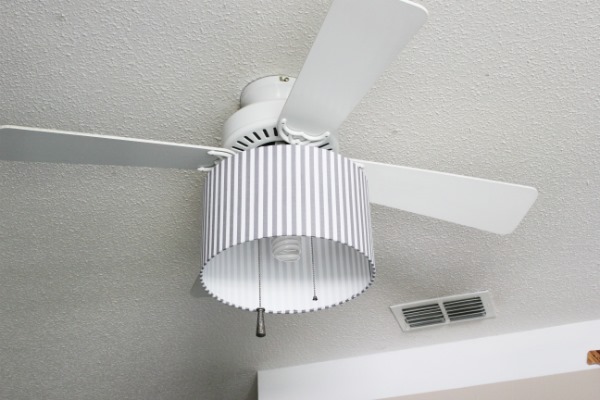
We made our own to adorn the new chandelier in the kitchen (above pic) and the one attached to Sebastian’s ceiling fan.
sebsroom2 (8)

Buying these new was way out of our budget; like $100+ out.  Plus, there’s no guarantee a shade made to the specific diameter and height you’re looking for even exists.  So, we do what we do and we make.  And so can you.  (FYI, some of the links to products I purchased/used below are affiliate links which means I’ll make a small commission if you click over and buy.  But don’t worry!  It doesn’t affect your price in the slightest!  Thanks for supporting me!)

Here’s what you’ll need:
Lamp Shade Rings
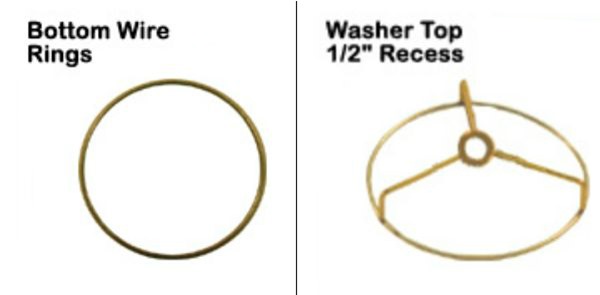
lamp shade rings
You can hunt down a lamp shade at a thrift store or other discount store just to take it apart for its rings and use those or you can buy bottom and top rings from The Lamp Shop like I did.  For the kitchen light, I needed the biggest they had to fit around the chandelier, 24 inches in diameter.  With shipping, I ended up paying around $20 just for the rings but I couldn’t find any local store that just sold rings like this.  When you go to order/search for rings, keep in mind the shape you’d like your shade to be.  You can have it taper at the top (bottom ring larger than the top) or you can keep the top and bottom the same, like I did.


Polystyrene Plastic Sheeting.  I searched for days for this sheeting.  I was so clueless on how thick it had to be and I wanted something semi-transparent so that it didn’t block too much light.  Finally, I settled on this polystyrene plastic. I thought it would be a little more transparent than it actually is but once I was finished making the shades with it and turned the lights on, it wasn’t bad by any means.  I’m really happy with the quality of it and how easily I could cut through it.

Again, it cost me a little over $20 for this roll but I’ll be able to get about 10+ shades out of it because it’s so large.  As I type I have four other shades in this house whose plastic linings are torn or yellowed so they’ll all be getting new plastic out of this roll.

IMG_0757

Fabric.  If you want a shade that doesn’t inhibit light, you’ll want to cover it with a thin fabric.  Quilting fabrics are great for this because they’re thin and you can find solids and lots of patterns.  I went with a plain white broadcloth from JoAnn Fabrics for the kitchen shade.  I like it because it’s really thin and resembles linen.  You can sort of see the texture in the picture below.  The pattern you can see through the broadcloth is my ironing board, so you can see just how thin this fabric is.
IMG_0854
(PS, to figure out length of fabric you’ll need for a drum shade where the top and bottom rings are the same size, multiply the diameter of your lamp rings by 3.14.  Make sure to buy a piece of fabric several inches longer and wider than your finished shade will be though.  You’ll cut it to size once it’s attached to your plastic.  A tapered shade is a little more difficult to make from scratch.  The best way to make one of those would be to find an old tapered shade somewhere, carefully remove the plastic, and trace it onto a new piece.  I’ll have a tutorial on reconstructing a tapered shade sometime in the future as some of mine are!)

Spray Glue
Scissors
Thin Marker or Pencil
Hot Glue Gun and Sticks
An Extra Pair of Hands

Ok.  Once you have everything, you’ll need to cut your plastic to size (figure out the circumference using the above formula and add a half inch for overlap at the ends).  Lay it out in an area large enough that you can lay the entire piece flat.  (I locked myself in our room one day while Anthony was home so I didn’t have to play defense to keep the kids from walking all over it…bedroom workshop.)
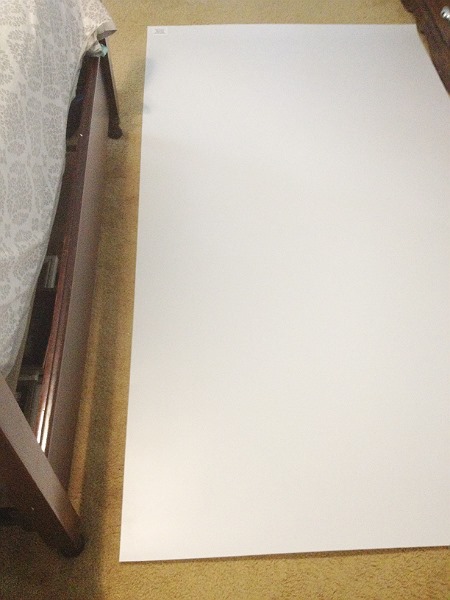
IMG_0759
Then, draw the shade out.  Assuming that one side of the plastic I purchased was straight, I lined up a quilting square and drew a straight line with a thin permanent marker along that side to the length I needed my shade to be.  I wanted my shade to be nine inches high (up and down) and it needed to be 78 inches long to cover my rings and overlap at the ends. IMG_0760If you don’t have a quilting square, you can cut a piece of paper to your desired height, line it up along the straight edge of your plastic, and mark along the opposite side.  If you’re using an old piece of existing plastic (the one you’re replacing the new plastic with) then obviously you’ll just have to trace.  :)

Next, cut out your shade plastic.
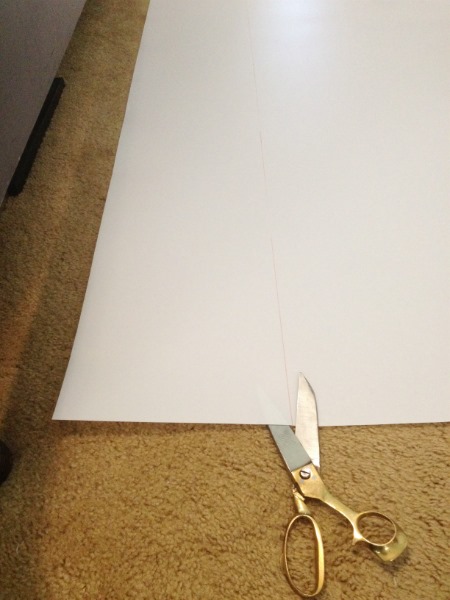
IMG_0761
(Side note:  I made a lamp shade to cover our living room fan a couple of months ago and had some difficulty cutting the plastic.  It wasn’t this new plastic sheeting I had but the old shade plastic that I was just shortening.  Every time I cut, the plastic cracked at the tip of the scissors when it was closed completely.  I’m not sure if that plastic was just old and brittle or if it was my scissors or what.  So, this time around I didn’t close my scissors completely while I was cutting just to make sure that didn’t happen again.  Make sense?)
 
So now that your plastic is set, covering it with fabric is up next.
The first thing you’ll probably want to do is give it a good ironing to make sure that no wrinkles pop up on your finished shade…because good luck ironing them out if that happens.  ;)
IMG_0853
After it’s nice and wrinkle-free, lay it out on a flat surface.  I’d recommend covering your flat surface with an old sheet or tablecloth first though just to make sure you don’t get glue everywhere. 
IMG_0855As you can see, my fabric was a tad bit longer than my table so I just made sure to get the majority on.

Next up, attached your fabric to the plastic with some spray glue.  I used Duro All-Purpose spray glue (I think I got this at Walmart awhile back).
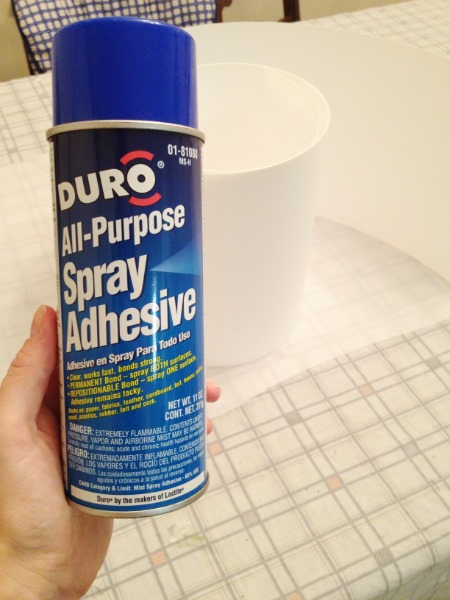
IMG_0856This stuff can get everywhere so make sure not to spray it around anything important.  I went outside (at 10 ‘o clock at night) to the middle of the backyard, held up the plastic, and sprayed.)  Make sure you spray the outside of the shade and not the inside.  Let the glue dry for a minute or two for a better stick.
Then, lay your plastic on top of your fabric.  To make sure there aren’t any bubbles, it helps to start on one side and sort of roll the fabric on while running your hand down the plastic…if that makes sense.  IMG_0858
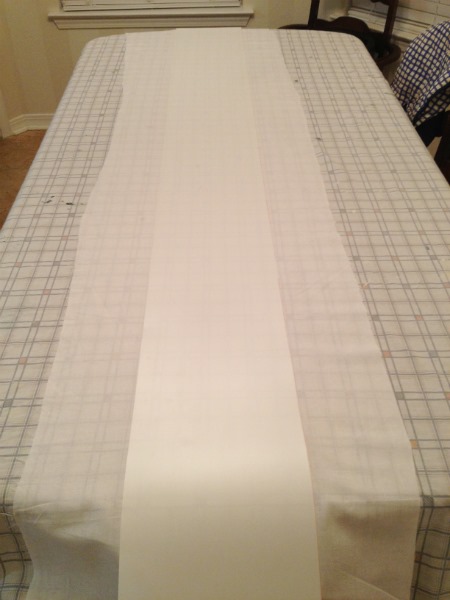
If you’re using a patterned fabric, make sure you lay the plastic on straight.  If you lay it on and it’s not straight though, don’t fret.  Just take it off and lay it on again.  It really helps with this step and the following to have someone helping.
Once you have your plastic positioned where you want it, run your hands along the top of it, pressing so that every inch sticks. 

Now, cut the extra fabric off.  At the ends, you’ll want to leave anywhere from a quarter to a half inch to be folded over onto the plastic.
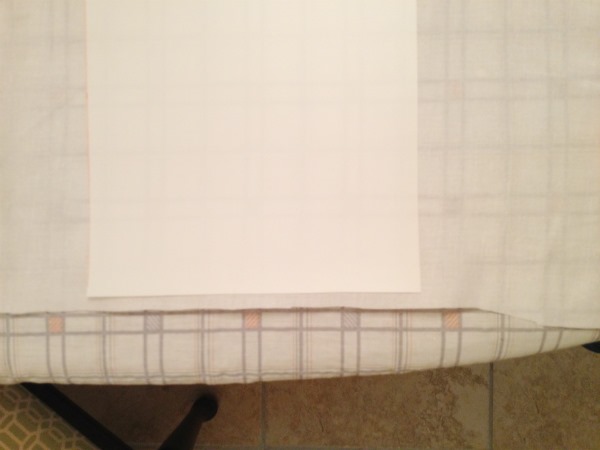
IMG_0859
A good way to figure out how much to leave on the sides is to fold the fabric over the ring while it’s sitting on the very edge of the plastic (see pictures towards the end of the post).  You’ll want to leave enough to completely cover the ring plus a few millimeters.
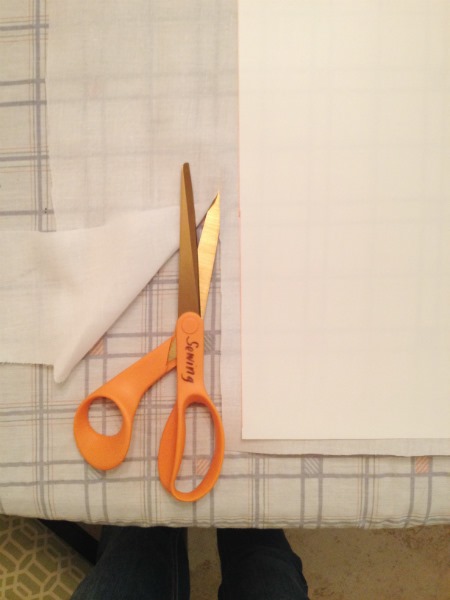
IMG_0860IMG_0861
Make sure to cut a straight line.  It doesn’t matter too much if it’s slightly thicker in some areas.  You just don’t want any jagged edges you can get from cutting short snips.  I was a little too hasty in spots thinking it wouldn’t matter and you can see those spots on the inside of my shade.  Doh!
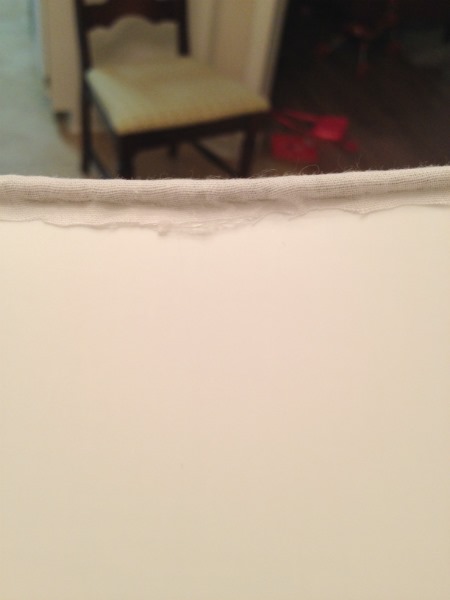
IMG_0870
So, now it’s time to get out that glue gun.  Make sure you grab a bunch of extra sticks too so that you don’t have to halt progress to run for some.
IMG_0862
Hot glue is great in that it dries really quick but sometimes that’s the downfall too.  And it’s messy.  If there were such a glue that was thinner, room-temp, and dried quick, I’d be all over it.  But, as far as I know, there isn’t, so hot glue it is.

First, glue both of your ends down.  Just place a very thin line of glue along the very edge of your plastic, fold the fabric over, and press it down.  The thinner your line of glue, the less bulky the ends will be.    IMG_0864
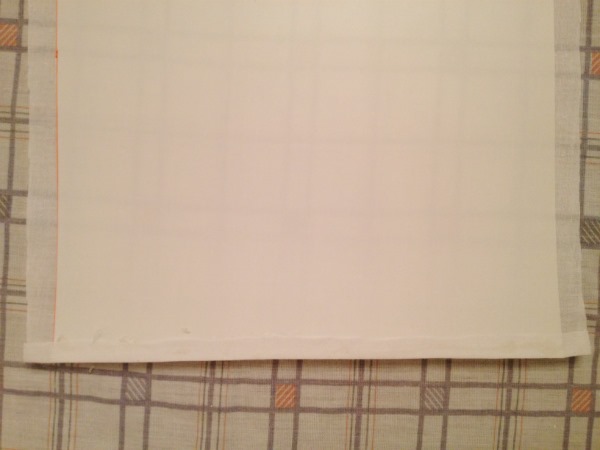
Next, grab both the top and bottom rings and place them directly over the ends and right at the very edge of the plastic.  They shouldn’t be sitting on top of the fabric at all.  Have someone hold them there for you.  (Make sure that if your top ring has a recessed washer ring and bars, that the recess is going into the shade vs. outside or on top of it.  I made that mistake with a recent shade and had to tear it apart and start over.)
IMG_0865
It’s really important to take this next part slow.  You’ll need to work in very small sections to ensure that you have no buckling/warping of the plastic on your shade.  Run a line of glue along a couple of inches of one ring and quickly fold your fabric on top of and over the ring.  Hold until it dries (a few seconds).
IMG_0866
Don’t glue the plastic (made that mistake too).  It makes for a cleaner finish if you just place glue on the ring because, as you fold the fabric over, you’ll push the glue into the crevice between the ring and plastic so it won’t be very noticeable in the end.

Glue a couple of inches on the top ring and then do the same couple of inches on the bottom ring.  Over and over and over.
IMG_0868
Meanwhile, your helper should be rolling the rings along so that whatever part your gluing is closest to the table.  This will help make sure that the plastic is always touching the ring and protecting you from having a less than straight edge once you’re finished.
 
When you’re a few inches from the end, stop gluing.  Roll your shade up so that the seam is visible.  Run a thin line of glue along the end you started with and press the other end to it.
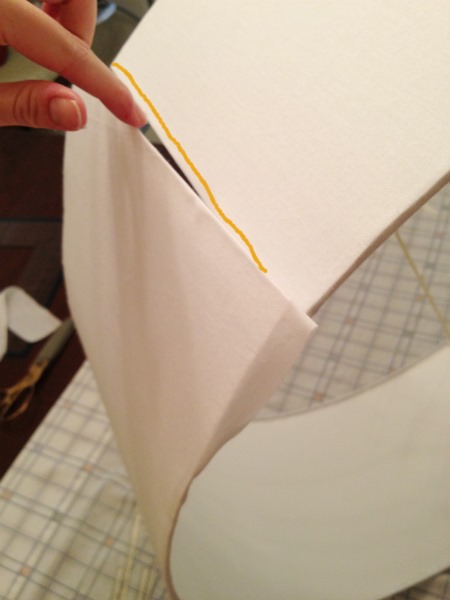
IMG_0869 
Last, finish gluing the rest of the shade where you left off in the same way that you glued before, little by little and with the part you’re gluing laying closest to the table.

I’ll go into more detail on the added stripes and how we attached this shade to the chandelier in another post but the washer at the top of this shade ring was a perfect fit over the threaded rod on the top of our chandelier so it just slipped right on.
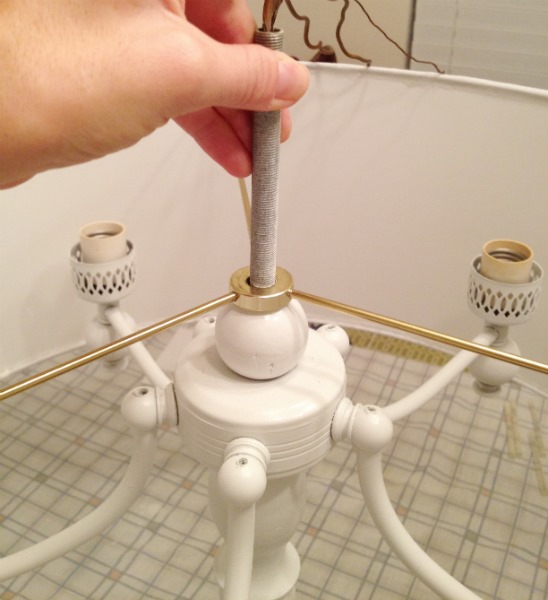
IMG_0871
Until that other post, ciao!  Thanks for letting me unload myself onto you through my fingers and a lengthy tutorial.  Now, if someone will actually make a lamp shade and let me know how it goes, it’ll get me to 100% real quick like.  :)

Hasta later.

IMG_6377

TGIF

Thank God It’s Finished.

I’ve been tossing out hints on what our latest project is and now that it’s done, I just can’t not share it! 

IMG_6376 
Folks, we rid ourselves of the obnoxious florescent tube light in the kitchen and with $35, built a whole new fixture.

I can’t wait to give you all the details with full tutorials on how we made (and how you can totally make) the shade from scratch and repurposed a garage sale chandelier!  Unfortunately, you’ll have to wait until next week because I’m off to the pool in twenty.

TGIFriday!

.           .           .

Oh and ps, this happened.  Eeep!  Lots more details later!  :)

Meal Planning is the Worst, No?

Let’s start with an apology.  I feel like I’ve been neglecting my blog a tad and if I have any readers left, I’m sorry!  It’s not because I don’t want to blog because I do and believe me, if I had the time, I’d have words everyday and not just once a week.  It’s really because I’ve been keeping busy seeing friends and housekeeping and the big one, TODDLERS.  Suffice it to say that I really miss cranking out projects and sharing tutorials with you here on the blog so, now that summer is kinda winding down, I’m going to start being better about that.  I have the usual laundry list of things I want to get done around here including a pile of clothes about two feet tall in my closet waiting to be refashioned.  There definitely isn’t a lack of motivation so hopefully I’ll have a new wardrobe along with a fully decorated house A to the sap and all the details to share.

And speaking of projects, I’ve been working on a really cool one for the past three weeks.  The last piece of it just came in the mail today and so the plan is to finish it after the kids are sawing logs tonight and have it on display tomorrow!  Toes crossed.  Until then, here’s a peek:

IMG_0884                                                      [heavily filtered so you don’t figure out too much ;)  ]
SO ANYWAY, I didn’t pop in today to just be a complete sulk.  I’m writing to tell you how my life has changed in the past three months thanks to eMeals.  But first, let me just disclaim that this is NOT a sponsored post nor did eMeals ask me to write a single word.  We are paying customers of eMeals and we LOVE the company.  However, after falling in love, I did sign up to be an affiliate which means that if you choose to use their meal planning service through me (through the links in this post and the affiliate ad in the sidebar), I will make a small commission.  Get them through me or get them elsewhere but I’m telling you, you should become good friends with that company if you’re anything like me which is…

NOT a meal planner.  Cooking?  Eh.  I’ll do it but only since I have four other mouths to feed.  There are just so many other fun things I’d rather do than stress out at five ‘o clock because my kids are hungry and shoot, I haven’t even thought about what to make for dinner.  Are you with me?  Or maybe you’re one of those peeps that’s ultra-organized and has the entire week planned food-wise in which case, you have a big admirer ova heeya.  :)

So, three months ago, I hopped over to eMeals website because I had spied them on Pinterest and I saw the “14 Day Free Trial” offer they have and signed up right that instance knowing that I had two weeks to give them a go and if I didn’t like it, it was no sweat off my back and I’d cancel. 

Well after the first week of being on a meal plan, we were hooked.  Anthony was elated to come home to a home cooked meal every night, I only had to put myself through one grocery store trip that week, and the kids were all like “whoa, mom’s doing something crazy at the stove”.  I seriously felt like I had just mastered being “domestic”.  It was awesome.  After our free trial, we signed up for a year of eMeals ($60) and right now, we’re three months in.

We’ve been eating things like…

Nacho Taco Salads
IMG_0874

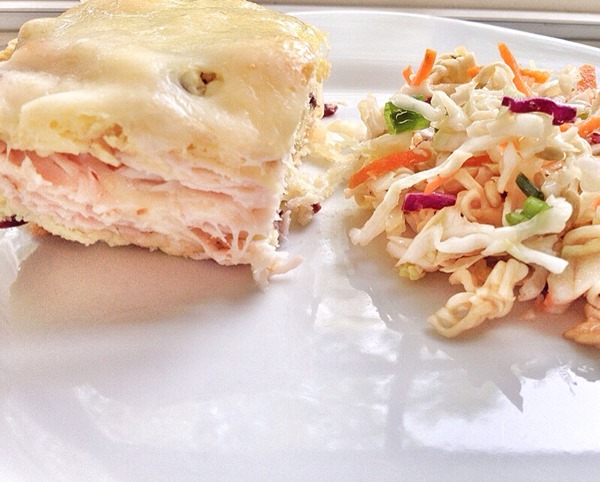
Warm Turkey and Cranberry Sandwich Bake with Oriental Slaw
 IMG_0875 

Mexican Pie and Corn
IMG_0873
…and so, so, so many other good meals.  They’ve all been so flavorful and seriously good.  Honestly, I can count on one hand the number of meals we weren’t fans of.  Good thing too because 90% of the time we have leftovers so dinner usually becomes lunch the next day!

So…

How does it work?  Well, every week eMeals sends you an email containing seven dinner recipes (there are lunch, breakfast, and dessert plans too) and a grocery list with everything you’ll need to pick up to make those seven recipes.  And, that amazing grocery list is separated into grocery departments (frozen, produce, meats, etc…), making the one grocery trip you’ll have to make almost mindless and dare I say it, enjoyable?  Nope, too far.  Also, they’re in tune with several grocery stores (ALDI, Costco, Kroger, Publix, Safeway, Target, Walmart, and Whole Foods), keeping an eye on their sales and planning meals around them so that you can get the best bang meal for your buck (store-based plans).  There are over 50 meal plans you can choose from (Paleo, Gluten-Free, Kid-Friendly, etc…) and we’re currently on the Budget-Friendly plan.  Since starting emails, we’ve cut an average of $80 off our monthly grocery bill.  Our swelling food budget was actually the acute reason we decided to try eMeals.  The month before we signed up for the free trial, we had spent a little over $500 on groceries; a number bigger than we’d like.  We also found that we had a lot of grocery items we’d buy for one meal that would sit untouched for weeks.  So eMeals has also helped us to buy and use only what we need. 

The budget-friendly plan lists individual food prices on the grocery list so I know about what I should be paying for certain things as I stroll the aisles.  But, to get that number even lower, we buy most of our items at Walmart but then head to Sam’s to buy meat in bulk and to Publix for their BOGO deals.

Anyway, I’ll quit typing your eyes off about food and groceries but I just want to reiterate that I wasn’t asked or compensated to write this post.  I just wanted to share something that we truly love that you might too.  Check it out!  You get two free weeks!  And after that, if you love it, you’ll happily spend the $5 a month for someone else to zip over the meal plan for your week while you sip Iced Teas on the porch, knowing that dinner tonight is covered.  :)      

I Dyed

Awhile ago Anthony mentioned to me that a pair of his brown canvas shoes were looking a little faded and worse for wear.
 IMG_0502 
A little conversation ensued after which it was decided that I would try to dye them.  His idea. 

So, we grabbed this Rit dye one day…

41AwuKmYhjL._SY450_

[image via amazon.com]

…and then while Anthony was out of two for a few days last week, I dyed.

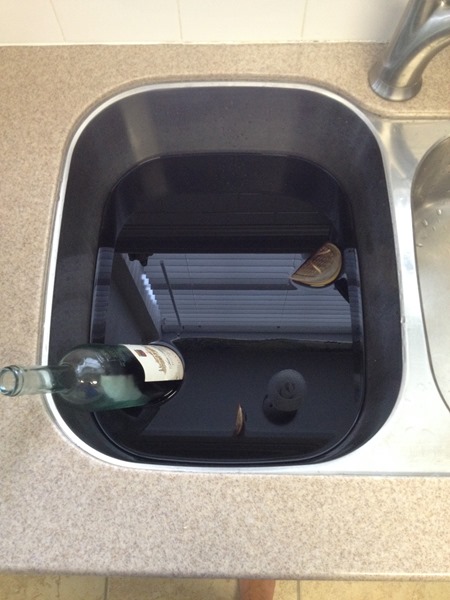
I followed the instructions and used our stainless steel sink for the process. 

IMG_0556
Except I cheated a little bit because I didn’t constantly stir the mixture plus shoes because I was too lazy/have three toddlers/had tons of other things to do for an hour.  I just laid them in the dye, making sure they were completely submerged (and put an empty wine bottle on top of one shoe that was being stubborn).  But I weaseled my way out of that instruction convincing myself that, since there weren’t any folds in a pair of shoes like there are in an article of clothing, it probably wasn’t necessary anyway.  And in the end they turned out okay so, phew!  Laziness for the win!

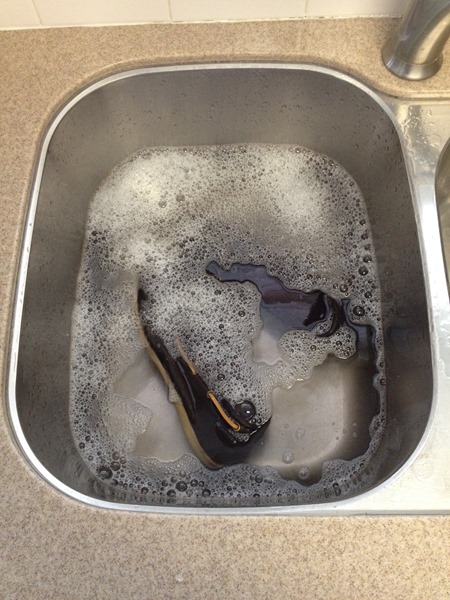
Anyway, after I kept them in the dye for about an hour, I ran them under water until the water ran clear and then hand-washed them in the sink.
 IMG_0558
They looked super dark wet (obviously because they were wet…she’s a smart one that Sheena) and when they dried, they looked like this: IMG_0677 
I know.  I see your eyebrow lifts.  Not much different.  I only used about half of the dye bottle (per the instructions for something of this size/weight) and this is where we ended up.

dyed cloth shoes

But Anthony is fine with them and so am I so I guess we’ll call it a success.  They don’t exactly look new but he’s just planning on wearing them on very casual days anyway.  And the coloring is still a little uneven; some spots have more and others less.  But, I think that that’s because they were faded in spots to begin with so the dye darkened the fabric evenly but didn’t even out the color.  Make sense?  I was also pleasantly surprised to see that the dye didn’t touch the leather string running around the sides and back of the shoe nor the thread at the top.    

Moral of this tale – dye to faded cloth shoes is like botox to Hollywood a-listers.  It turns back the superficial clock a tad.  ;)  

.           .           .

I can’t wait to show you guys what I’ve been working on for the past week!  You can get a glimpse here!  I probably won’t be completely finished until next week but when I am, I’ll be up and atcha with a couple of really good tutorials!  Check back!  :)

Dress 2 Skirt

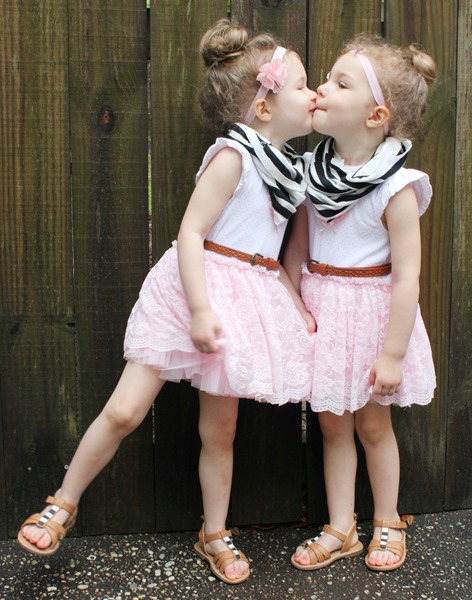
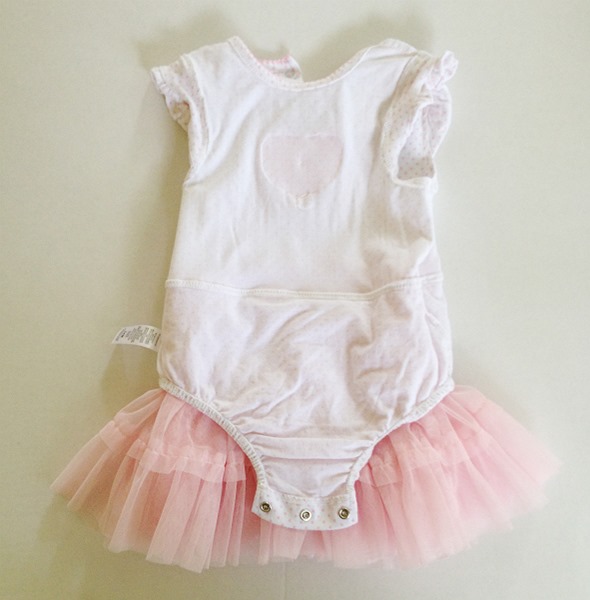
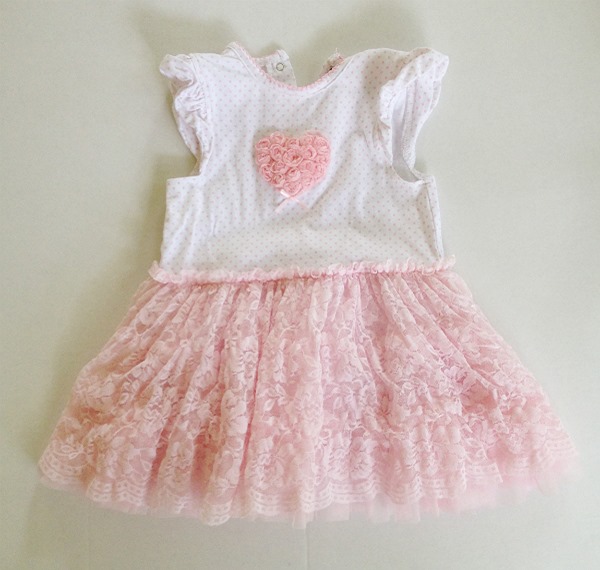
For their birthday last year, the girls got these dresses:
IMG_5942 [Click here to read about the scarves and sandals.]

And I love them because they can be sweet, like in the above pic, or they can be sassy with the addition of a jean vest and some boots.  Basically they’re just so cute they go with everything.

But, as the girls sprouted, they quickly became too short even though they still fit around.  So, since the top part was never really my favorite (the fluffy heart is cute but my style is more on the simple side so eh, to the heart), I refashioned the dresses into a skirt that’ll fit the girls for at least another year.

IMG_6359 You did what?!

I did.  Here’s how.

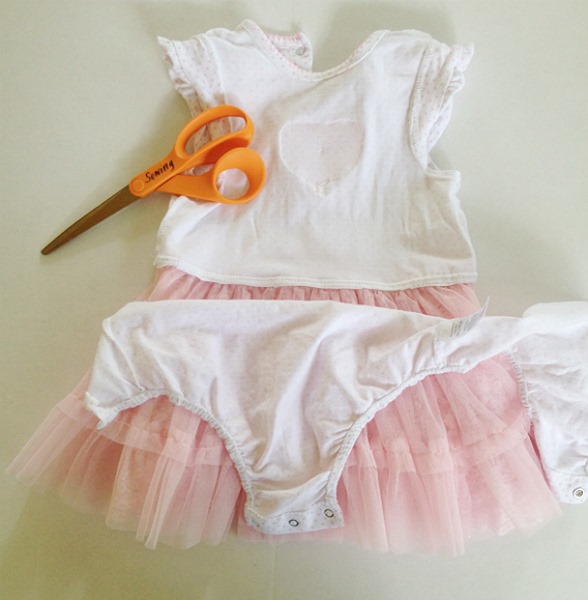
The dress is actually a onesie underneath so the first thing I did was turn it inside-out and cut off the bottom part of the onesie as close as I could to where it attached to the skirt and top. 

  IMG_9976 IMG_9977 (1)

BUT BUT BUT, I realized after I was completely finished and had the dresses on the girls that I should’ve kept this bottom piece on because it served as a slip of sorts.  Even though there are several layers of lace on the skirt part, you can still see dark and/or bright undies through it so leaving the bottom of the onesie on and hanging would’ve kept those brights under wraps.  Shoot.  Here on out, it’ll be white undies only when wearing these little things.

So, next I turned the dress right-side-out and laid it out flat.
IMG_9975

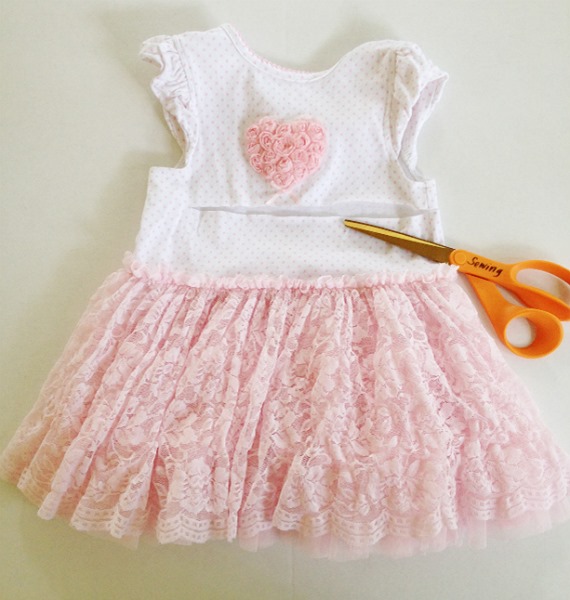
Then I cut the dress in two by cutting across the cotton bodice about two inches up from the lace skirt.  IMG_9978Note:  because of the thickness of the skirt, it was hard to make sure the dress was completely flat and that the top of the skirt in front and back were right on top of each other.  So, I cut the front and back layers separately; cutting around the entire dress about two inches up from the top of the skirt.
 IMG_9979
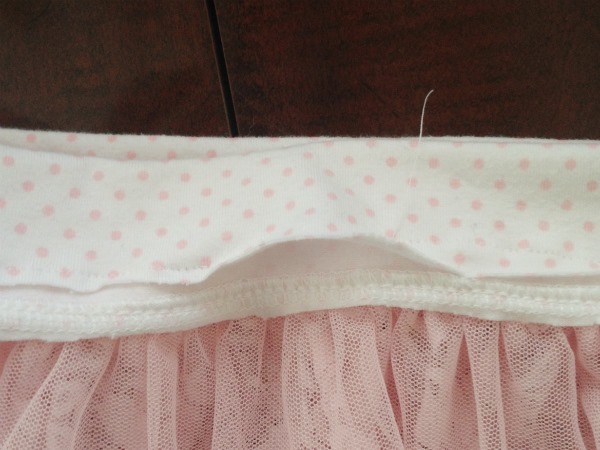
Once I had the skirt cut off, I turned it inside out and folded the fabric at the top over, in half.  I folded it so that it folded into the inside of the skirt.  Then I sewed along the edge to make a pocket to fit an elastic band.  I made sure to leave an opening in my stitching into which I fed the elastic through.

IMG_0215 I inserted the elastic exactly like I did to make this maxi skirt.  (Click that link for a tutorial.)
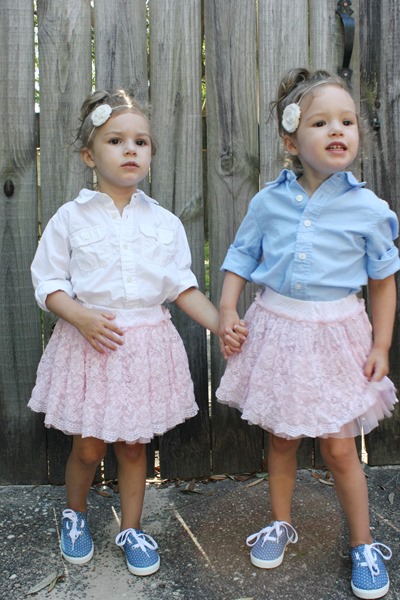
 
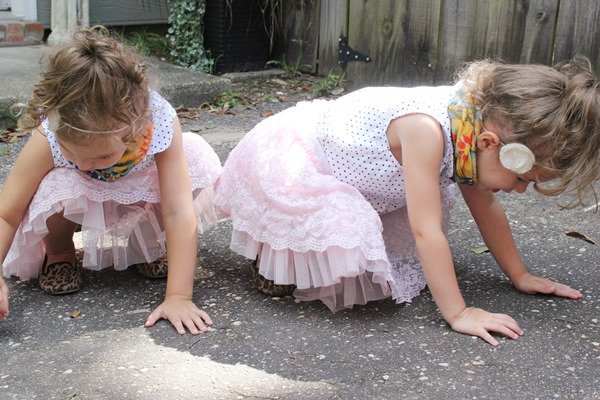
And then I bribed the girls with something or other and took them outside for a little shoot.
IMG_6362
It’s still a little too sweltering down here to have them wear this get-up outside for longer than five minutes but let me just say, I’m really excited for the fall.
 IMG_6364
And how cute are those tennies?  I’ve been searching for some inexpensive ones for the girls for awhile without any luck and stumbled upon these while strolling the shoe aisle at Walmart.  They’re only $6!  You can’t beat that!  They had white ones too and almost got them instead with the idea of painting them to look kinda like these $25 Vans tennies, but I didn’t.  Maybe someday.  (Psst…you should totally do it!)

These outfits might be my favorite though.
IMG_6370[I tried to get them to put their hands on their hips like all the high school girls these days and this is what I got.  Not awkward at all… ;) ]

I found those black and white tops at the same thrift store a year apart.  They’re size 4T and I grabbed one last year, saving it for when the girls ‘grew up’ and then couldn’t believe my eyes when I spied the exact same one a couple of weeks ago in the same size!  That never happens!  The leopard shoes on Seraphia (right) are thrifted (and refashioned) and the ones on Cecilia are these from Old Navy that I found on eBay for $7 a couple of weeks ago.  They are as cute and amazing as they look.  The scarves I made with leftover fabric from these kimonos.

Oh and did I mention that they’re playtime-friendly?  We don’t do clothes you can’t play in because, well, #toddlers
 IMG_6375