Bamboozled

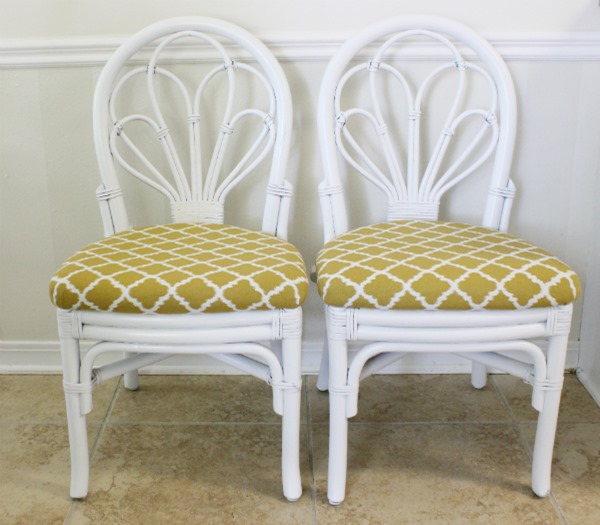
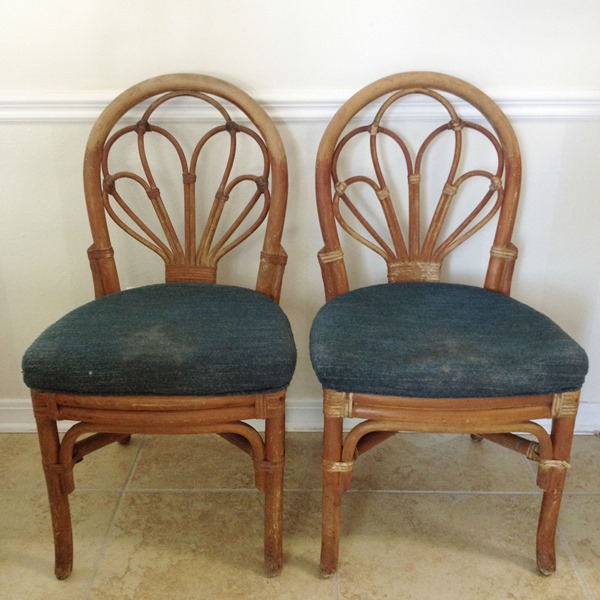
Our parish had a yard sale fundraiser a couple of weeks ago to raise money for this summer’s mission trip to Ecuador and we helped plan the event.  Everything in the sale was donated by parishioners, including these two ladies:
IMG_9259
Although sturdy, they looked a little sad – the fabric on the seats was worn and the bamboo was discolored and stained in many spots.  So, I did what anyone with a tooth for a project did, I snatched them up and told them I’d make them over so that they could sell them for much more than the $5 a piece they were asking.  :D

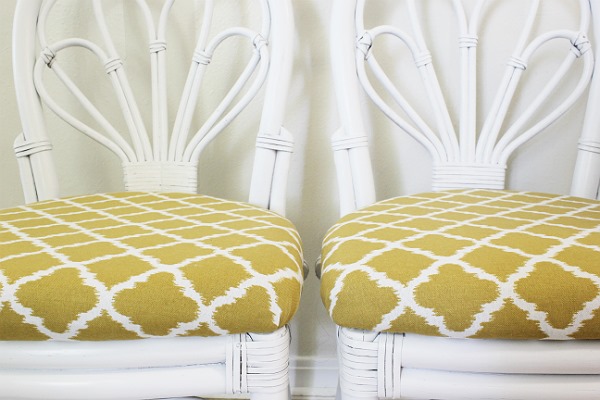
So I did.
IMG_6189

And here’s how.

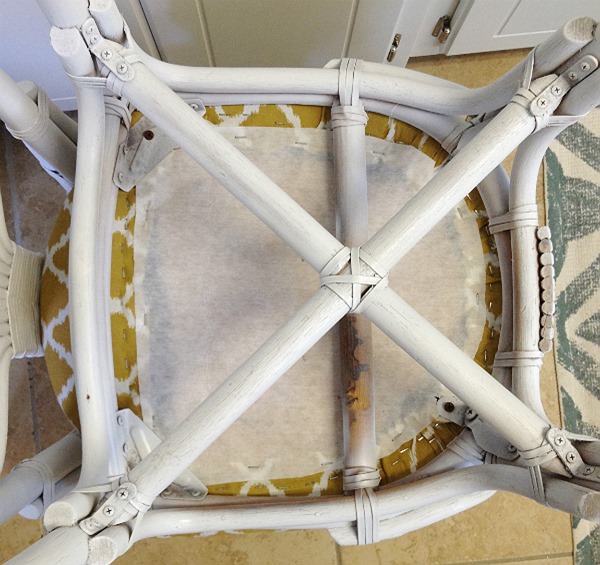
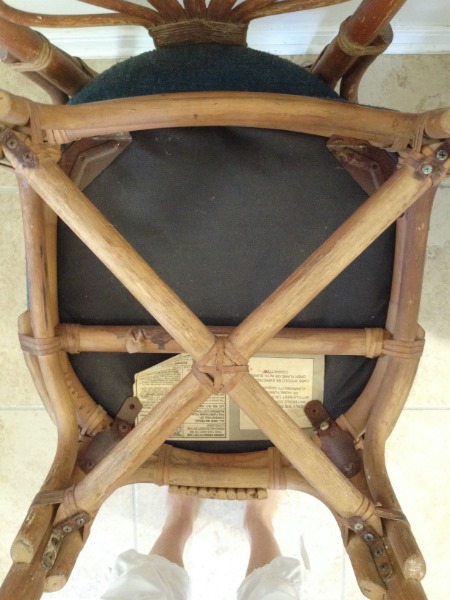
First I removed the seats.  You can see they were just attached by four screws, screwed in through metal brackets at the four corners under the seat.
IMG_9262

Then I gave the bamboo a quick vacuum with a bristled vacuum attachment and scrubbed them down with some soap and water - I used a wet toothbrush to clean out crevices and to remove a little grime and a damp washcloth to clean the rest.

Once clean, I took them outside to be painted.  I used Rustoleum spray paint in white and to make sure I covered every inch of the chairs that would be seen, I first painted the chairs upside down.  This enable me to get underneath the curves on the backrest and places under the chair that might be seen from above.
 IMG_9268 

I covered most of the underside of the chair but I didn’t waste paint with parts that definitely wouldn’t be seen.  Also, I sprayed two coats for good coverage – I painted the second coat about 30 minutes after the first.

After the underside was dry, I flipped the chairs over and sprayed them standing upright.
IMG_9269

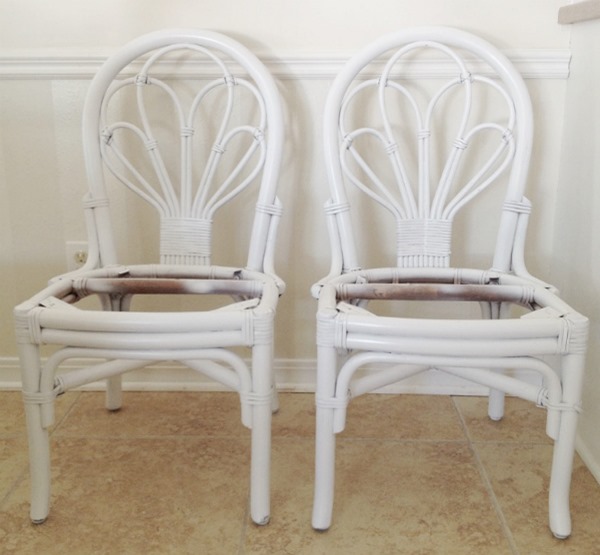
Here’s where all that painting got me:
  IMG_9314

Next came the seats.
IMG_9435

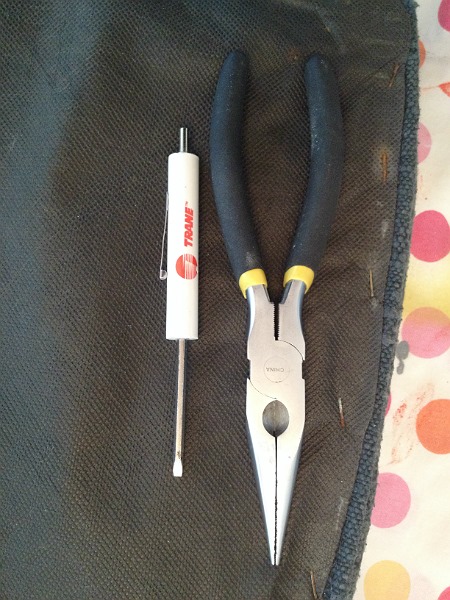
Lots of staples had to be removed in order to freshen these babies up.  To remove them, I used a small flathead screwdriver to pry them up and a needle-nose pliers to pull them out.
IMG_9434

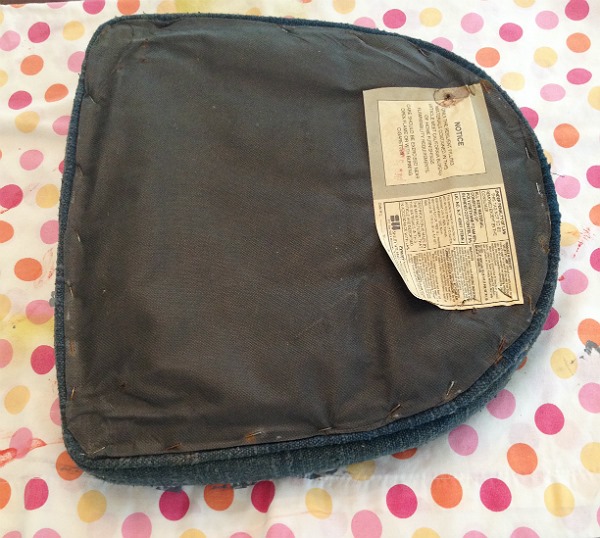
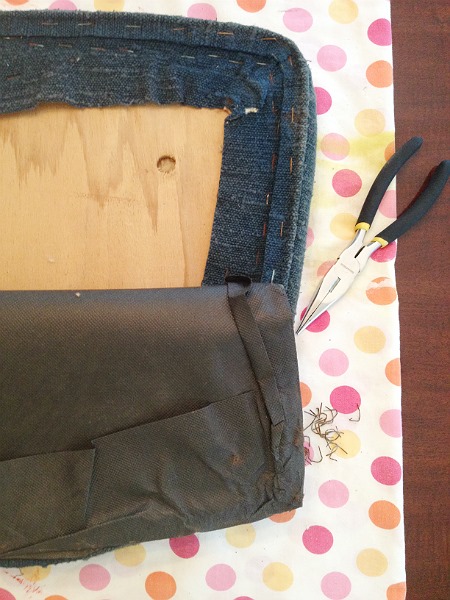
First I started by removing the black backing.
IMG_9436

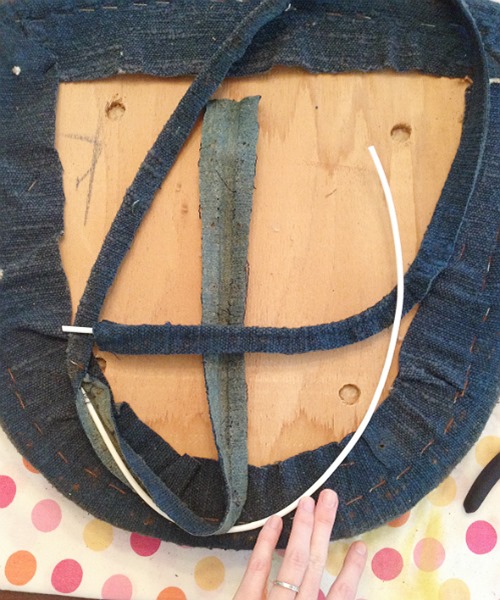
Then I removed the piping.
 IMG_9437
I removed the old piping material from the piping itself because the original intention was to redo the piping with the new fabric.  But, in the end, it turned out the chairs didn’t really need the piping…which was good because I didn’t have a ton of time to finish these and I had never made my own piping before.

After I started removing the actual seat material on one of the chairs, I realized that it wasn’t foam underneath but a sort of loose fiber.  We debated on just buying new foam to fit to the seats but then ditched that for the easier route – simply putting the new fabric over the old.  The old fabric wasn’t gross, just worn and faded, so it worked out well to skip a few steps! 

To make sure the new geometric fabric (a mustard-colored curtain panel we purchased at Kohl’s) was straight, I first laid the seat right on top of the fabric, which was upside down so that the wrong side of the fabric was facing the top of the seat.  Then I eyeballed it, making sure it was right in the center of the design.
 IMG_9438
Then, while I wrapped the fabric around to the underside, Anthony stapled.  We did the front (straight edge) of the seat first followed by a few staples at the back center.  Then we did the sides and front corners.  Last we did the rest of the back; around the curved corners.  I wish we had more hands to take pictures because, while it seems fairly easy, there’s a lot of pulling and folding involved to make sure there are no folds along the sides of the seat.  These seats were a little more difficult since they were rounded at the back; a squared seat (like this one) would’ve been a lot easier.

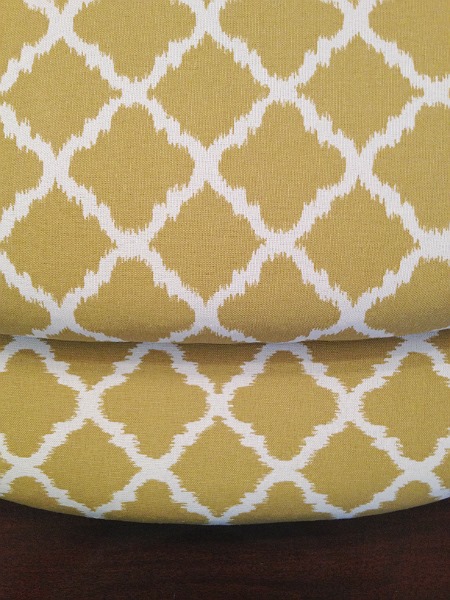
We did one seat one night and the next seat a couple of nights later.  While I love the outcomes of recovering seats, the process isn’t the most fun past time so you can imagine how glad I was after that last staple was in on the last seat…and then you can imagine my grief when I set both seats on their bamboo counterparts and realized the ikat design on one was opposite the other:
  IMG_9480
This is what happens when you do projects while the kids are awake.  #facepalm #facepalm #facepalm

Out came lots of staples and in went more and finally, we had it right and almost done.  Before our last step, which you’ll see below, I made sure that none of the screw holes were completely covered by layers of fabric, making it really difficult if not impossible to get the seat back on the chairs.  I simply cut around the holes if there was too much fabric over them or cut a small hole in the fabric above the holes if I couldn’t cut around them.  Hopefully that makes sense.  Again, I didn’t take pictures of the underside of the seats once we were finished upholstering them (rookie mistake!) but you can see similar scenarios in this post and this one.

The next and last step was covering the underside of the seats.  Because we opted to cover over the old fabric, some of it was peeking out from under the new on the underside of the seat.  Of course nobody really looks under there but it bothered me.  So, I grabbed some interfacing we had left from covering the bottom of the loveseat, and stapled it on there.

First, I cut out a piece a little larger than the area I wanted covered and centered it over the area, placing two staples in the middle to hold it in place.
 IMG_9630 
The interfacing I used was fairly thin and allowed me to see the edge of the fabric underneath so I just grabbed a scissors and cut it to size, making sure I was cutting it so that it overlapped the edge of the fabric.  Then I stapled it in place.
  IMG_9631

Much cleaner.
 IMG_9632

And that’s it!
 IMG_6191 

Do you have upholstering chairs under your belt?  My friends Pam and Oscar are in the process of doing their dining room chairs and look how great they’re turning out!  I love the floral fabric they chose!
11377327_895520677819_658923612710182627_n 

And my friend Natasha did hers too!  So classy, right?
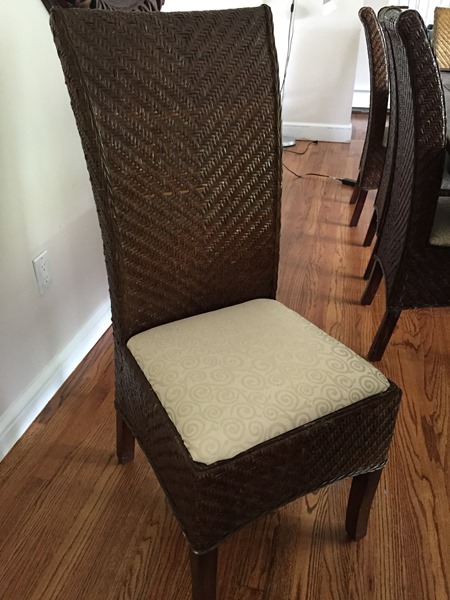
11423733_10153085825629011_4153465474137497591_o

It’s a really simple update anyone can do!  Like I said above, the more square the cushion, the easier but if you can tug and pull, you can tackle any shape!

bamboo chair

.           .           .

P.S.  If you live in the Mobile area and are interested in buying these lovely ladies (or even just one…they’d make great desk chairs!), email me at beaninlove@gmail.com

P.P.S.  A huge virtual hug and cheeky kiss to all of you who voted for my outfit for the Goodwill Fashion Challenge!  I got second place – a $100 gift card to Goodwill!  I’m going to pass on a small token of appreciation to one lucky voter so if you voted, keep your eyes peeled because that just might be you!  I’ll pick a winner before the end of the week!  Seriously, thanks again!

Tulip Wreath: Take II

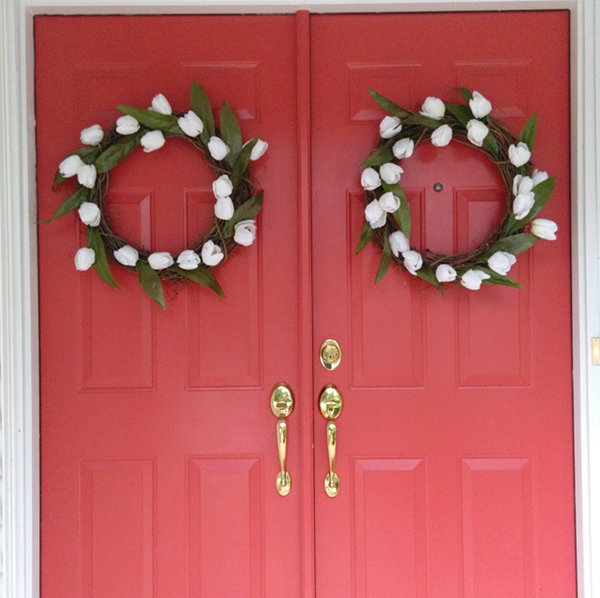
Remember the tulip wreath I made a couple of years ago?  I pulled it out of the attic this spring but didn’t hang it because, hello, bright orange-red door + hot pink floral wreath = clashboombang  But, I had a plan.  I’d go to Hobby Lobby (where I bought the pink tulips), grab the same number of white tulips, pop the pink heads off and replace them with white.  Sounds easy enough, right?  Right.  Only it wasn’t that easy.  Is it ever? 

Why?  Because apparently Hobby Lobby now sells a different brand of tulip stems than they did two years ago so not only were the stems a little thinner this year (boo!) but I had a really hard time getting the pink heads off the old stems without ripping the flowers.  I was so bummed.  So what did I do?  I just made a whole new wreath.

[Don’t worry, our ceiling isn’t actually slanted as it appears in the above picture.  It’s just the curve of the camera lens playing its tricks…I haven’t yet learned how to reign those in!]
I made it a little differently this time though.  The old one held up great but there were a couple of tulips that slipped out while I was moving the wreath because they had become unstuck.  I needed something a little more durable than hot glue.  After a quick brainstorming sesh I came up with the perfect thing; a thing I wasn’t sure existed.  Zip ties!  Those would hold my flowers on!  But, not any zip tie would do.  I needed some really small ones.  After a quick internet search, I found that, not only do mini zip ties exist, they also come in a plethora of colors.  I search the big box stores first (Lowe’s and Home Depot) for the best prices but then stumbled upon this pack of 100, brown mini zip ties on amazon (affiliate link).  They were cheaper than any other mini zip ties I could find and my hope was that they’d blend in with the brown grapevine.  I bought two packs and anxiously awaited their arrival.
They came, my friend Jesse came over with some vino, and we had ourselves a little wreath-making party.

Want to make one of your very own?  Here’s how! 
First, I followed my earlier tutorial by cutting the tulip stems off the bunches so I had a lots of individual stems.
[I used three bunches of tulips, just like last time.  Each bunch had about 11 blooms on it.]

Then, also per my other tutorial,  I stuck tulip stems in and through the wreath, all the way around.  When I had all the tulips in and where I wanted them, I carefully turned the entire wreath over so that the tulips were face-down on the table.
 
Here’s where the zip ties come in.

I attached each piece of stem that was sticking out the backside of the wreath with a zip tie.  I wove the zip tie underneath each tulip stem plus a few of the grapevine twigs closest to it.

Then I zipped it shut, making sure it was nice and tight.  See how well the brown is camouflaged?  I circled it to make sure you wouldn’t miss it.  ;)

After I had zip tied all of the stems to the wreath, I went along and cut the excess plastic off all the zip ties.


The stems of the tulips were sticking a good three to four inches out the back of the wreath so I grabbed a needle-nose pliers and shortened them with the wire cutter at the base of the pliers.


After I was finished zip tying and trimming stems, I plopped a blob of hot glue over each zip tie for extra reinforcement and to ensure all of the stems were stuck and stuck good.  If a hurricane every breathes it’s strongest breaths upon this house (praying that never happens but…), you’ll find this wreath in one piece wherever it lands.  I guarantee it.

We have a screw on our front door in prime position to hold a wreath…I’m guessing that was the previous owners intention when they put it there and left it.  So, all I did to hang the wreath was tie a piece of twine to the back and hook it right up on that screw.
 
And that’s a wrap wreath!

Here’s my friend Jesse’s:
How great does her porch look?!  She not only made the wreath but also whipped up those uber cool planters!

Hannah also sent me a picture of the two wreaths she made using this tutorial and look how great they look!
IMG_0344
Her double doors are amazing, no?
And then came more wreaths.  You see, I’ve a had a bunch of floral stems stashed away for projects and decor that I recently took out of hiding to sell and they sat on a resale site without any interest whatsoever.  So, I grabbed a medium-sized, grapevine wreath from Hobby Lobby and these two from a yard sale…

…and turned them into these:


My favorite is the pink and white one!  I really want to keep it but then I’d back right into the whole pink and bright red dilemma I just escaped.  Maybe next spring I’ll duplicate it with something more coordinating.

.           .           .

Are you a wreath-maker or a wreath-buyer?  Or maybe you’re just not a wreath person at all which is totally cool.  A lot of people down here in the South hang big monograms on their front doors to mark their territory.  Form and function!  :) 

The $22.95 Outfit(s)

gesfashionchallenge (40)

A dream post of mine is to hit up a thrift store or two and take pictures of all the things I see that have potential to be great!  Furniture, decor, linens, lighting, clothes, and shoes…they’d all qualify.  It’d kinda be like a glance into my brain upon walking through a thrift store door.  But, I haven’t gotten around to it yet because I definitely can’t do it with the kids in tow and when I do get out of the house, I’m usually running to the grocery store or to hang out with friends.  But, I did go to a couple of our local Goodwill’s in the past week so that I could participate in their Spring Fashion Challenge.  (Read more about it here.)  I always find pieces of outfits when I stroll their aisles but I don’t think I’ve ever found an entire outfit…until now.

goodwillfashionchallenge
 
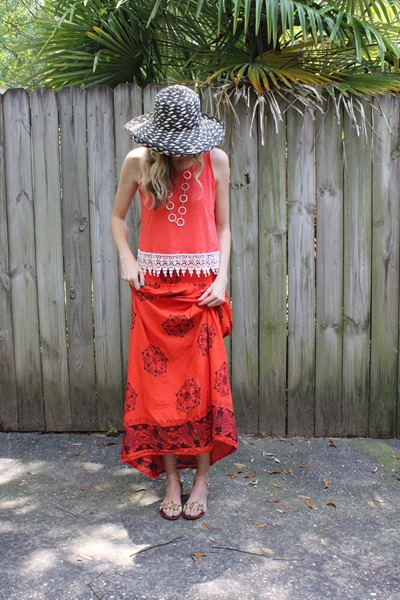
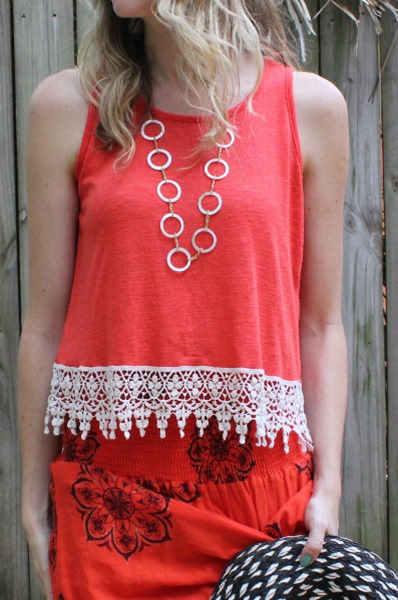
I went out last Sunday afternoon while Anthony was home with the kids and spent about an hour in the Goodwill closest to my house where I found the dress/skirt, the crop top, and the capiz necklace.  The crop top is the same color as the dress (even though it looks a smidge more neon in pictures) and is a couple of sizes bigger than my norm so I was planning on taking it in but then ended up liking the looser look over the skirt.  I went into the store that day figuring I’d have to do some sort of altering to whatever I bought, so I was surprised to have found everything without having to pull out my machine!  It is possible!

The dress is my size and has a ruched, elastic top to make it the strapless dress it is but that elastic made a great waist-line too!  It hit me at an awkward length as a dress though so I just knotted the end to disguise the awkwardness. I found the hat and shoes at other Goodwill's.  The hat is just your average wide-brimmed hat but I couldn’t resist the black and white.  It had one loose strand that I glued and now it’s good to go.        gesfashionchallenge (69)

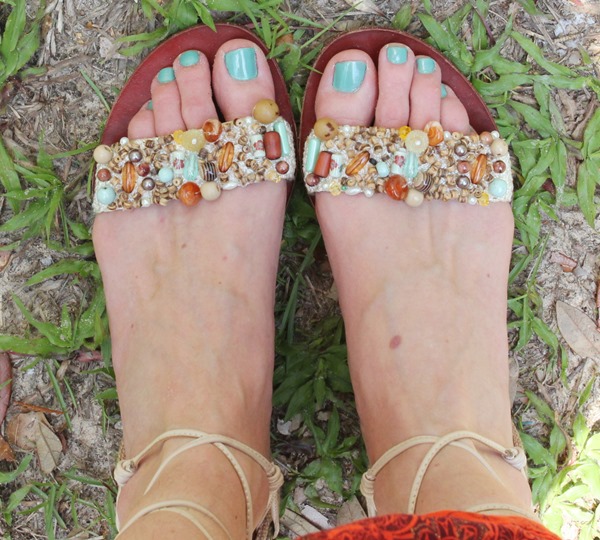
The shoes are leather-soled and have one wide, beaded strap on top, a burlap strap behind the ankle, and thin leather straps that tie around the ankles.
 gesfashionchallenge (74)
I think I’ll switch out the straps for some wider ones later on but for now, they’re great and really comfortable.  Oh yeah, did I mention that they’re a size 6.5?  That would usually be a moot point except that I wear a size 7.5!  Moral of that story (and of the crop top), don’t just thrift within your own size!

I might’ve taken one-too-many pictures during naptime one day this week…
goodwill fashion challenge
…but I blame it on the hat.  There’s something fun about seeing how many ways you can work the hat.  ;)

Anthony told me the whole outfit reminds him of Downton Abbey.  At first I was like “wuttheheck?” but then…
Downton-Abbey-Christmas-E-008 
[image from here]
…maybe baby.  Just maybe.  He did preface that by saying he liked my outfit though so the reference had the best of intentions backing it.

Anyway, if you’re down with what I found and if you have a few extra seconds, you can “like” my photo on Goodwill’s Facebook page or on Instagram!  There are prizes for the most likes!  :)

So, all you thrifters out there, what have you found recently?  I swooned over Mandolyn’s recent find…and the rest of her closet is amazing too!  If you need a little inspiration, look to Ana and go grab yourself some thrifted sweatpants and a dress/long shirt and whip up a new skirt!

The sky’s the limit!   
gesfashionchallenge (49)

;)

Made by Kely & Dave

I don’t have many issues with the diy/interior design blogosphere…usually.  One issue I do have and have often though (and one huge reason why I blog), is seeing these beautiful rooms and then finding out that hundreds, and many times, thousands of dollars went into the before to make it the after.  While that’s all great and grand, it leaves budgeting folk like me hanging.  I mean, I have lots of before’s I’d love to stamp after’s but I definitely don’t have hundreds much less thousands of dollars to do so.

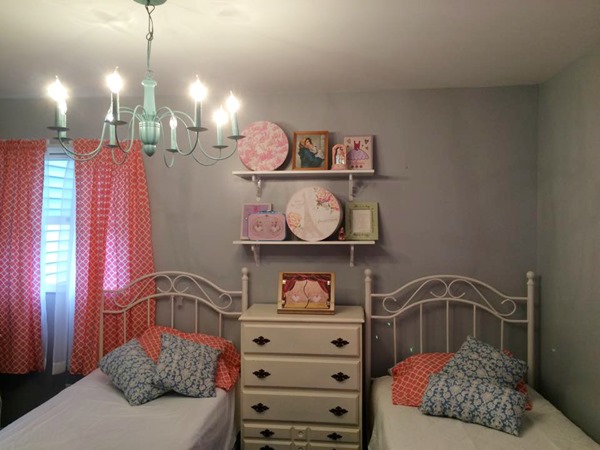
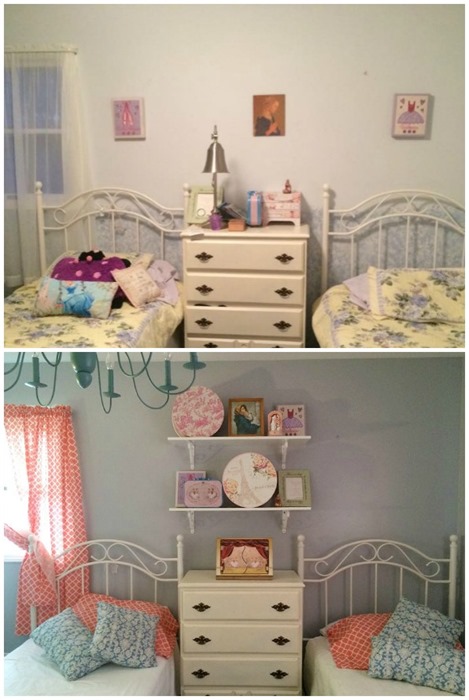
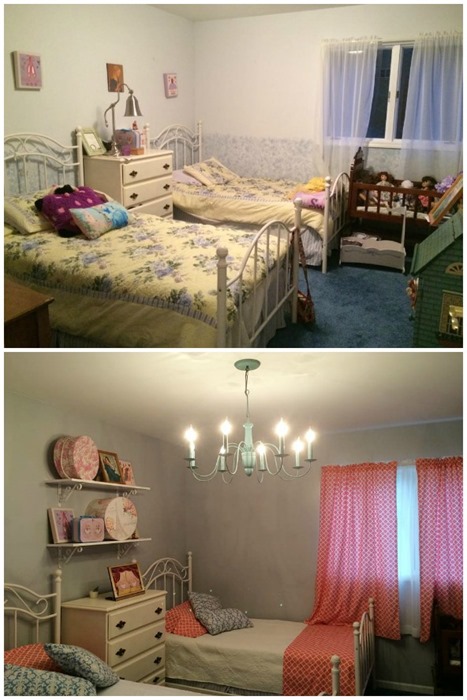
That’s why I love love love so very very much when I see beautiful rooms made beautiful on a dime (or a few…but you get my point).  It’s also why I tried not to sound too please-please-please when I asked my college friend Kely if I could share her recent makeover on the blog.  She and her husband, Dave, recently redid their daughters’ room for their eldest’s birthday and they did it on a budget…and it’s gorgeous!

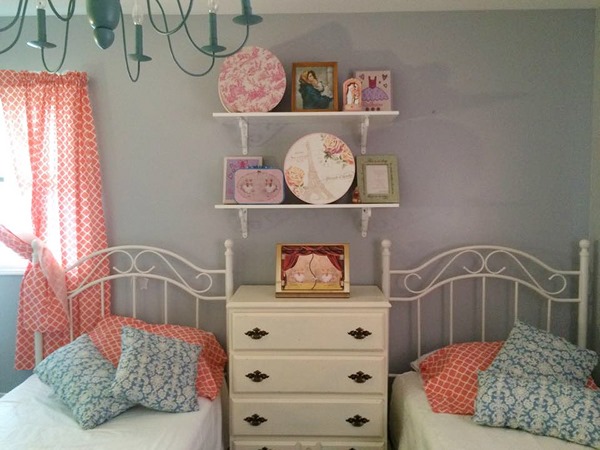
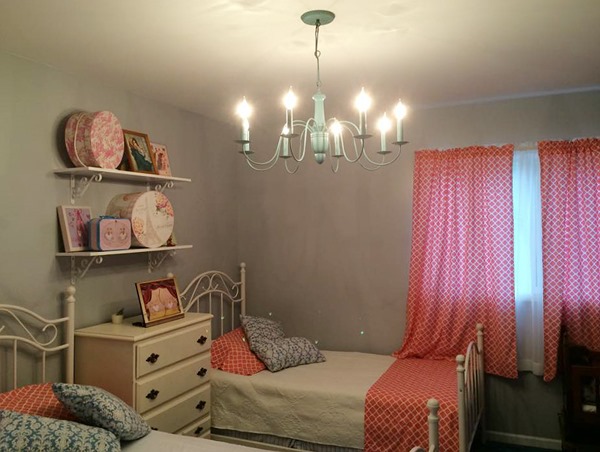
Look!
    11215964_833186666530_783775742_n
On. A. Budget.  You can pick your jaw up off the table/floor now.

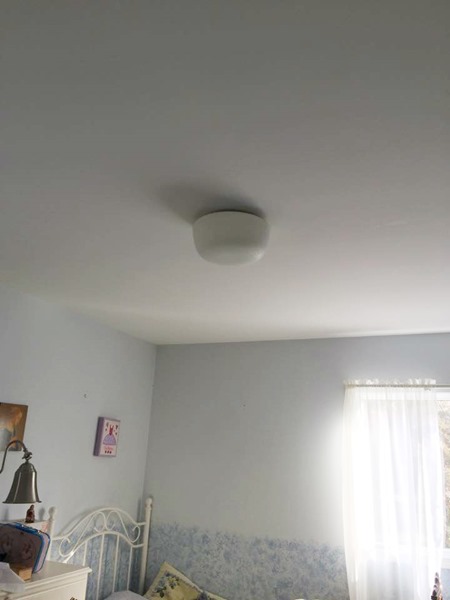
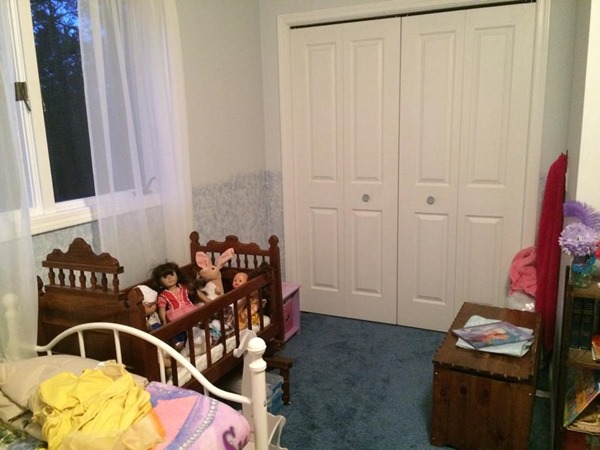
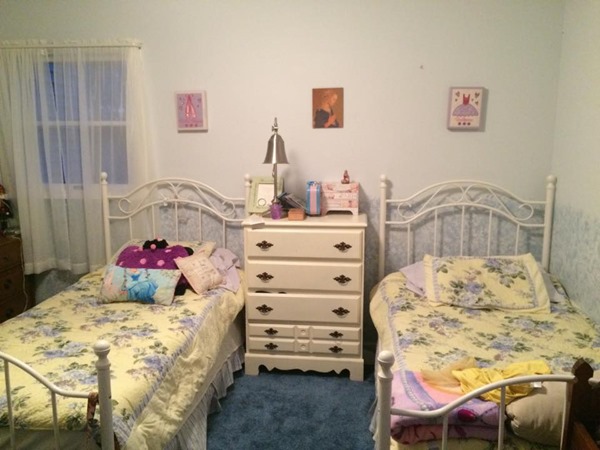
Here’s what the room looked like before:
 11134363_827335801710_452251828_n
Maybe you could argue that it had a ombre vibe going with the light blue paint meets blue sponge paint meets blue carpet but maybe you’d be arguing from the 1990’s.  Painting the walls was an easy and cheap update but swapping out that blue carpet was out of the question so Kely and Dave just worked with it; incorporating it into the room to make it feel like it belonged by adding some other, more 2015-ish blue accents.

 11245395_833186696470_1825916420_n

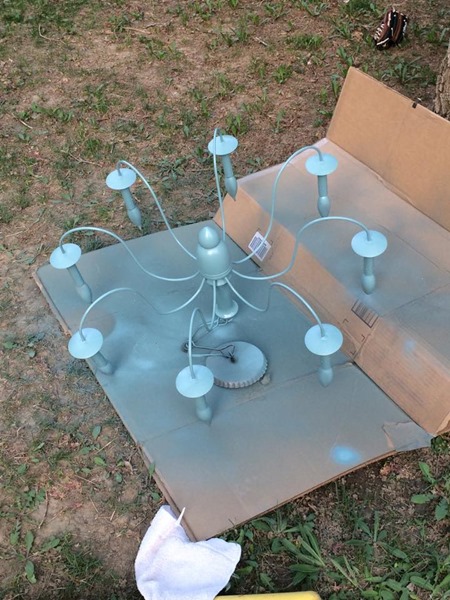
And let’s talk about what I think might be my favorite part, the chandelier!  This is the boring fixture that was:11136886_827940195500_1363965512_n

But Kely spray painted a chandelier, up it went, and boom!  Amazing!
11225660_832058397590_323761945_n

Before:
11148931_827335776760_715054516_n

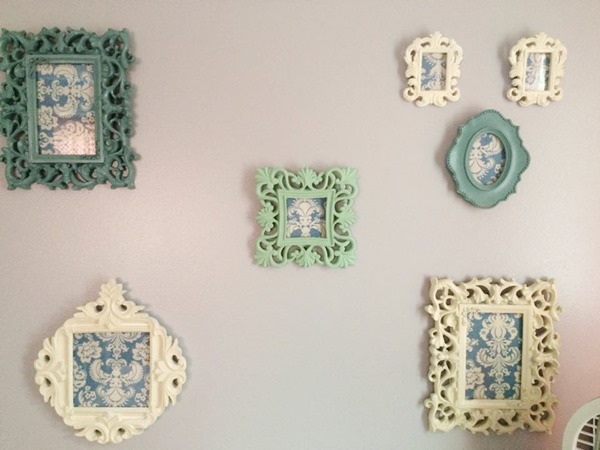
They also painted the long dresser and hung a gallery wall of sweet little frames over it. 11210083_833186691480_1283506594_n
Inside the frames are pieces of the blue fabric that Kely used in making the bed pillows…yes, she did.  She sewed the pillow covers and curtains.  She’s good.
11195517_833187110640_1199687321_n

Before:
11134265_827335771770_2127094831_n

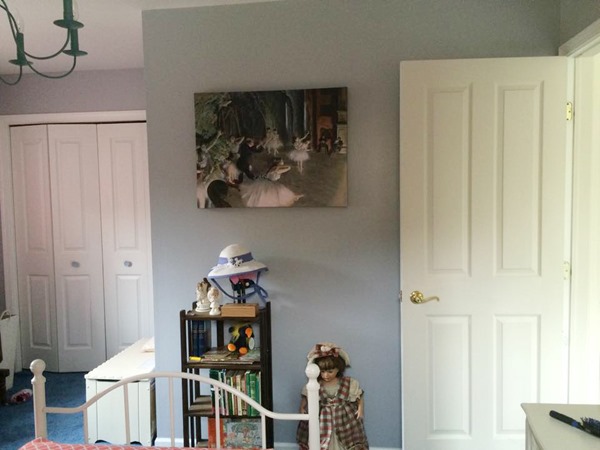
Their daughter loves Edgar Degas’ work so one of his prints went up on the wall opposite the beds.11225773_833507308960_1836043015_n

Before:
11149025_827335751810_2035792260_n 

After:
  11251585_833187095670_1561414217_n     

Are you as amazed as me?  Seriously, I couldn’t stop looking at the after pictures when she sent them to me.  Beauty can be attained on a budget and here is some serious proof!

Let’s take a gander one more time because it’s just that good.kelyanddave

kelyanddave2

*heart-eyed emoji*

:)