Showing posts with label Prepping for Paint. Show all posts

Our Painted [Upper] Kitchen Cabinets

I've painted a thousand cabinets, ok, maybe not thousands...let's see - four kitchens now, four bathrooms, and more dressers and pieces of furniture than I can count - and each time, I've done things a little differently.  Each time, I learn a more efficient way, or a better way to get a smooth finish, or I use a new paint.  So I can't say that I have an ironclad, tried-and-true method to painting cabinets but I can say that I've had great success in the arena.  The same story follows the most recent endeavor of painting our current upper cabinets in the kitchen.

First, I removed all of the doors and the contents of the cabinets.


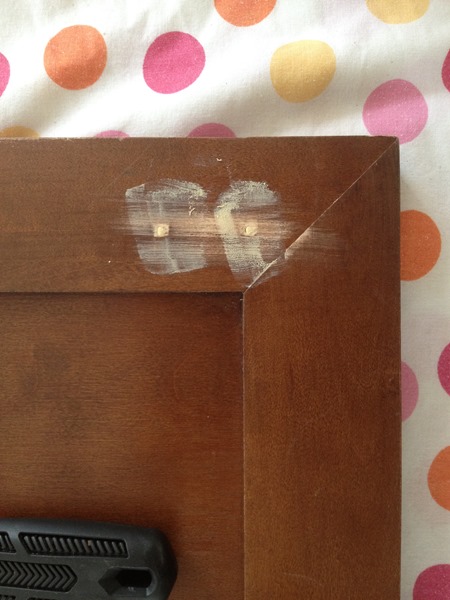
I wanted to replace the old cabinet pulls with new knobs so the next thing we had to do was fill in the old hardware holes and drill new holes.

Quite a Distressing Situation

We’ve been storing all of Gianna’s clothes in two drawers of Anthony’s dresser and two fabric boxes in the kids closet and, the older she grows, the bigger her clothes are getting, and the more that that’s just not working.  We had room leftover galore when we were talking newborn clothes but lately I’ve been just digging and storing excess stuff in a large tupperware bin…in the kids room.  Not efficient and definitely not pretty.

So, for the past couple of months I’ve been keeping an eye out online for a tall dresser that could fit in the kids room to house her things and then some.  Mid-century dressers are some of my favorite things and so I’ve been looking with that aesthetic in mind and coming up short.  The few that I’ve found had either been sold right before I messaged the owner or the owner just never messaged me back.  Well last weekend, my luck changed and I found one.  It didn’t really fit into the mid-century category but I loved the thick molding detail on the doors and the drawers themselves were simple enough that I flew in with a $50 offer (down from the $75 asking price) and they were sold. 

Here’s the picture from the listing:IMG_8283
The listing noted that the piece was solid wood and that all of the drawers “worked properly”.  I could tell it had been painted from the listing and the paint job didn’t look that bad via pictures so, if anything, I figured it might need a touch-up or I could totally go a different color with it.  Either way, it was painted white and with the addition of some new hardware, I hoped we could as least live with it as-is until I get around to making over the kids’ room.

Well, when I showed up to pick up the dresser, the owner had all of the drawers extracted and set by the door (which I thought was great since I figured we’d have to do that anyway to make it easier to carry).  At first glance of it, I could tell the owner used a semi-gloss or gloss paint and so I knew at that moment that I’d be repainting.  I also noticed that the paint job was really poorly done – there were brush strokes everywhere and it looked like maybe some spray painting mishaps.  But, like I said, I had already prepped myself for a possible repainting so that didn’t scare me away.  When we went to lift the dresser, the owner said he’d carry the lower side (we carried it horizontally) since it was heavier.  At the time I was like “Dude, the top is clearly the heaviest part with these doors that weigh a ton…” but I didn’t say anything because I wasn’t really worried about not being able to carry it.  (Four babies over the years has given me quite the biceps.  Ha!)  We got it outside and slid it into the back of my van and I remember seeing that the underside of the dresser, the side he was closest to carrying the dresser, was pretty beat up.  Immediately after he saw me looking at the bottom, he distracted me by stepping in front of it and telling me it would be helpful if I got into the back seat and pulled.  And ok, this is me adding a little bit of assumption in saying he distracted me because maybe he was really in a hurry to get this thing gone (even though after he talked my ear off) but it all happened in the matter of a few seconds and dawned on me afterwards.  I thought about it the entire drive home (ten minutes) and really, I wasn’t too deterred by the state of the bottom of the dresser – I mean, it still stands perfectly and is sturdy and the bottom isn’t seen whatsoever.  But then I got home.  And we pulled the dresser out of the van and into the car port.  And I noticed a few things I hadn’t before because I didn’t take the time to really look it over.  First of all, it wasn’t “solid wood”.  Argh.  The sides of the dresser and drawers are all particle board…not the cheap kind but still, not wood.  There were a couple of screws – one in the top of the dresser and one on the bottom trim on the same side – that were definitely not meant to be there.  Also, one of the “properly working” drawers was missing an entire track so that it literally just falls out of the dresser if you pull it out more than six inches.  I was annoyed.  Annoyed with shady sellers and annoyed with myself for not taking the time to look over the dresser better before I pulled the trigger.

Either way, it was now ours, I was happy I didn’t pay the $75 asking price (I wished I would’ve offered more like $30), and something fun and unexpected happened after I cleaned it out (there was so much dirt and dust in the drawer slots!) and sanded it down.  It was somewhat of a redemption for the whole situation.


One Room Challenge–Week 3

Hey hey!  It’s week T H R E E of theORC
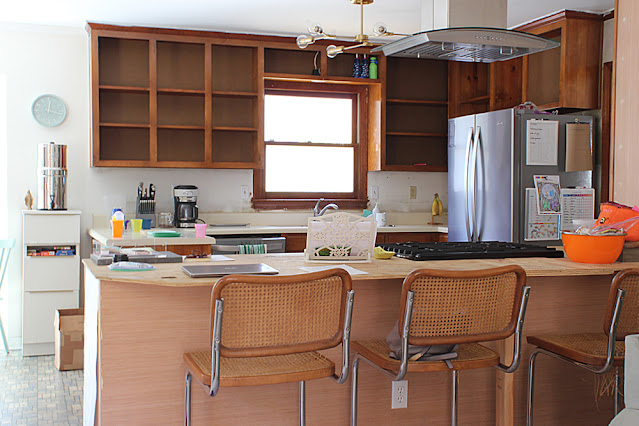
and over here, things are looking UP!!  No really, they are.  I got all of the upper cabinets painted this week and, oh my, it is CRAZY how much more light bounces through what I already thought was a fairly bright kitchen!

Check this out:IMG_7417


And then take a look at the same area pre-move:IMG_6824
The Almighty said it best with “Let there be light!”  Have you ever gone white in the kitchen (or any room really) and experienced the added light?  It’s great, right? 

I’ve written a few posts on how I paint cabinets in the past and time around the paint can wasn’t much different in the way of technique but I did use a new-to-us paint than I have in the past and got a little smarter as far as set-up goes.


Two-Toned Down

Two weekends ago, our church had a yard sale filled with lots of donated treasures; the proceeds of which went to a bunch of our youth group teens who are going on a mission trip this summer.

Among those things donated was this solid wood table and chair set:
IMG_9010

And actually, it was donated last year for the same fundraiser but didn’t sell.  It’s seen better days and a picture doesn’t really acknowledge that – peeling paint and a slightly warped top.  It probably had a really cheery life though considering the fun paint job, no?

Well, who shows up at the smell of great potential that apparently no one sees?  You oughta know by now…yes, yes I did.

I helped transform the table into this to be (hopefully) sold to benefit the mission trip:
IMG_3733(For some reason the fabric seat on the chair on the bottom right looks darker than that of the chair on the bottom left but they’re the same fabric so it must just be the angle of the camera on the geometric print.  Also, the table top was removed for delivery and so it’s a little off-center in the picture simply because it was just set on top for a quick pic.  In case you were wondering about those things, which you probably weren’t, I thought I’d fine-print them.) 
However, I can only take a little bit of credit because, even though I had the vision, I didn’t do all the work.  Some of the teens going on the mission trip sanded everything down just enough that the peeling paint was gone and what was left was nice and smooth.  Another teen (hey Duncan!) painted the big ‘ole base of the table and the love of my life painted the top.  I finished painting the chairs (the teens started), did the distressing, and added a little flavor to the table top.

But let’s break it down a little more than that, shall we?  Of course we shall.

The Chairs
Like I mentioned above, they were rocking lots of peeling paint and some slick vinyl seats that were in need of replacements.  First, we took all the seats off.  Since they were nestled right inside the chair frame, no screws were holding them in place nor did any need to be, so they just popped right out with a little pressure from underneath.  The chairs were then sanded and two or three coats of chalk paint (this in ‘Kid Gloves’ from Lowe’s) were applied.  We decided to go with chalk paint mainly because I had heard there was no prep or primer needed to apply it so we thought it easiest since multiple people would be working on the chairs.  I’ll go into more in a little bit, but I probably won’t ever use chalk paint again.  Half of the chairs were painted with a brush and the final coat was done with two cans of spray chalk paint because we ran out of the canned stuff and thought spraying them would be quicker, which it was.

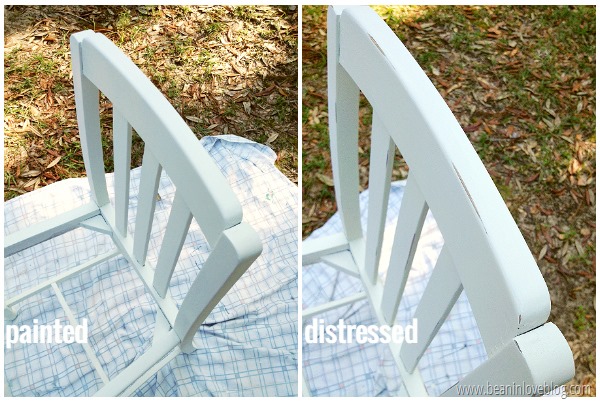
Once they were painted and completely dry, I went over some of the edges with a palm sander paired with fine-grit sandpaper to give them a slightly distressed look.
chairs
A palm sander is a lot quicker than sanding by hand but it requires a bit more care as it can easily get away from you if you’re not paying attention.  After sanding, Anthony put a coat of polycrylic on each chair to seal the chalk paint.

The fabric that we recovered the seats with was a remnant donated by someone to be sold at the yard sale and it ended up being perfect for these chairs.  It’s a heavy-weight upholstery fabric so it’ll hold up great.  The boards that made up the seat on a couple of the chairs were broken, so Anthony grabbed some thin plywood and replaced them.  The seats were made of a wood frame that was curved at the front (you can see the that curve in front in the pictures) so the plywood was placed right over the frame.  We used thin plywood because it needed to be able to bend to the shape of the frame and chair once attached.
IMG_3716I’m sorry I didn’t take more pictures but I wasn’t around when a lot of the refinishing was happening.  :(

Each chair was the same but also a little different since the distressing was done in different spots but they turned out so great, didn’t they?
IMG_3717

The Table
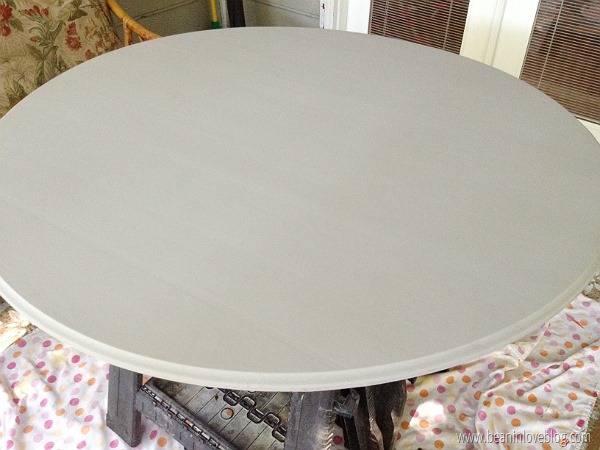
To help straighten out the table top (it was slightly warped), we laid it on the hard tile floor of the youth center for a day and piled some weights on the underside (and when I write “we” I mean Anthony…don’t go all freaking out on me because you think this preggo lifted some weights).  It didn’t completely straighten it out but helped and it made it far less noticeable and luckily, it wasn’t set-your-plate-on-it-and-watch-it-slide-off bad in the first place.  The base was painted with the same chalk paint we used on the chairs and the top was painted a gray color, mixed at 50% intensity (I think the color was “Woolen Stocking”, but in the paint can form). 

IMG_3681
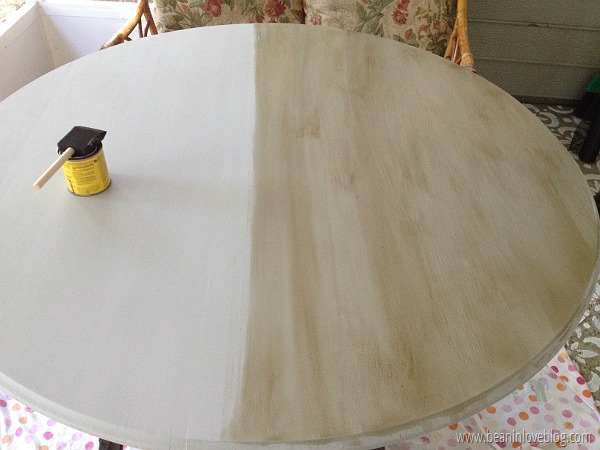
To add a little more character, I added a layer of this stain on top of the dried and quickly sanded chalk paint (sanding chalk paint with a fine sandpaper after it’s dry makes it really smooth).  Using a foam brush, I brushed on one coat, making sure I brushed in the same direction as the grain of the wood and/or the placement of the boards that made up the table top.
IMG_3682
Halfway done:
IMG_3683Imperfection is completely okay with this step and really, the more imperfect, the more character after.

I actually had to do this twice because, the first time around, the polycrylic layer we put over the stain bubbled because of the foam roller we used.  So we had to sand the entire top down and repaint, restain, and reseal.  This picture was taken after the first time I applied the stain.  I loved how it looked before I had to wipe it off and I was tempted to leave it that way.IMG_3572
But back to round two, after applying the stain, I let it sit for two minutes and then wiped it off with an old t-shirt.  I made sure to wipe in long sweeps and once again, with the grain of the wood.  (I did stain around the edge too and along the small lip underneath, in case you were wondering.)
IMG_3684
IMG_3685
It took a whole day for the stain to dry and then, once it was, I brushed on (vs. rolling on like the first time) two coats of polycrylic, allowing the first coat to dry completely and be lightly sanded before the second coat went on.  I like using polycrylic instead of polyuerathane 1) because it doesn’t yellow near as much even though it still yellows a teeny-tiny, possibly unnoticeable bit when painted over white and 2) because it’s soap and water clean-up. 

So here’s the thing about the chalk paint.  I see it being used EVERYWHERE around here.  I’m guessing the no-prep feature makes it a hit because it definitely isn’t the price.  That stuff costs $$$.  The chalk paint we bought from Lowe’s cost $30 for a quart and, for us, that covered one coat of paint per chair, three coats for the table base, and a couple of coats of paint on the two small doors and three small drawers of a hutch that’s also being refinished to sell.  I feel like we could’ve gotten more painted with a quart of $15 latex paint…but maybe I’m not factoring in primer which I know helps a ton when we’re talking coverage.  Even still, it’s double the price of the latex paint I use to paint furniture and the coverage seems to be less or not that different without a primer.  Also, while no-prep sounds appealing, the thing with chalk paint is that you have to seal it.  I mean, you HAVE to…unless you’re painting something that will never be touched post-paint.  I know this because, while they were painting this table, another teen was painting another table and that table got water on it.  The water made it so that you could literally take your finger, swipe it over the surface of the table, and watch the paint come off with your finger – not something you want happening to your furniture ever, ever, ever.  A lot of people seal chalk paint with a wax and some with a polycrylic or even polyuerathane.  Wax sealer doesn’t harden so, while it prevents liquid and fingerprints from getting to the paint beneath, you can’t place anything hot on it because, like wax does when it gets near heat, it’ll melt and stain.  Also, I’ve read that it wears off over time so anything sealed with wax will eventually have to be resealed.  So, in the end, you don’t have to prep by sanding or priming but you do have to seal so really, you’re doing extra work whether you use latex or chalk paint.  It’s in the beginning with latex (primer) and in the end with chalk paint (sealer).  For me personally, the cost will probably deter me from ever using chalk paint again.  I mean, we spent close to $50 alone on paint for this table!  I can get the same distressed, antique look if I want with latex and I feel like, in the end, it’s a lot more durable.  But, that’s just me.  You painters out there, what do you prefer?  What are your experiences with chalk paint?

Anyway, back to the object at hand, which once was a fun table that is still a fun table, just a little toned-down. 

IMG_3736

We all need that sometimes, right?  Maybe it’s called entering adulthood…or maybe just parenthood.  Supposedly that’s when all the fun stops.  Supposedly.

I beg to differ.  ;)

.           .           .

P.S.  The table ended up selling before the day of the yard sale and while it was half finished.  A lady came in to buy something else that we had posted online to profit the mission trip team when she saw the table and fell in love.  Next up is french provincial-style hutch that’s awaiting a makeover that I’m going to help with…hopefully before this baby gets here. 

Mini-Bar in the Toddler Room

Hey good and faithful readers!  If you’re reading these words right now, I love ya!  You are the bestest and sweetest and have stuck with me after a two point five week (unintended) break!  Christmas prep (read, the play kitchen) kicked mine and Anthony’s butts and then right after the big reveal Christmas day, we started packing and headed out and up to St. Louis for my best friend’s wedding!  Then we all decided to get sick and we’re still sick and trying our best to recover.  It’s been crazy around here and I don’t think I picked up my computer once in that span!  But, never fear, I’m back and I’ve got some good stuff to share and lots of catching up to do! 

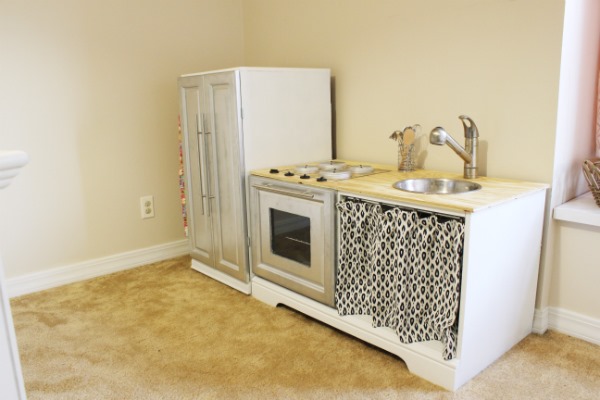
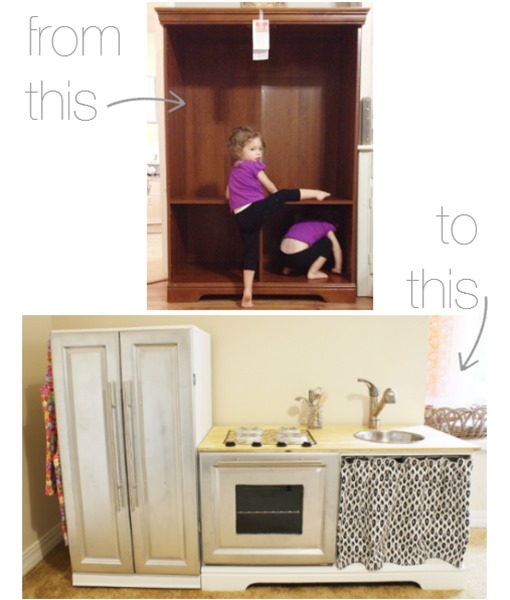
As much as I’d love to take up a whole post writing about how great 2014 was and all the highlights and lowlights and in-betweenlights, time is precious around here and I think we’ll just skip right into 2015 without a look back.  What a better place to start than one heck of a DIY – the play kitchen.  You guys.  This little kitchen we were so excited to make became the bane of our existence for three days straight.  What was supposed to be an easy and fun DIY turned into a problem-solving challenge.  It was one thing after another.  Not to mention the fact that we did this with the three kids running around!  We had it locked up in our bedroom and we’d take turns watching the kids and being locked in with it, working hard to get it done before Christmas!  But, we got to the end and we’re so happy with the way it turned out!
diy play kitchen


In case you didn’t read this post, we found an entertainment center at Goodwill for $5.99 a few weeks ago that matched our criteria for a future play kitchen.  We had been on the hunt for one for months and were willing to spend up to $30 so this one was heaven-sent at 1/5 of that price.  The structure itself is made of laminated particle board and in great shape and the doors are solid wood and beautiful!

It all started with a simple plan - use the basic structure of the entertainment center as is, separate the large compartment on top into two by adding a partition down the middle, add the double doors (refrigerator) to the left side of the large opening, create an oven in the left compartment under the fridge, add a curtain for storage over the right compartment, plant a sink and faucet above the curtained compartment complete with some faux penny tile and a faux window on the back wall above the sink.  Add some paint and little details here and there and bada bing, bada play kitchen.  And then alllll that changed.  On second thought (and right before we started), Anthony decided our initial plan wouldn’t be very conducive to play.  It was too small of a space to accommodate two little girls + their friends + the occasional mom/dad/little bro bomb.  So, we decided to remove the top of the entertainment center, repurposing it as a fridge.  I’ll get into that more later.

Once we had our final plan and all of the supplies were accumulated, it began.  (I know that not every entertainment center is the same so I know that the way we did things won’t apply to everyone but I hope that in some way, a tutorial will help inspire you to create one yourself and maybe help in the how-to area.  Also, I’ve included affiliate links to some of the products we used.  We purchased everything we used ourselves so if you click and purchase through an affiliate link, we’ll get a (very) small kickback.)

The wood doors of the entertainment center were unattached when we bought it from Goodwill and had a good amount of tape residue on them.  Also, all of the hinges were very rusted and needed to be removed and tossed.

To remove the tape residue, I sanded down the gunky areas with a medium-grit piece of sandpaper (soap and water didn’t cut it).  Then, to roughen up the doors a tad to ensure maximum paint adhesion, I sanded them down quick with a fine-grit sanding block. 
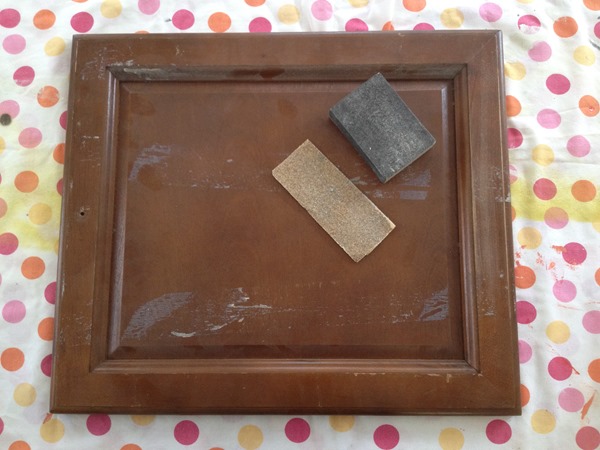
    photo 1 (10)

After all was sanded, I vacuumed up all the sawdust and used a damp cloth to wipe everything down.  The last thing I did to prep the doors was fill in all the hinge and hardware holes.  I used the same technique I used with filling in the hardware holes on this desk awhile back – over-fill holes with wood filler, let dry, sand, wipe, over-fill holes with spackle to make them smooth, let dry, sand, wipe.
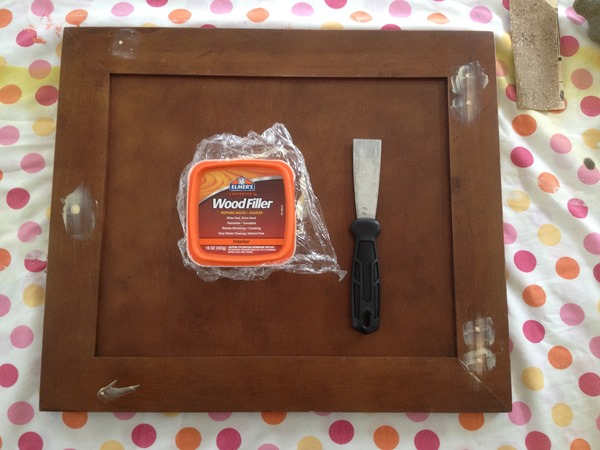
photo 2 (12)

Post-wood filler:
photo 3 (6)

I also took the fine-grit sanding block to the rest of the cabinet to prep for paint.  (I had some issues with primer and paint sticking even after sanding.  They must’ve used some sort of spray adhesive during assembly at the factory because there were areas along seams that resisted paint and crackled when painted.  I’m assuming it was glue overspray.  I didn’t have time to backtrack so I just painted a few coats over those areas and eventually it covered even though it’s still rough in some areas.  Next time I paint anything laminate like this, I’ll probably wipe the entire thing down with some Goo Gone or something like that.)

After everything was sanded, it was prime time.  The oven door and fridge doors were going to be spray painted silver so I primed them with some gray primer we had left over from way back when.  The inside of the oven also got primed gray.  Everything else would be light or white so it got primed white.

Let’s break it down now (imagine the musical notes emoji):

The Fridge

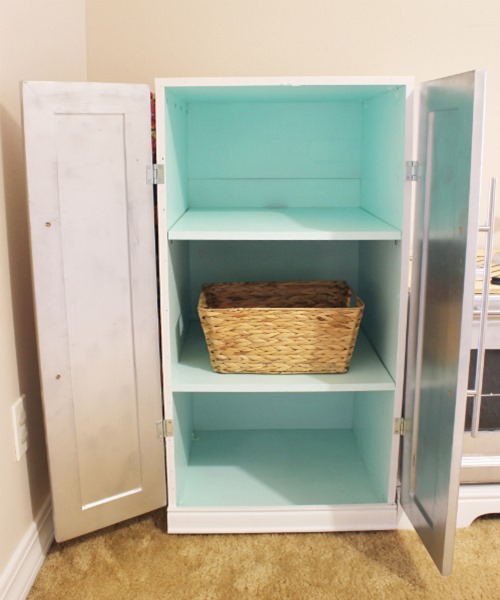
Instead of the built-in fridge we had first planned, we went with a standalone.  To build it, Anthony sawed off the entire top 2/3 of the entertainment center and took it apart, piece by piece.  In the end there were around 10 different pieces of wood trim, the sides, the top, hardware, etc…  The sides of the fridge are the original sides to the top of the cabinet and the top and bottom are the original top of the cabinet cut in half.  Get it?  To connect everything, he used the existing L-brackets and pocket screws.  (I didn’t take any pictures of this part!  So sorry!  We were so involved with this thing that snapping a still or two was the last thing on my mind!)  The existing backing wasn’t large enough to cover the whole space of the new fridge because the girls had knocked out a large perforated area so we cut and taped together a couple of pieces to fit.  You can see the seam above the top shelf.
  IMG_5687
(The doors look a little splotchy in this pic because they are.  Explanation to come…)

To give off the feeling of “cold”, I painted the inside a cool blue (Sprinkle by Valspar).  The shelves are the existing shelves that came with the entertainment center, primed and painted to match.  The outside is white and the doors were spray painted with Design Master’s super silver.  I was so excited to try this DM spray paint because I had read great things about it and how it has the best reflective quality and as much as I loved the color, I’m disappointed in the quality.  I only used 3/4 of a can to spray paint all of the doors, front and back, plus the stove burners but there seems to be a lingering residue.  It was all over Anthony’s hands the day after they were painted, as he was attaching them to the kitchen.  We chalked it up to the fact that they had only been drying a day but days later there will still be a silver residue on our hands if we rub the doors.  I wiped them down to see if it’d help and not only did it not help but it made the doors a little blotchy.  Such a bummer for a comparatively expensive spray paint.  Anyone else use DM spray paint and run into this issue?

Back to fridge construction though, the box Anthony built was a little too large length-wise for the doors (intentional so that he didn’t have to cut off the ends where he could reuse the pocket screws, so he added a piece of trim from the original structure to the bottom to cover the gap left there when the doors were closed. 

Attaching the doors took us a couple of hours and earned us lots of patience points.  We purchased four new hinges (two for each door) and it was matter of me holding the doors up to the cabinet, Anthony measuring, re-measuring, measuring again, drilling, screwing, having two screw heads break so, redoing, blah, blah, blah.  I’m not including the links to the hinges we used because of the crappy screws they came with but these are similar and hopefully better.

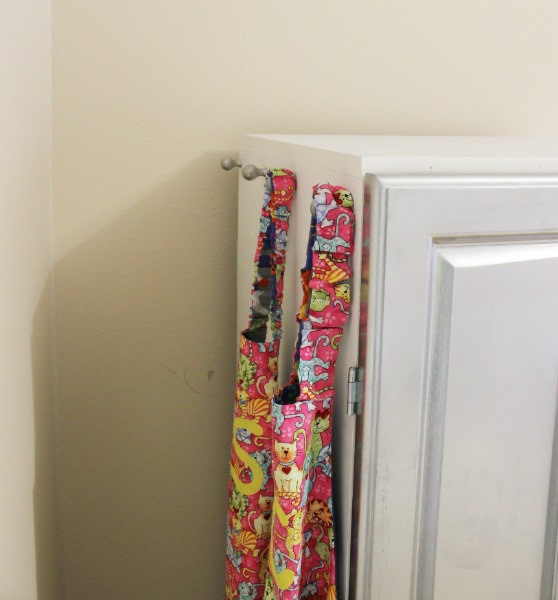
On the left side of the fridge there are four holes along the top where trim was originally attached so I screwed some Ikea knobs through the holes so the girls could hang their aprons.  :)
 IMG_5698

The long bar hardware on the doors was purchased on eBay.  I got all three bars for $15; a fraction of what I would’ve paid at Lowe’s.  They’re nice and heavy and the quality is great!  I’d highly recommend this eBay store if you’re in the market for some!

The Stove

The stove is on top of the left compartment on the bottom half of the entertainment center (mother’s sister’s friend’s wha?).  To serve as a countertop, we bought a piece of 1/2 thick plywood from Lowe’s, sanded it down so it was nice and smooth (no slivers to be had here!), gave it a couple of coats of clear Polycrylic, and attached it from underneath with some screws.  Originally, my plan was to paint it white and give it a faux marble look with some gray streaks (like Jesse’s countertops) but I kinda liked the butcher block look in the end and so for now, natural it stays.

For the burners, we used two sizes of round wood plaques I bought at JoAnn Fabrics and some square wood rods that Anthony cut into pieces (also found at JoAnn’s).  The knobs are made out of small wood rounds and pieces of the square wood rods cut down to size and cut with a point at one end (he cut an extra knob dial just in case I wasn’t happy with the points on one…good hubby knows his wifey.)
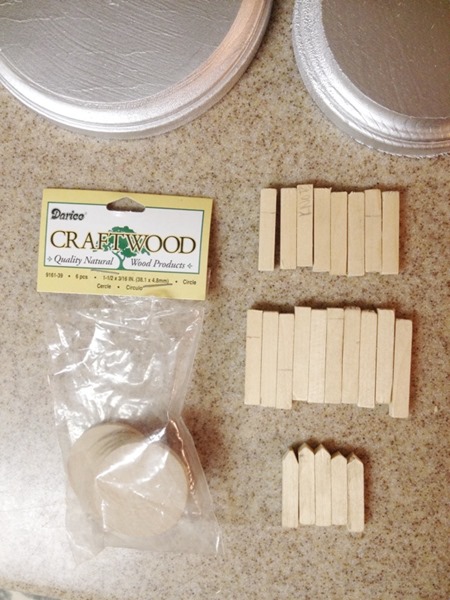
photo 3 (7)

I spray painted the burners silver, painted the small rods black, and attached the two with Liquid Nails.
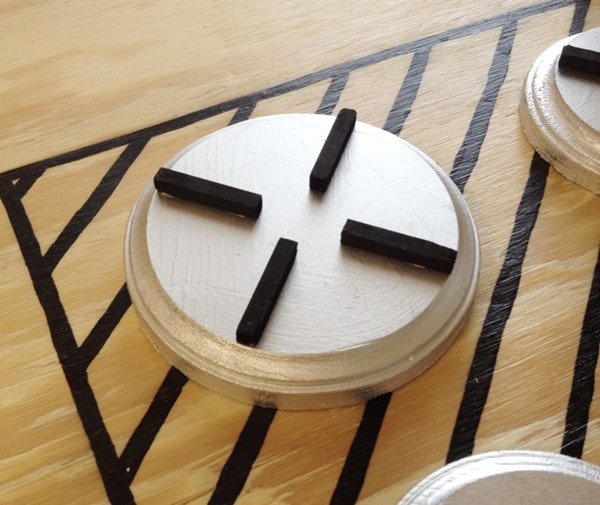
photo 4 (8)
The striped black background of the stove area I drew on with a ruler and hand-painted black.  It wasn’t necessary but without it, it looked a little funny with just some random burners glued to a countertop.  The striped area helps to define the stove.  :)
 
On day two of the kitchen’s existence, Basher Smasher (Sebastian) managed to remove half of the little black rods we worked so hard to make and the stove area looked like this:
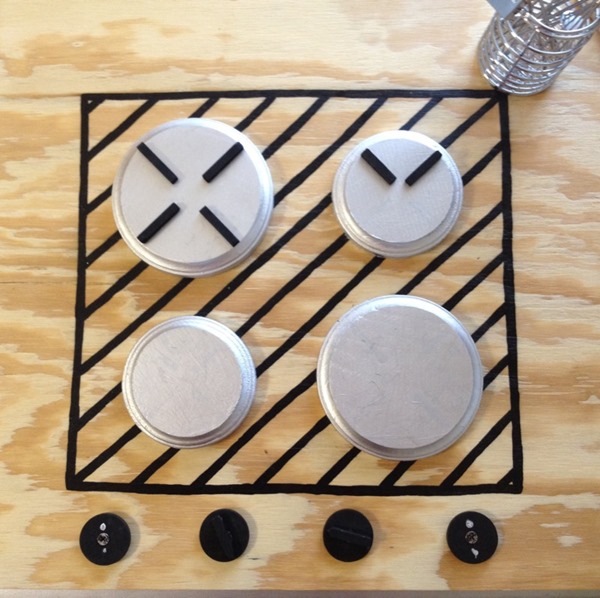
photo 5 (5) 

So in a bag they went, labeled “for more mature days”, and I went back in and painted on the burner lines.  The knobs I have yet to reattach but I’m trying to figure out how to Seb-proof still.  They actually spin, which is super cool.  We used Young House Love’s technique to make that happen.
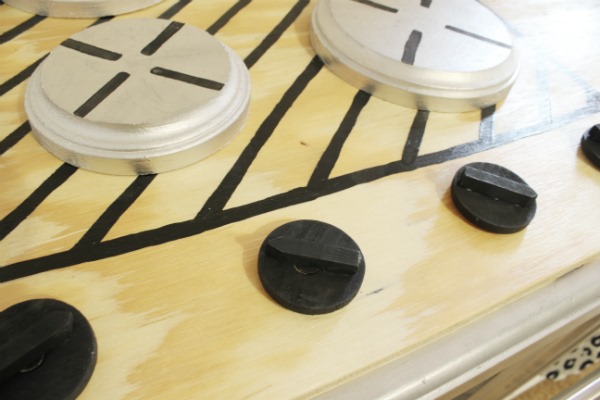
IMG_5689

I still want to add a HI and LOW around the knobs but for now, here’s where we’re at: IMG_5688
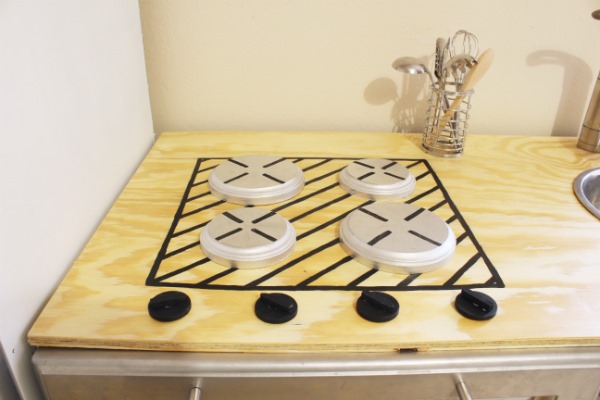
(The oven door and countertop look a tad warped in the above picture thanks to the camera lens.  They’re straight in real life…promise.)

The Oven

The oven was our biggest challenge.  Painting it was simple.  It was when we went to attach it to the cabinet that we had some issues.  I primed the entire inside with gray primer and painted it with the gray paint I had leftover from stenciling our entry rug (Cathedral Stone by Valspar).  The door was primed gray and painted with the DM silver.  We grabbed an 8 x 10 piece of plexiglass from Lowes for the window that Anthony cut out of the door and attached it with some Liquid Nails (and then C punched it out during a temper tantrum three days later and we’re in the process of a re-install that’s tantrum-proof).  The wire rack is the one that belongs to our actual microwave (we never use it) and that happens to fit perfectly width-wise even if it is a little short depth-wise.  Anthony cut and attached two pieces of 1 x 2 to fit along the sides of the oven to support it.
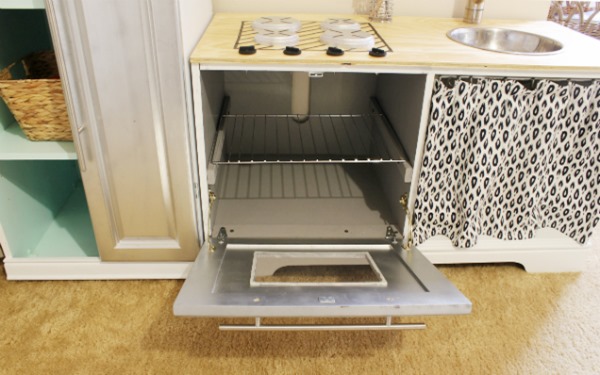
IMG_5690

Here’s where things got dicey.  We wanted the oven to do as ovens do and open from the top.  But, because of the trim on the very bottom of the entertainment center, it wouldn’t open more than a couple of inches before it hit the trim below (read:  scratch the paint I worked so hard at brushing on).  We realized this prob circa midnight the night before Christmas.  So, Anthony grabbed a leftover piece of trim, cut it down to fit width-wise into the bottom front of the oven and then sliced it in half length-wise so that we could attach the oven door to it and still have the door fit the space; not hit the countertop above.  The hinges we used for the oven door are strap hinges and more heavy-duty than those we used on the fridge.

It took a lot of last-minute painting and install but we got it in.  To hold it closed, Anthony installed a magnetic catch at the top center of the oven.  We also had to install some friction lid supports on each side of the door to keep it from opening all the way so that the kids couldn’t climb on it once open (which they tried) and to keep it from hitting the trim below.
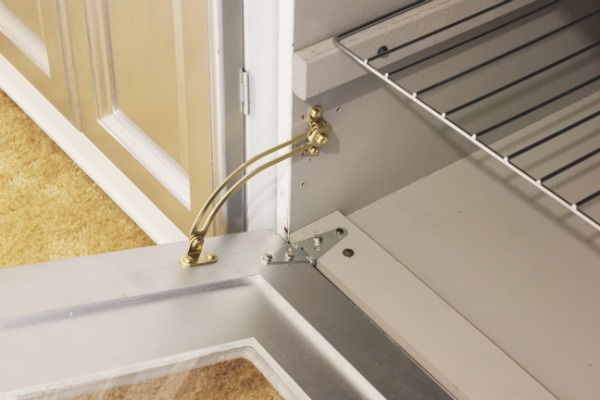
   IMG_5691
We didn’t have a choice between brass or silver with the lid supports at Lowe’s but personally, I have a thing for gold and gray and so I’m totally fine with it.  :)

The Sink Area

The sink is actually a stainless steel mixing bowl we had laying around.  Anthony cut out a circle, lined the lip of the bowl with some silicone caulk, and dropped it in.

Progress:
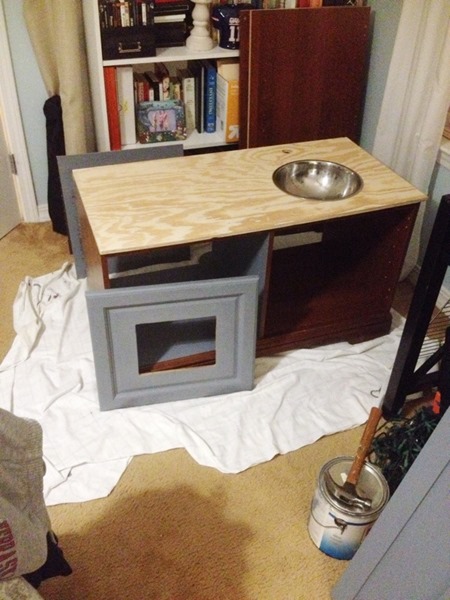
 photo 5

The faucet is our old, leaky faucet that we actually threw out, realized we could use it on the play kitchen hours later, and dumpster dove for.  Don’t worry, we gave it a thorough cleaning and cut all of the copper wiring and excess tubing off the bottom.  Anthony attached it just as it was attached to our countertop, with the existing nut and bolt.
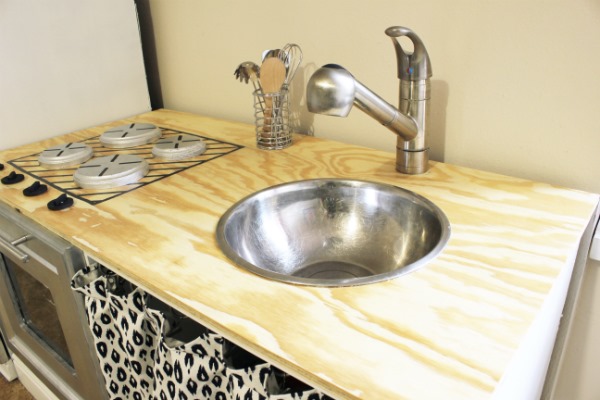
IMG_5692

I sewed a curtain out of this Nate Berkus fabric to cover the space below the sink and hung it with some curtain rings on a small tension rod.
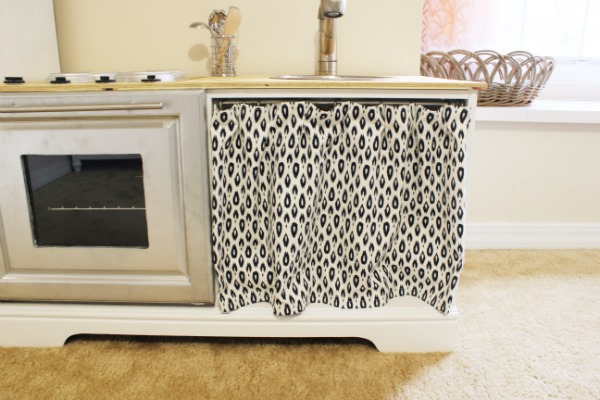
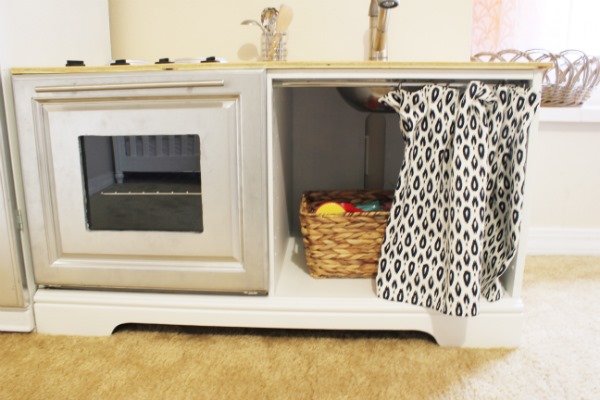
 IMG_5694
IMG_5697

And I think that just about does it!  Whew!  Right?  Can we talk about a labor of love?  This one takes the cake!

Before:
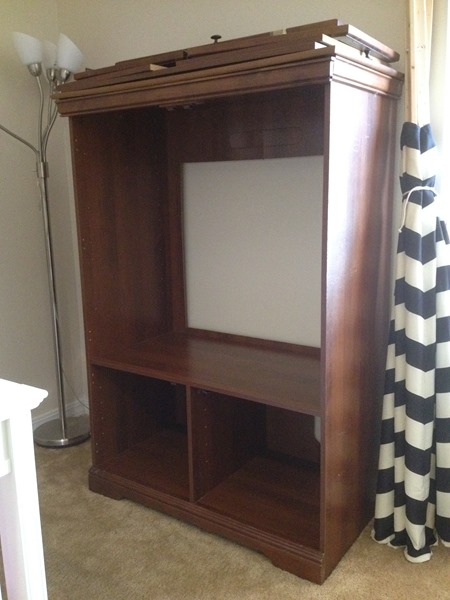
photo 2 (11)

After:
  IMG_5699

>>> Budget Breakdown <<<

Entertainment center:  $6 (Goodwill)
Spray paint:  $3.75 (MIchael’s - $7.50 + a 50% off coupon)
Paint and primer:  $0 (used leftovers)
Bar hardware:  $15 (eBay)
Hinges and magnet:  $9  (Lowe’s)
Friction lid supports:  $6 (Lowe’s) 
Burners and knobs:  $10 (JoAnn’s – used a 25% off total purchase coupon)
Plexiglass:  $3 (Lowe’s)
Wire rack:  $0 (belongs to our microwave)
Piece of 1 x 2 for wire rack supports:  $3
Plywood countertop cut-to-size:  $12 (Lowe’s – they cut it for free)
Faucet:  $0 (our old one)
Sink bowl:  $0 (already had)
Fabric for curtain:  $9 (JoAnn’s – was on sale for 40% off plus used a 25% off total purchase coupon)
Baskets:  $0 (JoAnn’s – stolen from Sebastian’s room)
Knobs on fridge:  $0 (Ikea – bought years ago)
GRAND TOTAL:  $76.75 ($27 over our inital $50 budget but even so, not bad!)

We moved the kitchen to the girls’ room yesterday and I’ve got plans to still get in the faux penny tile backsplash I wanted along with a window and a light above the sink.  Oh, and did I mention that we moved the girls into our previous guest room a couple of months ago? 
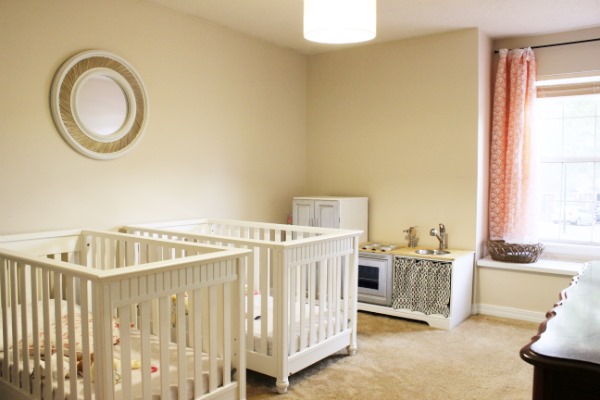
 IMG_5702

Their room is pretty plain right now but I have plans yo.  They might take awhile to come to fruition but I can’t wait to see it evolve.
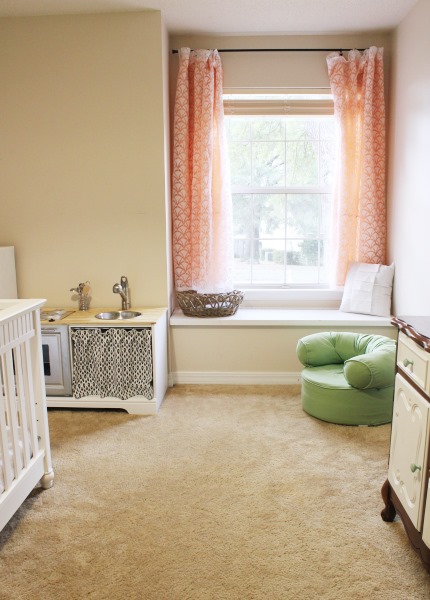
  IMG_5705

As you might’ve guessed, we moved Seb into their old room and he’s still living with half of their decor on his walls and their pretty curtains over his closet.  Progress is slow ‘round here folks.

Slow but with great results…usually.  ;) 
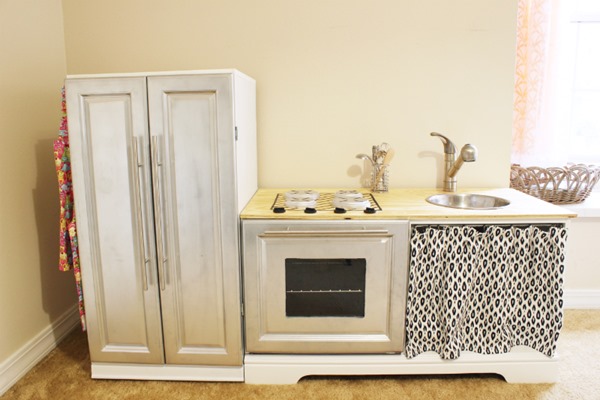
IMG_5686

In the Corner

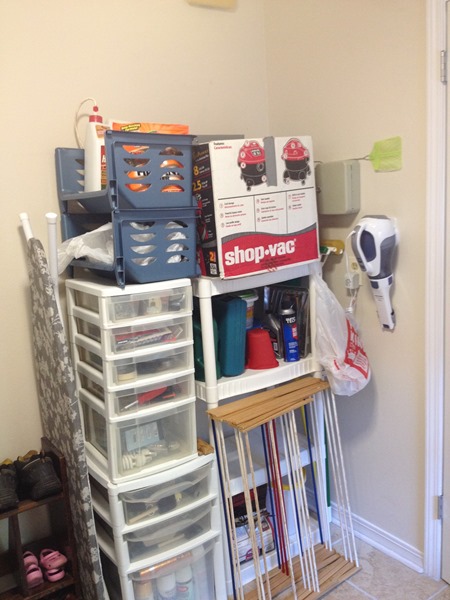
Wow-eee.  Life is busy, no?  Places to be, things to do, people to see, thoughts, more thoughts, kids, more kids, throw in a cold or four…add yours to the list because I’m sure you can relate!  That’s why posting around here has been minimal the past few weeks and why the project I’m about to tell you about has been in-progress for a month now and still isn’t finished.  You see, we’re on a mission to re-organize our laundry room.  I’m not sure why this whole process started…it might’ve been the annoyance of looking at this to long:photo (7)
The corner in question.  It’s organized ‘per-say’ – drawers full of painting supplies, spray paint, tools, paint chips - but overall it’s just a big heap of random stuff that’s really not the most aesthetically pleasing sight we ever did see.

Enter this big lug:
 
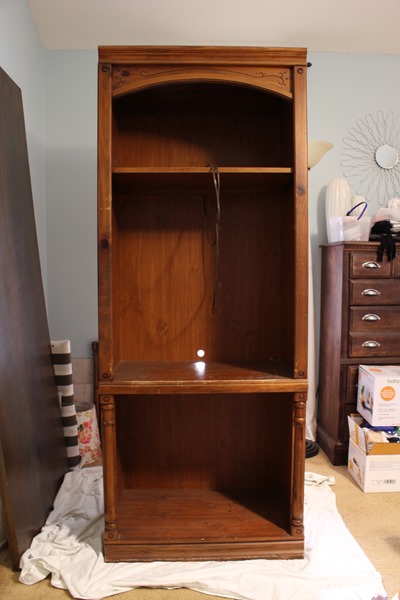
IMG_5069
I found him at Goodwill a month ago.  At $19.99 his tall, dark, and not-so-handsome physique was just what we needed to take that corner of the laundry room to the next level of organization.  We removed the built-in lighting and also ripped out the top shelf, as it didn’t extend all the way to the back of the cabinet, in order to replace it with a few more shelves and left the bottom opening as it was because it’s the perfect size to accomodate our shop vac.

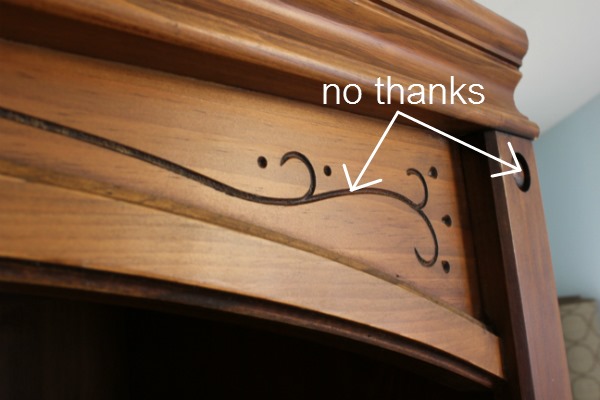
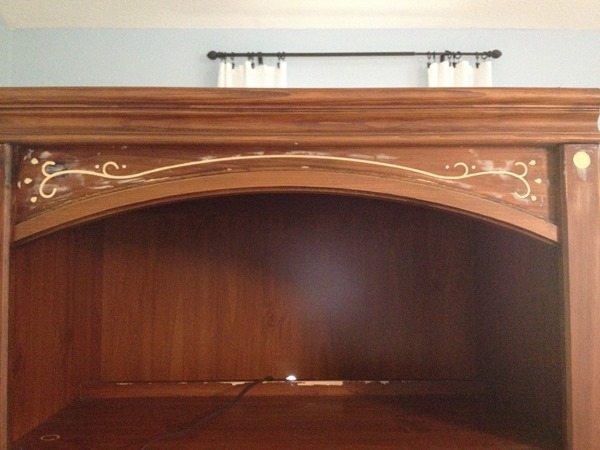
The plan was to paint him white before we put him in his place.  So first things first, I wanted to make him a little less country and a lot more modern by filling in the scroll work and decorative holes.
IMG_5072 

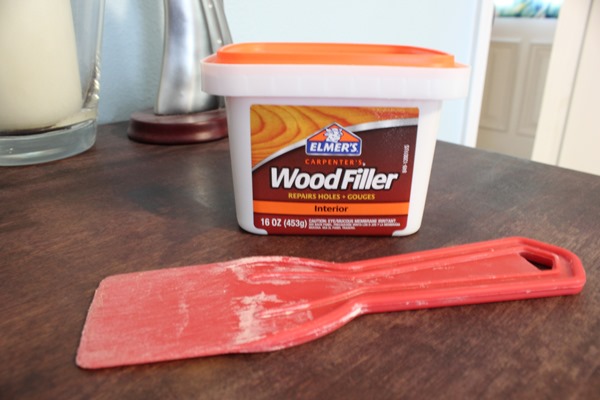
To do that, I used a plastic putty knife with this Elmer’s wood filler that we picked up from Lowe’s:
IMG_5073 I’ve used it before (to fill in holes in this desk and this dresser and cracks in this loveseat) and have been really happy with it.  It dries nice and hard without cracking.  However, it doesn’t sand down to a very smooth finish so I usually use it in conjunction with spackle.  More on that later.
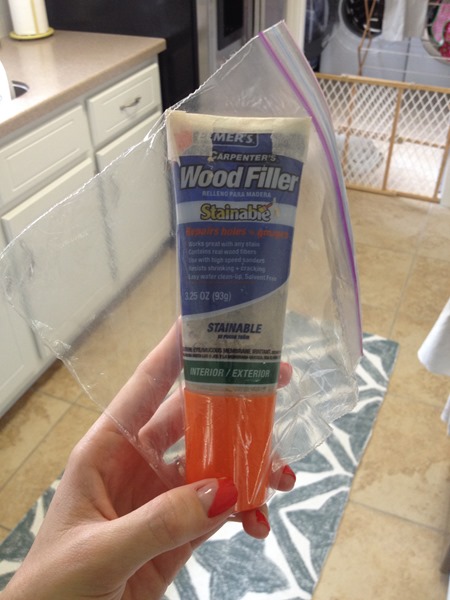
Side note:  For the loveseat, I used a tube of the wood filler and when I went to use it for the desk, I found it had hardened near the opening, even though I had the lid screwed on nice and tight.  So, since the stuff towards the other end was nice and soft, I cut off the top of the tube and pulled from there, taping the opening off and storing it inside a plastic bag for extra protection against drying.
 
photo 2 (8)
Hoewever, when I pulled it out again for this project, the whole tube was hard and unusable so we that’s when we purchased the tub of filler, hoping its fate will be the opposite.  I’ll keep you updated but so far, so good (This just in!  Kelly told me she puts saran wrap over hers before she lids it and it keeps hers nice and nothardened!  Thanks for the tip Kelly!)

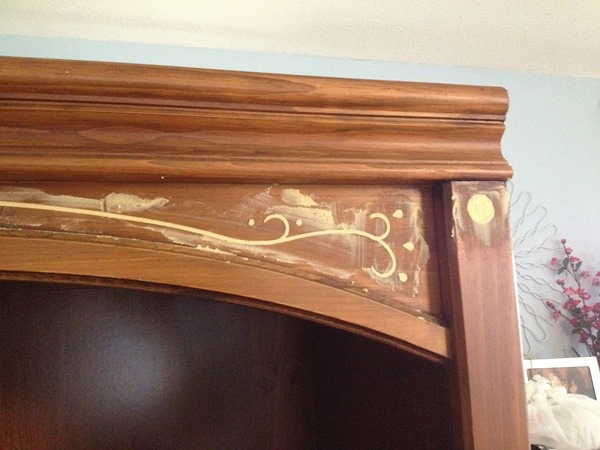
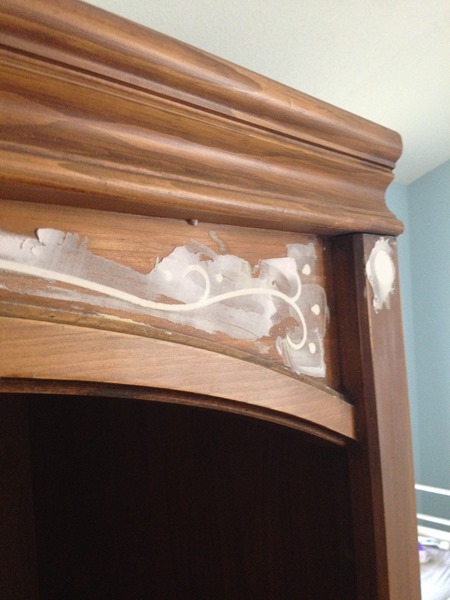
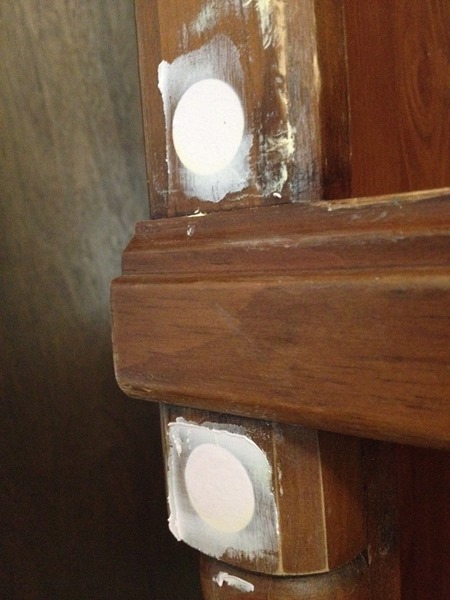
To fill in the scrolls and holes, I scooped up a large chunk of wood filler and spread it over the holes like I was buttering bread, making sure I pressed it in enough that it filled the entire area.  Then I drug my knife across the surface, scraping off excess.  When you do this you don’t want to scrape off all the excess.  There should be more filler than you need over your filled areas, sort of like a miniature hill.  You’ll make everything smooth and level by sanding the dried excess off later.  Make sense?  Here’s what the top of the cabinet looked like after I was done filling:
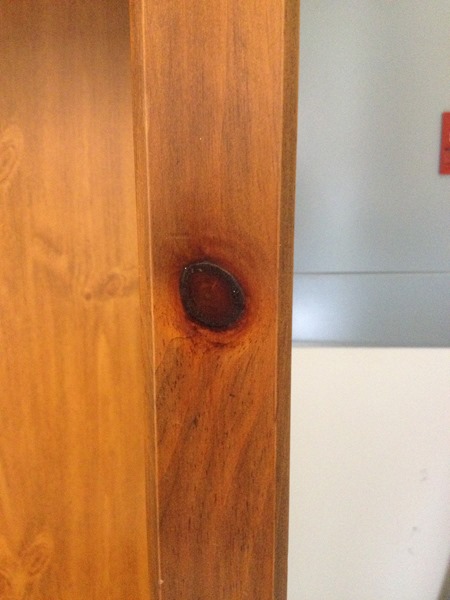
 
photo 1 (8)

So, after everything was filled and dry (since the holes were pretty deep, I waited a whole 24 hours to ensure the filler was completely dry), I went over it all with a fine-grit sanding block to remove the excess and level the surface as well as I could.
 
photo 4 (5)

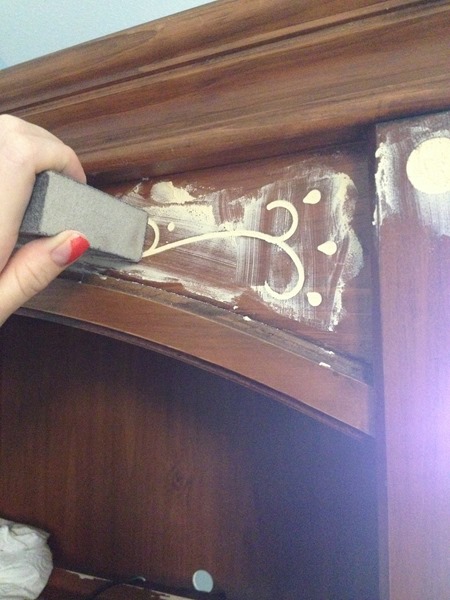
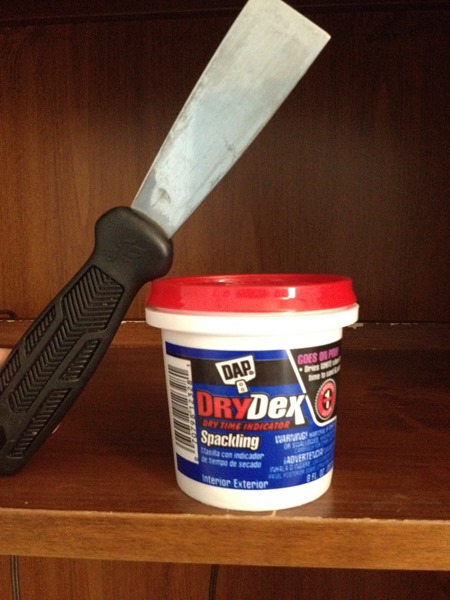
I mentioned above that I like to use spackle in conjuction with wood filler.  Wood filler has fibers in it that make it unable to be sanded down to super smooth surface.  So, using this spackle and a metal putty knife (our plastic putty knife has some tiny divots on the edge so metal was better to get a smoother finish)…
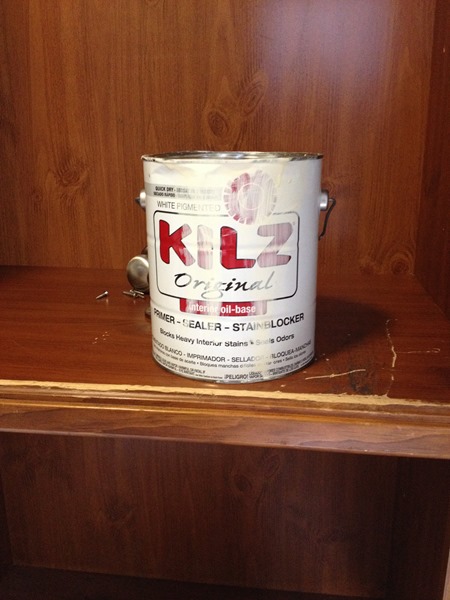

photo 2 (7)
…I went over all the areas I had filled with the wood filler using the same technique, only with spackle.
photo 3 (5)photo 1 (7)       
After that was dry (I spackled in the morning and it was good and dry by late afternoon), I got out the fine-grit sanding block again and sanded everything until it was smooth and level.  After wiping it all down with a damp rag to get rid of any sanding dust, I was ready for paint.
photo 5 (2)

The cabinet front, bottom, and shelf are solid wood; the sides are particle board.  The wood parts had a few large knots which tend to bleed through latex paint (so I’ve read).  photo 5 (1)

To keep them from bleeding through my handiwork, I brushed a thin layer of oil-based primer over them first.
photo 4 (4) 

Once those areas were dry, I primed the rest of the piece with some Kilz primer.  I reminded myself over and over to take pictures of the cabinet primed before I painted but still forgot.  Not a huge deal but just know that when I prime, I just make sure everything is covered.  Primer will probably always be splotchy and that’s ok.  Next up was paint.  It took me three hours on four different nights and naptimes to prime the cabinet so I opted to spray paint the cabinet with its final layer of latex paint.  Not canned spray paint though.  Some good friends of ours offered to let me use their paint sprayer so I used some basic white latex we had on hand (by Olympic).  This
Graco paint sprayer is what I used to spray on the paint.
graco sprayerIt was really cool to be able to borrow it so I could get a feel for how paint sprayers work and whether we should invest in one.  It definitely took me more time to set up and learn how to use it than it did to paint.   However, I apparently have a lot more learning to do because one side of the cabinet turned out really drippy…
 
photo 1 (6)
I either added too much water to my second round of paint or painted too close so next time I’ll have to pay attention to those two things to make sure it doesn’t happen again.

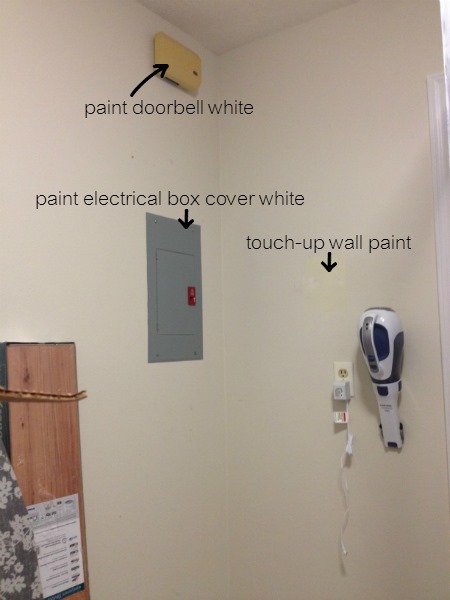
I painted the cabinet outside and while it was drying, there were some things to take care of in its corner:
photo 2 (5)I wanted to paint the doorbell white (like I did our other doorbell), spray paint the electrical box white so that it’d blend in in with the back of the cabinet, and touch up the wall paint where we removed an old key box.
 

To spray paint the electrical box, I simply protected the area around it by taping pages of a magazine (thank you Franciscan Way) to the surrounding wall.
photo 3 (3)

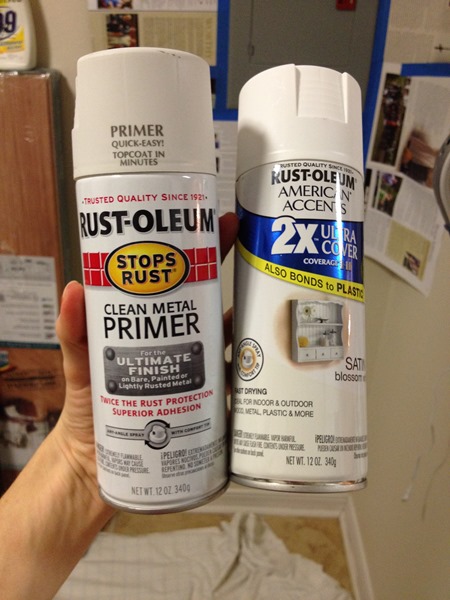
Then I primed it with Rustoleum’s Clean Metal primer and spray painted it white.
photo 4 (3)

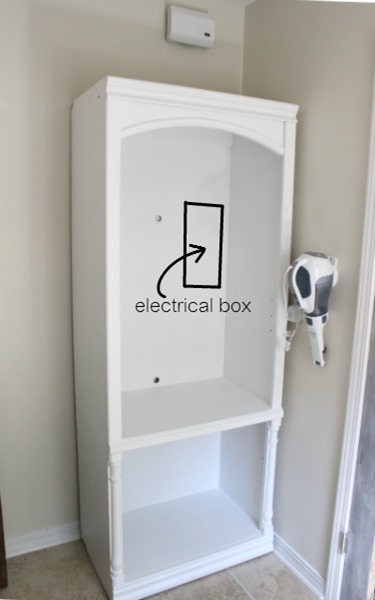
Then in went the cabinet!  We have yet to cut out a hole in the back so that we can access the electrical box without having to pull the entire cabinet out from the wall but so far so good!
 
IMG_5241

Like I said above, we’re not done yet.  There are still a couple more things we want to do before everything gets put back and organinzed and those things started with a bang last night in the form of a DIY fail.  Stay tuned.

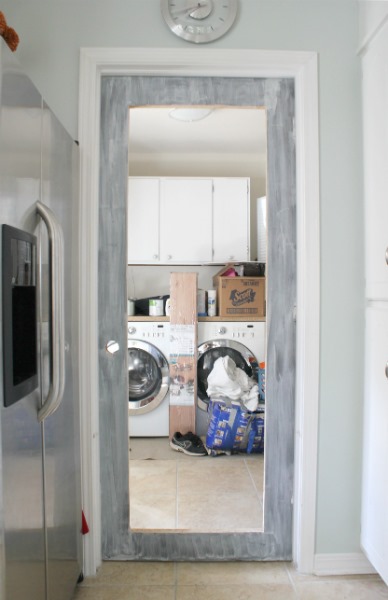
Also, a sneak peek!  The french door leading from the kitchen to the laundry room is becoming a reality…slowly!  We used an old wood door we found at ReStore, cut out the middle (which is now on top of the washer and dryer working as a countertop), and hung it!  I managed to prime it while I primed the cabinet but that’s all the farther we’ve gotten.
 
IMG_5246
We would’ve had it finished a few weeks ago but the glass insert turned out to be more expensive than we thought so we had to postpone in order to save up.  A typical step in the life of budget-ridden folk, I guess.  :)  All the details on how that all went down up to come hopefully soon.

And that’s all she wrote…so far!  We’re moving the kids rooms around today which means that Sebastian is going to his own room and the girls are moving to another.  I’ll be crying out of sadness that they’re getting older and smiling out of happiness that I won’t have to tip-toe around my own room anymore to avoid waking a sleeping boy, all while I move furniture this afternoon.  What are you up to?  Any projects that have been in-progress for quite some time now or are you pretty good at starting and finishing without too much time in between?  Any paint sprayer users out there?  Any secrets or tricks I should know?  Spill ‘em!  I need to make this relationship work!  :)

Have a great Tuesday!