Hellooo Sheena. Take a deep breath and settle down on those hippity-high hopes from here on out. Time ain't crawling like it used to.
Our Entry Way - The Reveal!
Hellooo Sheena. Take a deep breath and settle down on those hippity-high hopes from here on out. Time ain't crawling like it used to.
Crossing My Ts and Dotting My...Lamp
Painting Trim - Tips and Tricks
But, I've picked up a few tips along the way (this is my second time painting alllll the trim in the house after all) that I'll pass on to you in case you're ever staring down the miles of *insert ugly color* trim.
First, a picture of the current sitch in our entry.
Feast your eyes on that painted trim!! The crown molding is hard to spot in pictures but in real life, it shines against the matte ceiling. I can't tell you how happy I am to be done with trim in here and moving on to painting the walls! It's like the icing on the cake!
Back to those tips and tricks though...
Prepping Walls for Paint, Post-Wallpaper
Now looks like this:
Entry Way - Before & After
Anywho, the entry way. Entry ways are one of my favorite rooms in any house. Just like I wrote about a back entrance awhile back, they can make or break first impressions of a house being the spot that's seen first. They can also make or break your mood when you walk in from wherever it is you’ve been.
Here’s what ours looked like before we moved in:
I didn’t take this picture in the brightest part of the day in this room so it was feeling a little dark already and obviously, a pile of boxes doesn’t do much for aesthetics. It was a real Debbie Downer for sure.
But, BUT, look at it now:
Enter
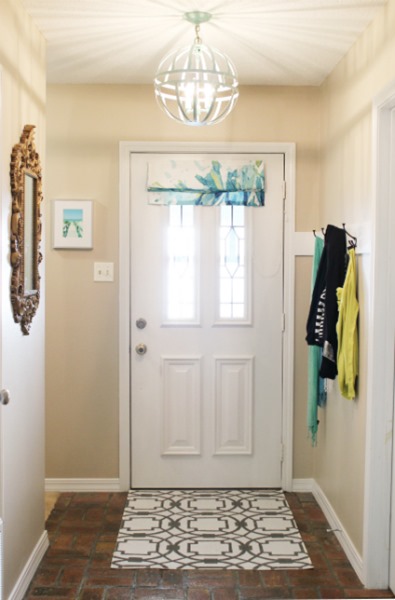
I mentioned in Monday’s post on the kitchen that we might be ‘done’ fiddling with that room. The entry way is another space we might be done fiddling with. Here’s what it looks like as of this afternoon: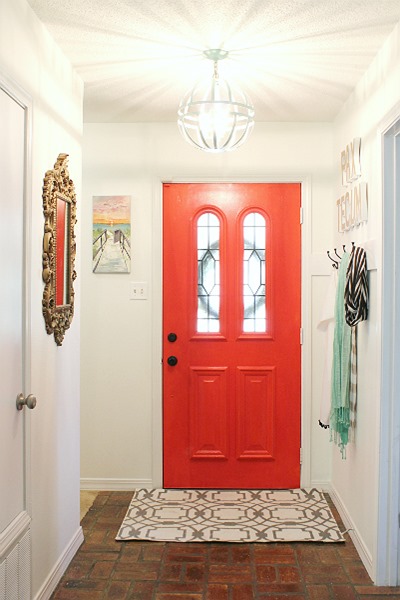
You can get all the details about the rug, chandelier, and wall decor if you head over to our Current Nest page and click on the appropriate links to each, but one thing I haven’t written about yet is the painting by the front door.
I couldn’t get a good picture of it, or I should say, a picture doesn’t do it justice, but our good friend and amazing artist, Jesse, painted it for us.
I should note that she selflessly painted it for us because I asked her to. I know, I have incredible friends. You might remember her because she let me share some of her other talented feats like her faux marble countertops and her captain’s mirror here on the blog.
For the painting, I really wanted something colorful that tied into the bright red door. I also wanted to somehow get a picture I took on our beach vacay last year up in there. This one:
I loved the idea of having two very different doors right next to each other.
So, I found a picture of a sunset I liked on pinterest that had bright red and lots of other colors in it and asked her to meld the two. She did an amazing job, no? It’s so much more amazing in person too. The colors are more vibrant and the texture of the oil paint is nothing a 2D picture can show.
And speaking of 2D pictures, let’s take another one of those fun walks I like to do down memory lane with a few.
Here’s our entry shortly after we moved in, painted the walls, and a threw a few things in to make it functional. 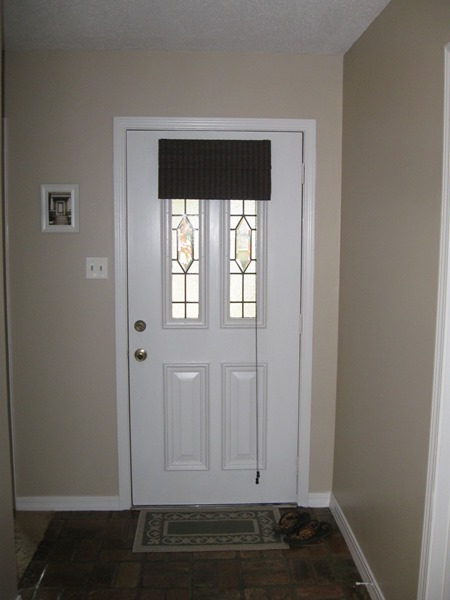
And then I switched out the rug for an equally boring rug and threw a few things up on the walls to make it less boring. Too bad it was still very boring…
Then we added function with the built-in hook system and color with a roman shade made out of a mini-blind.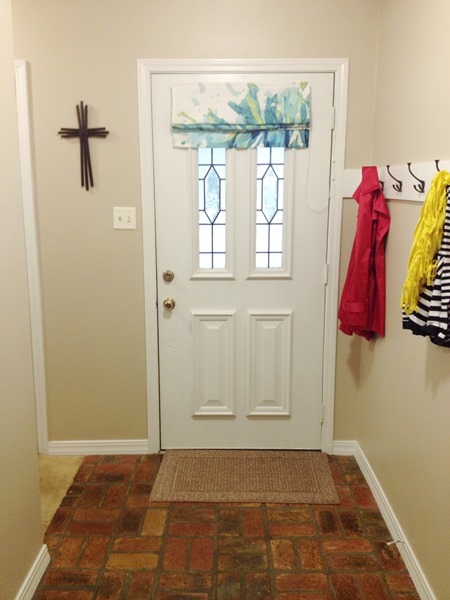
Next came a little more glam with the addition of the metal basket chandelier, the thrifted mirror, and the stenciled rug.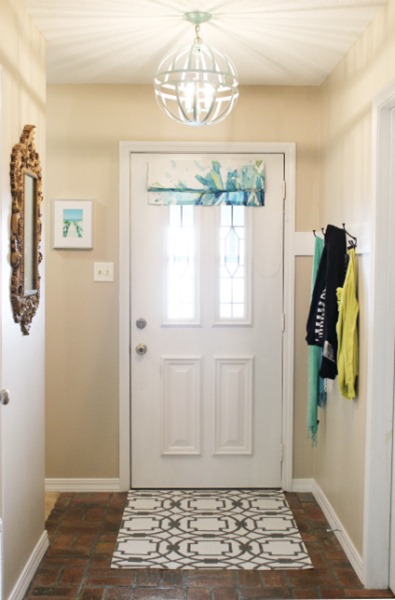
Add some word art and red paint…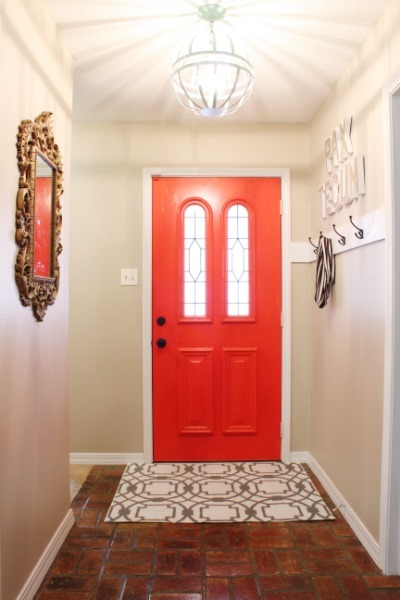
And then some white paint and a super-duper-cool painting and here we are, once again.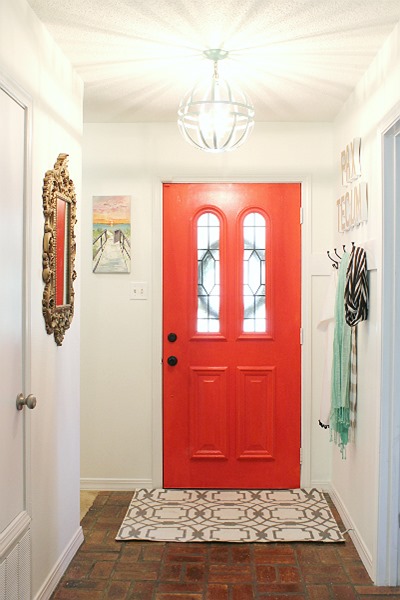
But let’s not stop there! Let’s open Red and step out into the sweltering heat and sky high humidity, shall we?
Here’s what the front door once looked like: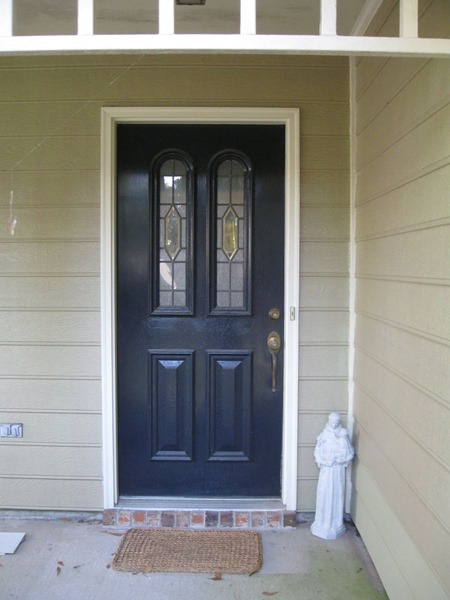
And now, with the addition of a bold color, a homemade tulip wreath, a woven grass rug, and a thrifted planter with gifted plant, we have achieved happy.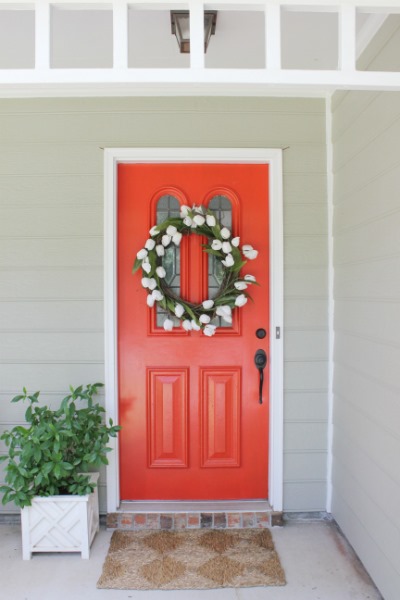
Currently sitting in our attic at this very moment, we have a big ‘ole brass and glass chandelier I found at Goodwill that’s waiting to be painted and hung out here too. Don’t hold your breath though. It’ll be a few months. :)
Turn your head to the left and five years back and we have the porch we so desired when house-hunting way back when.
We painted the entire exterior of our house a few years ago so, thankfully it’s not looking so scary today. 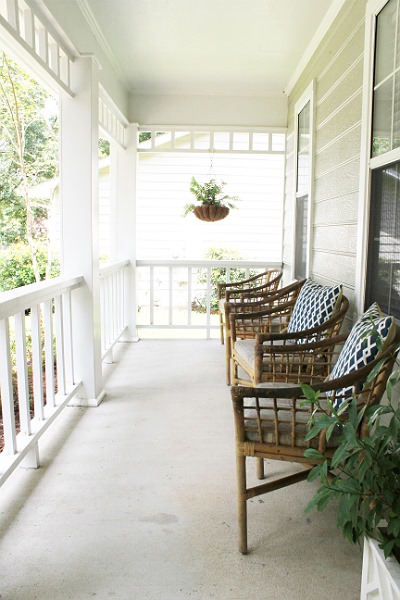 You might remember that I thrifted those bamboo chairs last year and I still have yet to refurbish them. I think I’ll move two out and hunt down a small side table and some more potted plants to live here too. Or maybe leave two chairs and add a swing or a hanging chair? This girl can dream…
And that’s all I have time for as I madly type to finish up while all three kids are slowly awaking from their slumbers and gaining steam. I hope you enjoyed our little time hop as much as I did! And thanks again to Jesse for the entry way’s finishing touch!
Adios!
Peace Out…and In
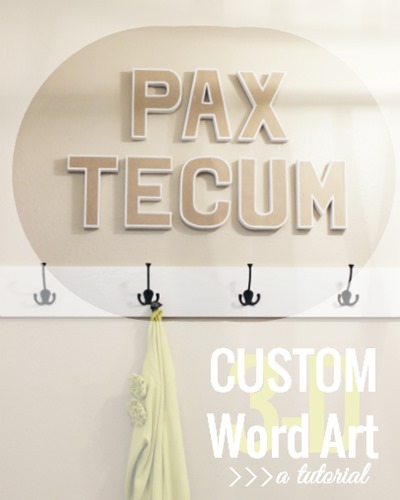
I’ve always had a plan in my noggin’ to have the words “Pax Tecum” somewhere in our entry way. The phrase means “Peace be with you” in Latin. I like the idea of wishing our visitors peace as they enter and leave the main entrance of our home and so a-brainstormin’ I went to figure out how to get those words somewhere around there – a wooden plaque over the door, a framed printable…
On the other side of my brain, I’ve been trying to think of something out of the ordinary that could fill the empty space above the hook system in the entry.
My first thought was to whip up some colorful abstract art but the roman shade has all the abstract that space needs. More picture frames just seems too normal and another mirror or two would just be too much since there’s a mirror on the opposite wall. Two issues; one simple solution. Words + empty space = words in empty space.
You might’ve already guessed that if you saw this picture when I wrote about painting the front door: 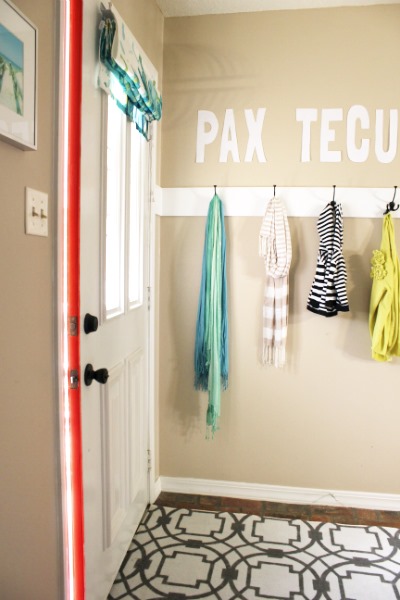 Those letters are simply cut out of computer paper and sticky-tacked up. I wasn’t sure about the size and layout I wanted so we sat around with those hanging for a good month.
The end result looks a tad different: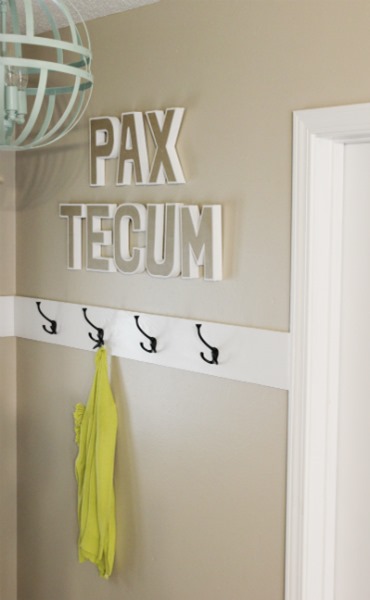
I saw these paper mache letters at JoAnn Fabrics a while ago and thought they’d be perfect for this project only I didn’t know if I should just buy them or attempt to make my own. At $2.99 each they’re not quite as cheap as some DIYed versions could be, but in the end I weighed the number of hours it would take me to DIY them vs. throwing them in a shopping bag and, well, you know, kids, very little free time…buying them won out. But, I waited for a sale ($1 off) and used coupons so in the end I ended up only paying about $1.70 a letter. They also have some huge letters of the same sort that would be amazing monograms anywhere in a home. They’re around $10 ($5 if you can get your fingers on a 50% off coupon!) and I’m thinking maybe the girls’ room could use some. :)
The letters are the color of cardboard (an obvious note) and I actually didn’t mind them sans any sort of paint or paper addition but up against the tan wall in the entry, they were blah. So I pulled out some white primer and spruced them up a bit.
First I painted the edges of each letter. I had to do two coats for full coverage.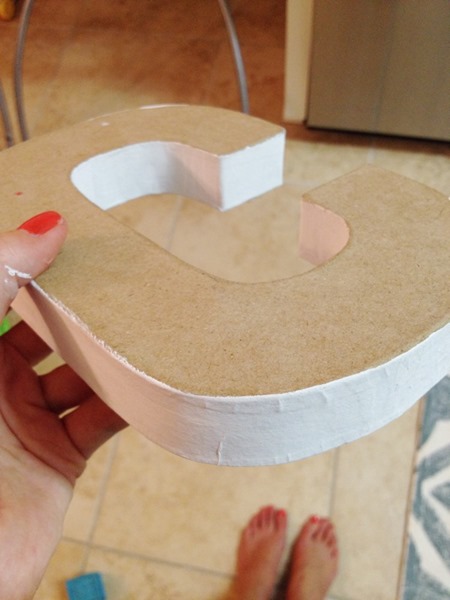
I wanted a thin border around front edges of each letter so I used some painters’ tape to get straight edges. This could definitely be free-handed and parts of the letters, like the curve in the P, had to be free-handed no matter what.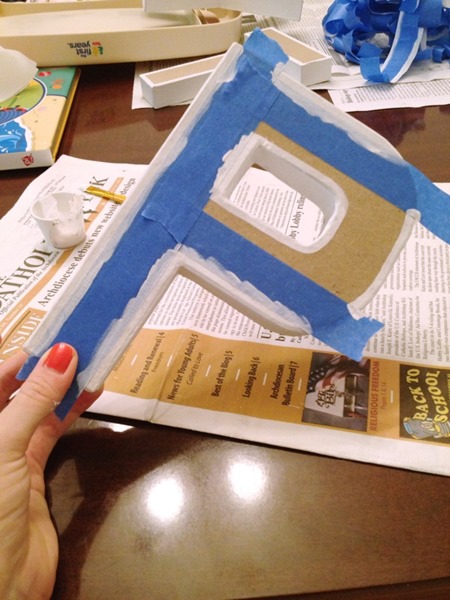
To attach them to the wall I used these Command mounting strips. They’re like velcro.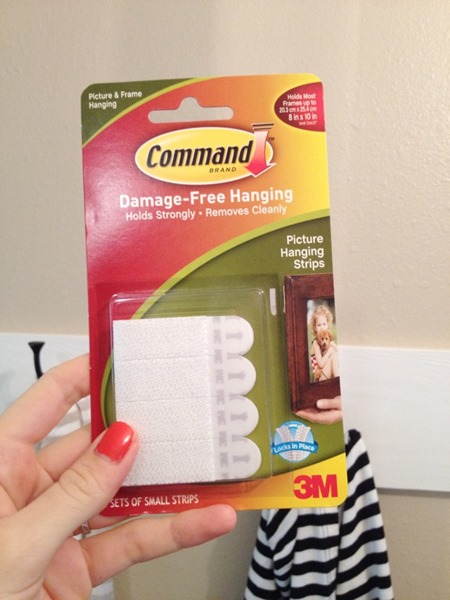
I didn’t realize until I was unpacking these things that there were only four strips vs. the eight I had thought (says it right on the package…face palm). So, I improvised by cutting them in half (vs. running to Walmart with three kids for one little thing).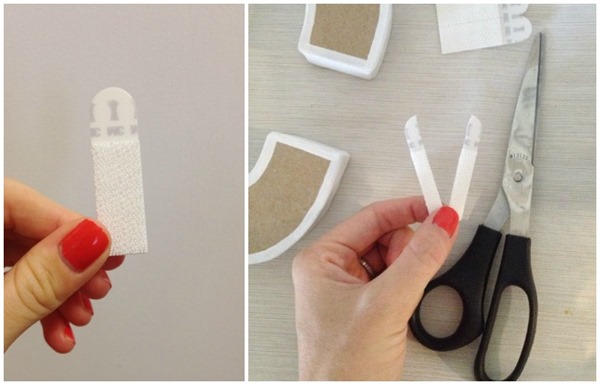
I did a lot of thinking about how to use these strips in the days before I hung the letters, over-thinking that is. In my head my process was to mark with a pencil where the wall strip would go right on the wall, hold the letter up, trace a part of the letter onto the wall…well, let’s just say all this thinking was completely unnecessary. I’d blame it on lack of sleep but everyone in this house has been sleeping through the night so I’ll have to get back to you with another excuse later……….
Ehem, as directed on the package (which I didn’t read until it was go time…heello), I attached one side of the strip to the letter being hung…
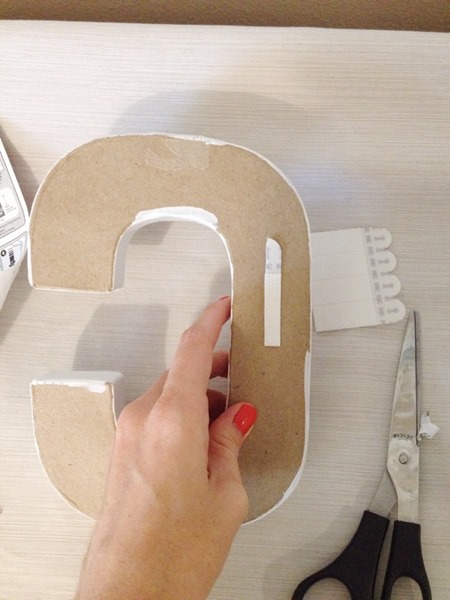
then velcro’ed it’s counterpart to it…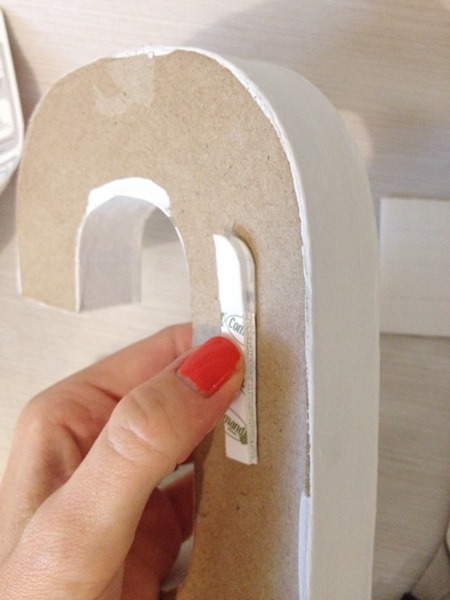
…peeled off the sticky backing to the wall strip, and stuck the letter to the wall. I used our level to make sure all was on the straight and narrow.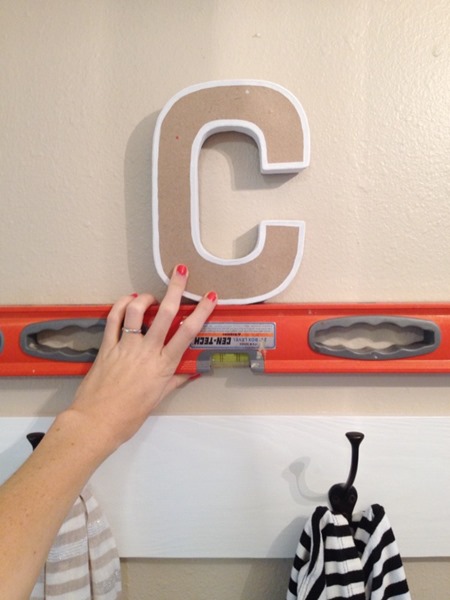
Even with the velcro strips holding them up, the letters still wiggled a bit (maybe because I used halfsies?) and even though no one’s going to be wigglin’ them, I added a couple of pieces of sticky tack to them for added stability. 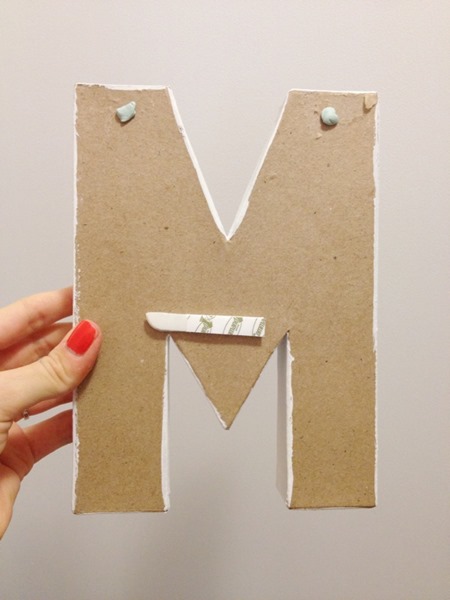
Those letters ain’t goin’ nowhere.
Pax Tecum y’all.
. . .
Go Bold or Go Home
Congratulations Jamie!!!! You guessed it and you’re ten points richer courtesy of my imagination. Our front door is now a bright and bold orangey-red or reddish-orange…oraned, reorange, oranged…you know, I thought since gray + beige = greige and Angelina + Brad = Brangelina, I could surely make something work with orange and red but no-go me is thinking. Back on the color track though, our newly painted front door: 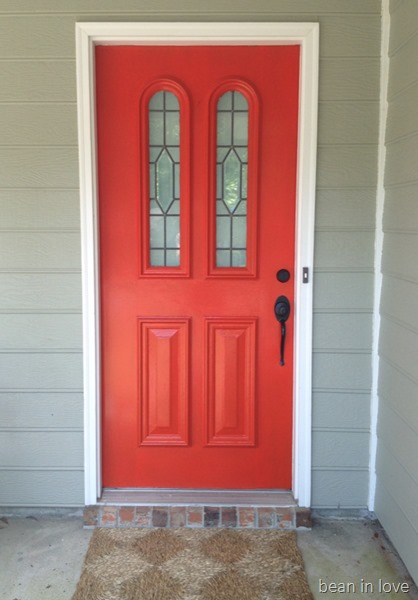
Redange? Hand slice to the neck Sheena. Okay, sorry.
The door, the door, oh yes…the door. Before it was a nice navy but a bubbly navy. For some reason the navy paint had bubbled and I hadn’t noticed just how bad it was until I went to prep it for paint. Look: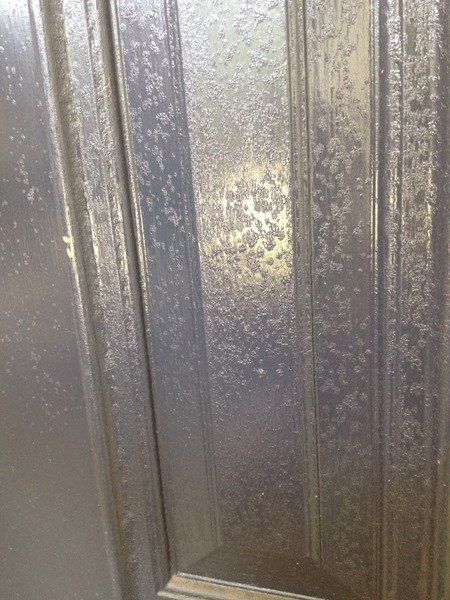
The decorative moldings were the bubbliest and simultaneously the worst/hardest parts to sand which was just great. More on that later.
So, I mentioned in the previous post that when I got the hankering to paint the front door it was because I had to have a bright orared (?) door. So began the month long process of finding that perfect red with a hint of orange. It had to be bright, not dull and not muted but not screaming ‘Nickelodeon’ either. After grabbing a few swatches at Lowe’s one day, I taped them up and left them there for a month so that I could see them in every light God said “Let there be light” to that there ever was…
After much deliberation, the top swatch won out. Until, that is, I went to Home Depot to get the paint mixed (had a gift card I wanted to use) and out of the sea of reds was thee color I had been looking for all along. It’s called Red Hot by Behr. I didn’t even take a swatch home to make sure. I got it mixed right then and there.
So, itching to get that paint color on our door, I started the process of prepping it. Here’s where I almost lost my sanity and definitely threw out my trait of perfectionism. My plan was to lightly sand the areas that weren’t that bubbly and really sand the areas that were, like the moldings. We had a spray can of stripper in our possession that I thought would help that process go a lot faster. Let it be known that I also thought that the decorative moldings on our door were wood moldings. Wrong and wrong. They’re fiberglass. Fiberglass and stripper don’t mix, in fact, stripper eats fiberglass and fiberglass dies. Or maybe it just can’t put up a fight so it just boils in the stripper’s wake. Either way, I totally ruined one corner of one of the decorative moldings because of this critical info I didn’t know. I didn’t know how to fix it so I just painted over it and painted over my perfectionism as well. You can see the damage here: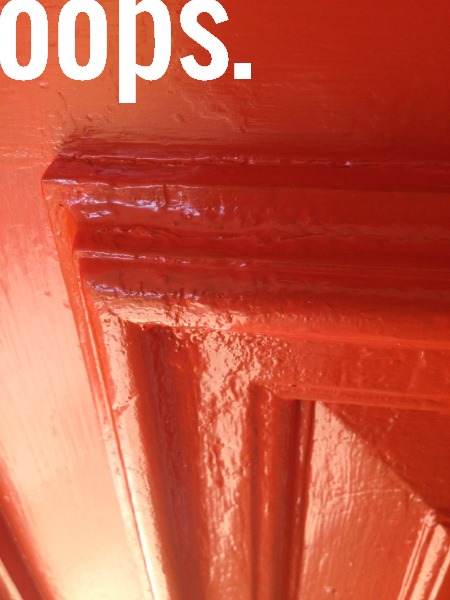 The moral of the story: paint stripper is tough stuff. Make sure you know what you’re stripping before you use it.
Back to the prep though. I learned my lesson, put away the stripper, and forged on in the old-fashioned way – my hand, a piece of medium-grit sandpaper, and a narrow, metal putty knife. It took me literally three hours to get to this point: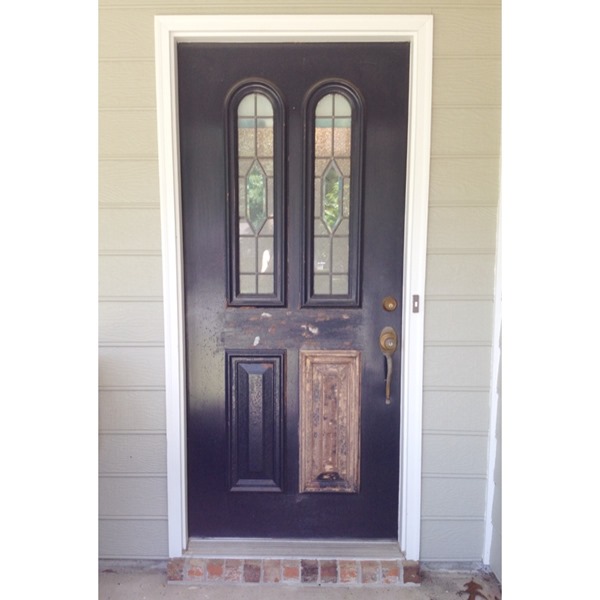
A.k.a. not very far. And it took another two to finally get to the point where I could call it sanded and begin painting. Still, I didn’t sand the door down to the metal and it’s not the smoothest door I’ve ever seen but I’m hoping the bright color detracts from the imperfection? Tell me it does, please…
Next up, paint. I dedicated an entire day to painting the door (two Saturday’s ago while Anthony was home to entertain the tots) and opted to paint it while it was open so I could get it all done in one foul swoop. So, I taped off the doorway with some painters’ plastic to keep the great outdoors at bay…
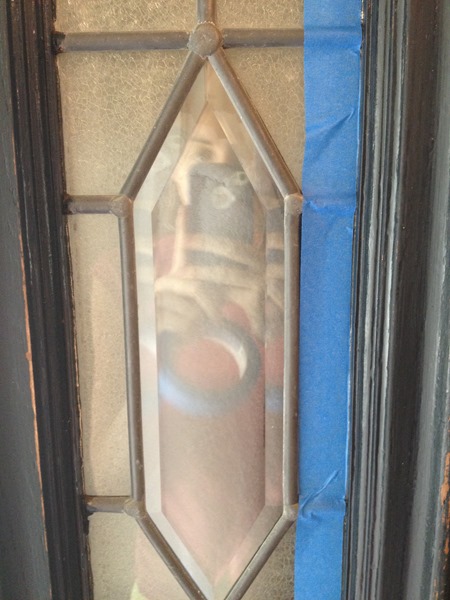 and used our sofa to keep curious toddlers at bay.
Then, because of all the dings I made while scraping off paint with my metal scraper in too big of a hurry, I filled in those little dents with some spackle, let it dry, and sanded it smooth.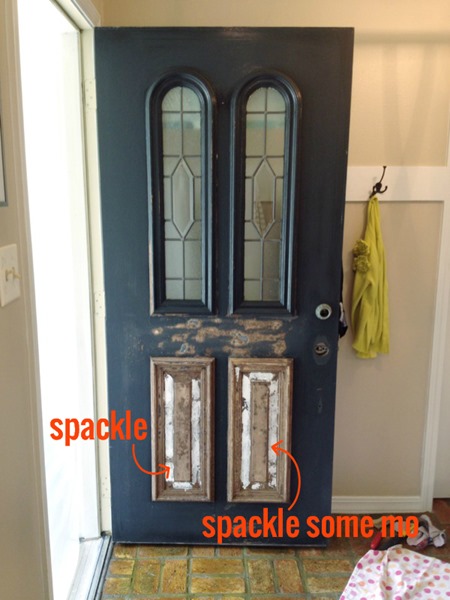
Finally, as you may have spotted via Instagram, I had a nice, long, much needed session with my therapist: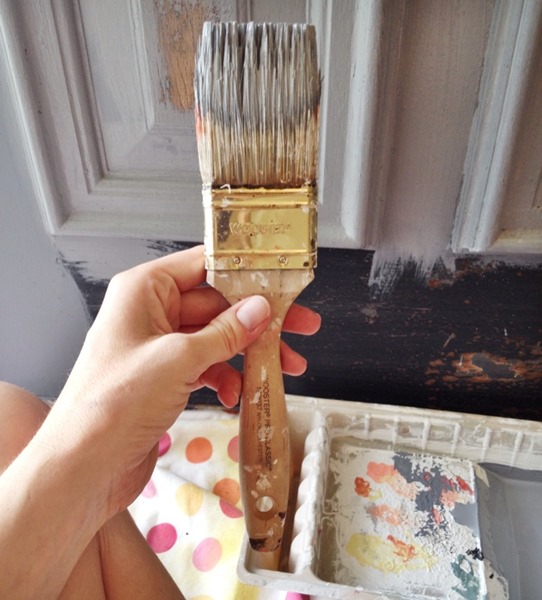
She and I went to town priming the door with some gray-tinted Kilz we had left over from painting the dining room in our first house and it felt glorious. (P.S. I love my Wooster paintbrushes! I’ve had this particular one for five years now and she’s still going strong! However, I wash my brushes right after painting and take really good care of them so I know that plays into it but still, Wooster’s are awesome!)
Enter my second, maybe third helping of frustration involved with this project. I mean, seriously, all I wanted to do was paint our front door – a 24 square foot space! That is, it took me four coats of paint! I expected one maybe two. But four? Ain’t nobody with three kids under two got time fo dat!
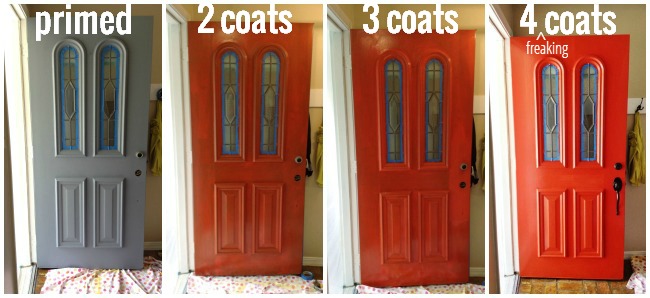
[Oops, didn’t get a ‘1 coat’…must’ve been busy face palming.]
I’m blaming it on the paint. This is my first time using Behr paint and compared to my normal go-to’s (Olympic and Valspar) it was so thick. I used exterior paint so I imagined it’d be a little thicker than the interior stuff but sometimes it felt like I was painting on layers of Elmer’s glue. So annoying. Anyone have else experience with exterior Behr?
So, like I said, four stinkin’ coats and I was done. The door could probably use another but I’m probably the only one who notices and it’s probably my perfectionism slinking back in and talking. One thing I did that I love is paint the inside edge of the door.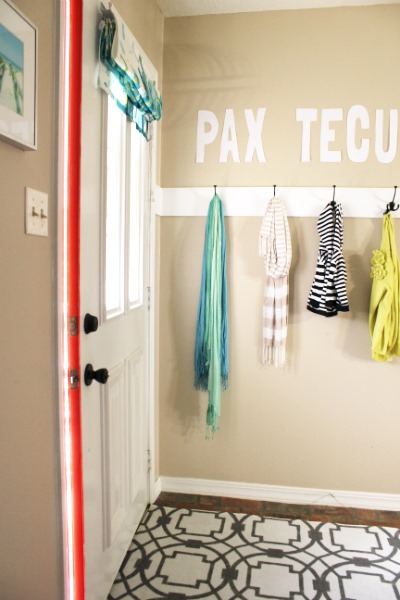
I love that little surprise that awaits just by cracking the door open. I’m tempted to go around and paint the inside edges of all the doors in our house now… :)
I also took the opportunity to spruce up the door hardware by giving it all a coat of oil-rubbed bronze spray paint. After Anthony took everything off the door for me, I first sanded the hardware down just a tad and then I wiped it all off with some liquid deglosser I had left over from our little kitchen overhaul.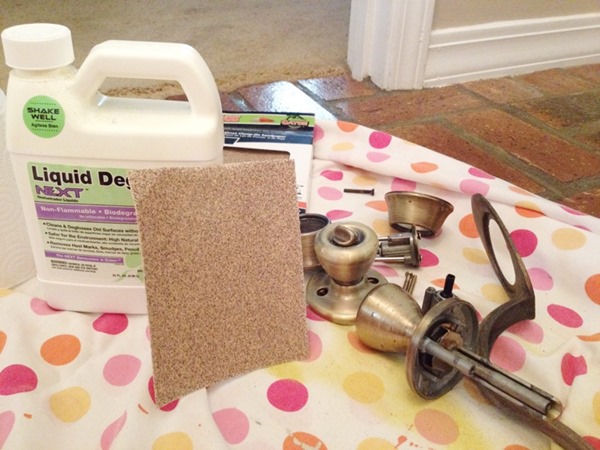
After I taped off all the areas I thought paint shouldn’t touch, I gave all the pieces a thin coat of primer (Rustoleum Clean Metal Primer) and a few thin coats of oil-rubbed bronze (Krylon).
They turned out awesome! I’m hoping they hold up and I’ll be sure to keep you posted!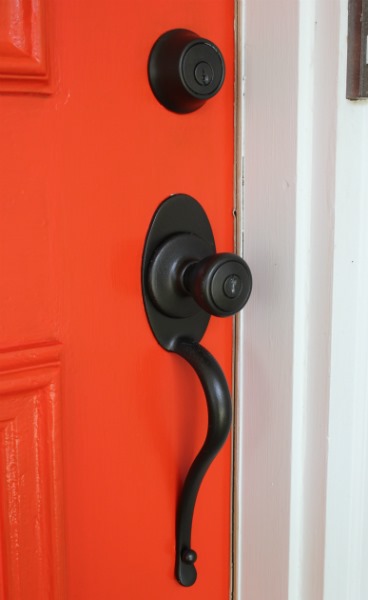
But back to the door itself, I really want to paint the inside now too. The only thing stopping me right now is the fact that I’m not a huge fan of the taupe wall color plus the oragned…yet. I whipped this up in Pixlr just to get an idea of what it’d look like: 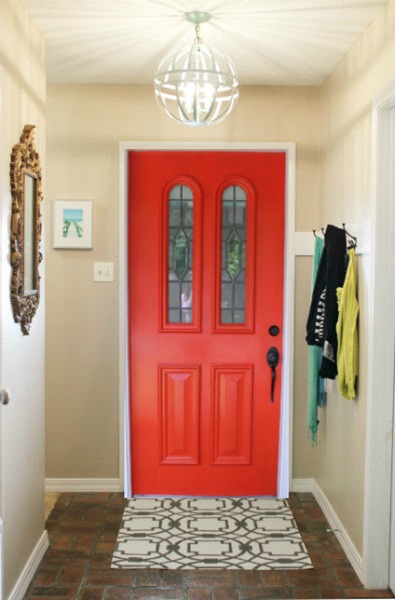
Should I or should I just stick with the white?
While I was at it in Pixlr, I also did a little pretending with my ideal front door. 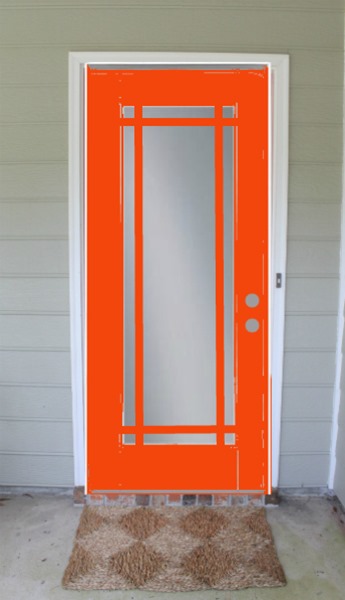 I like our front door but I’d love more light to come through it by way of a larger glass area. But right now it’s just a dream. We actually spotted a glass door just like this at ReStore last year and I really, really, really wanted to get it but it was $120 that we didn’t have to spend on a door at the moment so it’ll be forever ingrained in my mind as the door that got away. :(
I could go on and on with tangents here and there but I’ll stop now. In summary, I painted our front door and I love it and that’s it. I’m also planning on painting the other outside doors on our house but those posts will come another day. :)
So, have you ever painted an entry door? Was it a rough experience like mine or was it easy peasy? More importantly though, what color did you use?! Bright and bold or cool and laid back?
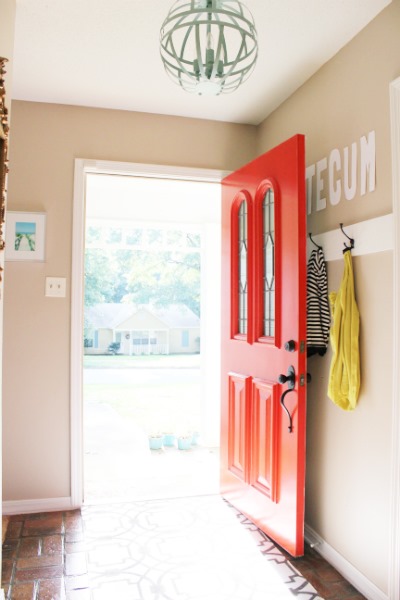
[Love is an open doooooorrr…so sorry, I had to.]


