There's lots of new hardware in the storage room (still thinking I need to come up with a much more charming name...ideas?). Some, like these double hooks*, have been hanging out for awhile, waiting for a fresh coat of paint on the wall to make them shine.
A Mid-Century Wood Dresser Makeover / Restoration
A Four-Legged Nightstand Makeover
Lincoln Cane Chair Makeover
Right before we moved out of our rental last year, we bought these chairs:
Updating an Old Dresser | A Makeover
That’s a Wrap
Today I just want you to tap into your memory store and think back to the year 2016…back to the post in which I introduced this new and improved dresser: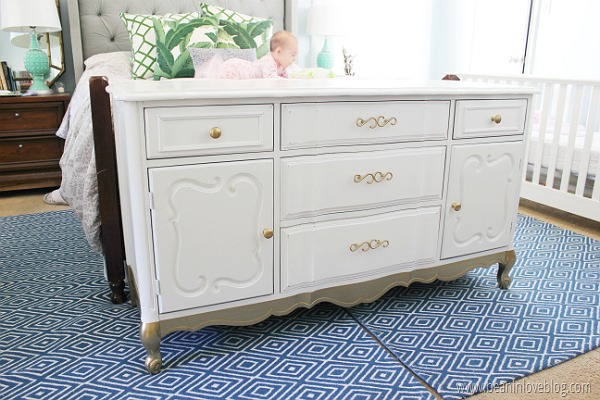
You can get all the details on its new paint job if you click here but if you want to go inside, keep reading. I decided that adding some glam in the form of a gold dip wasn’t enough so I took it one step further and lined all of the drawers with some gold dotted wrapping paper by Sugar Paper that I found at Target for $6. (PS, I found it in the Christmas section but I’m hoping it wasn’t just part of a Christmas collection so that anyone who wants to follow suit can go grab some!) 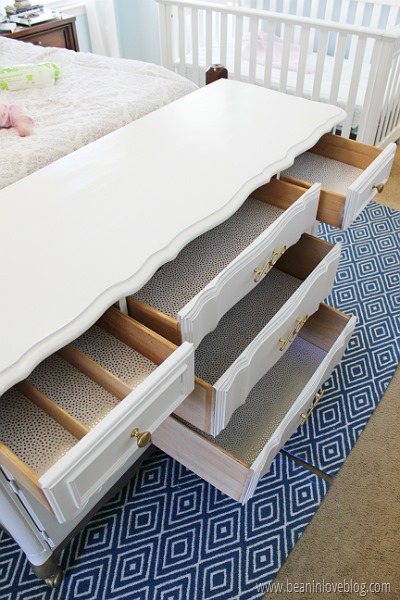
I’ll tell you all about it, the good and the bad, but first, let me tell you how hard Sugar Paper made this decision for me. Their papers are gorgeous!
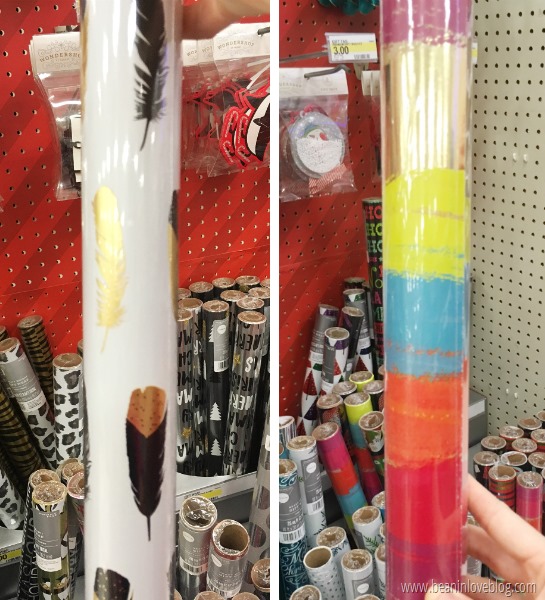
I choose a gold dot because I thought it would appeal to more buyers since I was going to sell the dresser but, if it were my own dresser, I probably would’ve went with the black and gold feathers on the gray backgroud (which, btw, would look amazing in Grace’s dresser) and if I we were keeping the dresser for the girls, I would’ve went with the colorful striped paper on the right. So fun you guys! <3
But there will always be more dresser drawers to line I’m sure, so let’s move on to the how on the current ones.
Measuring
Before you line your drawers with whatever paper you’ve got, you’ll have to measure each drawer to figure out how much paper you’ll need. Stating the obvious, I know. You can grab the old ruler or tape measure and write down measurements or you can do it the easy way. :)
The easy way consists of grabbing a few sheets of computer paper, scrap paper, and/or used coloring book paper and laying it all out inside the drawer so that it overlaps, thereby making a template.
Making sure the paper is covering every square inch of the bottom of the drawer, tape it all together along the seams.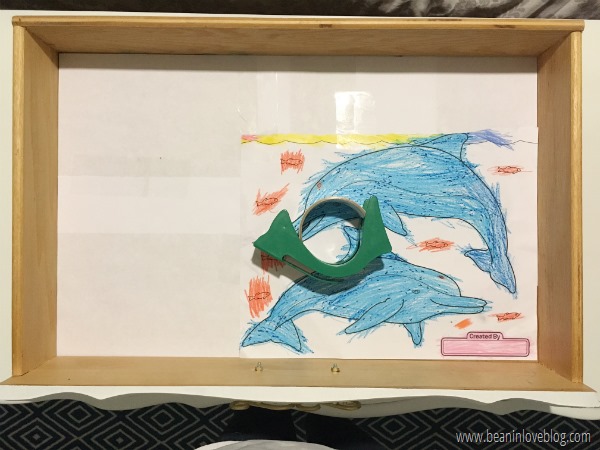
If you have any drawers that are the same size, just make sure the template you just made fits inside all of them. (I made this template inside the top drawer and hooray, it fit inside the next two drawers down too!) 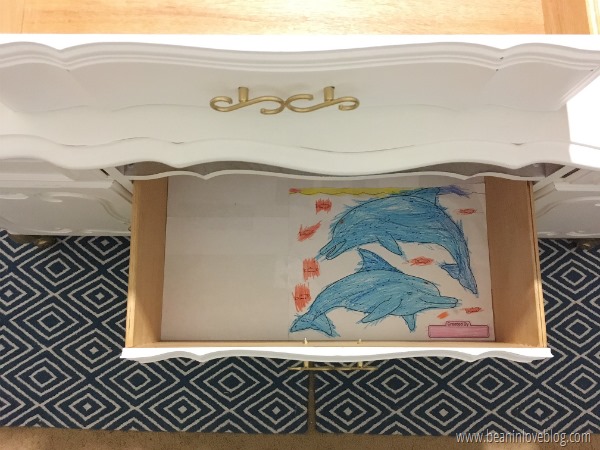 Chances are, it will fit just fine. On the rare occasion that the drawers are a smidge different, just make another template.
So easy, right?
Next, place your template on the wrapping paper, trace, and cut it out. (Note: Turn your template upside down and trace it on the underside of the paper so that there are no pencil/marker marks on the top of the paper that might be seen.)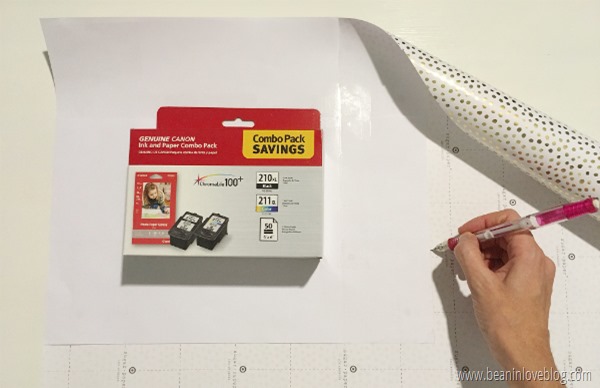 (It helps to place something semi-heavy on top of your template as you trace to keep it from shifting, hence the ink cartridge package.)
Template (if necessary for different-sized drawers), trace, cut and repeat until you have all of the pieces of paper needed.
Papering
As far as adhering the paper to your drawer, there are a few ways to do it. For a more temporary lining, you can just use double-sided tape at six-or-so inch intervals around the perimeter of the drawer to stick it down. Then simply pull it up when you want a change. For a more durable lining, I used some satin modge podge I nabbed on clearance. 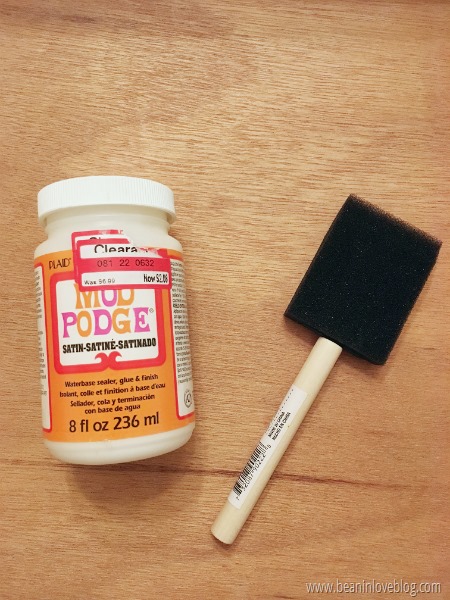 Nevermind the sponge brush though. I took this picture before I started which was also before I realized how much I hate sponge brushes. Just grab a small paintbrush instead.
Ok, here’s where things got a little dicey for me. I’m just telling you so you know what NOT to do.
DON’T brush the modge podge onto the entire bottom of the drawer and then proceed to lay down your template.
It doesn’t matter how much painstaking effort you exert to lay out the paper so that there are no air bubbles and wrinkles, they will probably come. Think they’ll disappear once everything dries? Nope, think again. And then hold back tears as you rip out and waste a beautiful piece of fairly expensive wrapping paper.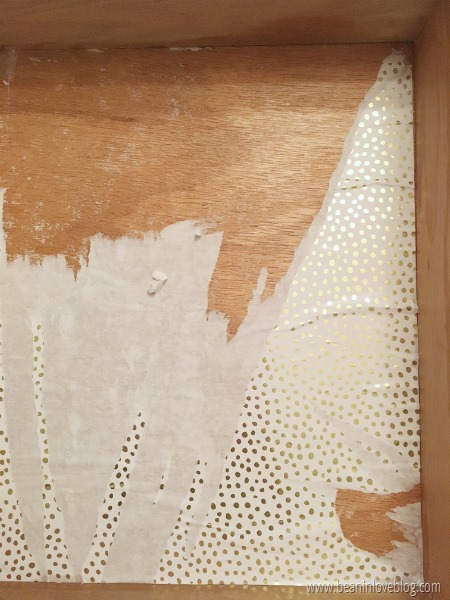
So maybe that’s a little dramatic but I can assure you, the frustration was real.
Now, let’s skip over to the greener grass. Here’s what you SHOULD DO.
Before you even think about laying the paper into the drawer, grab some clear acrylic or laquer spray and spray the back of each piece of paper. This will form a nice barrier between the modge podge and paper; the modge podge won’t saturate the paper causing it to get all soggy and wrinkly.  (Random note: I used this Krylon clear acrylic I had on hand and look how *not*clear it sprayed! It’s a couple of years old so maybe it yellows over time when kept in the can but I guess I was just glad I wasn’t using it to spray something I wanted a clear coat on! I didn’t have much left in this can so I also used some clear spray laquer and that was still clear despite being a couple of years old too. Moral of the story, buy the laquer instead of the acrylic.)
I sprayed all of my pieces of paper one-by-one and then set them out flat to dry. Once they were all dry, I went back to lining the drawers.
First, I laid the piece of paper in the bottom of the drawer so that it was exactly where it needed it to be. Then, to hold it in place, I grabbed the kids’ pencil box (because it was the closest thing) and set it on one half of the paper to hold the whole piece in place. 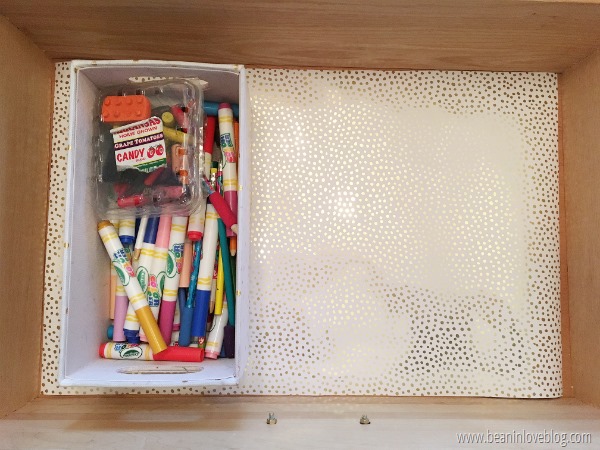
Next, I folded one half of the paper over so that I could brush modge podge onto one half of the drawer bottom.
And then I slowly folded/rolled the paper back down over the modge podge from the middle to the far edge. It helped to grab a washcloth and rub it as I went.
See? No wrinkles!
Once that side was done, I moved the pencil box to the other side and repeated.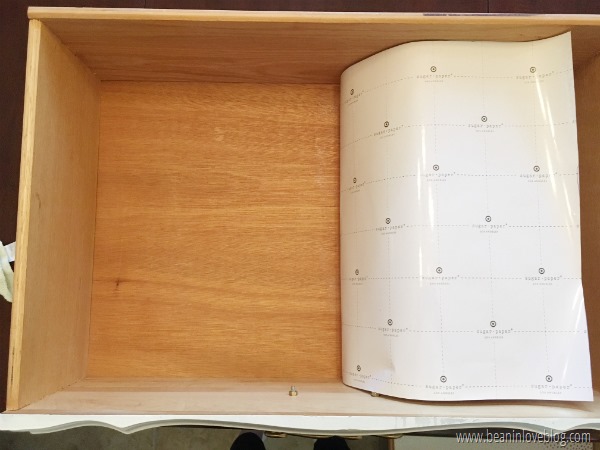
I wish I hand one more hand to catch a video of how I did this but with the washcloth, I just rubbed up and down across the paper as I was laying it down.

I let all of the papered drawers dry overnight and the next day, I went in and brushed a thin layer of modge podge over the top of each piece. I was a little nervous that this would take away the shine of the gold so I held my breath but phew!…once the modge podge dried, the paper looked just like it did pre-modge podge.
I LOVE the added beauty the lined drawers bring to the dresser! It was definitely worth the extra steps to use this paper. It’s the perfect compliment to the dresser’s paint job! If you’re not in the mood to deal with paper to line drawers, check out this post on how to line drawers with fabric!
Also, you might remember that behind the doors on each side of the dresser, there are a couple of shelves that I set storage baskets on.
I made paper templates and cut out wrapping paper to line the shelves with but then I decided against papering them. I was too afraid that, when sliding in the baskets, the paper at the front edge of the shelf might catch on the basket being slid and rip.
But then I had those rectangles of paper laying around. I could’ve saved them to wrap small presents but instead I stuck one inside our to-do list frame…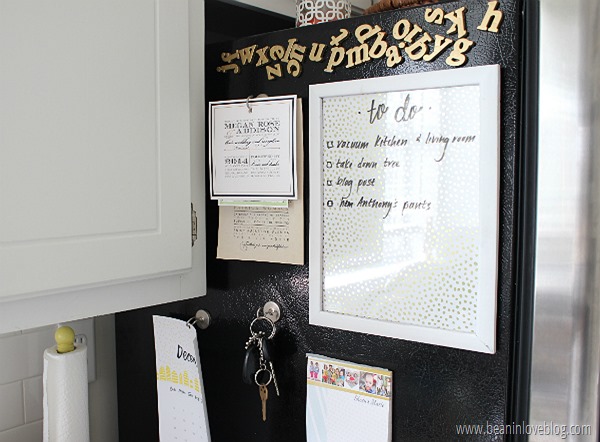
…and the three others went into the three frames hanging in the living room, specifically because I thought they’d be pretty behind the wreaths I hung on each for Christmas.
Which brings me to a tangent…Christmas decor. The weeks leading up to Christmas were super busy here so not much seasonal decorating happened here. :(
The plans I had to make Gianna a stocking never happened. And thankfully she’s too young to care this year anyway.
The rest of the decor was quick and simple.
I had a hankering to hang wreaths on the picture frames mentioned above so I grabbed some faux garland from the dollar store, unwrapped it to ruffle it up a little, and then wrapped it back up into a wreath shape.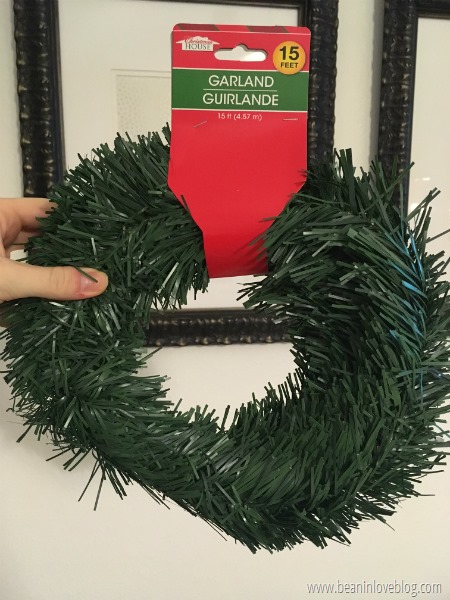
Then I grabbed some red glittery ribbon I also got at the dollar store and hung those wreaths. 
I also used some of the leftover strips of paper to disguise this almost-empty candle as a vase:
I’ve still got a small piece left and I’m thinking I might wrap a book with it. It’s really hard to toss pretty pieces of leftover paper, ya know? Haha!
Anyway, that’s my drawer plus wrapping paper experience. Have you ever lined anything with wrapping paper or any other paper? If so, how’d you come out in the wrinkle department? Maybe it was just me or maybe you had the same problem. And maybe you’ve never lined any drawers but are now eyeing all the dresser in the house. I know I am. ;)
Happy New Year folks! I hope it’s been a good one so far!
*post includes affiliate links
. . .
Acting on a Hutch
This post will show the snail’s pace at which we project these days…in case you’ve ever wondered how we get it all done with four kids in tow. Answer: WE DON’T! Haha…oh *sigh*.
The hutch I’m about to unveil has been around and waiting to be finished for a few months now. Actually, it was part of the yard sale fundraiser that this table was also a part of. One of the teens going on the mission trip painted it and it was up to me to do some slight distressing and stenciling of the back. I didn’t get a before shot but I did find this one Googling, and it’s kind of similar to what ours (ours as in the donated-to-the-fundraising-effort) looked like: 
It was brown all around with that dated gold pattern on the glass doors but thankfully, in really good shape. Perfect for a few coats of paint and a trip to 2016.
We put the teens to work on giving it a light sanding, giving it a coat of white primer, and then going over that with a couple of coats of a creamy white latex. We removed the backing behind the top part of the hutch (it was just held on by several small nails) and, on it and on the back on the inside of the doors, the teens painted on a coat of the leftover chalk paint we used on the table mentioned earlier.
And then that backing sat,
and sat,
and sat,
and sat at our house, waiting for me to stencil it.
And finally, I got around to it one night last week. I used the Beads Allover Stencil from Cutting Edge Stencils (the same stencil I used on an accent wall in the twins’ room last year) and some of that creamy white latex paint to add a unique touch to the hutch.
It’s currently sitting in the youth center waiting for a buyer and for sale pictures, I ran around Anthony’s office, trying to find what I could stage her shelves with. I didn’t have many options, as you can tell but either way, it was a fun challenge.
The stencil goes horizontally but actually I meant to paint it on vertically. We sort of guessed on which way the backing went on while it was sitting at our house, miles from its counterpart hutch and our guess was wrong. But it’s okay because we were both pleasantly surprised at how good it looked going the “wrong” way. But really, with a stencil this pretty, there’s probably no wrong way anyway. :)
The mission trip is done and over this year so the proceeds from this hutch will go towards the trip next summer. One of the coffee tables I’m working on turning into a tufted bench is also a part of the fundraiser so you’ll see that finished on the blog in approx. three months. Ha! Slow and steady does not win the race folks but as long as what you’ve got looks better than what you had, hopefully no one will notice. ![]()
Headboard Retrofit
Annnnnd we’re back with the last step in the making of our new, luxe headboard. Get all the details on the tufting here and see how we made the arms here. Pretend that it hasn’t taken me weeks to pound all these out for you and we’ll be well on our way to a harmonious and constructive blogger/reader relationship based on mutual trust and understanding. ;)
Right after we got hitched, we made our way down the road from our new house to our favorite thrift store in Steubenville, Ohio where we found and purchased a new-to-us bedroom set. We paid $100 for the solid wood four-post bed, long dresser, and tall dresser. It wasn’t exactly the style I would’ve picked up new at the store but we needed something and our teeny, newlywed budget loved this set.
I know it’s hard to see the entire thing with all those pillows in the way but here’s what the bed used to look like and what it looks like now after we retrofit the new headboard right over the old:
“How?”, you might ask. Well, let me tell you. Quick though because all the kids are apt to wake up in the next half hour.
The posts on the bed simply screw on and off so, off they came. 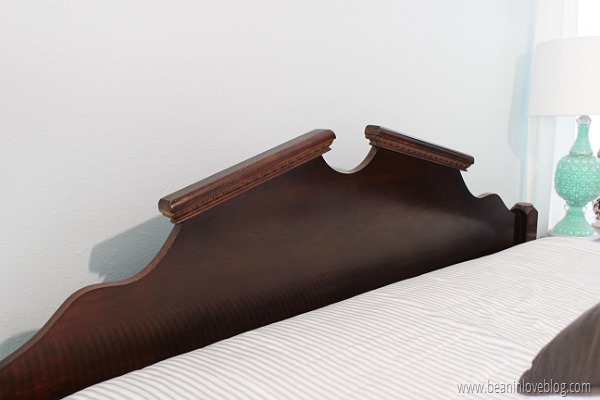
Next we had to remove those two pieces of trim at the top of the headboard. If they hadn’t been as bulky and thick as they were, we probably could’ve left them there but, alas, they had to go or the new headboard wouldn’t have fit in between the mattress and old headboard. I thought it’d be as easy as removing the three screws holding them in…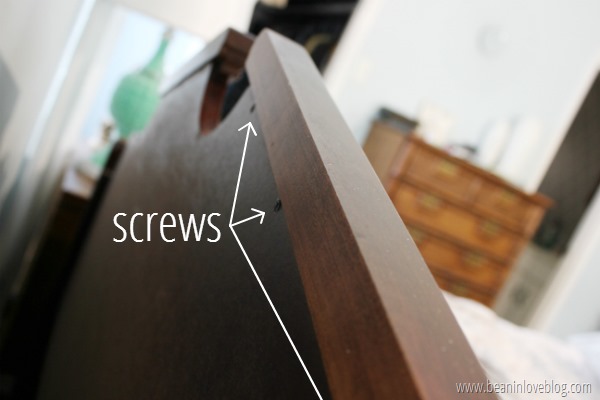
…but once the screws were out, I still couldn’t get them off because they were also glued on. In came Anthony and his hammer to the rescue with a few solid taps and that brought us to the new blank slate.
Pan to the new headboard…
Before attaching it to the old headboard, we attached the arms. Along the back of the plywood we used to make the headboard, we had to place a few boards – two 1 x 4s on the top 1/3 of each side, a 1 x 4 close to the bottom, and a 1 x 4 plus a 2 x 4 along the entire top.
Those boards needed to be there, not only for extra support for the plywood but also so that the screws that would attach the arms had a place to sink into. The top of the headboard had to be extra thick so that it sat flush at the back with the arms, which were extra deep in order to completely cover the existing bed posts.
In order to attach the new we had to construct it so that it, in a sense, slid right over the old headboard. Screws would be placed through the arms into the side posts of the old headboard and from the back of the old headboard into the 1 x 4 along the back of the new. 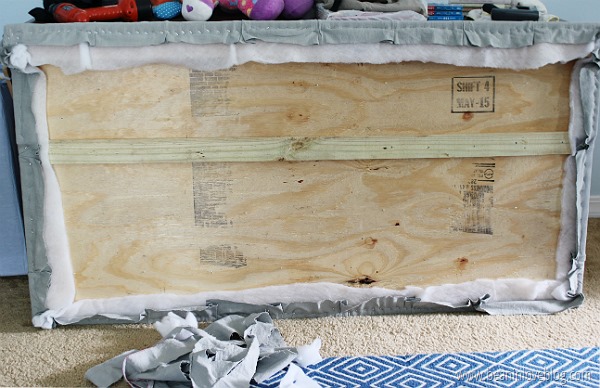
And then we realized shortly before we went to install it that we (ok, I) mismeasured and that the 1 x 4 across the middle-back needed to be moved down so that it was between the old and new headboards. My. Bad. #pregnancybrain
Then it was up and at ‘em as Anthony and a friend slipped the new over the old. It sounds super easy but really, we didn’t realize how heavy the entire headboard was being that it was solid wood and so when I write they “slipped” the headboard on, what I really mean it that they heaved it on. They pulled the entire bed out from the wall and one held the tufted back while the other attached the arms.
Here it is on but unsecured; just standing on it’s own between the mattress and old headboard:
To give you an idea of how it slipped over the old headboard, here’s the old just prior…
…and here’s a mock-up of how the new fits on: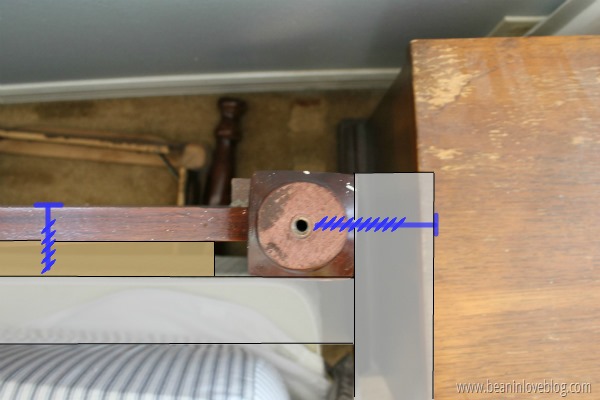
Three screws were placed into the back of the old headboard straight into that 1 x 4 spanning the lower back of the new headboard and then Anthony put a couple of screws through the side of the legs into the posts of the old bed frame.
Here is the view from the back:

See how the arms extend back past the plywood in order to cover the posts? That might help explain why we needed to add the 2 x 4 along the top of the new headboard – so that the back of the arms would be flush with the top back of the headboard.
I think McGyver would be proud, don’t you?
The entire headboard cost us around $100 to make from start to finish. That’s not including the tools we used (drill, a friend’s jigsaw to make the curves at the top of the arms, and a measuring tape) nor does it include the foam since that was given to us. I could be a tad biased but the quality of this headboard would probably make it over $1000 retail so I’m throwing confetti over what we did (and didn’t) spend. Oh what a little vision and elbow grease can achieve, no?
 (Sources: the sheets and duvet are both originally from Target but found at Dirt Cheap ($28 altogether), the lamps are updated thrift store finds, the euro pillows are down-filled, West Elm scores from a local resale group ($12 for both) and their covers I recently made along with the matching shades, the square decorative pillows actually belong in the living room, the small lumbar pillow was a thrift store find but originally from Target, and the faux bamboo mirror was a resale group find.)
I’ve conked out at the nursing wheel a bajillion times during these midnight feedings and I blame it all on the softness of what’s behind my head these days in our new headboard. Also, it’s funny how much a luxe headboard will do to a room – it makes even the messiest moments look incredible. Our bed is the home of the contents of the laundry basket waiting to be folded and with the headboard in the background, the piles of clothes look just fab.
Anyway, this is the last you’ll hear of the headboard but probably not the last you’ll see of it. I still love it so much I take trips to our bedroom door just so I can peek in on it. I can’t wait to gussy up those nightstands and figure out some wall decor to compliment it but something tells me I’ll have to wait until we’re well out of the newborn stage.
So, retrofitting. It’s an awesome way to take what you already have and turn it into something else. What have you retrofit? I know there are some of you who have genius ideas that need to be unleashed! Go ahead! The comment section is open! :)
. . .
We are skimming right past summer and into fall and, for us, that means back into a routine of sorts and hopefully more consistent blogging. This summer was crazy busy with Anthony being gone a lot for youth group trips and then a week-long family vacation with my extended family and, oh yeah, we added another human to the fam bam. So I guess I should rephrase and say it’s been busy with a capital B. But, that’s how I like it. It’s better than boredom. Am I right? ;)


