Showing posts with label Countertops. Show all posts

DIY Concrete Countertops - Prep & Pour

Last year, I wrote a post all about our kitchen plans and in that post I mentioned concrete countertops were on the docket.  Well, here we are, many moons later excitedly crossing that off our list.  And boy, are we glad we can.  What. A. Process. it's been.

The kitchen isn't finished yet - we still have more painting and floors to tackle - but it's gotten to the point where it's skipped right on over the dated to modern line and our new countertops have a huge part to play in that.  


Here's where we started three long years ago:

I painted the cabinets a few months ago and I know that really helps up the ante too.  A post on those will come but today, I'm going to share the beginnings of how we prepped the kitchen for those new counters and poured them in place.  I was going to write a whole big post on the prep, the pour, and the finishing but just adding photos was a bajillion pages so we'll split it up so you can chew it all without choking. 

DIY Plywood Countertop

The laundry room.  The phrase doesn’t exactly bring up feelings of love and longing, does it?  No, for most it hearkens feelings of being buried in mountains of cotton and polyester and lost in seas of unmatched socks.  Or maybe it’s the monotony of it all that comes up – wash this, fold it, put it away, and two days later, there it is again.  Times that by a hundred and repeat it by a thousand and four and you’ve piled a nice slice of semi-despair onto your plate.  And maybe you’re one of those people who doesn’t mind doing laundry (which also means you probably don’t have kids) so I guess maybe you can’t relate and that’s ok.  Personally, I’d rather do laundry than dishes so I guess I’ll keep my cup half full with that.  But, there’s hope.  We have recently discovered that a pretty laundry space makes doing laundry a little, a little less of a chore.  You don’t even have to spend a lot to spruce up your space.  Last weekend we crossed off something that’s been our our to-do list for years – crafting a new wood countertop to be placed over the washer and dryer.  We love how it turned out and we’ve been shaking our heads at how long we waited to do it because of how easy it was.  Of course I typed up all the details for ya in case you want to make one of your very own.

Before we pull up to the new top though, let’s do a little refresher.  Here’s the laundry corner of our laundry room, sans any sort of countertop:
IMG_2378

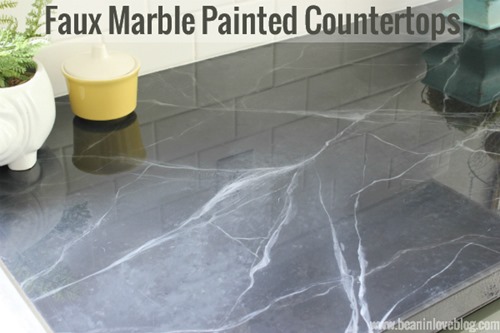
Faux Marble Countertops

So I have this friend.  Her name is Jesse.  She’s really awesome.  I might’ve mentioned her before…like here and here.  Before we were “friends”, I used to see her at church and I thought “that girl is so pretty.”  Case in point (don’t kill me Jesse!):

jesse 
[This is around about when we first met...and this pic was totally stolen from Facebook.]
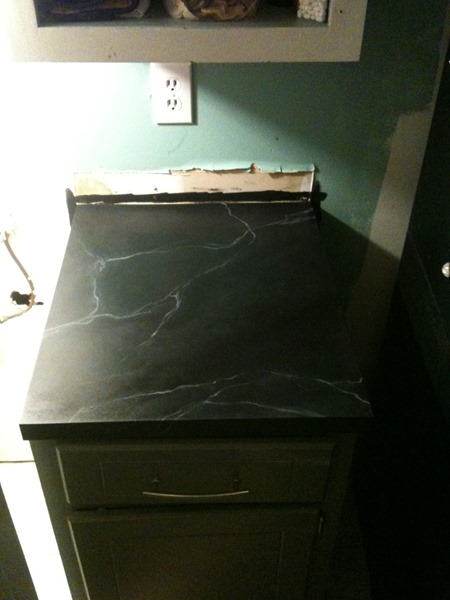
  She has this amazing short hair that only a few people can pull off which automatically makes you really cool and a semi-shy person like me very in awe and slightly intimidated, not wanting to risk a “Hi, I’m Sheena!” for fear that I could creep her out.  Thankfully, we started talking one night whilst our husbands had a meeting together and a budding friendship began.  She’s an avid DIY-er like me and this is the story of her kitchen countertops, previously (and technically, still) laminate gone marble of the faux variety.
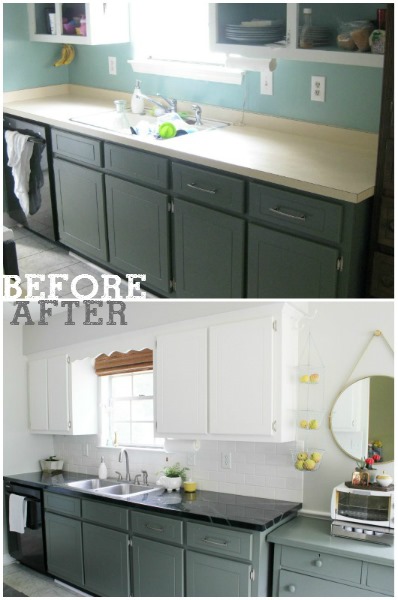
 
 
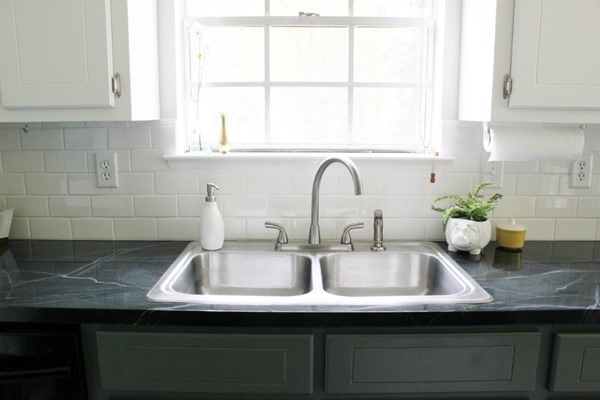
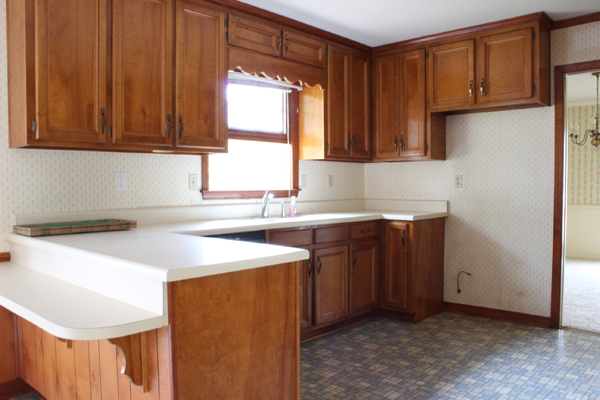
before & after - jjs kitchen 

You can see her whole kitchen transformation
here but today, we’re focusing on those gorgeous countertops.  As you can see from the ‘before’ photo, her tops used to be a not-so-wonderful shade of boring cream with a matching backsplash.  Before painting, Jesse ripped off the backsplash, saying hasta la vista for good.  Then she gave the countertops a light sanding and rolled on two coats of Zinsser primer with a foam roller.  When that was dry, she rolled on a dark charcoal latex paint as her base color.
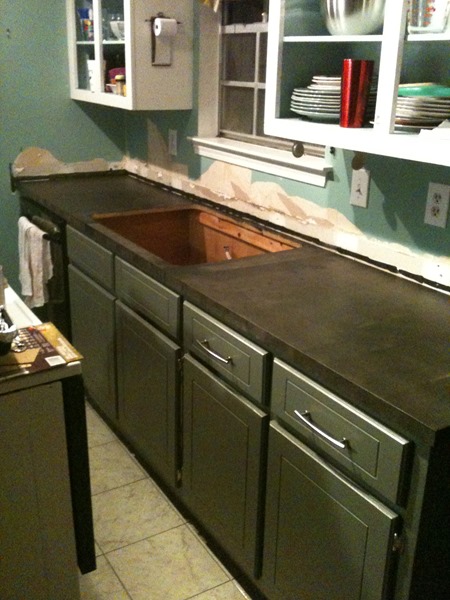
 
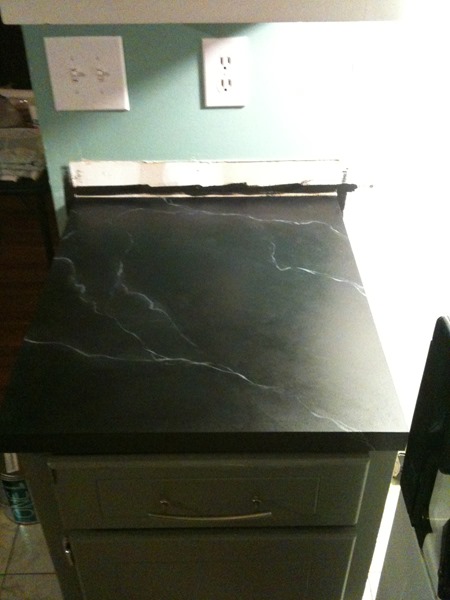
2014-03-25 20.47.39

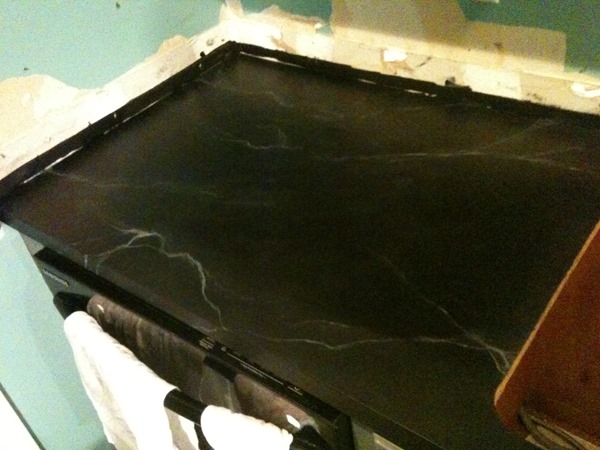
To achieve the faux marble look, she followed this tutorial by Danika Herrick at Gorgeous Shiny Things.  For the veining, Jesse used Folk Art acrylic paint (black, white, and a few shades of gray) she got at Walmart and added Floetrol to it to extend it’s drying time. 
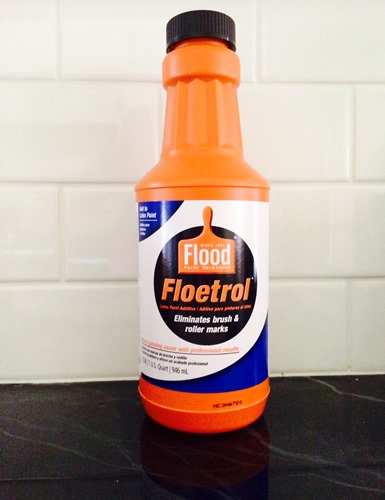
photo (6)
This was a really important step.  Acrylic paint tends to dry really fast so by adding the Floetrol, she had more time to work with it, change parts she didn’t like, move it around more, etc…

Here are some in-process shots:  2014-03-26 20.09.59
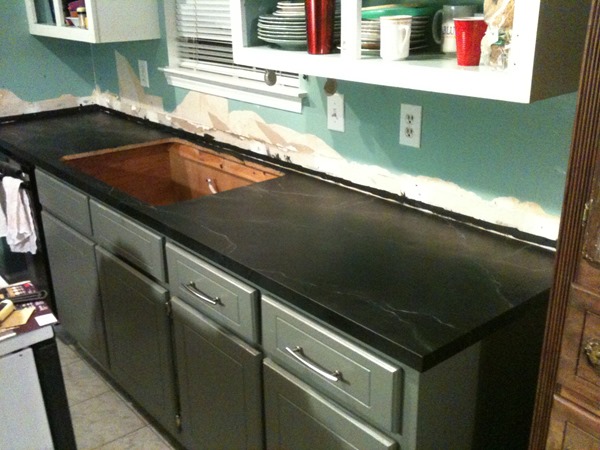
2014-03-26 20.09.10 

2014-03-26 20.11.17

2014-03-26 20.12.12

After all the marbling was done and dry, Jesse poured EnviroTex Lite over all the counters to seal them and add that amazing shine.
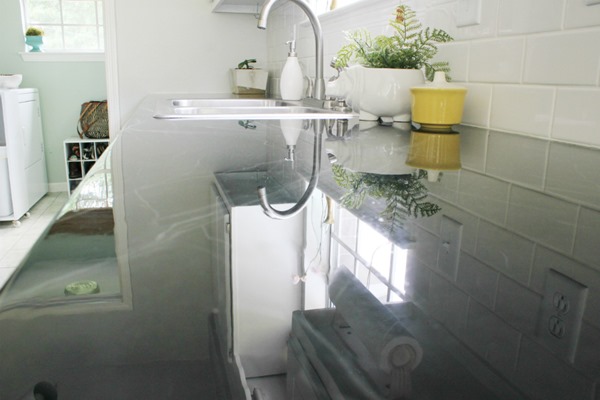
 
IMG_5041

Here’s Jesse to explain that part:

Let’s talk Envirotex Lite. This stuff is sticky & messy, kinda like tree sap, but oilier & more fluid. I recommend having a partner, a timer, lots of disposable stir sticks, foam brushes, latex gloves, disposable mixing containers, and lots of newspaper lying around to set sticky items on. The directions recommend using a small piece of stiff paper to facilitate the spreading of the epoxy once it is poured. I’d recommend a small piece of stiff plastic instead. Paper quickly soaks up the epoxy & becomes flimsy & useless.

First, I spread newspaper on the floor & taped it over the lower cabinets, under the countertop ledge to catch drips.  I still got a couple of drips on the cabinets - do your prep work.  It makes the process so much easier, especially once the stuff starts dripping everywhere!

What I did wrong:  I started with the largest counter space (2x6) & didn’t mix enough epoxy to cover the whole thing. So, instead of letting it self-level, I was trying to stretch it too thin (which left it uneven & drying too fast), spreading with a piece of floppy paper (did not work), then mixing another batch as fast as I could to cover all the bad spots. When I poured the new mixture next to the partly dry mixture, it created striations in the final effect, and slight ridges. Also, since I was dealing with a limited amount of epoxy, it wasn’t dripping over the edges in abundance, so it was harder to coat them. I think one 32 oz. size of epoxy is good for a 2x4 space.

Lesson:  Start with a small area (2x2) first, to get the feel of the stuff. Also—don’t panic! You have more working time than you think to push it where it needs to go - just make sure you’ve mixed enough!

To do it right, pour your epoxy on your space.  I poured in a spiral, so it was already over the whole space.  Hand off the empty container to your partner & get your spreader in one hand and a foam brush in the other.  Then, just move it around with your plastic spreader until there are no dry spots. You want it thick so don’t scrape it across the counter - more like skim over the top.  As it drips over the edges, try to catch the drips with the foam brush & spread it sideways to cover the counter edges.  The edges will not be as thick & pretty as the top surface, just make sure there are no dry spots.  As the epoxy dries, you can wipe/scrape off the drips from under the edge.

Ideally, I would have set up something over the counters to help keep dust from settling into the drying epoxy, but I didn’t want the hassle.  As it got tacky, I got a straight pin & picked out some noticeable dust particles.  I used a hair dryer on low to gently get trapped bubbles out.  This part was like magic!  And I blew my breath onto some particularly stubborn bubbles.

All in all, the epoxy is VERY Forgiving!  It does level itself out over the 3-day drying period.  And any striations/bubbles/dust particles that were left behind only added to the ‘real stone’ effect.  A more mottled design helps hide these thing also.

Daily use:  The epoxy scratches fairly easily - fine shallow scratches. So, don't slide heavy things around on it for fun (like full plastic pitchers of water).  Again, my design is mottled enough that I think these scratches add to the charm. The directions say if you want a satin finish, you can sand the whole surface with superfine sandpaper. I may do that one day if I feel my surface is looking shabby.  Or I could just pour a new coat on and voila, brand new shine!  The epoxy is very hard & durable, yet also remains slightly moveable.  Heavy or sharp items leave indentations in the surface, if left in one place too long.  I keep a pad under my coffee maker, so its little feet don't sink in.  If you get an indentation, don't fret, it will also settle out with time.  And I think it's needless to say, but don't put hot things on it, or chop on it - same as with regular laminate.

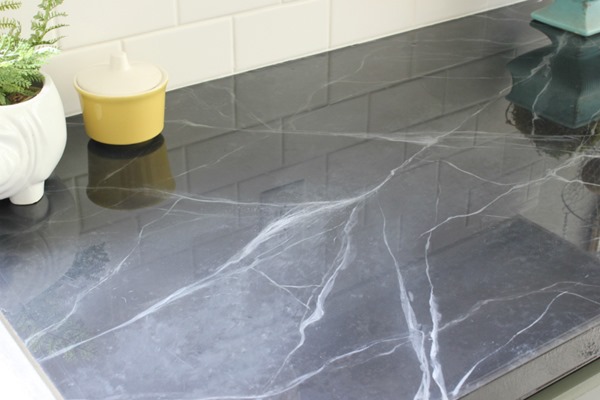
And that’s it!  Look how amazing her countertops look!IMG_5031 
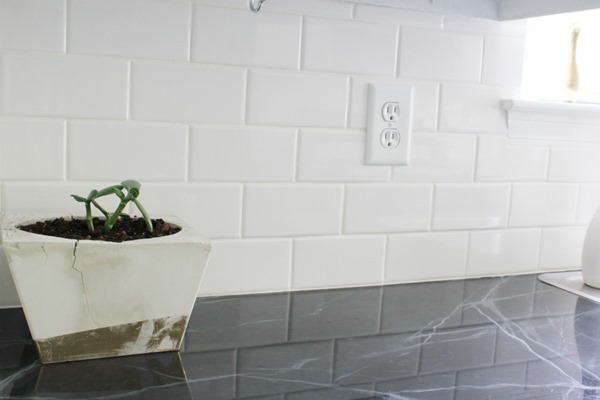
I promise you in person they look even more amazing and unless you’d read this blog post or were some sort of marble connoisseur, you’d never know they weren’t real.IMG_5032
IMG_5037

The countertops in our guest bathroom/kids’ bathroom are a lovely cream laminate and I’m dying to use this technique to paint them…and I will…one of these days! 
guest bathroom - fsbo

So, last but not least, Jesse’s cost breakdown -->
Primer:  $0 (had it)
Base color paint:  $0 (had it)
Acrylic paint:  $5 (Walmart)
Glaze:  $0 (had it)
Floetrol:  $0 (had it)
Brushes and rollers:  $0 (had them)
EnviroTex:  $45 (2 big and 1 small carton with a 40% coupon at Hobby Lobby)
Grand total Jesse spent:  $50
Grand total you’d spend if you had to buy everything:  about $105

If you have any questions about Jesse’s countertops or the process she used to paint them, feel free to leave them in the comments below and I’ll get with her and back to you asap!  If you marble-ize your countertops or anything else, let us know!  We’d love to see!

TGIF!

.           .           .

If you liked it then you shoulda put a (digital) pin in it!
Tutorial on faux marble painted countertops

State of the Painted Countertops

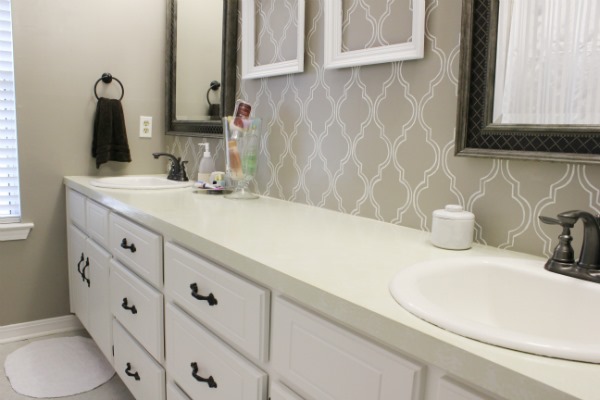
I’ve had a lot of inquiries into the state of the laminate countertops that we painted in our master bath.  Their report card so far, after being the landing place for many a bathroom thing is:  Good.  Not excellent, not bad, just good.

There hasn’t been any peeling or bubbling or fading but I think they’re a little less glossy today than they were the day they were painted three years ago.  They’re not matte by any means though.IMG_5129
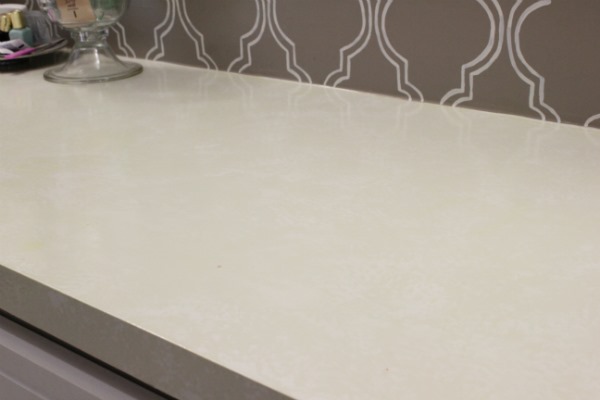
Not a huge deal because they still look good, but just sayin’.

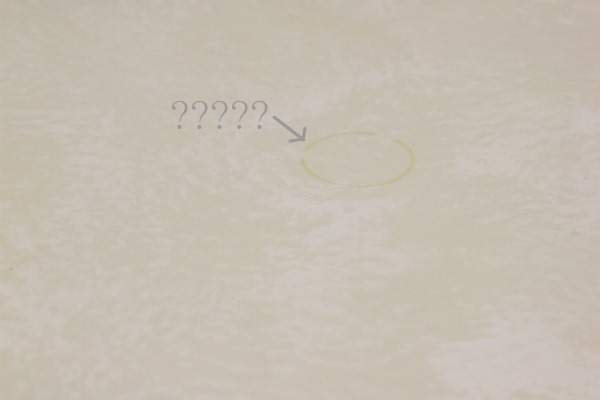
The one downfall about them is that they’ve acquired a few stains here and there, like this mysterious ring that’s in two spots on the countertop.  The only bottle whose bottom matches the size of the ring is my mousse bottle but it’s metal and clean so I’m not sure if that’s the culprit or not but either way, I can’t get the ring out.
 IMG_5130

And then there’s this little nail polish splatter stain:

IMG_5131 
But logic tells me nail polish isn’t nice to any countertop it’s spilled on so, whoops.

Also, there are several teeny tiny divots in the paint/polycrylic where my hot curling iron sits.  The divots were created by the curling iron stand.  They’re barely noticeable because they’re so small and because they’re at the far edge but they’re there.  To keep this from happening, I should just set my iron on a piece of heat resistant something – a tray or piece of fabric – while it’s in use.

On top of all that though, I still love the countertops and I’d definitely paint them again and even have plans to paint the guestroom tops in the future.  So, painting countertops = two thumbs up.  :)
IMG_5137

I’m hoping to get the tutorial and state of Jesse’s painted countertops up soon too!  She used a clear resin top coat vs. the polycrylic I used so the results are a little different.  Have you ever painted countertops?  How are they holding up?

Tops

 We ordered new countertops!  Scuzzy laminate, it's time for you to go!  After waiting and researching and waiting and researching, we actually landed ourselves a good deal (surprise, surprise) at Home Depot.  We found and went with a Staron solid surface that's a tid bit darker than the sample shown on the very left in the pic below.  (I returned the sample before taking a pic...shame, shame.)
 Lucky for us, we snatched up a countertop that was on 'Special Buy' - regularly $42/sq. foot on sale for $37/sq. foot.  On top of that, all of Home Depot's countertops were 10% off plus we persuaded them (easily) to give us an extra 5% if we opened their credit card (to match the deal Lowe's swings around these days).  All of those awesome discounts add up to about $300 in savings!  We can't wait until they're done and in!  Should take two to three weeks.  While we were at it, we scored a new sink (because we can't put an old sink over new countertops, right?...think wine skins people...thank you Jesus)  at a fave discount store around here - Dirt Cheap.  It is/was a $400 stainless steel sink but we got it for 70% off because of one little dent that won't even show once it's in because it's around the undermounted part...if that makes sense.

Anyway, you can be sure we'll have a "they're here and in" post for ya in a few weeks.  As for the current bump situation...

Here 'we' are at 12 weeks.
While we were in our doc's office last week, Anthony asked him what his "professional opinion" was on the sexes of the babes.  He informed us that he usually doesn't give his opinion for a few more weeks but did tell us that the "old wives, whoever and wherever they are, would tell you you've got two girls in there based on their quick heart rates."  Anthony proceeded to put his head on doc's desk...

See you next week!

Making Granite Out of Laminate

Since the beginning of our master bathroom mini-makeover, seen herehere, and here, we've been tossing around ideas in regards to replacing the dated, cream-colored, laminate countertops.  After shopping around and realizing that nothing we could buy in a store would fit in our budget (or be worth the investment in this house, with this market), we thought we were on track to create some concrete countertops, and then Tuscan Accents from Lowe's came into the picture.  Tuscan Accents is a line of paint products made to give your walls a sort of Italian charm using two different kinds of paint - one as a base and one as a top coat with a cool spotty effect achieved by using a stippling brush to dab on paint, waiting for the paint to semi-dry, and then wiping excess paint from the surface.  You can read more about it and see some examples by clicking here.  We, on the other hand, took the idea to our countertops, thinking that we'd conduct a little painting experiment - if it didn't work, we had the concrete to fall back on and if it did, well, we'd be two happy little jumping beans.  :)

When we decided to paint our tops, we actually toyed with two different techniques before we chose the Tuscan Accents route.  The other idea was to use a spray paint with a stone-looking effect.  So, to decide which idea would win, I tried out both on a piece of backsplash we removed the week before.  First, I primed the entire piece with a spray primer - Rustoleum's White.  Then I went to work using some leftover paint from our living room.  Here's what it looked like when I was done (with a little photoshopping for results sake):       
1 - Stone spray paint - a no go.  We weren't crazy about the colors - speckled ivory with a sort of greeny-beige - and couldn't find another color we liked.
2 -  Tuscan Accents with a semi-gloss white base - I liked it, Anthony didn't.  The lines between the dried, stuck on paint and the wiped off paint were very obvious.
3 - Tuscan Accents with the white primer as the base coat - nope.  I put too much paint on here so that when I wiped the excess off several minutes later, most of the paint was still wet and therefore came off leaving large splotches.  It really wasn't bad but in the end we liked...
4 - Tuscan Accents with the white primer as the base coat - winner, winner, chicken dinner!  Just the right amount of paint was dabbed on, left to dry, and wiped off to create this look.
5 - Tuscan Accents with the white primer as the base coat - nada.  This was actually my first attempt at the Tuscan Accents but I didn't wait long enough to let some paint dry and it ended up just looking like one big smear. 

So, after we decided on #4, I applied a glossy polycrylic finish (more on that later) over the area make sure it wouldn't yellow the TA finish and to see the look of it.  It worked great.  Then came the real test.  I pulled out my curling iron and straightener to test the durability of the future bathroom countertops, thinking they would be it's biggest ransackers.  It passed with flying colors!  Even though the surface became pretty hot after I left the straightener sit on it (on it's highest setting for 10 minutes), the surface was unscathed!  So anyway, on to the good stuff after I just rambled on for about a million words to set the stage...


First, we prepped by removing the sinks and covering all surrounding areas (thank you Catholic Weekly) since we'd be using the same spray primer as on the test strip.

Then I took a hand sander to the top to remove any sheen and build-up and to create a surface the primer would stick to.

After wiping any and all residue caused by sanding, we were ready to prime.  We made sure the window was wide open and even set a box fan in it, blowing any fumes outside.  While I sprayed, Anthony held a large piece of cardboard underneath the front lip of the top to protect the cabinets.  Here it is, all primed and ready to go:

Next up - painting or should I say, stippling.  I mentioned above that the TA look is achieved by dabbing on paint with a stippling brush.  They sell the brush at Lowe's for 20 bucks.  But, I wasn't going to spend 20 bucks for it considering it was basically a glorified scrub brush.  On the tester strip I 'tested' with a scrub brush we had on hand and it worked wonderfully, so why not continue using that same scrub brush, right?  It saved us $20 and now can brag that it's multi-purpose - "for all of your cleaning and painting needs".  :)  
All I did was dip the brush into a tupperware dish filled with paint and dabbed it onto the top.  I worked in sections, dabbing one section, waiting 17 minutes for it to dry, wiping excess paint, then moving on to the next section.  It was hard to get good pictures of the process as the paint we decided on was so light, but I tried... 

Waiting for it to dry:

Right before wiping (see how some of the paint is dry and some is shiny and wet?):

(Side note:  I might be worth mentioning that to wipe, I used an old, cut up t-shirt of Anthony's and also used a fresh, dry piece for each section.)

To do the front face of the tops, Anthony ran a line of tape underneath the lip to protect our freshly painted cabinets:

Here it is, all painted and ready for poly:


For added protection and to achieve the glossy sheen we were looking for we used Minwax Polycrylic.  After searching "painted laminate countertops" on Pinterest, we decided to go with the popularly used, non-yellowing polycrylic over epoxy ($$$) and polyurethane (yellows).  Using our best paint brush, I painted on seven coats over three days, leaving at least 2 hours of drying time in between each coat.  I also lightly (and I mean lightly) sanded down each coat before painting on the next because the poly directions said to and to get a smooth surface (in the beginning, the paint was a little bumpy so sanding each coat eventually leveled the top out).

This is after two coats of poly:

And this is after the lucky seven coats:


We are SO happy we decided to take the painting route.  You'd have to see it for yourself, but we honestly think that you'd have to take a second glance to realize it wasn't quartz or granite.  As for what it cost us:
Primer - already had
Paint - sample size at $3
Scrub brush - already had  :)
Polycrylic - $16.50 at Wal-Mart (cheaper than the same stuff at Lowe's) and we only used about half of the can bringing the total down to $9 
Paint brush - already had
Grand Total = $12

Some other possibly pertinent information:
1.  Our countertop is 18 square feet.
2.  The paint color we used for the top coat is called 'Oatlands Subtle Taupe' by Valspar.  (I had them add only 75% of the color at Lowes so that it was a little lighter but then added more white at home so really it's a custom light grayish-tan color.)

[Three years later, the countertops are still doing good!  Read the update post here!]

Anyway, I feel like I just wrote another ba-jillion word post about diy but I hope you enjoyed our little, muy successful painting experiment!  As I type these last few words, Anthony is putting the sinks back in (muttering "I hate plumbing" under his breath) so I'm gonna skidaddle and help him and then I'm off to play hair dresser and make-up artist for the day for some teens as Homecoming is this eve.  :)  Have a great weekend everybody!  I'll be back next weekend with more diy craziness!

.           .           .

P to the S:  If anyone has taken on the task of revamping their laminate countertops with paint, please send us pics and tell us how they've fared so far!  We'd love to hear from other peeps who are as paint crazy as us!  If you're contemplating it, we encourage you to take the leap...and then send us your pics!

Concrete Countertops

Well, for the second week in a row we've got no bathroom or loveseat progress to show so we're going to take a blast to the past.  A few years ago Anthony took his experience of working with concrete flooring to a new level - making concrete countertops.  He made a few outdoor kitchen countertops and also a few indoor kitchen countertops.  Unfortunately, we (I worked alongside as an apprentice) got so wrapped up in the entire, time-consuming process that we didn't take many pictures but we do have a few to share.  We're currently toying with the idea of bedecking our current bathroom and kitchen cabinets with new concrete tops so this post is actually very relevant at the moment.  We'll let you know if the idea becomes a reality in a few months...if we ever get our bathroom's mini-makeover or the curb-side loveseat finished.  :)  When and if we decide to take on that job, we'll getcha a post that's much more informative than this picturific, remember-when-we-did-this post.  :)  Anyway, onto the pictures.

Here's our garage-made-workshop, where we spent hours upon hours cutting, caulking, pouring, grinding, and sealing:


And here are the only finished tops we thought to take pictures of:


And, unfortunately, that's all we have this week.  Next week we'll be back after trying our darndest to make some major headway on either our bathroom or the loveseat so that we have an update for y'all.  Until then, have a great weekend!