Showing posts with label Alterations. Show all posts

Ripped Off

Hey y’all!  I have been spending all of my allocated blogging time (which translates to post bedtime once in awhile) fixing all of the links on my Projects & Ideas page!  I haven’t changed anything…just fixed the links after a technological error and user agreement change on behalf of Photobucket (don’t ever use them Baring teeth smile), but it has taken me hours and hours here and there to get them all up and running again.  Phew!  I still have a few to fix and they’ll eventually find their conclusion but I wanted to pop in quick with a tiny story and tutorial before I get back at the virtual housekeeping.  :)

I’ve been trying to up my collection of dresses recently, on a budget of course, and so you can imagine my delight when I found this shift at Dirt Cheap for $10:  IMG_6856
It adds a little pizzazz to my winter white skin and ashy knees, doesn’t it?  And the pink elastic around my wrist set for Phia’s noggin’ was the perfect accessory.  Clearly, I was made to be a fashion blogger.  A n y w a y, the dress hails originally from Target (the brand is A New Day) but it doesn’t look like they sell it there anymore.  If you likey too, you can find it here on Blinq (for $10!…though I’ve never shopped there before) and I found some ‘used’ on Poshmark but they’re almost retail price.  #dumb

Well, all was great until I slipped mine on for church one morning and noticed a big rip…right in front. 

Bean Refashioning: Military Jacket

Hand-me-downs.  Love them.  Half of my closet was my mom’s and sisters’…and then there’s one piece from my Grandma.  Yep, you read that right.  This jacket…
IMG_7653…was my Grandma’s.  She asked if anyone wanted it over Christmas and it took me a minute, but I knew it had potential, so I grabbed it. 

But, obviously, something had to give if I was ever going to wear it in public.  First, I took out the sleeves to make them a tad longer.  I took out this seam…
IMG_2651…and that’s it because there was another seam underneath that kept everything nice and finished.
 
I’ve never taken in a jacket before so I was a little intimidated by this refashion, I’ll be honest.  But, since it was free, I didn’t have much to lose if I messed up.  A bunch of seam ripping and another try was Plan B and donating it was the worst case scenario.

First, I zipped it up and turned it inside-out.  Then I laid it out so that the side seams were right at the sides and the jacket was flat along the edges.
IMG_2880There was a litte more fabric in the front of the jacket than the back so that’s why the above picture shows a little buckling on top.  It was more important for the sides seams to line up since that’s where I’d be sewing than for the jacket to be laying perfectly flat…if that makes any sense.

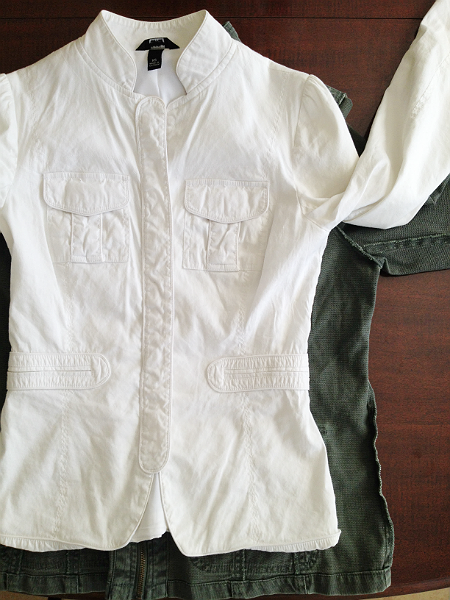
For sizing, normally I might just try it on and figure it out from there but with a belly and no waist, there’s no figuring out anything that way.  So, I grabbed my favorite white blazer that I know has a great fit and used it for sizing.

First I marked out how much I wanted to take the sleeves in.
IMG_2881I lined the two sleeves up along the top and used a white sewing pencil (technical term?) to draw a line onto the military jacket that followed the bottom of the white blazer’s sleeve.

Then I lined the armpits up, starting at the point where my line for thinning out the sleeve ended at the armpit seam, and used the same pencil to draw a line down the military jacket that went right along the edge of my white blazer.
IMG_2883
I made sure to press down the white blazer with my hand along the place I was penciling so that it was totally flat while I traced its edges.
IMG_2884
Next, I pinned everything into place, making sure my edges and armpit seams were lined up, and sewed a straight stitch right along my white line.
IMG_2893
A repeat on the other side of the jacket, a pinking shears to cut off the excess fabric (eventually I’ll serge the edges), and that was that.

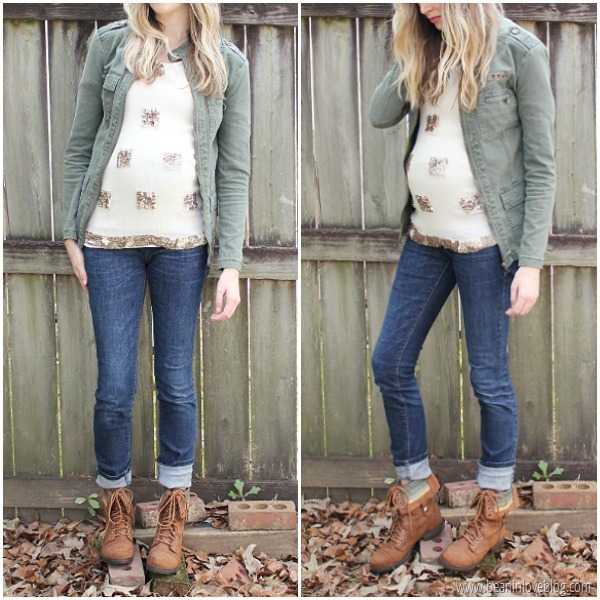
mil jacket2military jacket:  hand-me-down – $0
sequin-embellished top:  hand-me-down (mom’s) – $0
maternity jeans:  hand-me-down (friend – thanks Grace!) – Old Navy
boots:  Target (purchased on sale 2-3 years ago but here’s a similar pair* on clearance!) – $22
grand total:  $22


I can’t exactly zip it up at the moment but that’s totally fine by me – spring and summer don’t necessite zippers unless it’s the fly really, so looks like this chick is in the clear. 

I’ve had a military jacket on my wish list for awhile now so I’m happy I came across one for free, even if it did cost me a little bit of time.  :)

Thanks again Grandma B!

.           .           .


mil jacket

*affiliate link similar to combat boots I purchased from Target

Shortened Black Shorts

I’m long overdue for a refashion, aren’t I?  I think so and the two piles of ill-fitting clothes stacked in our closet sure as heck think so too.  One down though…these black shorts:Image-1
Hilariously, I bought them when I was pregnant with the twins off the 70% off clearance rack at Target (these and these* are very similar and on super clearance!), hoping that (years) after the twins were born, I’d be able to wear them.  They’re trouser style with the slanted side pockets and I loved that they can easily be dressed up or down.  But I wasn’t a huge fan of the length.  I have nothing against long shorts but I’m biased in that I think the five-inch inseam is the perfect one on me.  Also, Anthony has been begging me to take up some of his dress pants and they all need a blind hem so I thought these shorts would be the perfect thing to practice a blind hem on before I take to his good pants.  I used this tutorial to blind hem with my Brother sewing machine.  They turned out okay.  I learned that having a thick hem (there’s an inch-and-a-half hem on these) doesn’t work the best on shorts because, the farther you go up the leg, the wider around the leg is.  So essentially, when you fold up your hem, the bottom isn’t at wide as the top and so you can get a little bit of bunching like I did on these shorts.  It’s not too noticeable though but I still think that I’ll stick to tiny hems for shorts in the future.

I do love my ‘new’ black shorts.  Here’s how I’m planning on wearing them this fall:

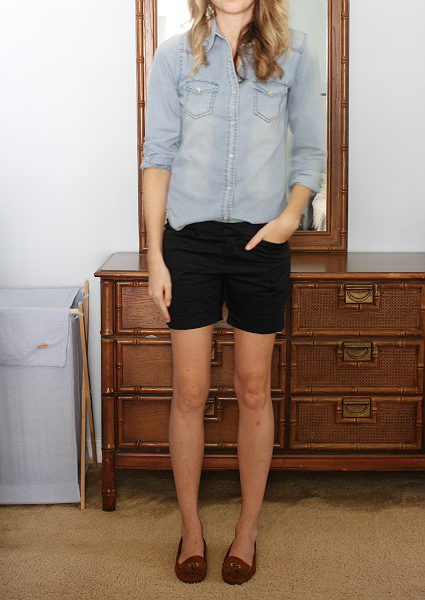
With this amazing chambray shirt my sister handed-down to me and my cognac brown moccasins:IMG_6530[similar (and clearanced) chambray top // similar moccs]


And maybe if I’m brave (or my hair hasn’t been washed for days), I’ll toss on my thrifted wide brim:IMG_6525


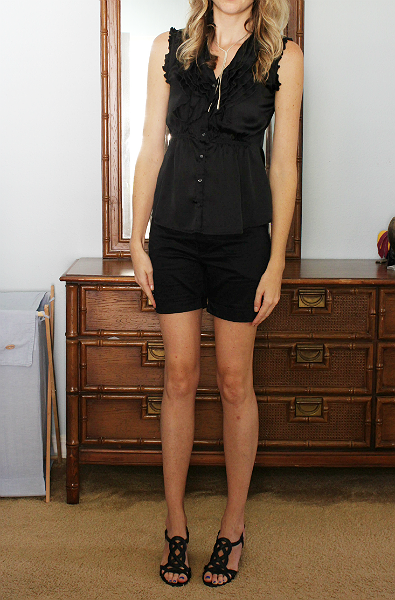
Black on black on black:IMG_6533Date night?  [top was a Target clearance buy several years ago // similar wedges*]


More blacks:IMG_6541[turtleneck from Old Navy years ago // caged flats were a Sam & Libby from Target clearance buy last year]


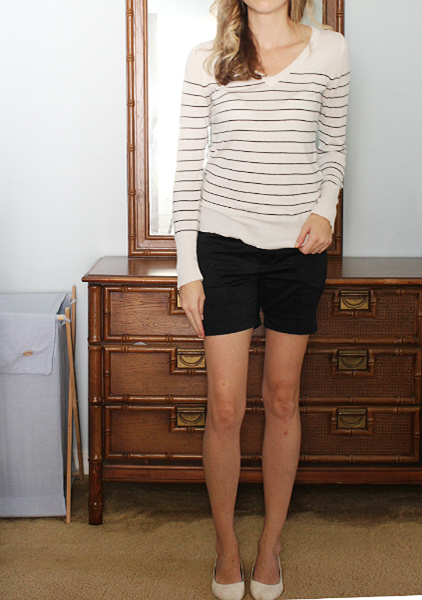
With a striped black and white sweater and pointed flats:
 IMG_6544
[sweater was a Target clearance buy three years ago // pointed flats were $1 Gabriel Brothers find]


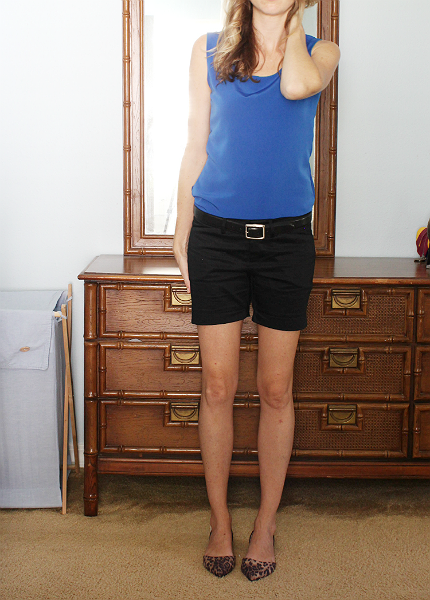
Black and blue (a refashion) and leopard:
 IMG_6551
[flats are Sam & Libby from Target, found at Dirt Cheap recently but I found them on eBay here]


Open chambray, a scarf, and these flats I recently got on clearance:
 IMG_6552
[flats* – still on clearance! // necklace was a recent sale find from Old Navy]


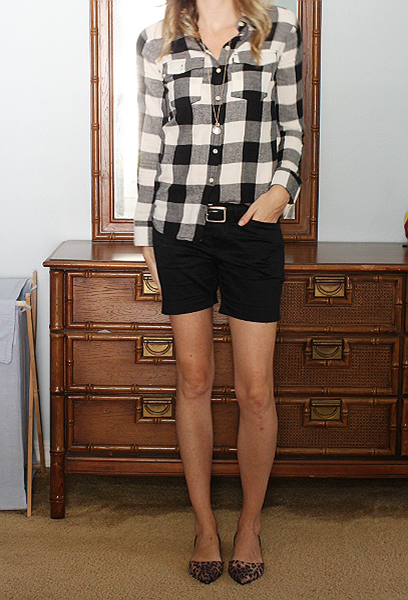
And last but never least, my favorite combo of buffalo check plus leopard:
 IMG_6556
[similar (clearanced!) top with smaller pattern]

Of course all the outfits would look much more chic with better photography and if I had a city street or Central Park as my backdrop but my bedroom it is.  You get the picture, right?

Do you have a pair of black shorts?  How do you wear them?

.           .           .

*affiliate links to products I purchased or similar products to those I wore 

7 ways to wear black shorts

Crew Cut

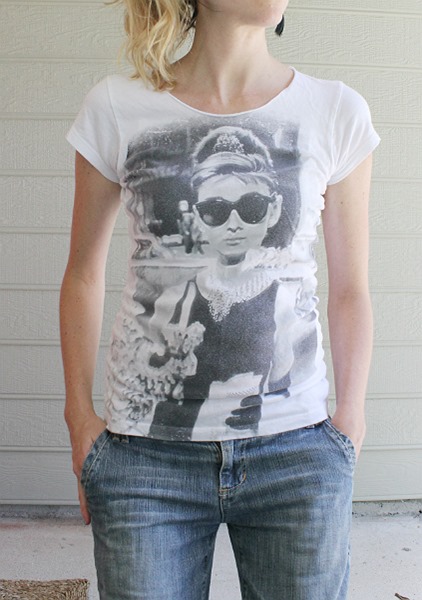
I’m not a fan of crew neck shirts.  They feel stuffy to me.  I’m all about v-necks and round necks and square necks and every other neck (besides plunging maybe because, for one, my kids tend to grab onto my shirt during times of slight duress and OOPS!  HELLOO!)  But, I do own a few crews.  In particular, there’s this hand-me-down:551201_707201945920_1701288495_nThis is the only picture I have wearing it and you can’t even see the crew neck so it should be tossed in the irrelevant category but I’ll humor myself again and post it.  This was when I was pregnant with Sebastian.  I laughed out loud to myself when I pulled it over the bump though because it seemed to add a little vavoom to Audrey’s chest area that wasn’t there before…so I took a picture.  :D

Here’s what it really looks like (except in white):avenue-la-black-t-audrey-hepburn-t-shirt-741540[image via Tradesy]

And why am I even worrying about posting a before picture?  You all know what a crew neck tee looks like!  Silly me!

So anywho, one day post-pregnancy, I decided I wanted to wear that shirt again but didn’t want to deal with the stuffy crew neck, so I just cut it off (and didn’t take a single in-process picture…boo). 

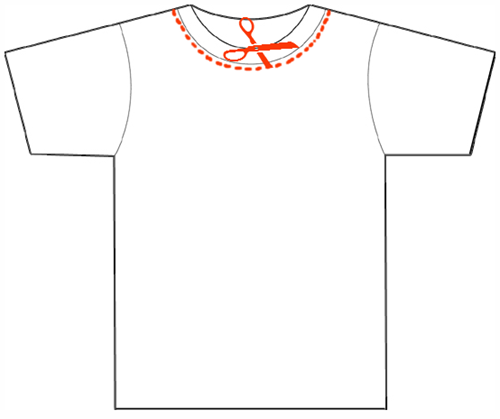
I cut right around the existing neck; cutting off the ribbing. 

blank-t-shirt

Cutting around the existing neck helped me make sure I wasn’t getting a wonky cut.  After I had done that, I decided I wanted it a tad wider so I cut another half inch off; following the circle I had just cut.  Since the tee I cut was jersey, there was no hemming needed!

Freedom!
IMG_6208
Here’s how I’m wearing it today:
  IMG_6204
[My mirror lied when it told me these ancient trouser jeans are still good to wear.  Looking a little shoddy these days…]

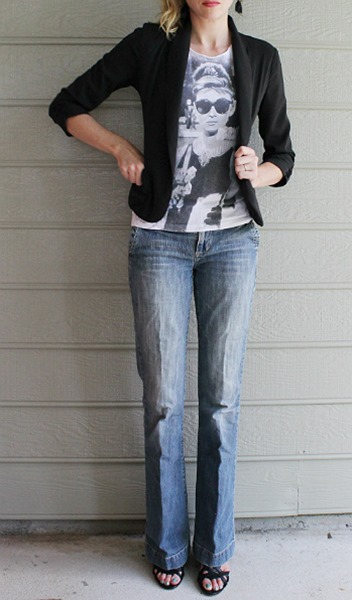
And, per J’s inspiration, I threw this altered blazer over it.
IMG_6223
Oh, hold on, my super-sleek, company-supplied phone is going off…

*

Oh wait, that’s just a toddler cry in the arena I call mi casa.

Gotta run.

Old to the New Navy

We are back from the Mile High City and let me tell you, traveling with toddlers is no easy undertaking!  We spent two hours on a bus and two and half hours on a plane, both ways.  I won’t go into details on the crazy but let’s just say we’ve sworn off major travel for severalllll months until there’s a little more independence amongst the toddlers in the fam and, therefore, a little more sanity amongst the adults.  ;)

So, moving on…

I’ve been drooling over these K & Elphy sandals for the girls:
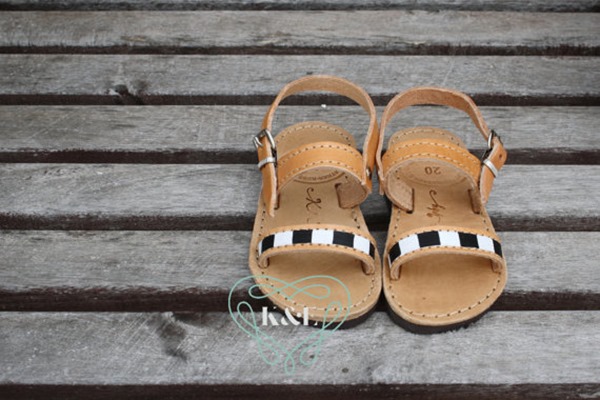
il_570xN.736628238_jfrb 
[image via K & Elphy]

But, at $56 a pair, they’re way out of the park when it comes to our tiny budget.

So, armed with a gift card I’ve had since Christmas, I bought a couple of pairs of these from Old Navy:
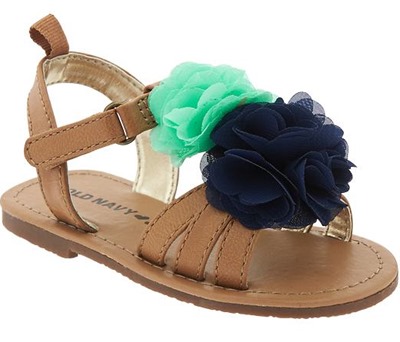
cn9247540

[image via Old Navy
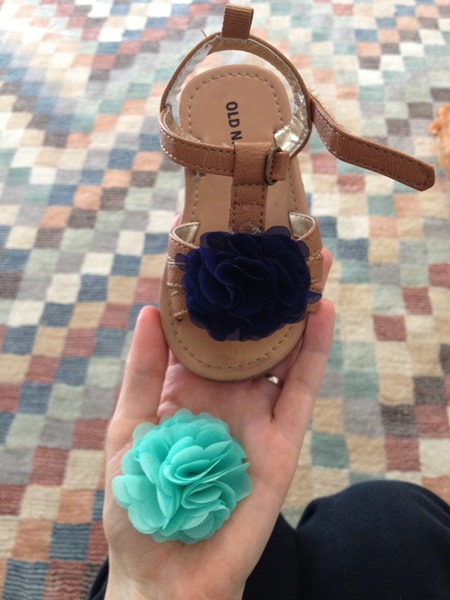
With a 30% discount code, I got them for about $11 each.  The thing about them though is that, while they’re cute with the fabric flowers, I feel like they’re a little too top heavy and being that the flowers are very notneutral colors, I’d have a hard time pairing them with every outfit I bedeck the girls in.  So, I bought them with the intention to change things up a little. 

And change them I did…
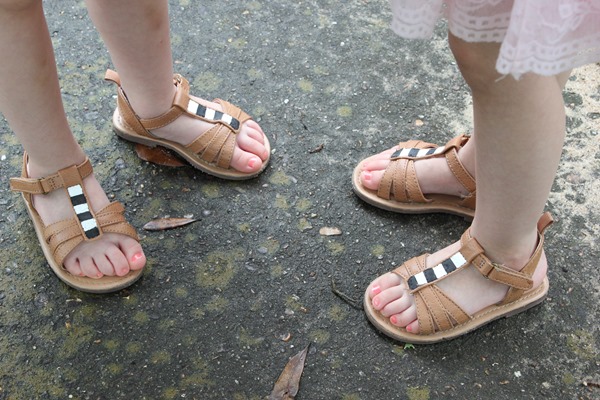
IMG_5933

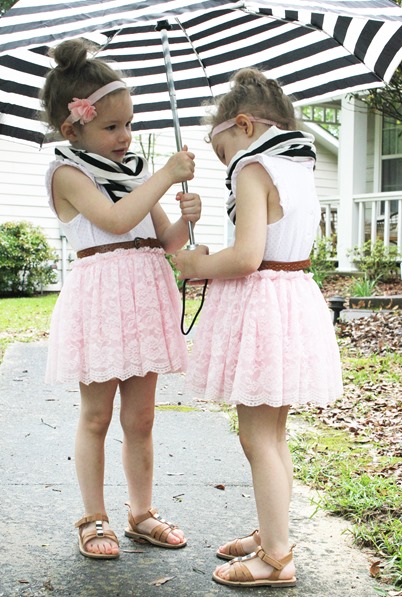
  A little bit different than how they came packaged, right?  Improvisation at it’s finest.  When I can’t have the ones I really want, I get them in a slightly different way. 

I was 90% sure I could take the flowers off the sandals when ordering them since I removed the bows off these shoes last year pretty easily and I was right.  All I had to do was remove the stitches holding the flowers on using a seam ripper.

See the stitches?
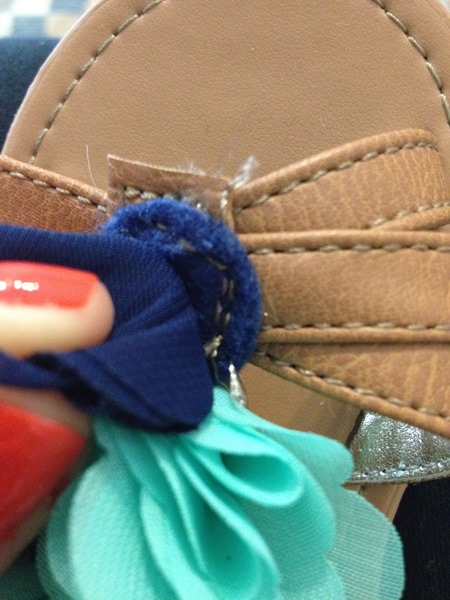
IMG_8500
The stitching around the outside of the bottom of the felt piece holding the flower on was the same color as the stitching along the faux leather sides of the t-strap (does that make any sense?) so I had to be really careful that what I was ripping was the flower stitching and not the actual stitching holding the shoe together. IMG_8501
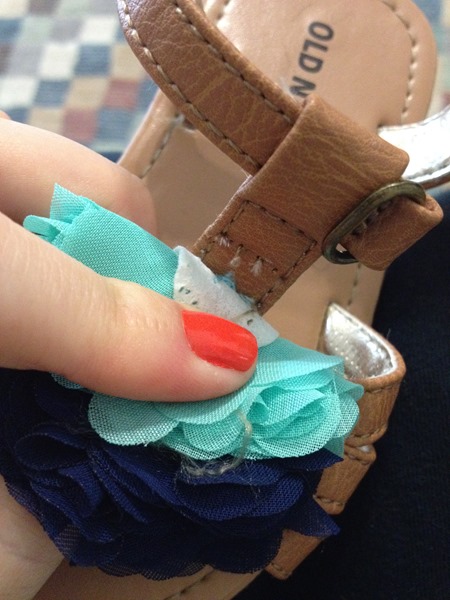
One down, one to go:
 IMG_8502
The flowers will make some cute headbands or clips sometime in the future.  :)

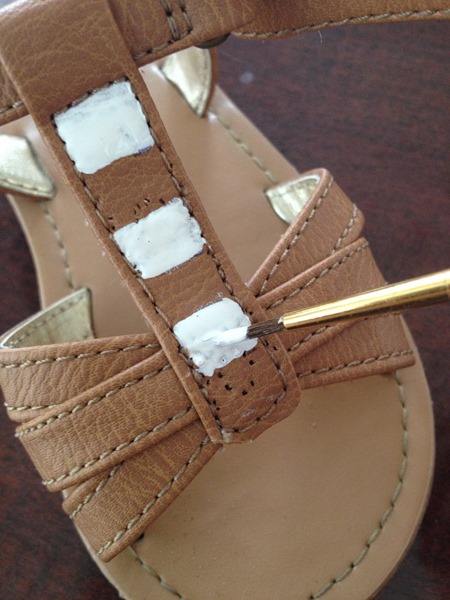
After I had both flowers off, I measured the t-strap into six even sections and painted those sections starting with white.  I didn’t paint the very top of the t-strap, where it meets the top strap, for no reason other than just because.  I just stuck to painting inside the stitching on the strap.
IMG_8583
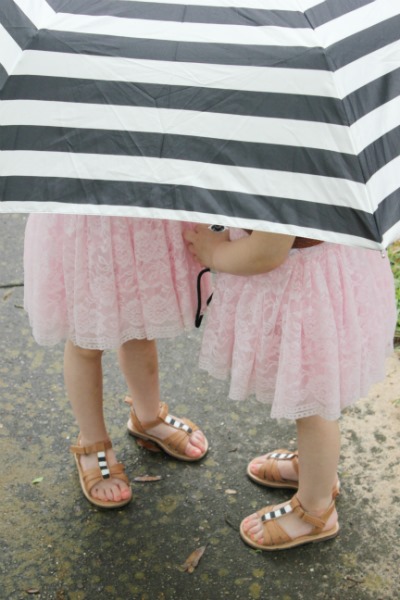
When the white was dry, I went in and painted on the black.  I used regular acrylic paint so the paint dried pretty fast and I was able to get both shoes done in about 20 minutes.  Originally I was going to use puff paint so you wouldn’t be able to see the tiny holes left behind from the stitching but the paint filled them in pretty well and I’m really loving the matte finish of the acrylic so we’ll see how it holds up in the long run.  So far, so good!

I love how they turned out!  Anthony isn’t the biggest fan of them but I’m hoping they’ll grow on him.  :) 
IMG_5934

(Side note:  Old Navy also has these sandals which, if you painted the front strap, would imitate the K & Elphy’s even more but I wasn’t sure if paint would stick to the patent faux leather so I went with the t-straps instead.)

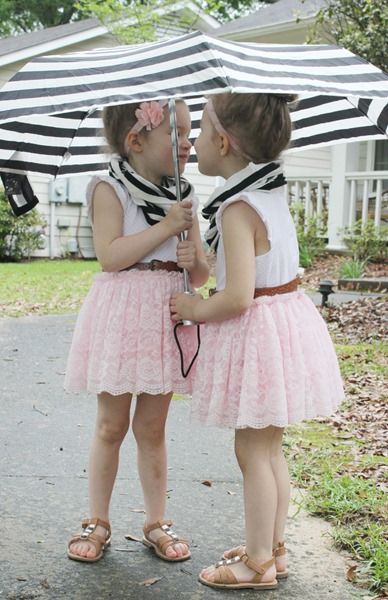
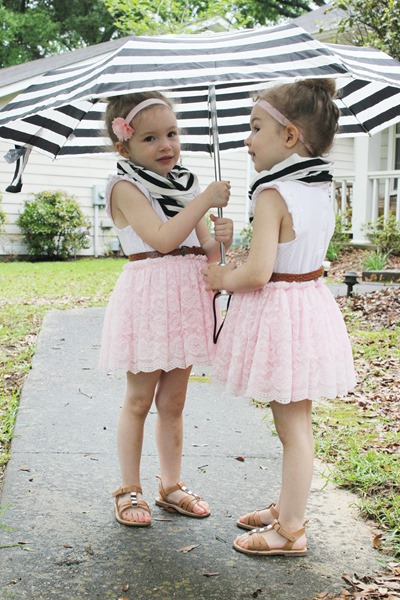
I took the girls outside in the rain this morning to grab the ‘after’ pictures and caught more than I needed so it’s only makes sense to share them.  I don’t like black and white stripes at all apparently…
IMG_5922

My bribe of “I’ll let you hold my umbrella” was a winner and they leapt out the door to do so. 
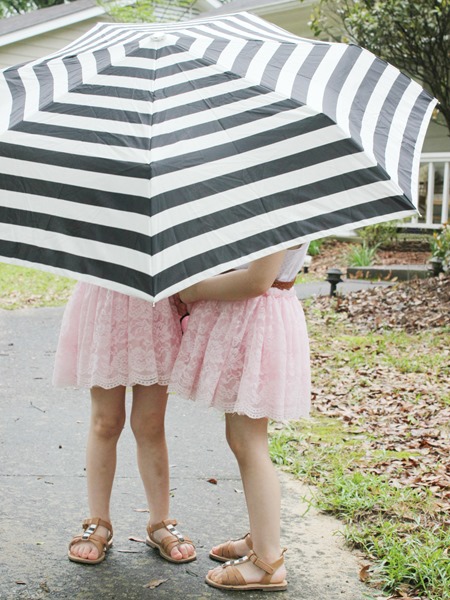
IMG_5924
IMG_5928
  IMG_5935

Oh and their scarves!  I debuted them to Instagram a couple of weeks ago but I might as well give the low down here since this is supposedly a DIY blog or something…  I found this long-sleeved tee on clearance (I found it for 70% off in-store but click the link to find it 50% off online!) at Target last month and knew it’d make great infinity scarves for the girls.  I grabbed the biggest size they had.  To get the scarves out of it, I first cut off the top portion by cutting off the bottom of the tee right under each armpit.  Then I cut the big square that gave me down the middle so I had two halves of the bottom of the tee. 
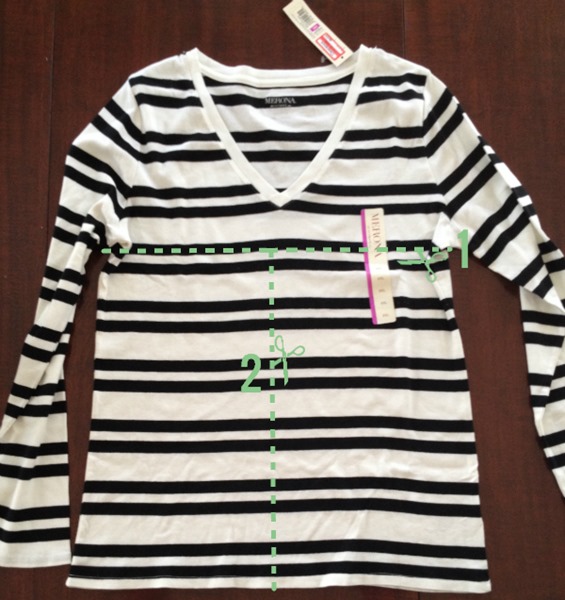
IMG_7764

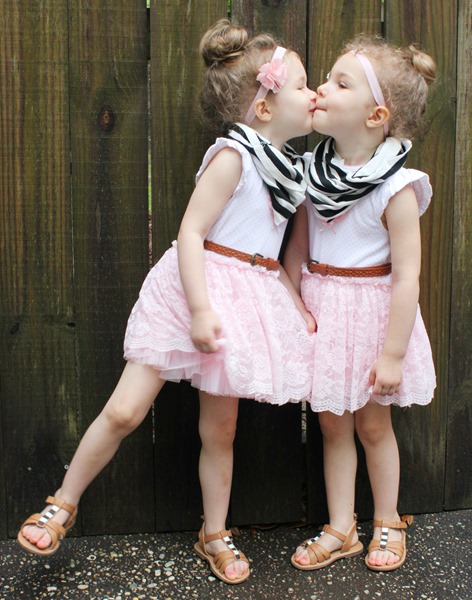
Placing the right sides of fabric together for each piece, I sewed the two cut sides together and that’s it!  You could totally do this with no-sew tape too – see this tutorial.  Since it’s cotton, I didn’t hem the top (the bottom was already hemmed since it was the bottom of the tee) because it won’t fray.
IMG_5929

I’m kinda wishing I’d have gotten another for myself!  :)

.           .           .

I hope it’s nicer in your neck of the woods than it is in ours.  Our forecast shows nothing but rain and thunderstorms for the next five days and that just makes this moms cabin fever warning siren go off loud and clear.  The last time I took the kids out in the rain I lost my car keys so I’m going to pretend I learned from that mistake and stay inside the casa…until desperation plays devil’s advocate and I suddenly find myself and the kids wandering those dangerous-to-the-wallet aisles of Target…  ;)
IMG_5942

Kisses to you and yours!  :*

Referee Chic

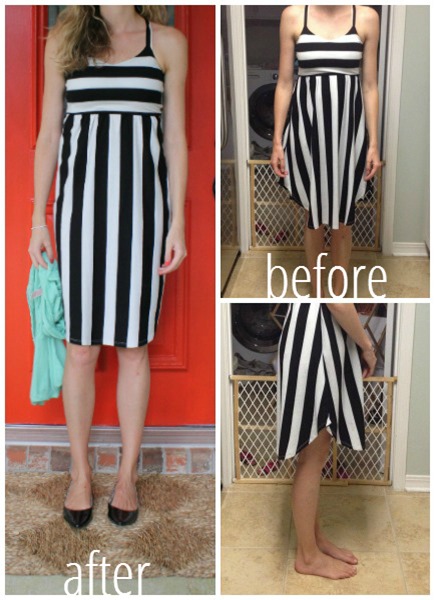
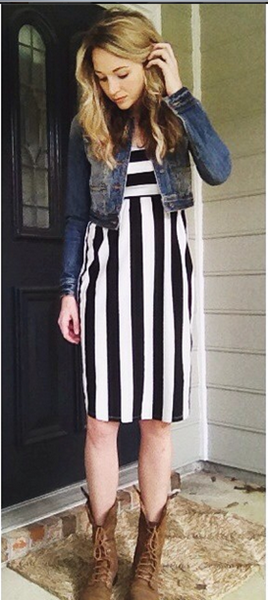
I haven’t done many alterations since Sebastian was born but a couple of months ago my best friend was here and while shopping with her, I scored a black and white striped dress for three bucks at Dirt Cheap (it was Xhilaration, originally from Target).  I had Sebastian strapped to my chest per the usual so I didn’t get to see the inside of the fitting room but I just scooped it up anyway (knowing there was a no return policy) and home we went.  Then I tried it on.  The pattern?  Loved it.  The fit?  Bad, bad, bad.  I had do something and quick so I got out my sewing machine and slimmed the sides of the skirt.  Things went from bad to better and it could probably still use a little more slimming and shaping in the waist area but for now…bwdress
Much better, wouldn’t ya say?

In my haste, I didn’t take a-one picture of my process but basically I laid the dress out flat, pinned and sewed two straight lines down either side of the skirt, cutting out two triangular pieces of excess fabric from either side.  Having vertical stripes helped because as long as I followed those, I was good.

I love how versatile this dress is!  I can dress it up, down, and sideways.  I shared this sneak peek on Instagram awhile back.  Let’s refer to it as “The Concert Goer”:
bw
[Except the last concert I went to was………..long before kids.]

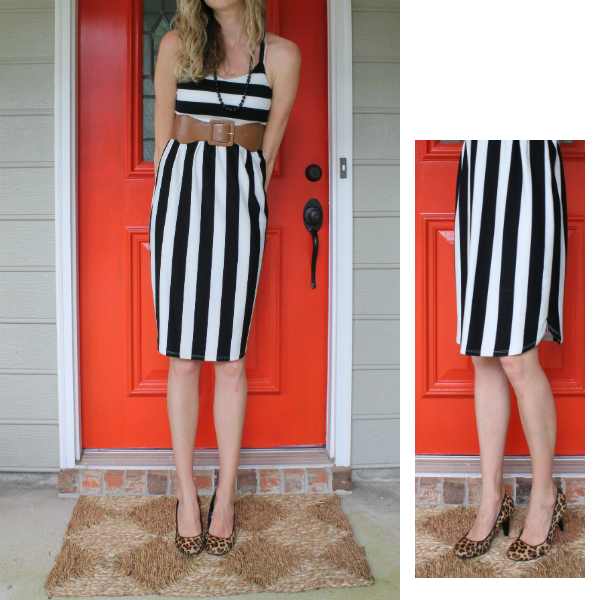
Then there’s “Her Husband’s Date”:
datenight
[See how I still managed to keep the small curve up to the side seam?  I love that part.  :) ]

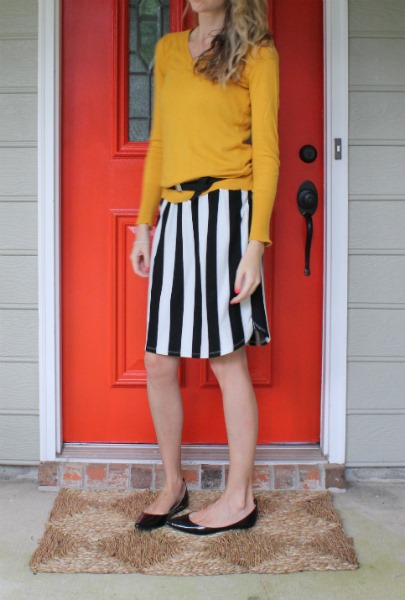
And the “Throw a Sweater Over It Because It’s Chilly”:
IMG_4862

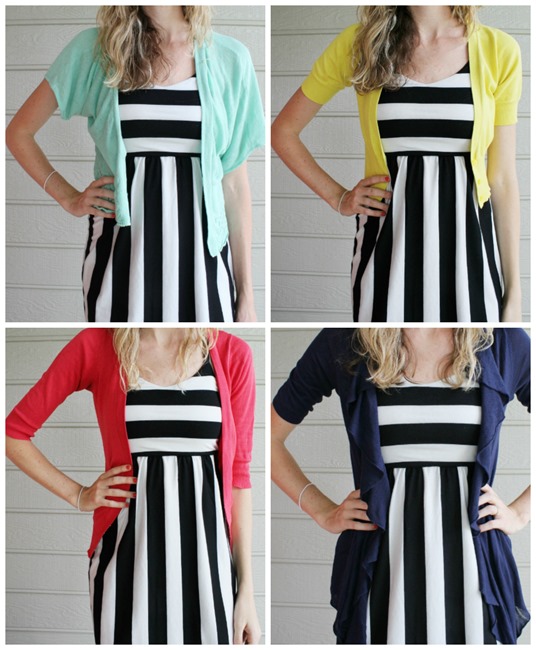
And my very favorite aspect, all the colors of cardigans that there every were can be matched up with it and live in synchronized harmony:
bwdresswcardis

Fingers crossed, this dress brought me out of sewing stagnation so stay tuned for more snips and tucks!

Cropped Minties

Oh life.  This past week was a doozy.  Last Thursday night Anthony and I were perched on the couch watching our favorite show, White Collar, when all of a sudden our furnace suddenly just shut off and our nostrils caught a whiff of burning something.  I freaked out a little thinking something was going to blow and Anthony remained calm and checked out the situation.  A few phone and house calls later and we found out the not-so-wonderful news that our furnace had breathed it’s last.  After all, it had a good 30 years under it’s blowing belt.  Even though we knew that at its age it was coming, it’s timing with a newborn around and the unseasonably cold weather here down south was nothing less than impeccable.  A few days of playing musical space heaters and a few thousand dollars later, we’ve got a shiny new furnace and a/c to put on this house’s resume.  Great.  Going along with the impeccable timing, Anthony had to leave in the middle of our outage to head up to D.C. with four bus loads of teens to stand up for the unborn in the March for Life.  It was bittersweet to see him go but a great sacrifice all the same.  Lucky for me, my younger sister flew over here from Dallas to help a mother hen and her three chicks out.  Thank God for her.  So, with all that hustle and bustle, the french door Anthony and I were planning on making and installing in the kitchen didn’t happen…yet.

.           .           . 

Oh parenthood.  I’m a go-getter.  Sitting all day just doesn’t do it for me.  And TV, I sat watched enough in the hospital before and after Sebastian was born to last me a year.  With that said, the new kid on the block is only satisfied if he’s nestled in the arms of ma or pa.  No swings, no soft surfaces, no co-sleeper…  So, as much as I love holding the kid alllllthedaylong, nothing ever gets done – no cooking, no cleaning, and especially no DIY.  It’s bittersweet and leaves me longing for the day when he’s old enough to just relax in his bumbo and watch his sisters scrap the place while I do something productive…not that holding him isn’t productive because it is and I love it, but I’m just in need of some activity/movement/excitement in my life (which is why Anthony is holding down the fort this afternoon so I can go out into the world sans children for just a teeny bit.) 

Anyway, what do you care, right?  I know.  It’s probably rambling and there are tons of people out there with weeks more trying than mine but the point is, I’m sorry if it’s a little slow around here in the next few months.  I’m going to try as hard as I can to blog because I really love and miss it and I hope you’ll keep following along!  And while you’re waiting for Sebastian’s birth story (if you even are), here’s a little something to keep you occupied until I’m awake enough to remember type out all those details.

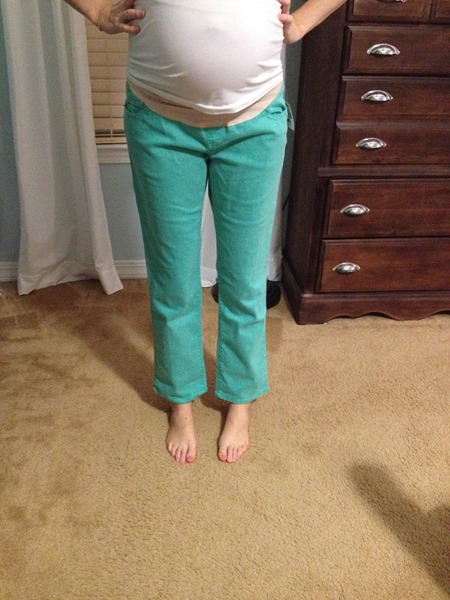
Around the eight month of carrying around Sebastian in utero, I found these Liz Lange (Target) maternity pants at Dirt Cheap for $6.  Maternity pants from Target have never quite fit me right in the hip area but these were just asking for an alteration and since they were so cheap (and that color!!), I couldn’t help myself.  Home they came. 


photo 1

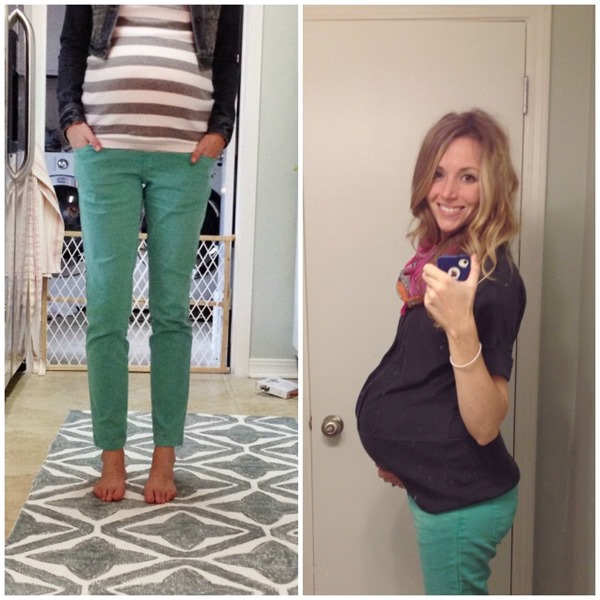
I took them in using the same technique (technique probably isn’t the right word…hack job is probably more like it) I used with these white Gap maternity pants last year.  Here they be now…err, previous to the boy’s arrival:  matmints

And that’s that.  I’d stay and write more (because you know my life be like crazy and lots of words could be poured out on it’s behalf…I only wish) but Anthony just suggested we go for a nice little family walk ‘round the block and guess who’s jumping at that chance…yep, this mom.

Have yourself a good weekend!

Oh and P.S. Some sweet somebody nominated us for a Sheenazing Award (inspired by the incredible Venerable Fulton Sheen…only a bit ironic that my name happens included in the title…) for having the best-looking blog over at A Knotted Life!  I’m truly honored and humbled!  I guess all my googling HTML and CSS code and pretending to be a blog designer has paid off!  Head over to check out all the award nominees and to vote for your faves!